“You better make a double batch,” my niece said, eyes wide with a mix of excitement and serious dessert determination. That night, the kitchen was humming with the scent of cocoa and something a little nostalgic—like when fireworks were just a part of the evening, not the whole show. It was the first time I tried making these Perfect Patriotic Brownie Pops for a 4th of July celebration, and honestly, I wasn’t convinced at first. Brownies on a stick? It sounded a bit gimmicky.
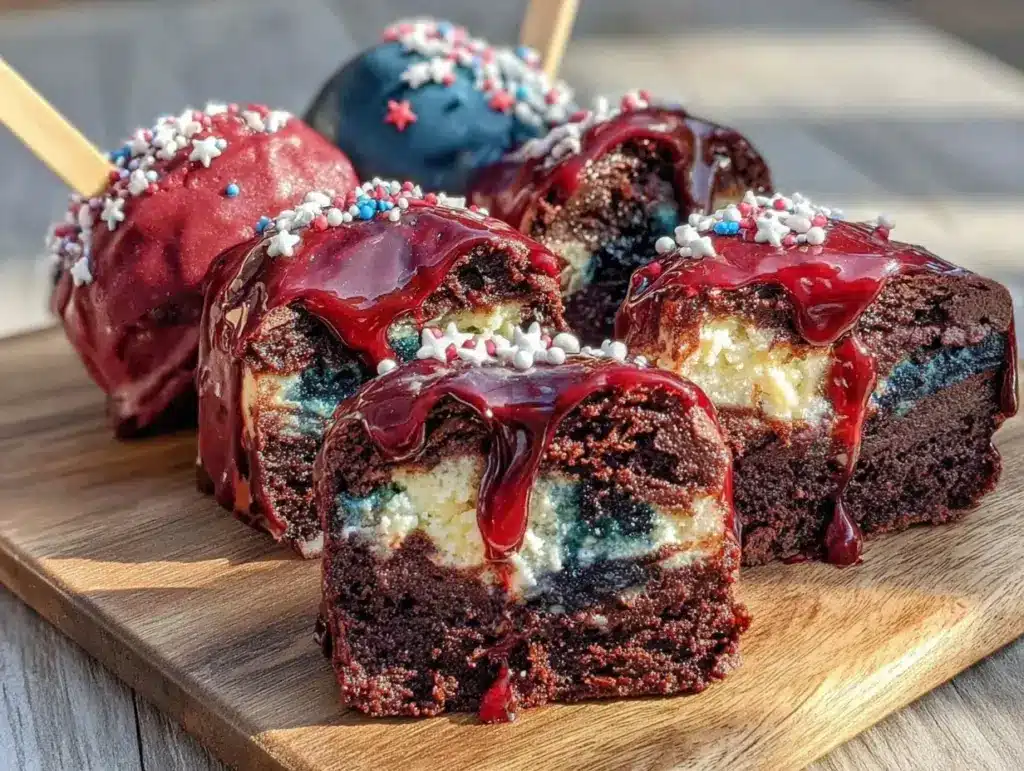
But then, as the pops came together—ripe with rich chocolate, swirled with white chocolate, and dotted with red and blue sprinkles—I realized they weren’t just cute. They were downright addictive. The way the fudgy brownie balanced with the crisp chocolate coating, and the popsicle stick made them ridiculously fun to eat outside on a summer evening, it hit a perfect note. I found myself sneaking bites (or three) before the kids even got to them.
What started as a quick idea to add a festive twist to a classic brownie turned into a small obsession—making these pops multiple times in one week, tweaking the drizzle and sprinkle ratios, even swapping out decorations depending on the mood. These Perfect Patriotic Brownie Pops aren’t just a dessert; they’re a mood lifter, a party starter, and a sweet way to celebrate with a little less mess and a lot more smiles. After all, sometimes the best recipes come from those unexpected kitchen moments, and this one stuck with me for good.
Why You’ll Love This Recipe
Making these Perfect Patriotic Brownie Pops for your 4th of July celebrations is honestly a game changer. Here’s why this recipe has become a go-to for me and many others:
- Quick & Easy: These brownie pops come together in under 45 minutes, making them perfect for last-minute dessert plans or impromptu celebrations.
- Simple Ingredients: No need to run all over town—most of these ingredients are pantry staples or easy to find at any grocery store.
- Perfect for Summer Parties: Whether you’re hosting a backyard BBQ or a casual picnic, these pops are portable, less messy, and a hit with both kids and adults.
- Crowd-Pleaser: The combo of fudgy brownie, creamy white chocolate drizzle, and patriotic sprinkles always earns rave reviews.
- Unbelievably Delicious: The texture is just right—moist and chewy inside with a smooth, slightly crunchy chocolate coating outside.
What sets this recipe apart from the many brownie variations out there? It’s the special touch of dipping each brownie square in melted chocolate and adding a fun patriotic decoration. Plus, using a tried-and-true brownie base recipe (like my favorite from the fudgy one-bowl brownies) guarantees a rich, moist foundation every time. The popsicle stick isn’t just for show—it makes these brownies super easy to handle during outdoor celebrations, avoiding the usual sticky fingers and plate juggling.
Honestly, if you want a dessert that’s festive, fuss-free, and makes your guests close their eyes after the first bite, these Perfect Patriotic Brownie Pops deliver just that. They’re the kind of treat that turns any simple gathering into a memorable occasion.
What Ingredients You Will Need
This recipe keeps things simple but packs a flavorful punch. Each ingredient plays a role, from building that classic fudgy brownie base to the festive finishing touches that scream summer celebration.
- For the Brownie Base:
- 1/2 cup (115g) unsalted butter, melted (I prefer Kerrygold for its rich flavor)
- 1 cup (200g) granulated sugar
- 2 large eggs, room temperature
- 1 teaspoon pure vanilla extract
- 1/3 cup (40g) unsweetened cocoa powder (use a good quality Dutch-processed cocoa for depth)
- 1/2 cup (65g) all-purpose flour
- 1/4 teaspoon salt
- 1/4 teaspoon baking powder
- For the Chocolate Coating:
- 6 ounces (170g) semi-sweet chocolate chips or chopped chocolate (Ghirardelli or Guittard work great)
- 1 teaspoon coconut oil or vegetable oil (helps the chocolate set with a nice shine)
- Decorations:
- White chocolate chips or melting wafers for drizzling
- Red, white, and blue sprinkles (look for festive star-shaped or nonpareils)
- Wooden popsicle sticks (about 4-inch length)
If you want to swap things up, feel free to use almond flour for a gluten-free option or substitute coconut oil with butter in the chocolate coating for a richer taste. For dairy-free, try vegan chocolate chips and use flax eggs in place of regular eggs. In summer, adding a handful of fresh blueberries inside the brownie batter can give a juicy surprise—totally delicious and super seasonal.
Equipment Needed
- 8×8-inch (20×20 cm) square baking pan – perfect size for brownies and easy to line with parchment paper.
- Mixing bowls – a medium and a small one for dry and wet ingredients.
- Whisk and spatula – a sturdy spatula helps fold batter without overmixing.
- Microwave-safe bowl or double boiler – for melting chocolate smoothly.
- Cooling rack – essential to cool brownies completely before dipping to prevent melting chocolate mess.
- Parchment paper or silicone baking mat – for easy brownie removal and cleanup.
- Wooden popsicle sticks – standard 4-inch size works best for handling.
If you don’t have a microwave, a double boiler setup with a heatproof bowl over simmering water works beautifully for melting chocolate without scorching. I’ve tried both methods and honestly, the double boiler gives you more control, but the microwave is quicker when you’re in a pinch. For budget-friendly options, parchment paper liners can be reused for multiple batches if you’re careful.
Preparation Method
- Preheat and Prep: Heat your oven to 350°F (175°C). Line your 8×8-inch baking pan with parchment paper, leaving some overhang to lift out the brownies easily later. This step saves a lot of hassle when it’s time to cut.
- Mix Wet Ingredients: In a medium bowl, whisk together the melted butter, sugar, eggs, and vanilla extract until smooth and glossy. This usually takes about 2-3 minutes by hand or you can use a mixer on low.
- Combine Dry Ingredients: In another bowl, sift together the cocoa powder, flour, salt, and baking powder. Sifting helps avoid lumps and gives a more even crumb.
- Mix Dry Into Wet: Slowly add the dry ingredients to the wet mixture, folding gently with a spatula until just combined. Overmixing can make brownies tough; you want it fudgy and tender.
- Bake the Brownies: Pour batter into the prepared pan, smoothing the top evenly. Bake for 20-25 minutes, or until a toothpick inserted near the center comes out with a few moist crumbs. Avoid overbaking for that perfect fudgy texture.
- Cool Completely: Let the brownies cool in the pan on a wire rack for about 1 hour. This step is crucial before cutting and dipping; warm brownies will melt your chocolate coating.
- Cut and Insert Sticks: Lift the brownies from the pan using the parchment overhang. Cut into 16 even squares (about 2-inch or 5cm each). Carefully insert a wooden popsicle stick into each brownie square, about halfway in.
- Melt Chocolate Coating: In a microwave-safe bowl, combine semi-sweet chocolate chips and coconut oil. Heat in 30-second bursts, stirring between each, until smooth and glossy. Alternatively, melt over a double boiler.
- Dip the Brownie Pops: Holding the stick, dip each brownie square into the melted chocolate, coating about 3/4 of the pop. Let excess chocolate drip off before placing them on parchment paper to set.
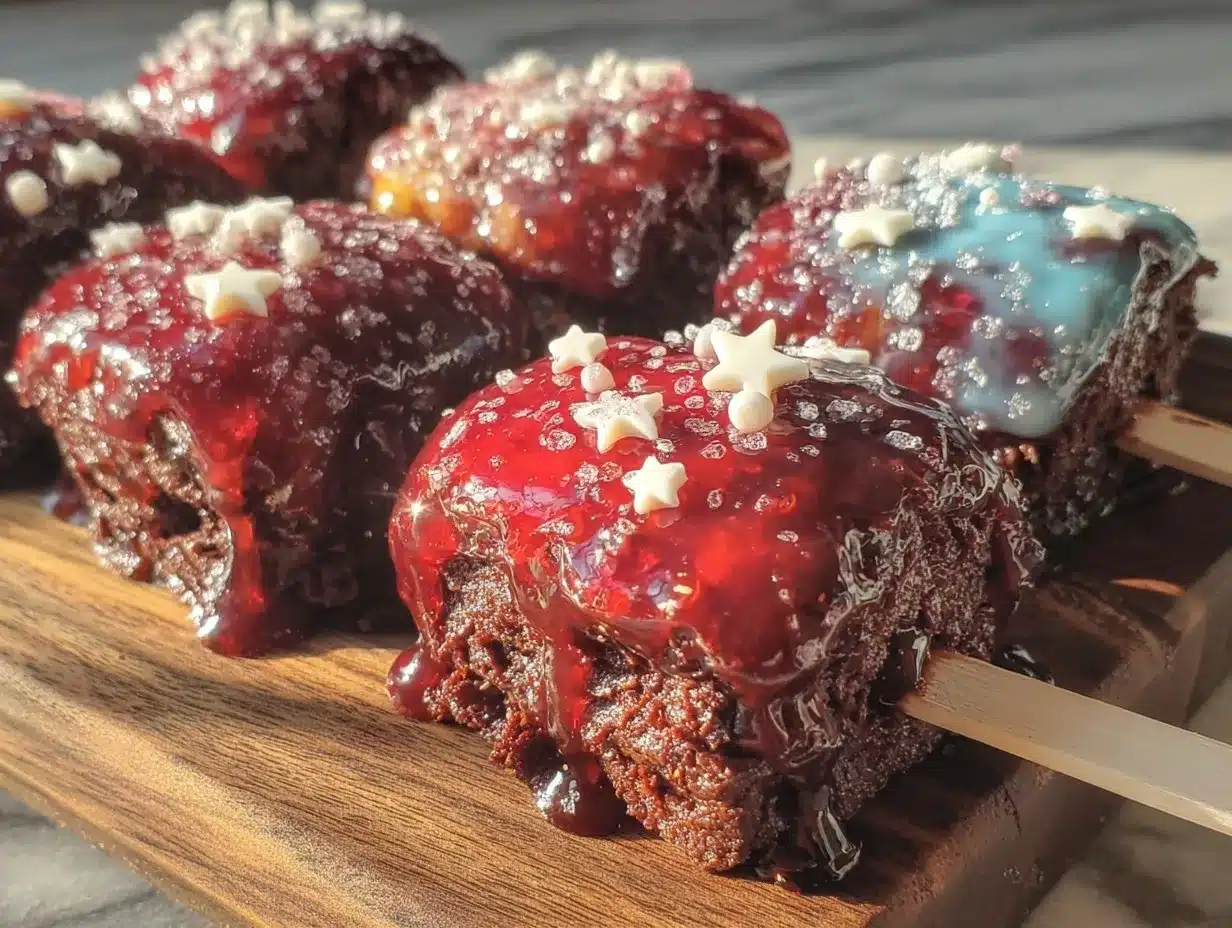
- Decorate: While the chocolate is still soft, drizzle melted white chocolate over the pops and sprinkle with red, white, and blue decorations. Work quickly before the coating hardens.
- Set and Serve: Allow the chocolate coating to fully harden at room temperature or pop them in the fridge for 10-15 minutes. Serve chilled or at room temperature for that perfect bite.
Pro tip: If your chocolate starts to harden while dipping, gently reheat it for a few seconds. Also, don’t skip the cooling step before cutting—trust me, it avoids a big sticky mess!
Cooking Tips & Techniques
Making these Perfect Patriotic Brownie Pops is straightforward, but a few kitchen-tested tips can save you from common pitfalls and improve your results:
- Use Room Temperature Eggs: They blend better with the melted butter and sugar, ensuring a smoother batter.
- Don’t Overbake Your Brownies: They continue to cook as they cool, so pulling them out when the toothpick has moist crumbs prevents dryness.
- Cooling Is Key: If you dip warm brownies, your chocolate coating will slide off or melt, so patience really pays off here.
- Chocolate Dipping Temperature: Keep melted chocolate warm but not hot. If it’s too hot, it can melt the brownies or become grainy when cooled.
- Sprinkle Timing: Add your sprinkles immediately after dipping while the chocolate is still wet for the best stick.
- Multitasking Hack: While brownies bake, melt your chocolate and prep decorations so you’re ready to assemble as soon as they cool.
- Storage: Keep extras in an airtight container between layers of parchment paper to avoid sticking.
I once rushed the cooling step and ended up with a chocolate-coated mess all over my kitchen counter. Lesson learned: the wait is worth it. Also, I find using a toothpick to swirl the white chocolate drizzle creates a beautiful finish without using a piping bag—simple and effective!
Variations & Adaptations
These brownie pops are a fantastic base recipe, and you can easily make some fun changes to fit your taste or dietary needs:
- Flavor Twists: Add a teaspoon of espresso powder to the brownie batter for a mocha kick, or swirl in some peanut butter before baking for a rich, nutty surprise.
- Seasonal Twists: For a fall-friendly version, try mixing in chopped pecans and cinnamon. For summer, sneak in fresh raspberries or blueberries inside the batter.
- Dietary Adaptations: Use almond or oat flour for a gluten-free option and swap regular eggs for flax eggs to make it vegan-friendly. Choose dairy-free chocolate for coating if needed.
- Alternative Coatings: Instead of chocolate, try rolling the brownie pops in crushed nuts, shredded coconut, or crushed peppermint candies for a festive touch.
- Personal Favorite: Once, I dipped these brownie pops in salted caramel sauce before the chocolate coating—utterly irresistible and a huge hit at a summer party.
If you’re interested in other easy crowd-pleasers, the slow cooker marry me sausage gnocchi soup is a cozy complement for cooler days, though these pops are definitely the star for sunny celebrations.
Serving & Storage Suggestions
These Perfect Patriotic Brownie Pops shine best served slightly chilled or at room temperature. The chocolate coating has that satisfying snap, but the inside stays moist and chewy.
Present them in a festive mason jar or a decorative stand with patriotic ribbons for an easy and inviting display. They pair wonderfully with fresh berries, lemonade, or iced tea for a refreshing summer spread.
For storage, place the pops in an airtight container lined with parchment paper to keep them from sticking together. They’ll stay fresh in the refrigerator for up to 4 days, or you can freeze them wrapped individually in plastic wrap and foil for up to 2 months. When reheating, let them thaw at room temperature for 15-20 minutes—microwaving can melt the chocolate prematurely.
Flavors actually mellow and improve a bit after a day, so if you want to prep ahead of your party, that’s a win. The combination of fudgy brownie and chocolate coating holds up well, making these pops a perfect make-ahead dessert.
Nutritional Information & Benefits
Each Perfect Patriotic Brownie Pop contains roughly 180-200 calories, depending on the size and amount of chocolate coating used. They provide a satisfying dose of energy from carbohydrates and fats, making them a great treat for active summer days.
The cocoa powder is rich in antioxidants, and by using real butter and quality chocolate, you get some healthy fats that contribute to satiety. You can boost the nutrition by adding nuts inside the batter or pairing the pops with fresh fruit for a balanced snack.
These pops are naturally gluten-containing unless you swap the flour, and they contain dairy and eggs, which are common allergens. For those with dietary restrictions, the variations section offers some easy substitutions to keep the fun going without compromise.
From a wellness standpoint, I like that these pops satisfy sweet cravings without overdoing portion sizes. They’re a little indulgent, but portioned on sticks, which helps with mindful eating (plus, they’re way more fun!).
Conclusion
Perfect Patriotic Brownie Pops have become my go-to recipe for 4th of July celebrations because they’re fun, festive, and downright delicious. Whether you’re feeding a crowd or just wanting a sweet treat with a bit of flair, these pops hit all the right notes without complicated steps or exotic ingredients.
What I love most is how easy it is to customize them—switch up the toppings, try different coatings, or sneak in some surprises inside the brownies. I hope you find yourself making these a few times during summer, just like I did, discovering your own little tweaks along the way.
Give this recipe a try and let me know how your Perfect Patriotic Brownie Pops come out. I’m curious about your favorite decorating ideas or any twists you add! Here’s to sweet celebrations with a little chocolate and a lot of smiles.
Frequently Asked Questions
Can I make these brownie pops ahead of time?
Yes! You can prepare the brownies and assemble the pops a day ahead. Store them in the fridge in an airtight container and take them out about 30 minutes before serving for best texture.
What’s the best way to melt chocolate without it seizing?
Use a microwave in short bursts (20-30 seconds), stirring frequently. Alternatively, melt the chocolate over a double boiler on low heat, stirring gently to avoid overheating.
Can I use a different type of chocolate for the coating?
Absolutely! Dark, milk, or white chocolate all work well. Just adjust sweetness to your preference and add a little coconut oil to help with smooth melting.
How do I prevent the brownie pops from falling off the sticks?
Make sure the brownies are completely cooled before inserting the sticks. Also, insert the stick about halfway in and dip quickly to avoid softening the brownie too much during the chocolate coating step.
Are these brownie pops suitable for kids?
Definitely! They’re a kid-friendly treat that’s easy to hold and fun to decorate. Just watch out for small sprinkles if you’re serving very young children.
Pin This Recipe!
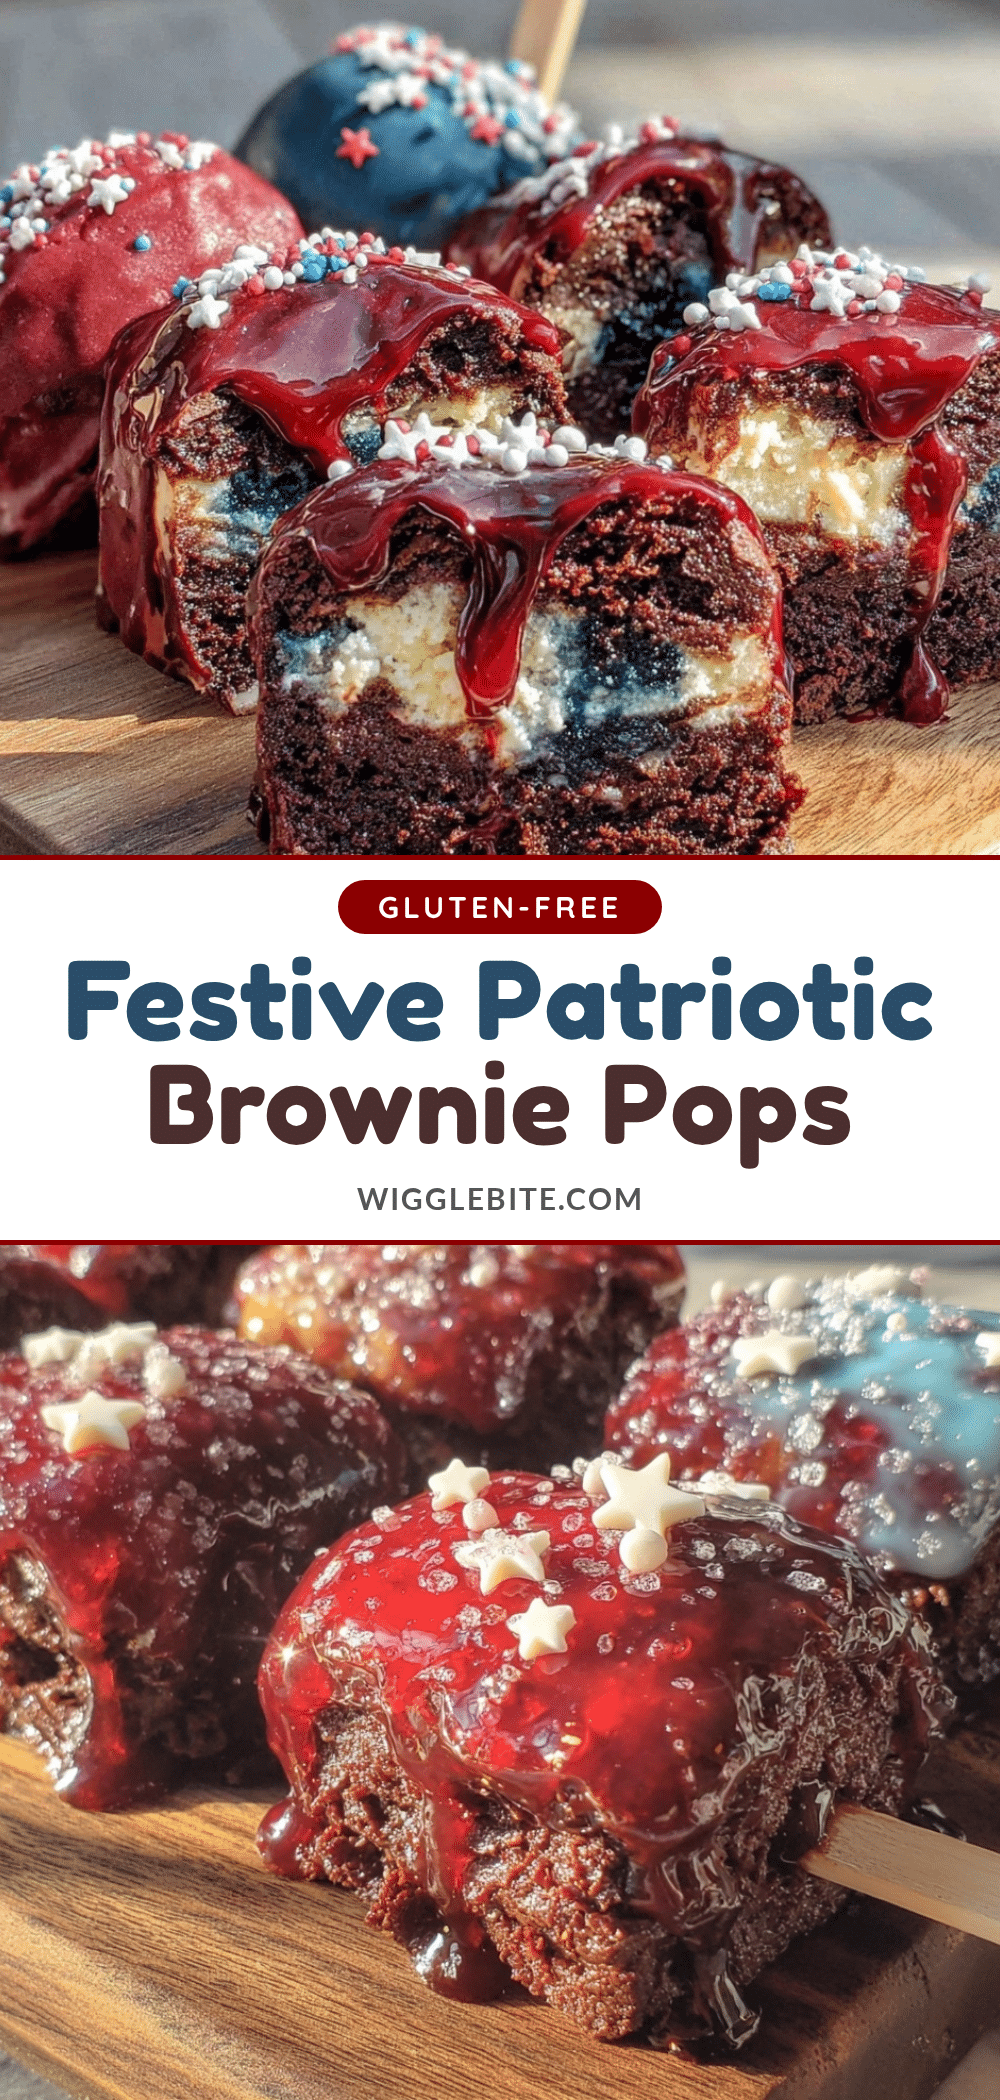
Perfect Patriotic Brownie Pops
These fudgy brownie pops dipped in chocolate and decorated with patriotic sprinkles are a fun and easy 4th of July dessert perfect for summer parties and outdoor celebrations.
- Prep Time: 15 minutes
- Cook Time: 25 minutes
- Total Time: 1 hour 40 minutes
- Yield: 16 pops 1x
- Category: Dessert
- Cuisine: American
Ingredients
- 1/2 cup (115g) unsalted butter, melted
- 1 cup (200g) granulated sugar
- 2 large eggs, room temperature
- 1 teaspoon pure vanilla extract
- 1/3 cup (40g) unsweetened cocoa powder
- 1/2 cup (65g) all-purpose flour
- 1/4 teaspoon salt
- 1/4 teaspoon baking powder
- 6 ounces (170g) semi-sweet chocolate chips or chopped chocolate
- 1 teaspoon coconut oil or vegetable oil
- White chocolate chips or melting wafers for drizzling
- Red, white, and blue sprinkles
- Wooden popsicle sticks (about 4-inch length)
Instructions
- Preheat oven to 350°F (175°C). Line an 8×8-inch baking pan with parchment paper, leaving overhang for easy removal.
- In a medium bowl, whisk together melted butter, sugar, eggs, and vanilla extract until smooth and glossy.
- In another bowl, sift together cocoa powder, flour, salt, and baking powder.
- Slowly fold dry ingredients into wet mixture until just combined, being careful not to overmix.
- Pour batter into prepared pan and smooth the top evenly.
- Bake for 20-25 minutes or until a toothpick inserted near the center comes out with a few moist crumbs.
- Cool brownies completely in the pan on a wire rack for about 1 hour.
- Lift brownies from pan using parchment overhang and cut into 16 even 2-inch squares.
- Insert a wooden popsicle stick halfway into each brownie square.
- Melt semi-sweet chocolate chips and coconut oil in 30-second bursts in microwave or over a double boiler until smooth.
- Dip each brownie pop into melted chocolate, coating about 3/4 of the pop. Let excess drip off.
- Drizzle melted white chocolate over the pops and immediately sprinkle with red, white, and blue decorations.
- Allow chocolate coating to harden at room temperature or chill in fridge for 10-15 minutes before serving.
Notes
Use room temperature eggs for smoother batter. Do not overbake brownies to keep them fudgy. Cool brownies completely before dipping to prevent chocolate from melting off. Reheat chocolate gently if it hardens during dipping. Store in airtight container with parchment paper between layers to avoid sticking. Can be made ahead and stored in fridge or freezer.
Nutrition
- Serving Size: 1 brownie pop
- Calories: 190
- Sugar: 18
- Sodium: 90
- Fat: 10
- Saturated Fat: 6
- Carbohydrates: 25
- Fiber: 2
- Protein: 2
Keywords: brownie pops, 4th of July dessert, patriotic dessert, chocolate brownie pops, easy summer dessert, fudgy brownies, chocolate coating