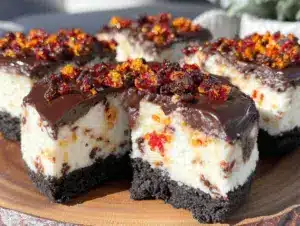
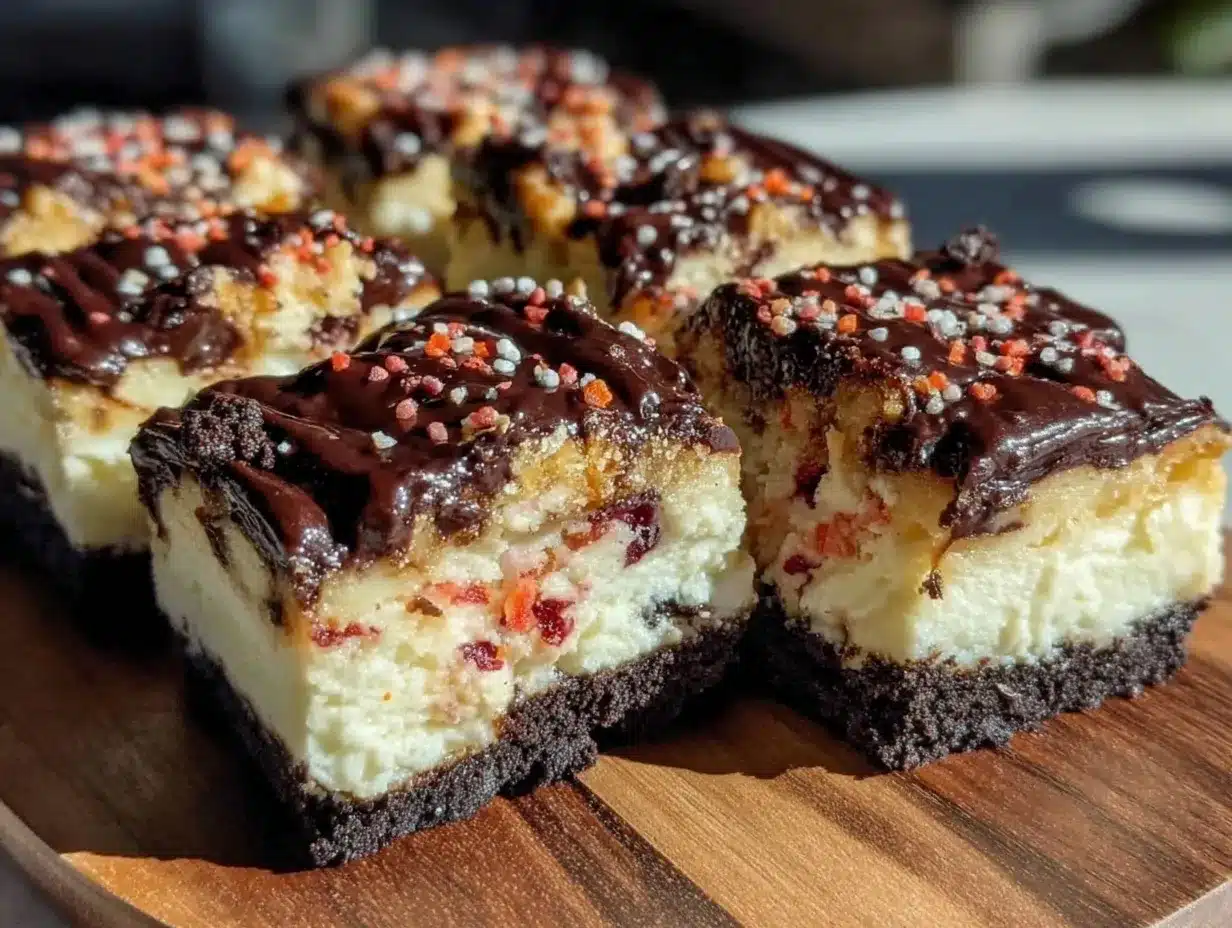
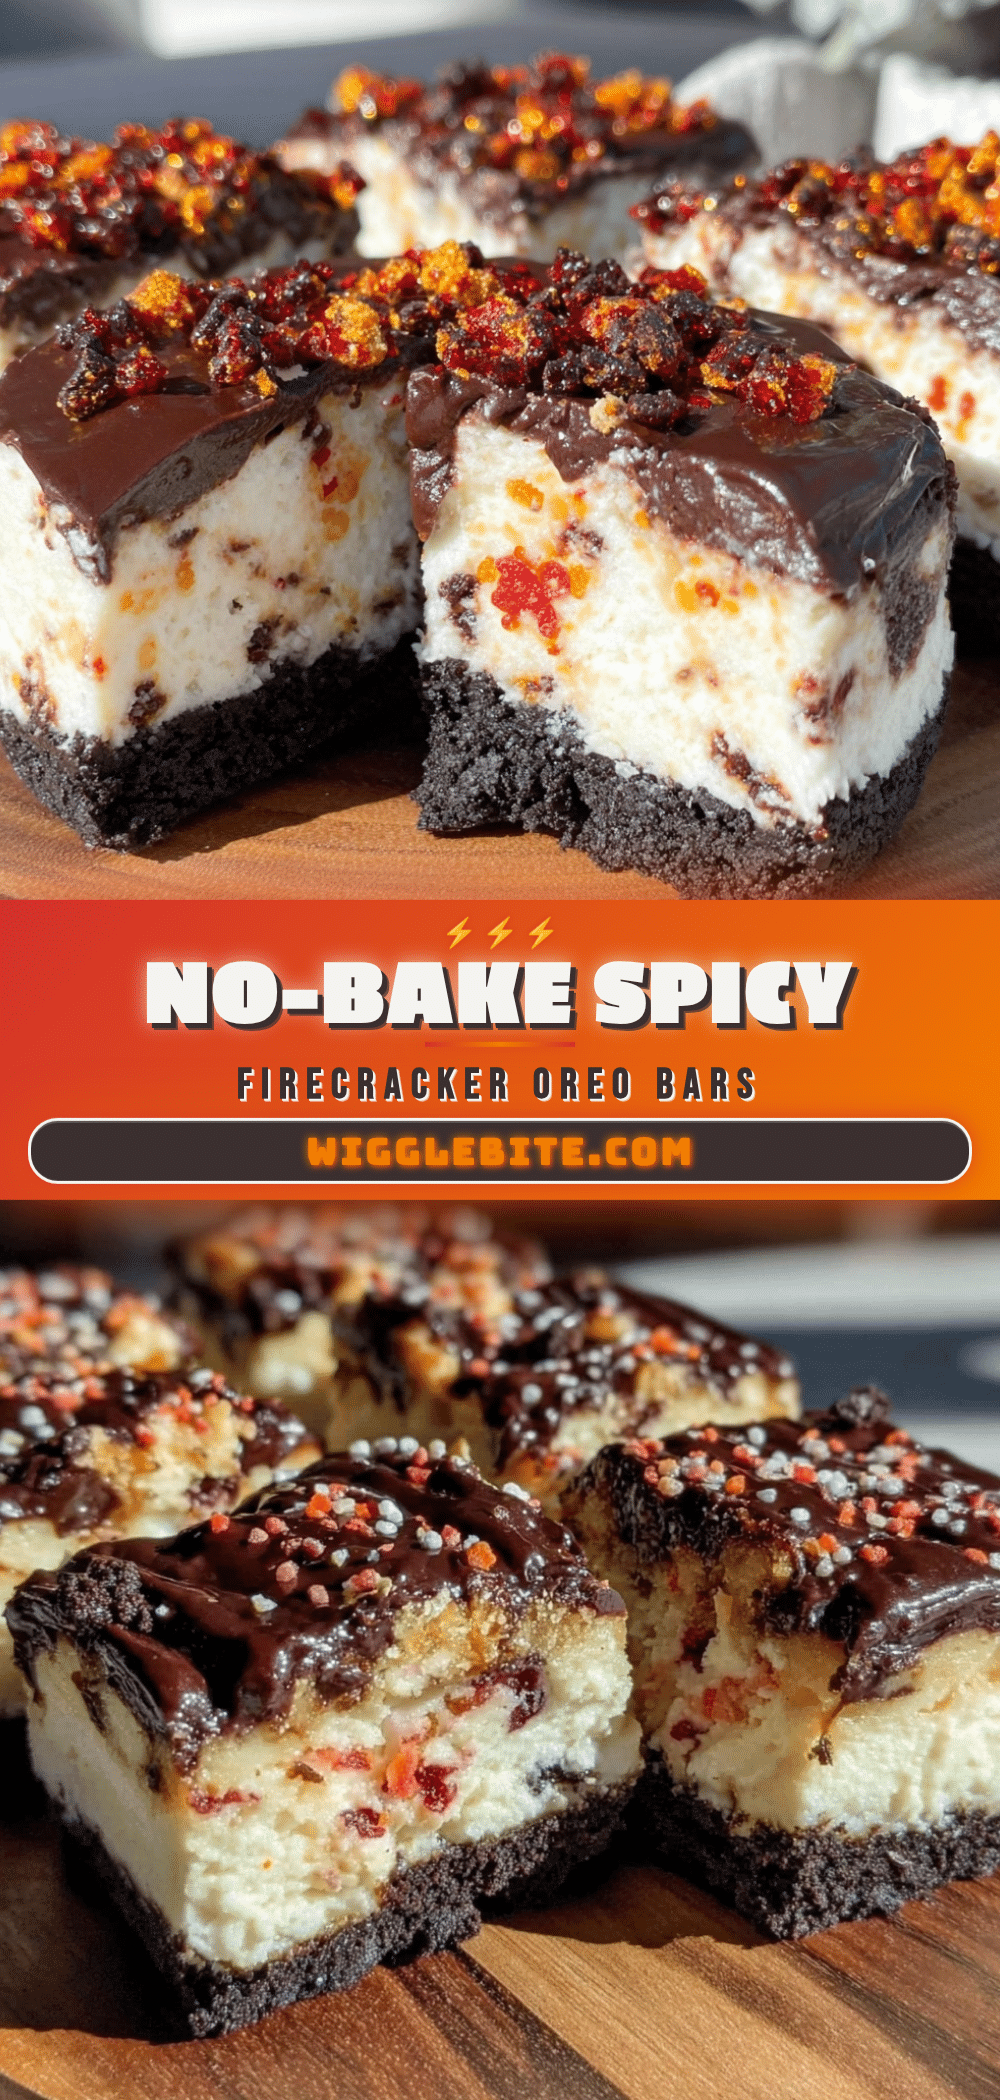
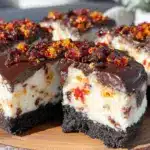
Honestly, I thought mixing Oreos with a no-bake cheesecake sounded like a recipe destined for a soggy mess. I mean, cheesecake is delicate, and Oreos? They’re crunchy and crumbly, not exactly the first thing you picture in a creamy dessert. But there I was, staring at a bowl of crushed Oreos and a smooth cream cheese mixture, wondering if this no-bake firecracker Oreo cheesecake bars idea was going to flop in the worst way. The red, white, and blue sprinkles on top felt festive but slightly gimmicky. Yet, after one hesitant bite, I had to admit it — the combination worked in a way I didn’t expect. The crisp Oreo crust held firm, the cheesecake layer was silky and just the right amount of sweet, and those sprinkles added a playful crunch that made each bite feel like a mini celebration.
This dessert stuck with me not only because it’s ridiculously easy to throw together but because it’s the kind of treat that feels special without fuss. No oven, no waiting around, just a quick chill and you’re good to go. If you’re like me, a bit wary of no-bake desserts promising the moon but delivering disappointment, this recipe is a little quiet proof that sometimes the simplest combos are the most satisfying. It’s also the perfect sweet fix for summer barbecues or holiday gatherings where you want wow factor without turning on the stove. No wonder this recipe became a favorite in my dessert rotation — it’s honest, tasty, and surprisingly reliable.
Why You’ll Love This Recipe
After testing the no-bake firecracker Oreo cheesecake bars multiple times (because, yes, this one deserves a few rounds), here’s what makes it a keeper:
- Quick & Easy: You can have these bars ready to chill in about 20 minutes—perfect for last-minute dessert needs or when you just don’t want to heat up the kitchen.
- Simple Ingredients: It’s mostly pantry staples—cream cheese, Oreos, whipped topping, and a handful of sprinkles. No hunting down fancy items.
- Perfect for Summer Parties: This dessert screams festive with its red, white, and blue “firecracker” vibe, making it a crowd-pleaser for Independence Day or casual get-togethers.
- Crowd-Pleaser: Kids love it, adults love it, even the skeptics (like me) can’t resist the creamy Oreo goodness.
- Unbelievably Delicious: The texture contrast is wonderful—the cookie crust adds crunch, the cheesecake filling is smooth and fluffy, and the sprinkles give a fun pop of color and texture.
What sets this apart? The secret is in gently folding the whipped topping into the cream cheese mixture, keeping the filling light but rich. Plus, using crushed Oreos for the crust (and a few mixed into the filling) gives it that authentic Oreo punch without any baking! Honestly, this recipe isn’t just another cheesecake bar; it’s the kind that makes you pause and smile because it’s both nostalgic and fresh.
What Ingredients You Will Need
This recipe uses simple, wholesome ingredients to deliver bold flavor and satisfying texture without the fuss. Most are pantry staples, so you might already have everything on hand.
- Oreos: About 24 cookies, crushed (for the crust and a bit to mix into the filling). I like using classic Oreo cookies, but feel free to try Golden Oreos for a twist.
- Unsalted Butter: 6 tablespoons (85g), melted — binds the crust together and adds richness.
- Cream Cheese: 16 ounces (450g), softened — the star of the cheesecake filling. I prefer Philadelphia cream cheese for the best texture.
- Granulated Sugar: 3/4 cup (150g) — balances the tanginess of the cream cheese.
- Vanilla Extract: 1 teaspoon — adds depth to the filling.
- Whipped Topping: 1 1/2 cups (about 360ml), thawed — use store-bought whipped cream or homemade whipped topping for the light, airy texture.
- Red, White, and Blue Sprinkles: 1/4 cup (optional) — for that festive firecracker look and a bit of crunch.
For substitutions:
- Use almond flour or gluten-free cookies to make the crust gluten-free.
- Swap regular sugar for a natural sweetener like coconut sugar for a different flavor profile.
- If dairy-free, try a plant-based cream cheese and coconut whipped topping.
Equipment Needed
Here’s what you’ll want to have ready before you start:
- 9×9-inch (23×23 cm) square baking pan — lined with parchment paper for easy removal.
- Mixing bowls — one large for the filling, one for the crust.
- Electric mixer or stand mixer — to beat the cream cheese smooth and fold in the whipped topping.
- Spatula — for folding and spreading the filling evenly.
- Measuring cups and spoons — precise measurements matter here.
- Food processor or plastic bag with a rolling pin — to crush the Oreos finely. I find a food processor saves time and gets a perfect crumb.
If you don’t have a food processor, no worries — just place the Oreos in a zip-top bag and crush them with a rolling pin or the bottom of a heavy pan.
Preparation Method
- Prepare the Oreo crust: Crush 24 Oreo cookies into fine crumbs using a food processor or by hand in a sealed bag. You should get about 2 cups (200g) of crumbs. Melt 6 tablespoons (85g) of unsalted butter and pour it over the crumbs. Mix until every crumb is coated and looks like wet sand.
- Press the crust: Transfer the crumb mixture into the lined 9×9-inch pan. Use the back of a spoon or measuring cup to press the crumbs firmly and evenly into the bottom. This step is key — pressing firmly keeps the crust from falling apart later. Chill the crust in the fridge while you prepare the filling (about 10 minutes).
- Make the filling: In a large bowl, beat 16 ounces (450g) of softened cream cheese with 3/4 cup (150g) granulated sugar and 1 teaspoon vanilla extract until silky smooth and lump-free. This usually takes about 3-4 minutes with an electric mixer.
- Fold in whipped topping: Gently fold 1 1/2 cups (360ml) thawed whipped topping into the cream cheese mixture. Be careful not to deflate it — you want a light, fluffy filling that melts in your mouth.
- Add crushed Oreos to the filling: Reserve about 6 cookies, crush them roughly (not fine), and fold them into the filling for that signature Oreo chunk surprise.
- Assemble the bars: Pour the cheesecake filling over the chilled Oreo crust. Spread evenly with a spatula, smoothing the top.
- Chill the bars: Cover the pan with plastic wrap and refrigerate for at least 4 hours, preferably overnight. This chilling step lets the cheesecake set firmly without baking.
- Add the firecracker topping: Right before serving, sprinkle 1/4 cup of red, white, and blue sprinkles over the top for that festive pop.
- Slice and serve: Use a sharp knife warmed under hot water and dried for clean cuts. Serve chilled.
Tip: If you want cleaner slices, freeze the bars for 30 minutes before cutting — it firms up the filling nicely.
Cooking Tips & Techniques
Here are some nuggets I’ve learned while making these no-bake firecracker Oreo cheesecake bars:
- Softening cream cheese: This can’t be rushed — if your cream cheese is too cold, lumps form. Leave it out for 30-60 minutes or microwave in short bursts (5 seconds) if you’re in a hurry.
- Folding technique: Be gentle when folding whipped topping into the cream cheese. Use a rubber spatula and fold from the bottom up to keep the mixture airy.
- Pressing the crust: Don’t skimp here! A firmly pressed crust avoids crumbling when slicing.
- Chill time: Patience pays off. The filling needs ample time to set. If you’re short on time, a quick freeze helps but don’t leave it frozen too long or it gets too hard.
- Cleaning your knife: Warm the knife under hot water, dry it, and slice slowly for neat squares.
When I first tried this recipe, I underestimated the importance of chilling. My bars were too soft and messy. Lesson learned — a proper chill time is key to success.
Variations & Adaptations
Want to switch things up? Here are some ways I’ve played with this recipe:
- Flavor twists: Add a tablespoon of instant coffee granules to the filling for a mocha Oreo cheesecake vibe. Or swap vanilla for almond extract for a nutty hint.
- Seasonal spins: Instead of red, white, and blue sprinkles, use pumpkin spice sprinkles in fall or green and red for Christmas.
- Dietary swaps: Use gluten-free Oreos or a nut-based crust for gluten sensitivity. Dairy-free cream cheese and coconut whipped topping make a vegan-friendly version.
- Chocolate overload: Fold in mini chocolate chips or drizzle melted chocolate on top before chilling.
One favorite variation I tried was adding a layer of crushed peppermint Oreos in the middle for a festive holiday surprise — it worked like a charm!
Serving & Storage Suggestions
Serve your no-bake firecracker Oreo cheesecake bars chilled for the best texture and flavor. They hold up beautifully on a dessert platter and look stunning with those patriotic sprinkles on top.
Pair these bars with a cup of coffee or a light sparkling lemonade for a refreshing contrast. If you want to serve something savory alongside, try complementing with grilled lemon herb chicken kabobs — the fresh flavors balance the richness nicely.
For storage, cover the bars tightly with plastic wrap and keep them refrigerated for up to 4 days. They also freeze well — wrap individual slices in plastic wrap and foil, then freeze up to 2 months. To thaw, place in the fridge overnight. Flavors develop and mellow out a bit after chilling, making the bars even tastier the next day.
Reheating isn’t recommended since this is best served cold, but if you want to soften the bars slightly, leave them at room temperature for 10-15 minutes before slicing and serving.
Nutritional Information & Benefits
These no-bake Oreo cheesecake bars aren’t exactly health food, but they do come together with some wholesome elements. A typical serving (about 1/12th of the pan) contains roughly:
| Calories | Fat | Carbohydrates | Protein |
|---|---|---|---|
| 320 | 22g | 28g | 4g |
The cream cheese provides calcium and protein, while the Oreos add sweetness and a nostalgic crunch. If you’re mindful of sugar, you can adjust the sugar amount or try sugar-free cookies.
This dessert is gluten-containing (unless you swap for gluten-free Oreos) and contains dairy. For those with lactose intolerance, the dairy-free adaptations mentioned earlier are a good option.
From a wellness perspective, I appreciate that this recipe lets you enjoy a crowd-pleasing treat without complicated prep or extra additives — just straightforward ingredients you can trust.
Conclusion
So there you have it: no-bake firecracker Oreo cheesecake bars that are surprisingly delicious, easy to make, and festive enough to impress without any stress. Whether you’re throwing together a last-minute dessert for a summer party or craving a sweet snack that doesn’t require the oven, this recipe fits the bill. Honestly, it’s become one of those reliable go-tos in my kitchen — simple, satisfying, and just a little bit fun with those colorful sprinkles.
Feel free to tweak it to your taste or occasion. I’ve found it pairs wonderfully with lighter dishes like the grilled lemon herb chicken kabobs or alongside a refreshing no-bake treat like the creamy frozen strawberry lemonade pie. Don’t be shy about sharing your own spin in the comments — I love hearing how you make this recipe your own. Here’s to simple, sweet victories in the kitchen!
FAQs
Can I make these cheesecake bars ahead of time?
Yes! They actually taste better after chilling overnight. Just cover and refrigerate until ready to serve.
What can I use instead of Oreos in the crust?
You can substitute with any chocolate sandwich cookies, graham crackers, or gluten-free cookie crumbs if needed.
How do I prevent the crust from becoming soggy?
Press the crust firmly and chill it before adding the filling. This helps create a sturdy base that holds up well.
Is there a way to make these bars vegan?
Use dairy-free cream cheese and whipped topping, and swap Oreos for vegan-friendly cookies. Just be mindful of the sprinkles’ ingredients.
Can I freeze the cheesecake bars?
Absolutely! Wrap them tightly and freeze for up to 2 months. Thaw in the fridge overnight before serving.
Pin This Recipe!
No-Bake Firecracker Oreo Cheesecake Bars
A quick and easy no-bake dessert featuring a crunchy Oreo crust, silky cream cheese filling, and festive red, white, and blue sprinkles. Perfect for summer parties and holiday gatherings.
- Prep Time: 20 minutes
- Cook Time: 0 minutes
- Total Time: 4 hours 20 minutes
- Yield: 12 servings 1x
- Category: Dessert
- Cuisine: American
Ingredients
- 24 Oreo cookies, crushed (for crust and filling)
- 6 tablespoons unsalted butter, melted
- 16 ounces cream cheese, softened
- 3/4 cup granulated sugar
- 1 teaspoon vanilla extract
- 1 1/2 cups whipped topping, thawed
- 1/4 cup red, white, and blue sprinkles (optional)
Instructions
- Crush 24 Oreo cookies into fine crumbs using a food processor or sealed bag. You should get about 2 cups (200g) of crumbs.
- Melt 6 tablespoons (85g) unsalted butter and mix with the Oreo crumbs until coated like wet sand.
- Press the crumb mixture firmly and evenly into the bottom of a lined 9×9-inch pan. Chill in the fridge for about 10 minutes.
- In a large bowl, beat 16 ounces (450g) softened cream cheese with 3/4 cup (150g) granulated sugar and 1 teaspoon vanilla extract until smooth.
- Gently fold 1 1/2 cups (360ml) thawed whipped topping into the cream cheese mixture, keeping it light and fluffy.
- Reserve about 6 Oreo cookies, crush roughly, and fold into the filling.
- Pour the filling over the chilled crust and spread evenly with a spatula.
- Cover with plastic wrap and refrigerate for at least 4 hours or overnight to set.
- Before serving, sprinkle 1/4 cup red, white, and blue sprinkles on top.
- Slice with a sharp knife warmed under hot water and dried for clean cuts. Serve chilled.
Notes
Press the crust firmly to avoid crumbling. Chill the bars for at least 4 hours or overnight for best results. For cleaner slices, freeze bars for 30 minutes before cutting. Soften cream cheese properly to avoid lumps. Fold whipped topping gently to keep filling airy.
Nutrition
- Serving Size: 1 bar (1/12th of the
- Calories: 320
- Fat: 22
- Carbohydrates: 28
- Protein: 4
Keywords: no-bake, cheesecake bars, Oreo, dessert, easy dessert, summer dessert, patriotic dessert, firecracker dessert