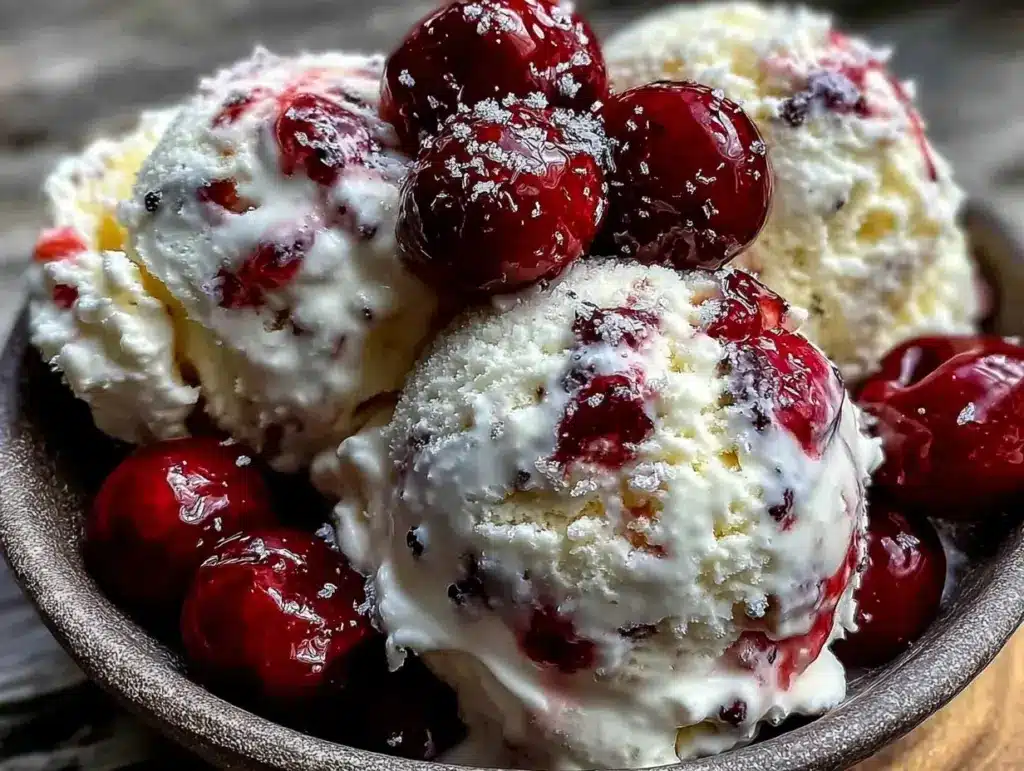
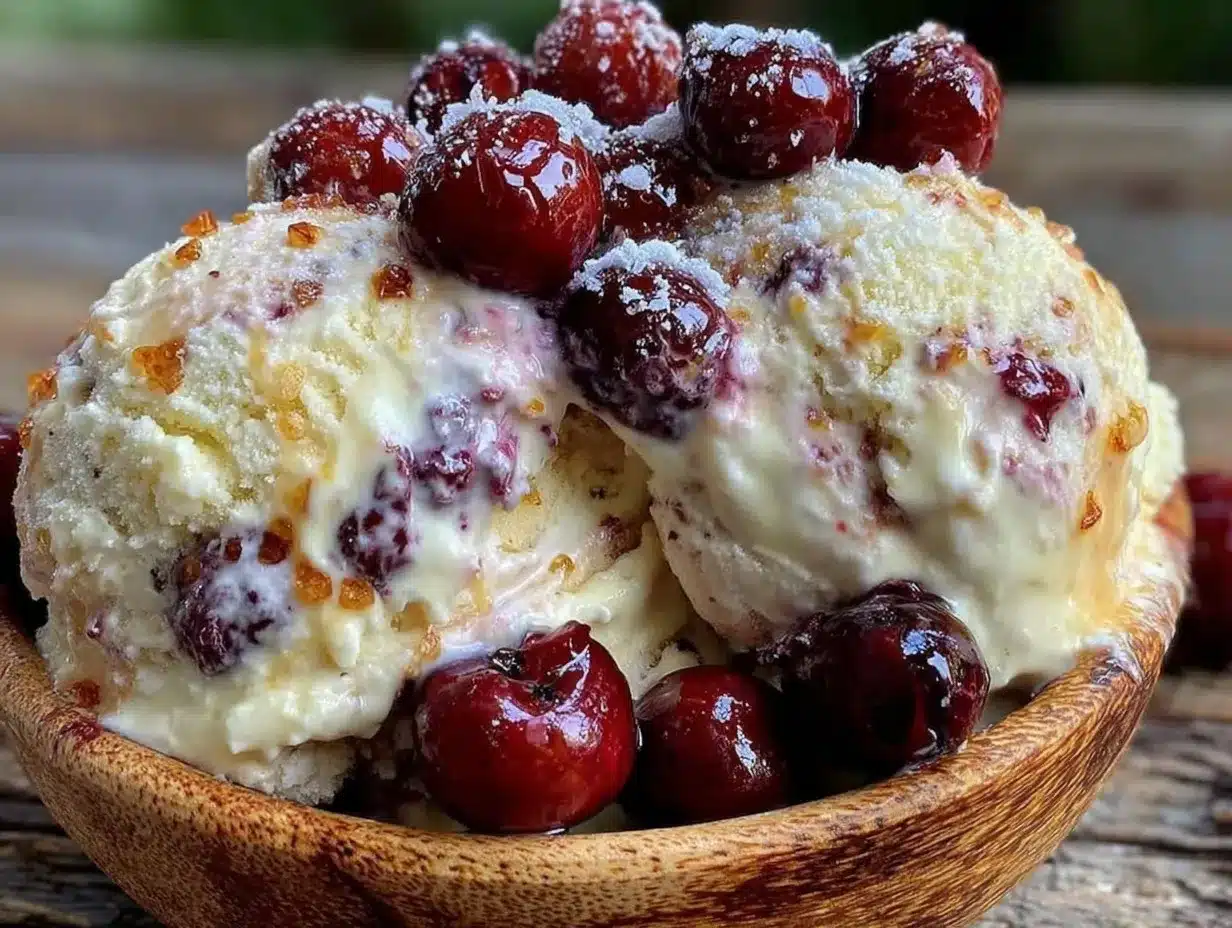
“Are you kidding me? You roasted the cherries first?” That’s exactly what my friend blurted out last summer when I brought this creamy roasted cherry vanilla bean ice cream to our backyard hangout. Honestly, I hadn’t expected such a reaction. I mean, roasting cherries before tossing them into ice cream sounded a bit extra, right? But that small step turned out to be a game-changer.
It all came about during a chaotic weekend when I was juggling a million things—kids running around, last-minute plans, and a fridge that somehow was only half-stocked. I wanted to whip up something impressive but fast, no-fuss, and with ingredients I already had. The vanilla bean was leftover from a baking spree, and the cherries were begging for some attention before they went bad.
So, I tossed those cherries into the oven with a sprinkle of sugar and a quick roast later, their flavor was deeper, sweeter, almost caramelized. Mixing those luscious roasted cherries into a no-churn ice cream base felt like a tiny culinary revelation. No ice cream maker, no complicated custard, just a simple mix and freeze.
Since then, I’ve made this creamy roasted cherry vanilla bean ice cream multiple times—sometimes as a quick treat after dinner, other times as a sweet surprise for friends. It’s that rare recipe that feels indulgent yet approachable. The vanilla bean specks scattered through the creamy base, paired with bursts of warm roasted cherry goodness, make you close your eyes with each bite.
This recipe stuck with me because it’s proof that a small twist can turn something simple into something memorable. It’s a quiet comfort on a hot day or an unexpected showstopper when you’re pressed for time. Honestly, if you’ve ever been skeptical about roasting fruit before adding it to desserts, this might just change your mind.
Why You’ll Love This Recipe
This creamy roasted cherry vanilla bean ice cream no-churn recipe isn’t your everyday frozen treat. I’ve tested it over and over, tweaking the cherry roasting time and vanilla bean intensity until it hit just right. Here’s why it’s become a favorite in my kitchen—and why I think you’ll adore it too:
- Quick & Easy: No ice cream maker needed. From roasting cherries to the first spoonful, it takes under 30 minutes of active prep.
- Simple Ingredients: You likely have heavy cream, sweetened condensed milk, and fresh cherries on hand. No specialty items or complicated trips to the store.
- Perfect for Summer Gatherings: Whether you’re hosting a casual barbecue or a cozy family dinner, this ice cream brings that little wow factor without stress.
- Crowd-Pleaser: The roasted cherries add a subtle caramelized sweetness that wins over even the pickiest eaters. Kids, adults, everyone asks for seconds.
- Unbelievably Delicious: The vanilla bean specks create a rich, authentic flavor that pairs beautifully with the deep, roasted cherry notes. It’s creamy, dreamy, and refreshing all at once.
What really sets this recipe apart is the simple roasting of cherries. It’s a tiny step that brings out a complex flavor, like a secret ingredient you didn’t know you were missing. Plus, the no-churn method means you skip the fuss of custards and machines but still get that creamy texture.
Honestly, this ice cream is the kind of dessert that makes you pause mid-bite, savoring the layers of flavor. It’s comforting yet special, perfect for anyone who loves fresh fruit desserts but craves something quicker than a pie or cobbler. If you’ve tried recipes like easy fresh peach cobbler or enjoyed the creamy notes in a fresh watermelon coconut cream popsicle, you’ll find a kindred spirit in this ice cream.
What Ingredients You Will Need
This creamy roasted cherry vanilla bean ice cream no-churn recipe uses straightforward, wholesome ingredients to bring bold flavor and a satisfyingly smooth texture to your freezer. Most of these are pantry or fridge staples, with the star being fresh cherries and real vanilla bean for that authentic aroma.
- Fresh Cherries: About 2 cups, pitted (you can use sweet or tart cherries depending on preference). Roasting deepens their flavor and softens their texture.
- Granulated Sugar: 2 tablespoons for roasting the cherries (balances tartness and helps caramelize).
- Heavy Cream: 2 cups (480 ml), cold. Use a trusted brand like Organic Valley for the best whipping results.
- Sweetened Condensed Milk: 1 can (14 oz / 400 g). This is the secret to creamy, no-churn ice cream—adds sweetness and body without eggs.
- Vanilla Bean: 1 whole bean, split and scraped (adds intense vanilla flavor and pretty specks). If unavailable, 2 teaspoons of pure vanilla extract works but is less striking.
- Lemon Juice: 1 teaspoon, fresh (optional but brightens the cherry roast and balances sweetness).
- Salt: A pinch (to enhance flavors).
If fresh cherries aren’t in season, frozen cherries work fine—just thaw and drain well before roasting. For a dairy-free version, swap heavy cream with full-fat coconut cream and use sweetened condensed coconut milk (available at specialty stores). Both substitutions keep the creamy texture intact.
When selecting your vanilla bean, look for plump, moist pods with a glossy surface. The quality of the bean profoundly affects the flavor depth. I’ve tried various beans, and Madagascar vanilla beans consistently deliver that rich, floral aroma.
Equipment Needed
- Baking Sheet: For roasting cherries. A rimmed sheet pan works best to catch any juices.
- Mixing Bowls: One large bowl for whipping the cream and another for folding in ingredients.
- Electric Mixer or Stand Mixer: Essential for whipping heavy cream to stiff peaks. A handheld mixer also works but requires a bit more arm power.
- Rubber Spatula: For gentle folding, preserving the airiness of whipped cream.
- Freezer-Safe Container: To store the ice cream. An airtight container helps prevent ice crystals.
- Sharp Knife: For splitting the vanilla bean pod and scraping out seeds.
You don’t need any fancy ice cream machine or specialized tools here. If you don’t have a mixer, whisking by hand is possible but takes patience and muscle. For roasting, a toaster oven can substitute if your main oven is busy, but watch the cherries closely to prevent burning.
Preparation Method
- Preheat your oven to 400°F (200°C). Line a baking sheet with parchment paper or a silicone mat for easy cleanup.
- Prepare the cherries: Pit about 2 cups of fresh cherries and toss them with 2 tablespoons of granulated sugar and 1 teaspoon of fresh lemon juice. Spread evenly on the baking sheet.
- Roast the cherries: Place the baking sheet in the oven and roast for 15-20 minutes. You’ll notice the cherries soften, their juices bubble, and a sweet caramelized aroma fill the kitchen. Watch carefully after 15 minutes to avoid burning.
- Cool the cherries: Remove from the oven and let them cool completely to room temperature. This step is crucial to prevent melting the ice cream base later.
- Scrape the vanilla bean: Using a sharp knife, split the vanilla bean lengthwise and scrape out the seeds with the back of the knife. Set aside the seeds and the pod for infusing.
- Whip the cream: In a cold mixing bowl, beat 2 cups (480 ml) of heavy cream with an electric mixer until stiff peaks form. This usually takes about 3-5 minutes on medium-high speed. You’ll know it’s ready when the cream holds a firm, billowy shape and doesn’t slide off the whisk.
- Combine condensed milk and vanilla: In a separate bowl, mix the sweetened condensed milk (14 oz / 400 g) with the vanilla bean seeds and a pinch of salt. Stir well to distribute the vanilla evenly.
- Fold together: Gently fold the whipped cream into the condensed milk mixture using a rubber spatula. Be careful to keep it light and airy—avoid overmixing or deflating the cream.
- Add roasted cherries: Fold in the cooled roasted cherries, including any juices from the pan. The cherries will create lovely swirls and pockets of flavor.
- Freeze: Transfer the mixture to a freezer-safe container, cover tightly, and freeze for at least 6 hours or overnight until firm.
- Serve: Let the ice cream sit out for 5 minutes before scooping to soften slightly. Enjoy the creamy texture and warm notes of roasted cherry and vanilla bean.
Pro tip: Keep the vanilla bean pod and steep it in your heavy cream a few hours before whipping to intensify the vanilla flavor even more. Just remove the pod before whipping.
Cooking Tips & Techniques
Getting this creamy roasted cherry vanilla bean ice cream just right is all about a few key techniques. Here are some tips I’ve picked up from multiple rounds in the kitchen:
- Roast cherries evenly: Spread them in a single layer and toss halfway through roasting for consistent caramelization. If the cherries crowd the pan, they’ll steam instead of roast.
- Cool cherries completely: Adding warm cherries to the ice cream base can melt the cream, ruining texture. Patience here makes a difference.
- Whip cream properly: Don’t under-whip or over-whip. Stiff peaks mean the cream holds shape but is still smooth. Over-whipped cream turns grainy and can collapse.
- Fold gently: Use a spatula and slice through the mixture rather than stirring vigorously. This keeps the air in the cream, resulting in fluffy, scoopable ice cream.
- Freeze in a shallow container: It freezes faster and more evenly, reducing ice crystals.
One time, I forgot to cool the cherries and ended up with a soupy mess in the container. Lesson learned! Also, if you’re short on time, whipping cream in a chilled metal bowl straight from the fridge helps speed up the process.
Variations & Adaptations
This recipe is a fantastic starting point for all sorts of tweaks and flavor profiles. Here are some ideas to make it your own:
- Berry Swap: Use roasted blueberries or blackberries instead of cherries for a different fruity twist. Roasting intensifies their natural sweetness as well.
- Chocolate-Cherry: Add ½ cup finely chopped dark chocolate or chocolate chips to the base for a classic black forest vibe.
- Nutty Crunch: Stir in toasted almonds, pecans, or pistachios just before freezing for added texture and flavor contrast.
- Dairy-Free Option: Use full-fat coconut cream whipped to stiff peaks and sweetened condensed coconut milk for a luscious vegan version.
- Herbal Notes: Add a teaspoon of finely chopped fresh mint or basil to the roasted cherries for a fresh, garden-inspired flavor.
I’ve tried the chocolate-cherry combo during a holiday get-together, and it was a smash hit—especially with the kids. It paired beautifully with the double chocolate espresso bundt cake I baked the same day.
Serving & Storage Suggestions
This ice cream shines best served slightly softened, about 5 minutes out of the freezer. The creamy texture becomes perfect for scooping, and those roasted cherries are juicy little flavor bombs.
For presentation, consider topping with fresh mint leaves or a drizzle of cherry syrup reserved from roasting. It pairs wonderfully with warm desserts too—try spooning it over a slice of nectarine frangipane galette for a seasonal dessert that impresses with minimal effort.
Store any leftovers in an airtight container in the freezer for up to two weeks. Avoid frequent thawing and refreezing to keep the texture creamy. If ice crystals develop, let the ice cream soften at room temperature for 10–15 minutes and give it a quick stir before serving to revive creaminess.
Over time, the flavors meld and deepen, making the ice cream even more enjoyable a day or two after freezing.
Nutritional Information & Benefits
Estimated per ½ cup (125 ml) serving:
| Calories | 280 |
|---|---|
| Fat | 16 g |
| Saturated Fat | 10 g |
| Sugar | 23 g |
| Protein | 3 g |
This no-churn ice cream delivers a good dose of calcium and vitamin A from the heavy cream. Cherries bring antioxidants and vitamin C, while the vanilla bean offers trace minerals and a comforting aroma known to lift the spirit.
While this treat is indulgent, it’s made with real, wholesome ingredients and no artificial additives. For those mindful of gluten or egg allergies, this recipe is naturally free of both. Just double-check the sweetened condensed milk brand if dietary restrictions apply.
Conclusion
This creamy roasted cherry vanilla bean ice cream no-churn recipe is one of those rare finds that blends simplicity and sophistication. It’s easy enough for a busy weekday but special enough for guests or celebrations. The roasting step adds a depth to the cherries that feels almost magical, while the no-churn method saves time and effort without sacrificing texture.
I love how this recipe invites you to slow down just a little, savor the layers of flavor, and enjoy the creamy comfort of homemade ice cream without the fuss. It’s become a quiet favorite in my kitchen—and I hope it finds a spot in yours, too.
If you try it, don’t hesitate to tweak it your way, whether that’s swapping in a favorite fruit or stirring in a handful of nuts. And if you’re curious about other easy, crowd-pleasing recipes, you might enjoy the fresh, seasonal vibes in my apricot glazed sheet pan chicken thighs or the summery lightness of strawberry basil mocktail smash.
Thanks for stopping by and happy scooping!
FAQs
Can I use frozen cherries instead of fresh for this ice cream?
Yes! Just thaw the frozen cherries completely and drain any excess liquid before roasting. This helps avoid watery ice cream.
Do I need an ice cream maker for this recipe?
Nope! This is a no-churn recipe, so you simply mix the ingredients and freeze. It’s perfect if you don’t own an ice cream machine.
How long should I roast the cherries?
Roast at 400°F (200°C) for 15-20 minutes until they’re soft and caramelized. Keep an eye after 15 minutes to prevent burning.
Can I make this ice cream vegan or dairy-free?
Absolutely. Use full-fat coconut cream whipped to stiff peaks and sweetened condensed coconut milk in place of dairy.
How long can I store this ice cream in the freezer?
Store it in an airtight container for up to two weeks. For best texture, avoid thawing and refreezing multiple times.
Pin This Recipe!
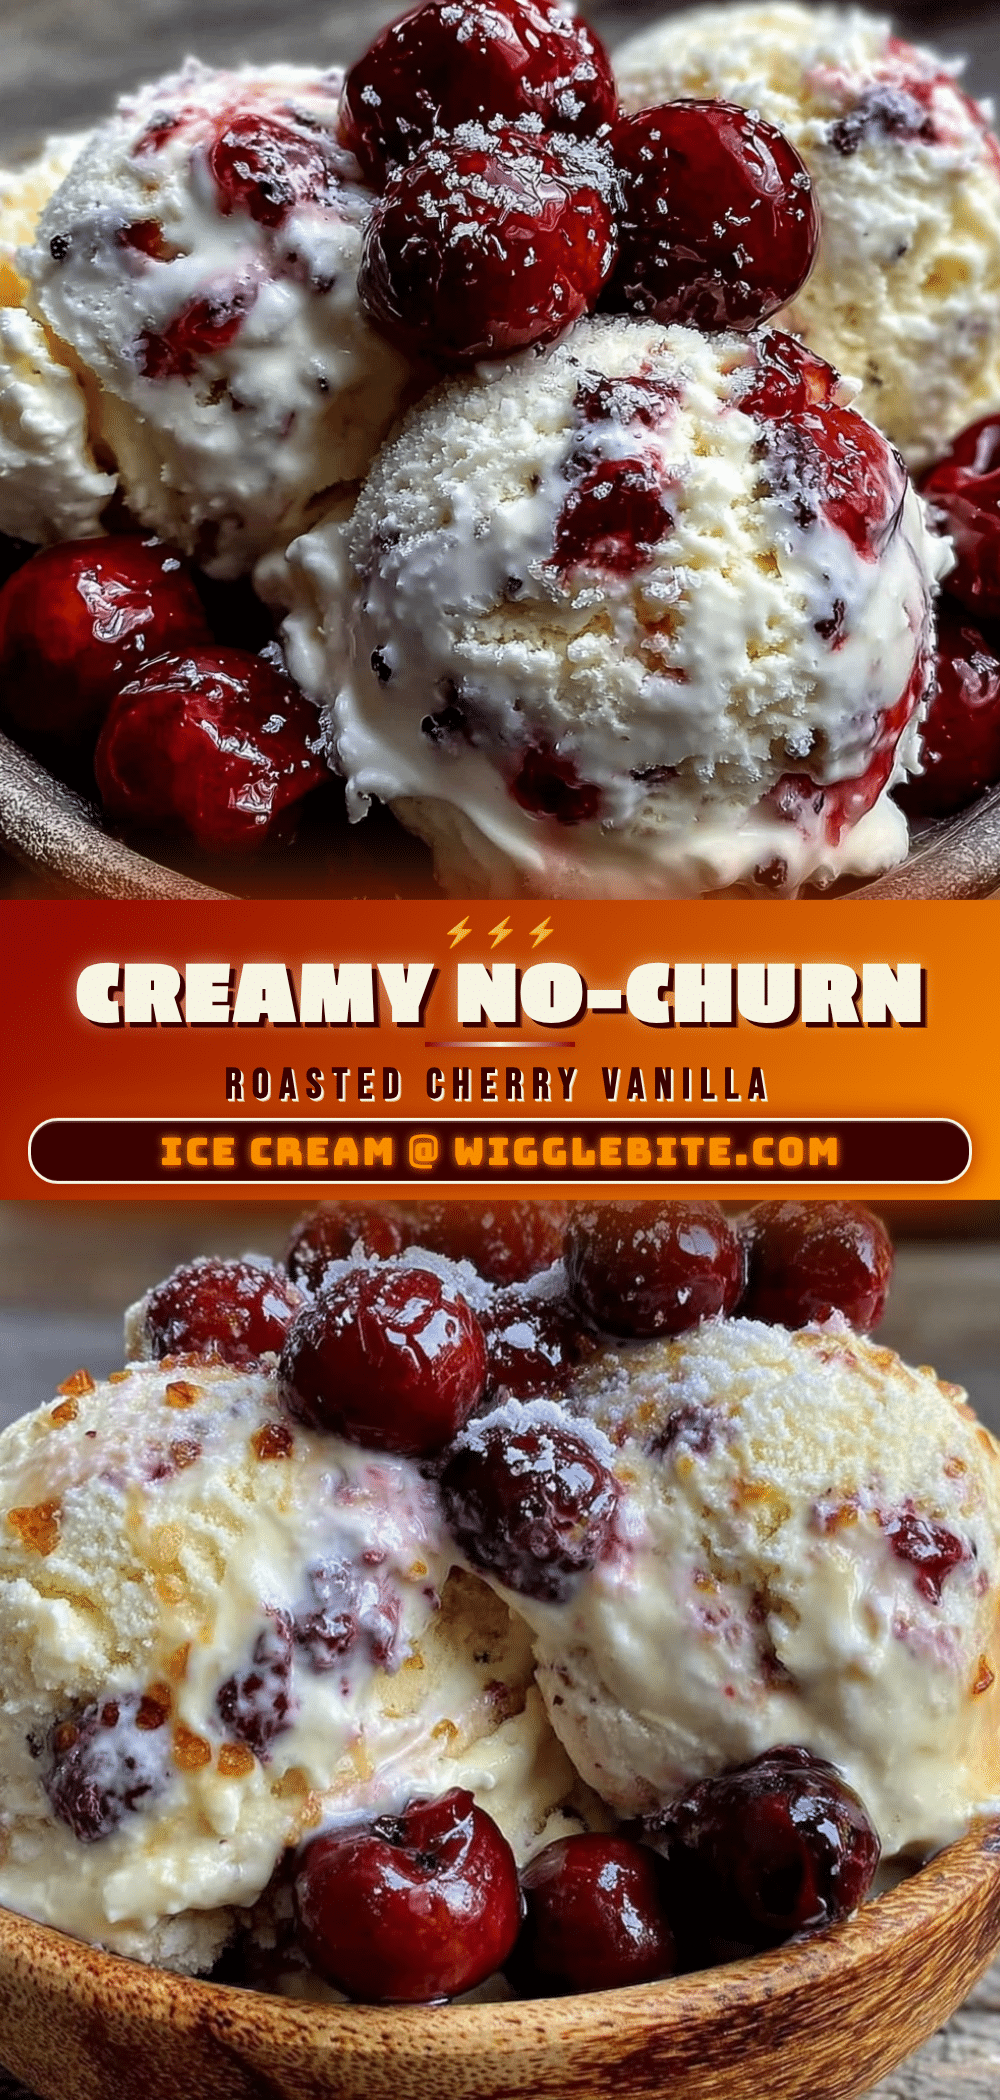
Creamy Roasted Cherry Vanilla Bean Ice Cream Easy No-Churn Recipe
A no-churn ice cream featuring roasted cherries and real vanilla bean for a creamy, dreamy, and refreshing frozen treat with deep caramelized cherry flavor.
- Prep Time: 15 minutes
- Cook Time: 20 minutes
- Total Time: 6 hours 35 minutes
- Yield: 8 servings 1x
- Category: Dessert
- Cuisine: American
Ingredients
- 2 cups fresh cherries, pitted (sweet or tart)
- 2 tablespoons granulated sugar
- 2 cups (480 ml) heavy cream, cold
- 1 can (14 oz / 400 g) sweetened condensed milk
- 1 whole vanilla bean, split and scraped (or 2 teaspoons pure vanilla extract)
- 1 teaspoon fresh lemon juice (optional)
- Pinch of salt
Instructions
- Preheat your oven to 400°F (200°C). Line a baking sheet with parchment paper or a silicone mat.
- Pit about 2 cups of fresh cherries and toss them with 2 tablespoons of granulated sugar and 1 teaspoon of fresh lemon juice. Spread evenly on the baking sheet.
- Roast the cherries in the oven for 15-20 minutes until softened and caramelized, watching carefully after 15 minutes to avoid burning.
- Remove cherries from the oven and let them cool completely to room temperature.
- Split the vanilla bean lengthwise and scrape out the seeds with a sharp knife. Set aside the seeds and pod.
- In a cold mixing bowl, whip 2 cups (480 ml) of heavy cream with an electric mixer until stiff peaks form (about 3-5 minutes).
- In a separate bowl, mix the sweetened condensed milk with the vanilla bean seeds and a pinch of salt.
- Gently fold the whipped cream into the condensed milk mixture using a rubber spatula, keeping it light and airy.
- Fold in the cooled roasted cherries, including any juices from the pan.
- Transfer the mixture to a freezer-safe container, cover tightly, and freeze for at least 6 hours or overnight until firm.
- Before serving, let the ice cream sit out for 5 minutes to soften slightly.
Notes
Cool cherries completely before folding into the ice cream base to prevent melting. Whip cream to stiff peaks but avoid over-whipping. Fold gently to keep the mixture airy. Freeze in a shallow container for faster, even freezing. Vanilla bean pod can be steeped in cream before whipping for extra flavor.
Nutrition
- Serving Size: ½ cup (125 ml)
- Calories: 280
- Sugar: 23
- Fat: 16
- Saturated Fat: 10
- Protein: 3
Keywords: no-churn ice cream, roasted cherry ice cream, vanilla bean ice cream, easy ice cream recipe, summer dessert, no ice cream maker