Let me tell you, there’s nothing quite like walking into a kitchen filled with the bright, citrusy scent of lemons mingling with the warm, golden aroma of butter baking away. The first time I made these zesty lemon bars with their buttery shortbread crust, I stood by my oven, eyes closed, breathing in the sunshine—right there in the middle of a rainy afternoon. It’s the kind of moment where you pause, take a deep breath, and just smile because you know you’re onto something truly special. These lemon bars aren’t just any dessert; they’re pure, nostalgic comfort with a tangy twist that makes your taste buds do a happy dance.
Years ago, when I was knee-high to a grasshopper, my grandma would whip up her own lemon squares for family picnics. She’d always say, “If it isn’t tart enough to make your cheeks pucker, you’re missing out!” I guess that stuck with me. I stumbled upon my own version one late summer when I was determined to recreate that perfect blend of sweet, tart, and buttery goodness—honestly, I wish I’d found this recipe sooner. My family couldn’t stop sneaking them off the cooling rack (and I can’t really blame them). Even my picky eater declared, “This is the best dessert you’ve ever made!”
There’s something dangerously easy about whipping up a batch for potlucks or brightening up your Pinterest board with their sunny, golden hues. Whether you need a sweet treat for your kids or a dazzling dessert for a brunch table, these zesty lemon bars are always a hit. I’ve tested and tweaked this recipe more times than I can count—in the name of research, of course—and now it’s a staple for family gatherings, gifting, and, honestly, when I just need a pick-me-up. It feels like a warm hug (with a citrus kick), and you’re going to want to bookmark this one!
Why You’ll Love This Recipe
If you’re searching for a dessert that’s both show-stopping and secretly simple, these zesty lemon bars with buttery shortbread crust are about to become your new go-to. After countless batches and family taste tests, I’ve nailed down the secrets for making lemon bars that are perfectly balanced, easy to whip up, and impossible to resist. Here’s why you’ll love them:
- Quick & Easy: Comes together in under an hour, making it ideal for busy weeknights or last-minute bake sale emergencies.
- Simple Ingredients: You probably have everything on hand—no trips to the specialty store needed.
- Perfect for Any Occasion: Whether it’s a cozy weekend treat, a sunny spring brunch, or a holiday dessert platter, these lemon bars fit right in.
- Crowd-Pleaser: Kids, grandparents, and even picky eaters go wild for the sweet-tart combo and buttery crust.
- Unbelievably Delicious: The contrast between zingy lemon filling and melt-in-your-mouth shortbread is next-level comfort food.
What sets this zesty lemon bars recipe apart? For starters, the shortbread crust is made with real, unsalted butter for that rich, crumbly texture—no oily aftertaste. The lemon layer uses fresh-squeezed juice and zest, so the flavor is bright and authentic (no bottled stuff here). I always sift my powdered sugar for a silky-smooth finish, and trust me, it makes all the difference.
Honestly, these bars are more than just dessert—they’re a mood-lifter. There’s something about biting into that sunshiny layer and buttery base that makes you close your eyes and savor every second. It’s comfort food reimagined: faster, fresher, with all the soul-soothing satisfaction you crave. The recipe is forgiving, so you can make it your own and impress guests without any stress. I can’t think of a better way to turn a simple meal into a memorable moment!
Ingredients Needed
This zesty lemon bars recipe uses simple, wholesome ingredients to deliver bold flavor and satisfying texture without the fuss. Most are pantry staples, and a few smart substitutions make it easy to cater to different diets and preferences.
- For the Buttery Shortbread Crust:
- 1 cup (226g) unsalted butter, softened (real butter gives the crust its signature flavor)
- 1/2 cup (60g) powdered sugar (sifted for best texture)
- 2 cups (240g) all-purpose flour (use gluten-free blend if needed)
- 1/4 tsp fine sea salt (balances the sweetness)
- For the Zesty Lemon Filling:
- 1 1/2 cups (300g) granulated sugar (some people like it a bit less sweet—feel free to use 1 1/4 cups)
- 1/4 cup (30g) all-purpose flour (helps the filling set)
- 4 large eggs (room temperature)
- 2/3 cup (160ml) fresh lemon juice (about 3-4 lemons; Meyer lemons add a floral note)
- 1 tbsp finely grated lemon zest (extra zing, don’t skip it!)
- For Garnish:
- Powdered sugar, for dusting
- Extra lemon zest or thin lemon slices, optional
Ingredient Tips: If you want a deeper flavor, try organic lemons—they’re worth the splurge. For the crust, I swear by King Arthur flour for its consistently tender results. If you’re baking for someone who’s dairy-free, use a good vegan butter substitute; Earth Balance is a solid choice. Almond flour works for gluten-free bars, too, though the texture is a bit more delicate.
Substitution Suggestions: Swap granulated sugar with coconut sugar for a caramel undertone. Use lime juice instead of lemon for a fun twist. For egg-free, try a commercial egg replacer, but know the filling will be slightly less custardy. In summer, you can add a handful of fresh berries to the filling for fruity pops!
Equipment Needed
- 9×13-inch (23x33cm) baking pan: Standard size for classic bars. If you only have an 8×8-inch pan, halve the recipe and extend baking time by 5-8 minutes.
- Mixing bowls: At least two—one for crust, one for filling. Stainless or glass works best.
- Electric mixer or sturdy wooden spoon: For creaming the butter. I’ve used both, honestly, and the results are similar.
- Whisk: Essential for a smooth lemon filling. You want no lumps here!
- Measuring cups and spoons: Precision counts for baking—always level off your flour.
- Fine mesh sieve: Sifts powdered sugar and flour for lump-free results. Not strictly necessary, but it’s worth the extra step.
- Microplane grater: For zesting lemons. If you don’t have one, use the fine side of a box grater.
- Parchment paper: Makes lifting and slicing a breeze. If you run out, grease the pan well.
- Sharp knife: For clean, beautiful squares.
I’ve tried glass and metal pans; metal gives crisper edges, glass offers gentler browning. For budget-friendly tools, you don’t need anything fancy—just solid basics. If your mixer is on the fritz, just let the butter soften a bit longer and use elbow grease. Don’t forget to rinse your grater right away; lemon zest gets sticky fast!
Preparation Method
- Prep the Pan (5 minutes)
Line a 9×13-inch pan with parchment paper, leaving a 2-inch overhang for easy lifting. Lightly grease the sides. This helps prevent sticking and makes cleanup simple. - Make the Shortbread Crust (10 minutes)
In a mixing bowl, cream 1 cup (226g) unsalted butter with 1/2 cup (60g) powdered sugar using an electric mixer (or a sturdy spoon if you’re going old-school). Beat until light and fluffy—about 2 minutes. Add 2 cups (240g) flour and 1/4 tsp salt, mixing just until a crumbly dough forms. If it’s too dry, add a teaspoon of water. Press the dough evenly into the prepared pan, using your fingers or the bottom of a measuring cup for a smooth surface. - Bake the Crust (18-20 minutes)
Bake in a preheated oven at 350°F (175°C) for 18-20 minutes. The crust should be pale golden and slightly firm to the touch. Don’t let it get too brown—if in doubt, pull it out early. If it cracks a little, no worries; the filling covers it up. - Prepare the Lemon Filling (10 minutes)
While the crust bakes, whisk together 1 1/2 cups (300g) granulated sugar and 1/4 cup (30g) flour in a large bowl. Add 4 eggs, 2/3 cup (160ml) fresh lemon juice, and 1 tbsp zest, whisking until well combined and slightly frothy. The mixture should smell bright and sweet—if it’s too tart, add a tablespoon more sugar. - Pour & Bake (20-25 minutes)
Once the crust is done, pour the lemon filling over the hot crust. Tilt the pan gently to spread it evenly. Return to the oven and bake for 20-25 minutes, until the center is just set and doesn’t jiggle much when shaken. The top may develop tiny bubbles or a thin white layer—totally normal. - Cool and Set (1-2 hours)
Let the bars cool in the pan on a wire rack for about 30 minutes, then refrigerate for at least 1 hour before cutting. This helps the filling firm up and makes slicing easier. If you rush this step, the bars might be messy (I’ve learned the hard way!). - Slice & Serve (5 minutes)
Lift the bars out using the parchment. Slice into squares or rectangles with a sharp knife, wiping between cuts for clean edges. Dust generously with powdered sugar and garnish with extra lemon zest or thin lemon slices, if you’re feeling fancy.
Troubleshooting: If your filling is runny, it probably needed a few more minutes in the oven. Bars too dense? Beat the eggs a tad longer for a lighter filling. Crust too crumbly? Next time, pack it a bit tighter and watch the bake time. The bars should look golden, smell like sunshine, and feel slightly springy in the center.
Cooking Tips & Techniques
I’ve baked more lemon bars than I care to admit, and here’s what I’ve learned along the way (sometimes the hard way):
- Use Room Temperature Eggs: Cold eggs can make the filling lumpy. Let them sit out while you prep the crust.
- Zest Before Juicing: Always zest your lemons before squeezing—the other way around is just asking for frustration.
- Don’t Overmix the Filling: Too much whisking creates air bubbles, which can make the top look uneven. Gentle whisking is best.
- Keep an Eye on the Bake: The filling should be barely set, not browned. Overbaking dries it out; underbaking makes it gooey. A gentle jiggle test does the trick!
- Multi-tasking: Prep the filling while the crust bakes to save time. Measure out your sugar and flour beforehand for a smooth workflow.
- Clean Slices: Chill the bars fully before cutting, and use a hot, damp knife for perfect squares. Wipe the blade between each cut.
I’ve had failures—once I forgot to line the pan and spent twenty minutes prying out lemon bars with a spatula (not recommended!). Another time, I used bottled lemon juice, and the flavor just wasn’t the same. Trust me, fresh lemons are worth it. Consistency is key; measure everything carefully, and don’t skip sifting the powdered sugar. If you’re making these for a crowd, double the batch and use two pans—no one ever complains about leftovers!
Variations & Adaptations
Lemon bars are a classic, but there’s plenty of room to play. Here are some favorite twists I’ve tried over the years:
- Gluten-Free: Swap the all-purpose flour in both crust and filling with a 1:1 gluten-free baking blend. Almond flour works, but the crust is a bit more tender—handle with care!
- Dairy-Free: Replace the butter with a plant-based alternative like Earth Balance. The flavor is still rich, just with a slightly softer texture.
- Berry Lemon Bars: Add 1/2 cup fresh blueberries or raspberries to the lemon filling before baking. The berries burst and add a pop of color and sweetness.
- Lime or Orange Bars: Swap out lemons for limes or oranges for a different citrus vibe. Meyer lemons are another fun option—they’re sweet and floral.
- Coconut Crust: Substitute 1/2 cup of the flour in the crust with unsweetened shredded coconut for a tropical twist.
For allergies, you can use a commercial egg replacer for an egg-free version, though the filling will be less custardy. If you prefer less sugar, reduce the granulated sugar by 1/4 cup—the bars will be a bit more tart, which I love. My personal favorite variation? I sometimes swirl in a tablespoon of raspberry jam before baking—looks gorgeous and tastes even better!
Serving & Storage Suggestions
These zesty lemon bars with buttery shortbread crust are best served chilled or at room temperature. I love to plate them on a vintage tray dusted with extra powdered sugar and a few lemon curls—makes them Pinterest-perfect and totally irresistible.
Pair with a cup of Earl Grey tea or a sparkling elderflower lemonade for a refreshing combo. If you’re hosting brunch, serve alongside fresh berries or fruit salad. For potlucks, they travel well in a sealed container—just layer parchment between rows to prevent sticking.
To store, keep in an airtight container in the fridge for up to 5 days. They freeze beautifully; just wrap well and thaw overnight in the fridge. Reheat briefly in the microwave if you like them warm, but honestly, they’re best cold. The flavors deepen by the second day, so don’t be afraid to make them ahead—just wait to dust with powdered sugar until right before serving!
Nutritional Information & Benefits
Each zesty lemon bar (about 1/16th of the pan) is estimated to contain:
- Calories: ~180
- Fat: ~8g
- Carbohydrates: ~25g
- Protein: ~2g
- Sugar: ~17g
Lemons are a natural source of vitamin C and antioxidants—great for immune support. The eggs add some protein, and using fresh ingredients means no artificial flavors or preservatives. If you make swaps like almond flour or coconut sugar, you’ll lower the carbs and add healthy fats. This recipe contains gluten (unless adapted), eggs, and dairy—so watch for allergies. Personally, I love how lemon bars satisfy a sweet craving without feeling heavy or overly indulgent. A little sunshine in each bite!
Conclusion
If you’ve been craving a homemade dessert that’s bursting with fresh flavor and wrapped in a melt-in-your-mouth crust, these zesty lemon bars are the answer. They’re simple enough for a weeknight, fancy enough for company, and flexible for almost any diet. I’ve made them for holidays, rainy days, and just because—and honestly, they never disappoint.
Feel free to tweak the sugar, swap the citrus, or add a sprinkle of berries. Whether you’re an experienced baker or just getting started, you’ll find these bars forgiving and fun to make. I love this recipe because it’s filled with happy memories and always brings a smile to my family’s faces.
Give them a try, and let me know your favorite twist or adaptation in the comments below! Share your photos, spread the sunshine, and don’t forget to save this recipe for your next dessert craving. Happy baking, friends!
FAQs
Can I use bottled lemon juice instead of fresh lemons?
Fresh lemon juice is best for flavor and brightness. Bottled juice works in a pinch, but you might notice a difference in taste.
How do I keep the powdered sugar from melting on top?
Dust the bars with powdered sugar right before serving. If you dust too early, moisture from the filling can dissolve it.
Can I freeze lemon bars?
Yes! Slice and wrap them tightly, then freeze for up to 2 months. Thaw in the fridge overnight for best texture.
Why is my crust crumbly or dry?
Make sure to press the crust firmly into the pan and don’t overbake. If it’s still crumbly, add a teaspoon of water to the dough next time.
Can I make lemon bars without eggs?
You can use a commercial egg replacer, but the texture will be less custardy. They’ll still taste great!
Pin This Recipe!

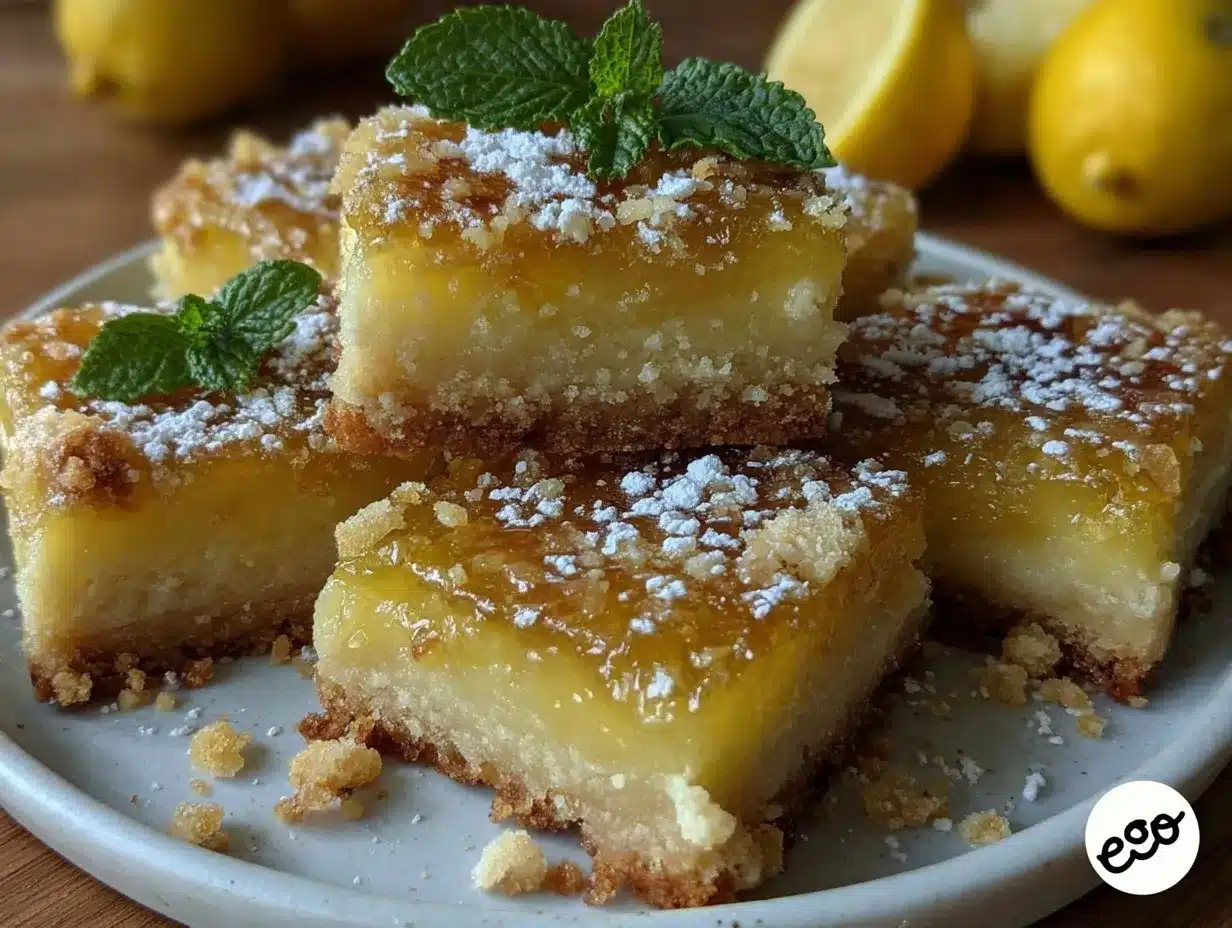
Zesty Lemon Bars Recipe Easy Homemade Dessert with Buttery Crust

These zesty lemon bars feature a bright, tangy lemon filling atop a buttery shortbread crust. Easy to make and perfect for any occasion, they’re a nostalgic comfort dessert with a citrus kick.
- Prep Time: 25 minutes
- Cook Time: 40 minutes
- Total Time: 1 hour 5 minutes (plus 1 hour chilling)
- Yield: 16 bars 1x
- Category: Dessert
- Cuisine: American
Ingredients
- 1 cup (226g) unsalted butter, softened
- 1/2 cup (60g) powdered sugar, sifted
- 2 cups (240g) all-purpose flour (or gluten-free blend)
- 1/4 tsp fine sea salt
- 1 1/2 cups (300g) granulated sugar (or 1 1/4 cups for less sweet)
- 1/4 cup (30g) all-purpose flour
- 4 large eggs, room temperature
- 2/3 cup (160ml) fresh lemon juice (about 3–4 lemons)
- 1 tbsp finely grated lemon zest
- Powdered sugar, for dusting
- Extra lemon zest or thin lemon slices, optional for garnish
Instructions
- Preheat oven to 350°F (175°C). Line a 9×13-inch pan with parchment paper, leaving a 2-inch overhang. Lightly grease the sides.
- In a mixing bowl, cream unsalted butter with powdered sugar using an electric mixer or sturdy spoon until light and fluffy (about 2 minutes).
- Add flour and salt to the butter mixture, mixing just until a crumbly dough forms. If too dry, add a teaspoon of water.
- Press the dough evenly into the prepared pan. Smooth the surface with fingers or the bottom of a measuring cup.
- Bake the crust for 18-20 minutes until pale golden and slightly firm. Remove from oven.
- While the crust bakes, whisk together granulated sugar and flour in a large bowl. Add eggs, lemon juice, and lemon zest, whisking until well combined and slightly frothy.
- Pour the lemon filling over the hot crust. Tilt the pan gently to spread evenly.
- Return to oven and bake for 20-25 minutes, until the center is just set and barely jiggles.
- Cool in the pan on a wire rack for 30 minutes, then refrigerate for at least 1 hour before cutting.
- Lift bars out using parchment. Slice into squares or rectangles with a sharp knife, wiping between cuts for clean edges.
- Dust generously with powdered sugar and garnish with extra lemon zest or thin lemon slices if desired.
Notes
Use room temperature eggs for a smooth filling. Zest lemons before juicing. Don’t overmix the filling to avoid air bubbles. Chill bars fully before slicing for clean edges. For gluten-free or dairy-free adaptations, substitute flour and butter as needed. Bars freeze well for up to 2 months.
Nutrition
- Serving Size: 1 bar (1/16th of pan
- Calories: 180
- Sugar: 17
- Sodium: 60
- Fat: 8
- Saturated Fat: 5
- Carbohydrates: 25
- Fiber: 0.5
- Protein: 2
Keywords: lemon bars, dessert, easy lemon bars, homemade lemon squares, buttery crust, citrus dessert, spring baking, potluck dessert, brunch treat, classic lemon bars