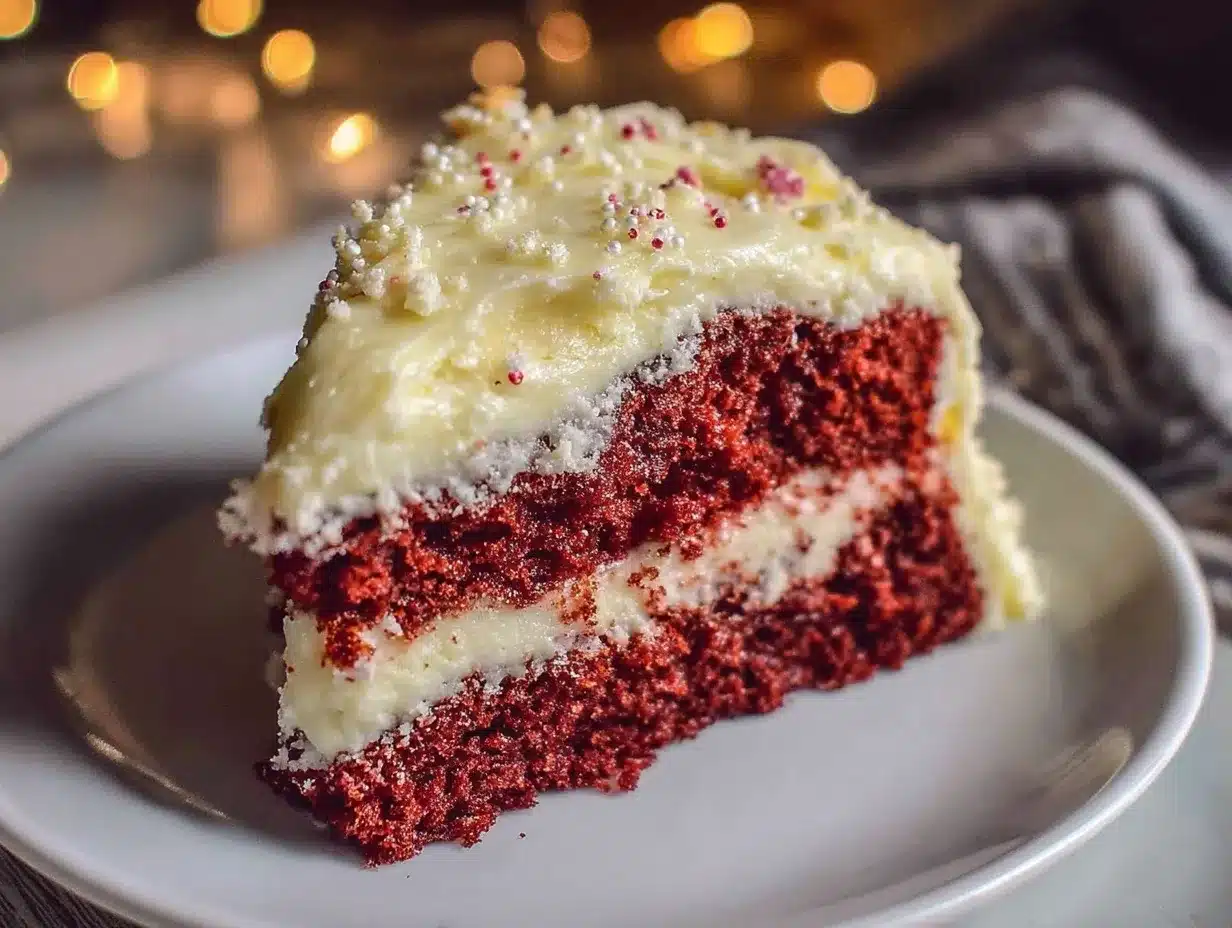
Let me tell you, the scent of cocoa and vanilla swirling together with that unmistakable tang of buttermilk, all wrapped up in a vibrant red velvet cake, is enough to make anyone’s mouth water. The first time I baked this ultimate moist red velvet cake with creamy frosting, I was instantly hooked—the kind of moment where you pause, take a deep breath, and just smile because you know you’re onto something truly special. Years ago, when I was knee-high to a grasshopper, my grandma used to make a red velvet cake that felt like a warm hug on a chilly afternoon. Trying to recreate that nostalgic comfort led me down a path of countless trials, tweaks, and tastings.
Honestly, my family couldn’t stop sneaking slices off the cooling rack (and I can’t really blame them). Whether it was a birthday, a casual weekend treat, or an excuse to bake during a rainy day, this ultimate moist red velvet cake recipe quickly became a staple for family gatherings and gifting. You know what? It’s dangerously easy to make and offers pure, nostalgic comfort with every bite. Perfect for potlucks, sweet treats for your kids, or to brighten up your Pinterest cookie board with that stunning red hue and luscious creamy frosting. After testing this recipe multiple times—in the name of research, of course—I’m confident you’re going to want to bookmark this one.
Why You’ll Love This Recipe
This ultimate moist red velvet cake recipe is not just your run-of-the-mill dessert; it’s a crowd-pleaser that brings together ease, taste, and texture in a way that’s hard to beat. I’ve tried plenty of red velvet cakes over the years, but this one genuinely stands out for several reasons:
- Quick & Easy: Comes together in under an hour, perfect for busy weeknights or last-minute celebrations.
- Simple Ingredients: No fancy grocery trips needed; you likely already have everything in your kitchen pantry.
- Perfect for Any Occasion: Whether it’s a cozy dinner, holiday morning, or a festive party, this cake fits right in.
- Crowd-Pleaser: Kids and adults alike rave about the tender crumb and silky frosting combo.
- Unbelievably Delicious: The balance of cocoa with tangy buttermilk and that creamy frosting is next-level comfort food.
What makes this recipe different? It’s the tiny details—like using a touch of vinegar and baking soda to create that classic red velvet tang and the perfect crumb. Plus, the creamy frosting isn’t just cream cheese-based; it’s whipped with a hint of vanilla and butter for that dreamy texture that spreads like a charm. This recipe isn’t just good—it’s the kind that makes you close your eyes after the first bite. Comfort food reimagined—simple, quick, and with all the soul-soothing satisfaction you want from a homemade cake. Trust me, this is the recipe you’ll turn to again and again.
What Ingredients You Will Need
This recipe uses simple, wholesome ingredients to deliver bold flavor and a satisfying texture without any fuss. Most are pantry staples, but a couple of special touches make all the difference.
- For the Cake Batter:
- 2 ½ cups (312g) all-purpose flour (I recommend King Arthur for best texture)
- 1 ½ cups (300g) granulated sugar
- 1 teaspoon baking soda
- 1 teaspoon fine salt
- 1 tablespoon unsweetened cocoa powder (preferably Dutch-processed for richer flavor)
- 1 cup (240ml) buttermilk, room temperature (adds tang and tenderness)
- 1 cup (240ml) vegetable oil (keeps the cake moist)
- 2 large eggs, room temperature
- 2 tablespoons red food coloring (liquid or gel works—gel gives a deeper red)
- 1 teaspoon pure vanilla extract
- 1 teaspoon distilled white vinegar (reacts with baking soda to lighten texture)
- For the Creamy Frosting:
- 8 ounces (227g) cream cheese, softened (use Philadelphia brand for best consistency)
- ½ cup (113g) unsalted butter, softened
- 4 cups (480g) powdered sugar, sifted
- 1 teaspoon pure vanilla extract
- Pinch of fine salt (balances sweetness)
If you want to swap things up, almond flour can be used for a gluten-free version (though texture will be a bit different). For dairy-free, try coconut yogurt in place of buttermilk and vegan cream cheese for frosting. In summer, fresh raspberries make a lovely garnish and add a touch of natural tartness. These little ingredient choices make this ultimate moist red velvet cake really shine.
Equipment Needed
- Two 9-inch (23cm) round cake pans (non-stick or greased and lined with parchment paper)
- Electric mixer (stand or hand) for smooth batter and fluffy frosting
- Mixing bowls (medium and large sizes)
- Measuring cups and spoons (accuracy matters!)
- Rubber spatula for scraping bowls
- Cooling rack to let cakes cool evenly (helps avoid sogginess)
- Offset spatula or butter knife for frosting application
Don’t have cake pans? A 9×13-inch pan works too—just adjust the baking time accordingly. Electric mixers definitely speed things up and ensure a smooth texture, but a sturdy whisk and some elbow grease can do the job in a pinch. If you get into baking often, investing in quality pans and a good mixer pays off. Keep your pans greased and lined well to make cake removal a breeze!
Preparation Method
- Preheat your oven to 350°F (175°C). Grease and line your cake pans with parchment paper; this prevents sticking and helps cakes come out perfect every time. This step takes about 10 minutes including prep.
- Mix dry ingredients: In a large bowl, sift together 2 ½ cups all-purpose flour, 1 teaspoon baking soda, 1 teaspoon fine salt, and 1 tablespoon unsweetened cocoa powder. This ensures even distribution and prevents clumps. Set aside.
- Combine wet ingredients: In a separate bowl, whisk 1 cup buttermilk, 1 cup vegetable oil, 2 large eggs, 2 tablespoons red food coloring, 1 teaspoon vanilla extract, and 1 teaspoon white vinegar until smooth and well blended.
- Incorporate dry into wet: Slowly add the dry ingredients to the wet mixture, stirring gently with a spatula or mixer on low speed. Mix just until combined—overmixing can make the cake tough. The batter should be smooth and shiny with a rich red color.
- Divide batter: Evenly pour batter into the prepared pans. Tap pans gently on the counter to release air bubbles. This step takes about 5 minutes.
- Bake: Place pans in the oven and bake for 25-30 minutes, or until a toothpick inserted in the center comes out clean. Oven times vary, so start checking at 25 minutes. The cakes will spring back lightly when touched.
- Cool: Remove cakes from oven and let cool in pans for 10 minutes. Then, run a knife around edges and invert cakes onto a cooling rack. Let cool completely before frosting—patience here prevents melting frosting disasters!
- Prepare frosting: In a large bowl, beat 8 ounces cream cheese and ½ cup softened unsalted butter until smooth and creamy. Gradually add 4 cups powdered sugar, beating on low speed to avoid a sugar cloud. Stir in 1 teaspoon vanilla extract and a pinch of salt. Taste and adjust sweetness if needed.
- Assemble cake: Place one cake layer on your serving plate. Spread a generous layer of frosting on top. Place second cake layer over it and frost the top and sides evenly. For a smooth finish, chill the cake for 20 minutes, then give it a final frosting coat.
- Serve: Slice and enjoy! This cake is best eaten the same day but tastes great for days after, too.
Quick tip: If your frosting feels too soft, chill it for 10 minutes before spreading. Also, using room temperature ingredients makes mixing easier and the final texture much better.
Cooking Tips & Techniques
Red velvet cakes can be a little tricky if you’re new to baking, but here are some tricks I’ve learned the hard way. First, never skip the buttermilk or vinegar—they react with baking soda to create that perfect tender crumb and subtle tang. Without them, your cake might turn out dense or flat.
Another tip: be gentle when mixing the batter. Overmixing develops gluten, which makes cakes tough—not what you want for this moist red velvet. Mix just until ingredients come together, and it’s okay if a few streaks remain.
When it comes to frosting, softened cream cheese and butter are key. If either is too cold, you’ll end up with lumps or a frosting that’s hard to spread. If too warm, it gets runny. I usually leave them out for about an hour before mixing. Also, sift your powdered sugar to avoid gritty spots.
Timing matters, too. Let your cakes cool completely before frosting. I learned the hard way that frosting a warm cake leads to melty, messy results. If you’re short on time, pop the layers in the fridge for 15 minutes to speed up cooling.
Multitasking tip: bake the cakes first and prep the frosting while they cool. This way, you’re ready to assemble as soon as the cakes are set. It saves a lot of waiting around!
Variations & Adaptations
Want to switch things up or cater to different diets? Here are some fun variations for the ultimate moist red velvet cake:
- Gluten-Free: Swap all-purpose flour for a gluten-free blend (like Bob’s Red Mill 1-to-1). The texture is slightly different but still delicious.
- Vegan: Use flax eggs instead of regular eggs, almond milk mixed with vinegar instead of buttermilk, and vegan butter plus cream cheese alternatives. Bake a little longer and watch closely.
- Chocolate Boost: Add ¼ cup melted bittersweet chocolate to the batter for an extra rich twist.
- Berry Infusion: Fold fresh raspberries or strawberries into the batter before baking for a fruity surprise.
- Alternative Frosting: Try whipped coconut cream with a splash of vanilla for a dairy-free frosting that’s light and luscious.
Personally, I once made this cake with a hint of espresso powder in the batter—just a teaspoon—to deepen the cocoa flavor. It was a hit at a friend’s dinner party and something I recommend if you love that mocha touch.
Serving & Storage Suggestions
This ultimate moist red velvet cake is best served at room temperature. The frosting tastes creamier and the cake itself feels tender and soft. For presentation, sprinkle a few fresh raspberries or edible rose petals on top for a festive look. It pairs wonderfully with a cup of black coffee or a glass of cold milk.
To store, cover the cake loosely with plastic wrap or place it in an airtight container. It keeps well in the refrigerator for up to 4 days. If you want to freeze it, wrap tightly in plastic wrap and then foil; freeze for up to 2 months. Thaw overnight in the fridge and bring to room temperature before serving.
Reheating isn’t usually necessary, but if you do, a quick 10-second zap in the microwave softens the frosting and warms the cake slightly—just be careful not to overdo it. Over time, the flavors actually deepen, so leftovers might taste even better the next day.
Nutritional Information & Benefits
Per slice (based on 12 servings), this ultimate moist red velvet cake has approximately:
| Calories | Fat | Carbohydrates | Protein | Sugar |
|---|---|---|---|---|
| 350 kcal | 18g | 45g | 4g | 32g |
The key ingredients offer some benefits: buttermilk provides calcium and probiotics, cocoa powder adds antioxidants, and eggs deliver protein and essential nutrients. While this isn’t a health food by any means, it’s a treat that offers comfort and a little nourishment in every bite.
If you need to avoid gluten or dairy, the substitutions mentioned earlier make it accessible to more diets. Just mind any allergies, especially to eggs and dairy, common in this recipe.
Conclusion
This ultimate moist red velvet cake with creamy frosting is truly a recipe worth trying. It brings together simple ingredients and straightforward steps to create something that feels special and tastes incredible. Whether you’re baking for a birthday, a cozy weekend treat, or a festive gathering, this cake is sure to impress without stress.
Feel free to customize it to suit your tastes or dietary needs—the variations and tips I shared make it easy to adapt. Honestly, I love this recipe because it reminds me of family, warmth, and those sweet moments worth savoring. So go ahead, give it a whirl, and don’t forget to share your thoughts, questions, or any fun twists you try. I’m excited to hear how your version turns out!
Happy baking, friends!
FAQs
What makes red velvet cake red?
The signature red color traditionally comes from a reaction between natural cocoa powder and acidic ingredients like buttermilk and vinegar, often boosted with red food coloring for that vibrant hue.
Can I use regular milk instead of buttermilk?
You can make a buttermilk substitute by adding 1 tablespoon of vinegar or lemon juice to 1 cup of regular milk. Let it sit for 5 minutes before using.
How do I know when the cake is done?
Insert a toothpick into the center; if it comes out clean or with a few moist crumbs, the cake is ready. The cake should also spring back when lightly pressed.
Can I make this cake ahead of time?
Absolutely! Bake the layers a day ahead and wrap tightly. Assemble and frost just before serving for the freshest taste.
How should I store leftover cake?
Keep leftovers covered in the refrigerator for up to 4 days or freeze wrapped tightly for up to 2 months. Bring to room temperature before serving for best flavor.
Pin This Recipe!
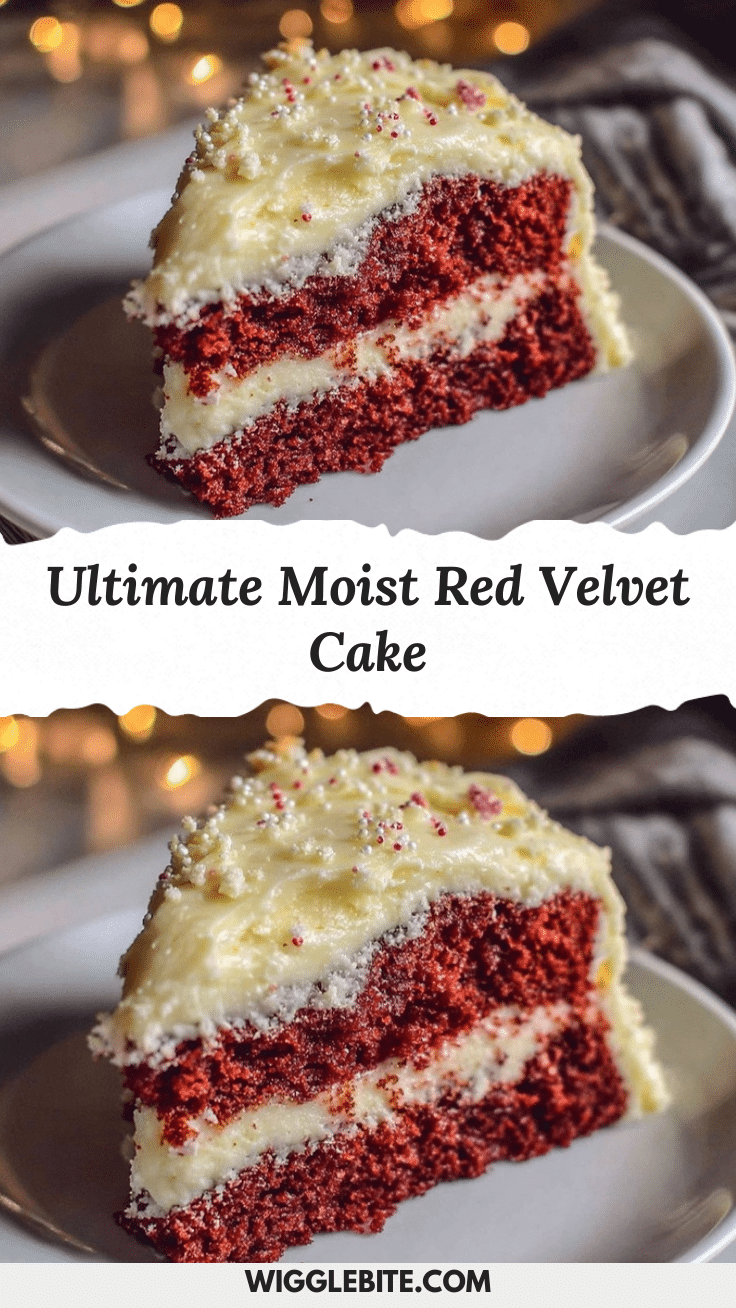
Ultimate Moist Red Velvet Cake
A moist and tender red velvet cake with a creamy, luscious frosting that combines cocoa, buttermilk, and a hint of vinegar for the perfect tang and texture. Easy to make and perfect for any occasion.
- Prep Time: 15 minutes
- Cook Time: 30 minutes
- Total Time: 45 minutes
- Yield: 12 servings 1x
- Category: Dessert
- Cuisine: American
Ingredients
- 2 ½ cups (312g) all-purpose flour
- 1 ½ cups (300g) granulated sugar
- 1 teaspoon baking soda
- 1 teaspoon fine salt
- 1 tablespoon unsweetened cocoa powder (preferably Dutch-processed)
- 1 cup (240ml) buttermilk, room temperature
- 1 cup (240ml) vegetable oil
- 2 large eggs, room temperature
- 2 tablespoons red food coloring (liquid or gel)
- 1 teaspoon pure vanilla extract
- 1 teaspoon distilled white vinegar
- 8 ounces (227g) cream cheese, softened
- ½ cup (113g) unsalted butter, softened
- 4 cups (480g) powdered sugar, sifted
- 1 teaspoon pure vanilla extract (for frosting)
- Pinch of fine salt (for frosting)
Instructions
- Preheat your oven to 350°F (175°C). Grease and line two 9-inch round cake pans with parchment paper.
- In a large bowl, sift together the flour, baking soda, salt, and cocoa powder. Set aside.
- In a separate bowl, whisk together the buttermilk, vegetable oil, eggs, red food coloring, vanilla extract, and white vinegar until smooth.
- Slowly add the dry ingredients to the wet ingredients, mixing gently until just combined. Do not overmix.
- Divide the batter evenly between the prepared pans and tap gently to release air bubbles.
- Bake for 25-30 minutes or until a toothpick inserted in the center comes out clean and the cakes spring back lightly when touched.
- Let the cakes cool in the pans for 10 minutes, then run a knife around the edges and invert onto a cooling rack to cool completely.
- For the frosting, beat the cream cheese and softened butter until smooth and creamy.
- Gradually add the powdered sugar, beating on low speed to avoid a sugar cloud.
- Stir in vanilla extract and a pinch of salt. Adjust sweetness to taste.
- Place one cake layer on a serving plate and spread a generous layer of frosting on top.
- Place the second cake layer over the first and frost the top and sides evenly.
- Chill the cake for 20 minutes, then apply a final coat of frosting for a smooth finish.
- Slice and serve. Best eaten the same day but also delicious for days after.
Notes
Use room temperature ingredients for best mixing and texture. Do not overmix the batter to avoid toughness. Chill frosting if too soft before spreading. Let cakes cool completely before frosting to prevent melting. For gluten-free, substitute flour with gluten-free blend. For dairy-free, use coconut yogurt and vegan cream cheese.
Nutrition
- Serving Size: 1 slice (1/12 of cak
- Calories: 350
- Sugar: 32
- Fat: 18
- Carbohydrates: 45
- Protein: 4
Keywords: red velvet cake, moist cake, creamy frosting, easy cake recipe, homemade cake, birthday cake, dessert