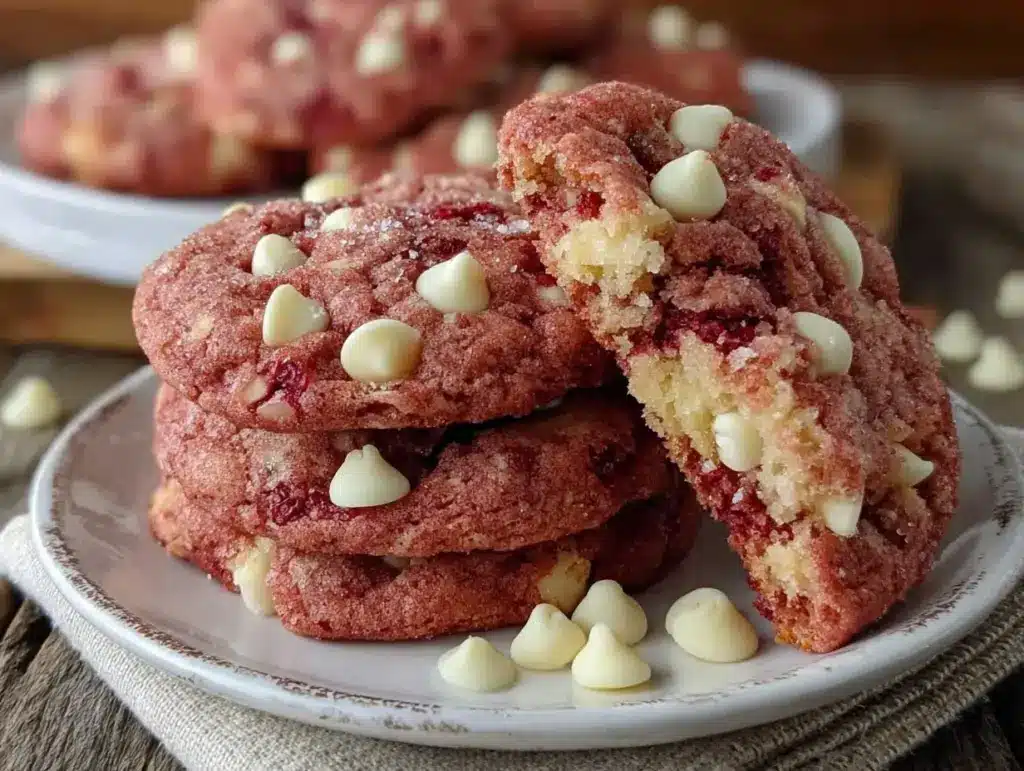
Let me tell you, the scent of these Soft and Chewy Pink Velvet Cookies wafting from my oven is enough to make anyone’s mouth water instantly. There’s just something magical about that warm, buttery aroma mingling with a hint of vanilla and the subtle kiss of cocoa. The first time I baked these cookies, I was instantly hooked—the kind of moment where you pause, take a deep breath, and just smile because you know you’re onto something truly special. I remember when I was knee-high to a grasshopper, my grandma’s kitchen was the heart of our home, filled with all sorts of sweet smells, but nothing quite like the nostalgic comfort of these soft and chewy cookies.
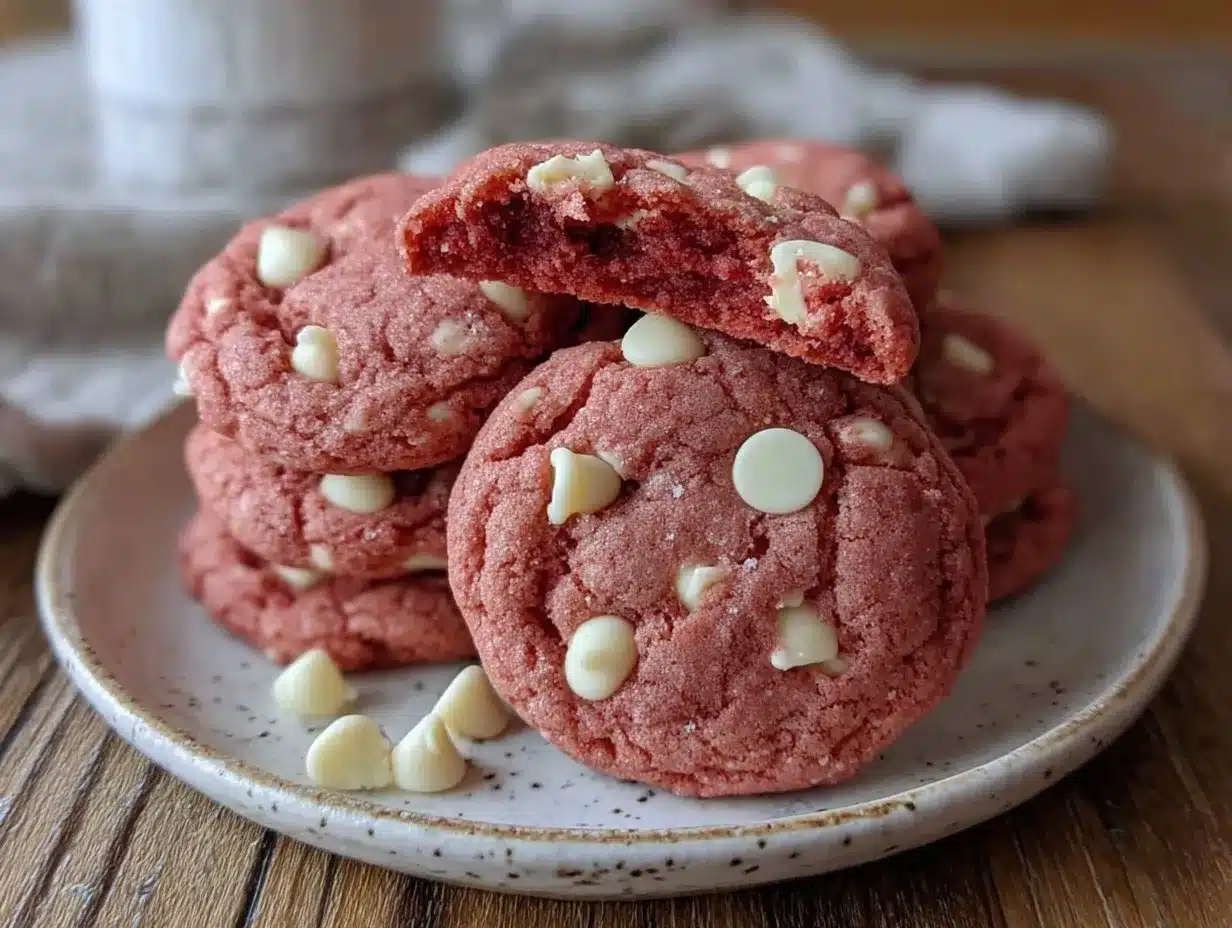
Years ago, I stumbled upon the pink velvet cookie idea during one of those lazy, rainy weekends when I was trying to recreate a bakery favorite. Honestly, it felt like pure, nostalgic comfort rolled into one delicious bite. My family couldn’t stop sneaking them off the cooling rack (and I can’t really blame them). They’re dangerously easy to make, so they’re perfect for quick after-school snacks, potlucks, or even as a sweet surprise for your kids’ lunchboxes. You know what? These cookies brighten up your Pinterest cookie board and your day with their vibrant pink hue and melt-in-your-mouth texture. After testing this recipe multiple times (in the name of research, of course), it has become a staple for family gatherings and gifting—like a warm hug in cookie form. You’re going to want to bookmark this one for sure.
Why You’ll Love This Soft and Chewy Pink Velvet Cookies Recipe
Having tried countless cookie recipes over the years, I can confidently say these Soft and Chewy Pink Velvet Cookies bring something truly special to the table. Here’s why they stand out:
- Quick & Easy: They come together in under 30 minutes, perfect for busy weeknights or last-minute cravings.
- Simple Ingredients: No fancy grocery trips needed; you likely already have everything in your kitchen.
- Perfect for Any Occasion: Great for birthday parties, Valentine’s Day, cozy afternoons, or just because.
- Crowd-Pleaser: Always gets rave reviews from kids and adults alike, packing that soft, chewy texture everyone loves.
- Unbelievably Delicious: The subtle cocoa with just the right balance of sweetness and a creamy vanilla note makes the flavor unforgettable.
What really makes this recipe different? It’s the way the dough stays soft and chewy without being greasy or crumbly. A small trick I picked up was using a mix of brown sugar and white sugar to get that perfect moisture balance. Plus, incorporating a touch of buttermilk powder (don’t worry, it’s optional but worth it) adds a slightly tangy depth that feels like comfort food reimagined. This recipe isn’t just good—it’s the kind that makes you close your eyes after the first bite and sigh contentedly. Whether you want to impress guests without stress or turn a simple afternoon into a memorable treat, these pink velvet cookies will do the trick.
What Ingredients You Will Need
This recipe uses simple, wholesome ingredients to deliver bold flavor and satisfying texture without the fuss. Most of these are pantry staples, and the pink color comes from a little food coloring or natural beet powder if you want to keep it clean. Here’s what I use:
- All-purpose flour – 2 ½ cups (315g), for that perfect soft structure
- Baking powder – 1 teaspoon (4g), helps the cookies rise just right
- Salt – ½ teaspoon (3g), to balance sweetness
- Unsweetened cocoa powder – 2 tablespoons (10g), for that velvet chocolate hint
- Unsalted butter – 1 cup (227g), softened (I recommend using Land O’Lakes for best texture)
- Granulated sugar – ¾ cup (150g), for sweetness and crisp edges
- Brown sugar – ½ cup packed (110g), adds moisture and chewiness
- Eggs – 2 large, room temperature
- Vanilla extract – 2 teaspoons (10ml), pure vanilla makes all the difference
- Buttermilk powder – 2 tablespoons (optional, about 12g), adds tang and tenderness
- Pink gel food coloring – 1 teaspoon or to desired color (or substitute with 1 tablespoon beet powder for a natural tint)
If you don’t have buttermilk powder, you can substitute with 2 teaspoons of lemon juice or vinegar mixed into the eggs to get that slight tang. For a dairy-free option, swap butter for coconut oil and use a dairy-free milk powder substitute if you want that tender crumb. And if you want to switch things up seasonally, fresh raspberries mixed in or white chocolate chips folded into the dough are a lovely variation. Just remember, the key to these cookies lies in the balance of sugars and the gentle hand when mixing!
Equipment Needed
- Mixing bowls: At least two – one for dry ingredients, one for wet.
- Electric mixer or stand mixer: Makes creaming butter and sugar a breeze, but a sturdy hand whisk works too.
- Measuring cups and spoons: Accurate measurements keep the texture consistent.
- Baking sheet: A heavy-duty rimmed baking sheet for even baking.
- Parchment paper or silicone baking mat: Prevents sticking and helps cookies bake evenly.
- Cooling rack: For letting your cookies cool perfectly without getting soggy.
If you don’t have a stand mixer, no worries! I’ve made these cookies many times just with a hand mixer or even a wooden spoon and some elbow grease. For budget-friendly options, silicone baking mats are reusable and save you from buying parchment paper all the time. Also, I recommend cleaning your mixing bowls right after use to avoid butter residue buildup, which can make the dough tricky to mix next time.
Preparation Method
- Preheat your oven to 350°F (175°C). Line a baking sheet with parchment paper or a silicone mat. This step ensures even baking and easy cookie removal.
- Whisk together dry ingredients: In a medium bowl, sift or whisk the all-purpose flour (315g), baking powder (4g), salt (3g), and cocoa powder (10g). Set aside. This keeps your dry mix lump-free and evenly distributed.
- Cream the butter and sugars: In a large bowl, use an electric mixer to beat the softened butter (227g), granulated sugar (150g), and brown sugar (110g) together on medium speed until fluffy and light in color – about 3 to 4 minutes. This step traps air for that soft texture.
- Add eggs and vanilla: Beat in the eggs (2 large, room temp) one at a time, mixing well after each addition. Stir in the vanilla extract (10ml). If using lemon juice or vinegar instead of buttermilk powder, add it here.
- Mix in the pink coloring: Add your gel food coloring (1 tsp) or beet powder (1 tbsp). Mix until the color is evenly distributed and vibrant. Don’t overmix; just enough to blend.
- Combine wet and dry: Gradually add the dry ingredients into the wet mixture, mixing on low speed or folding gently with a spatula. Stop as soon as the dough comes together – overmixing can make cookies tough.
- Chill the dough (optional but recommended): Cover the dough with plastic wrap and chill in the fridge for 30 minutes. This helps prevent spreading and keeps the cookies thick and chewy.
- Scoop onto baking sheet: Use a cookie scoop or tablespoon to drop dough balls about 2 inches apart. Slightly flatten each ball with the palm of your hand or the back of a spoon for even baking.
- Bake for 10 to 12 minutes: The edges should be set but centers still look soft. Don’t overbake – they’ll firm up as they cool.
- Cool on baking sheet for 5 minutes: Then transfer to a wire rack to cool completely. This prevents soggy bottoms and keeps them chewy.
If your cookies spread too much, your butter might have been too soft or oven temperature too low—try chilling the dough longer or increasing the oven by 10°F (5°C). The dough should feel soft but not melting when you scoop it. The smell while baking? That’s the gentle chocolate and vanilla teasing you into the kitchen.
Cooking Tips & Techniques for Perfect Pink Velvet Cookies
Here’s the deal: getting soft and chewy cookies consistently isn’t always a walk in the park, but a few tricks go a long way.
- Don’t overmix: Once you add the flour, mix just until combined. Overmixing develops gluten and can turn your cookies cakey or tough.
- Use room temperature ingredients: Eggs and butter that aren’t cold blend more easily, giving you a smooth dough and even bake.
- Chill the dough: You might skip this step when in a hurry, but chilling reduces spread and deepens flavor.
- Measure flour correctly: Spoon and level your flour instead of scooping directly with the cup to avoid dense cookies.
- Bake on the middle rack: This ensures even heat and prevents burnt bottoms.
- Watch your oven closely: Every oven bakes differently. Start checking cookies a minute or two early to avoid overbaking.
- Multitasking tip: While cookies bake, clean up your mixing tools and prep the next batch to save time and keep your kitchen tidy.
I learned these lessons the hard way after a few batches of rock-hard cookies and sad, flat pucks. Trust me, a little patience and attention to detail makes all the difference. Also, swapping out gel food coloring for natural beet powder gave me a gorgeous pink without any artificial taste—that’s a personal favorite tweak!
Variations & Adaptations to Try
If you want to switch things up or accommodate dietary needs, here are some ideas that I’ve tried or heard rave reviews about:
- Gluten-Free Version: Substitute the all-purpose flour with a 1:1 gluten-free baking flour blend. Just be sure it contains xanthan gum for structure.
- Vegan Adaptation: Use coconut oil or vegan butter instead of regular butter, and replace eggs with flax eggs (1 tbsp flaxseed meal + 3 tbsp water per egg).
- Flavor Twists: Fold in white chocolate chips or chopped macadamia nuts right before baking for extra texture and sweetness.
- Natural Coloring: Use beetroot powder or freeze-dried raspberry powder instead of food coloring. It adds a subtle fruity flavor and vibrant color.
- Seasonal Spin: During fall, add a teaspoon of pumpkin pie spice or cinnamon for a cozy vibe.
One variation I adore is adding a cream cheese swirl on top before baking—it gives the cookies a rich tang and looks gorgeous too. You can also experiment with different sugars like coconut sugar for a deeper caramel note. The possibilities are endless, and these cookies are forgiving enough to handle your creative experiments.
Serving & Storage Suggestions
Serve these Soft and Chewy Pink Velvet Cookies slightly warm or at room temperature. They pair beautifully with a cold glass of milk, a cup of hot tea, or even a scoop of vanilla ice cream for an indulgent treat. Presentation-wise, stack them on a pretty plate or wrap a few in wax paper tied with twine for gifting.
To store, place cooled cookies in an airtight container at room temperature for up to 4 days. For longer storage, freeze them in a freezer-safe bag or container for up to 3 months. When ready to enjoy, thaw at room temperature or warm in a low oven (300°F/150°C) for about 5 minutes to bring back that soft, fresh-baked feel.
Fun fact: these cookies actually taste even better the next day as the flavors meld and the texture softens just a bit more. Just don’t tell anyone I said that—they’ll want to eat them all at once!
Nutritional Information & Benefits
Each Soft and Chewy Pink Velvet Cookie (based on 24 cookies from this batch) roughly contains:
| Calories | 140 kcal |
|---|---|
| Fat | 7g (mostly from butter) |
| Carbohydrates | 20g |
| Protein | 2g |
| Sugar | 12g |
Key ingredients like butter provide healthy fats that help with satiety, and using brown sugar adds a touch of minerals like calcium and potassium compared to white sugar. Cocoa powder is rich in antioxidants, giving you a little health boost alongside your sweet treat. If you opt for natural beet powder, you’re adding nitrates known to support circulation—a nice bonus!
For those watching allergens, these cookies contain gluten, dairy, and eggs. However, the variations section offers ways to adapt for gluten-free and vegan diets, making this recipe quite flexible. From a wellness perspective, I appreciate that these cookies are made from scratch with simple ingredients—no preservatives or weird additives to worry about.
Conclusion
In a nutshell, these Soft and Chewy Pink Velvet Cookies are worth every minute you spend baking them. They’re approachable for beginners yet delicious enough to impress anyone lucky enough to get a taste. Customize the recipe to fit your mood or dietary needs, and don’t be shy about making it your own.
I love this recipe because it brings back sweet memories and creates new ones every time I bake a batch. Plus, the smiles from my family when they realize the cookies are homemade? Priceless. So, go ahead—give these cookies a try, share your thoughts, or tell me how you’ve tweaked the recipe. I’d love to hear from you!
Happy baking, and may your kitchen always smell like a warm, pink velvet dream.
FAQs About Soft and Chewy Pink Velvet Cookies
Can I make these cookies without food coloring?
Absolutely! You can skip the coloring or swap it for natural options like beet powder or freeze-dried raspberry powder for a subtle pink tint.
How do I keep these cookies soft for longer?
Store them in an airtight container with a slice of bread inside; the bread helps keep cookies moist and soft.
Can I freeze the cookie dough?
Yes! Scoop the dough into balls, freeze on a tray, then transfer to a bag. Bake from frozen, adding 1-2 extra minutes to baking time.
What if my cookies spread too much?
Try chilling the dough longer, reducing butter slightly, or checking your oven temperature. Also, avoid using melted butter.
Can I add mix-ins like nuts or chocolate chips?
Definitely! White chocolate chips, macadamia nuts, or dried cranberries all pair wonderfully with these pink velvet cookies.
Pin This Recipe!

Soft and Chewy Pink Velvet Cookies

These Soft and Chewy Pink Velvet Cookies are a nostalgic, easy-to-make treat with a vibrant pink hue, soft texture, and a subtle cocoa and vanilla flavor. Perfect for beginners and great for any occasion.
- Prep Time: 15 minutes
- Cook Time: 12 minutes
- Total Time: 27 minutes
- Yield: 24 cookies 1x
- Category: Dessert
- Cuisine: American
Ingredients
- 2 ½ cups all-purpose flour (315g)
- 1 teaspoon baking powder (4g)
- ½ teaspoon salt (3g)
- 2 tablespoons unsweetened cocoa powder (10g)
- 1 cup unsalted butter, softened (227g)
- ¾ cup granulated sugar (150g)
- ½ cup packed brown sugar (110g)
- 2 large eggs, room temperature
- 2 teaspoons vanilla extract (10ml)
- 2 tablespoons buttermilk powder (optional, about 12g)
- 1 teaspoon pink gel food coloring or 1 tablespoon beet powder for natural tint
Instructions
- Preheat your oven to 350°F (175°C). Line a baking sheet with parchment paper or a silicone mat.
- Whisk together dry ingredients: all-purpose flour, baking powder, salt, and cocoa powder in a medium bowl. Set aside.
- Cream the butter, granulated sugar, and brown sugar together in a large bowl using an electric mixer on medium speed until fluffy and light in color, about 3 to 4 minutes.
- Beat in the eggs one at a time, mixing well after each addition. Stir in the vanilla extract. If using lemon juice or vinegar instead of buttermilk powder, add it here.
- Add the pink gel food coloring or beet powder and mix until the color is evenly distributed.
- Gradually add the dry ingredients to the wet mixture, mixing on low speed or folding gently with a spatula until just combined. Do not overmix.
- Cover the dough with plastic wrap and chill in the fridge for 30 minutes (optional but recommended).
- Scoop dough balls about 2 inches apart onto the prepared baking sheet. Slightly flatten each ball with the palm of your hand or the back of a spoon.
- Bake for 10 to 12 minutes until edges are set but centers still look soft. Do not overbake.
- Cool on the baking sheet for 5 minutes, then transfer to a wire rack to cool completely.
Notes
Do not overmix the dough to avoid tough cookies. Chilling the dough helps prevent spreading and keeps cookies thick and chewy. Use room temperature ingredients for best results. If cookies spread too much, chill dough longer or increase oven temperature by 10°F. For dairy-free option, substitute butter with coconut oil and use dairy-free milk powder. Natural beet powder can be used instead of food coloring for a subtle fruity flavor.
Nutrition
- Serving Size: 1 cookie
- Calories: 140
- Sugar: 12
- Fat: 7
- Carbohydrates: 20
- Protein: 2
Keywords: pink velvet cookies, soft cookies, chewy cookies, easy cookies, homemade treats, pink cookies, velvet cookies, baking, dessert