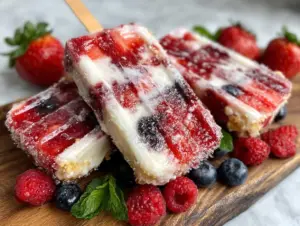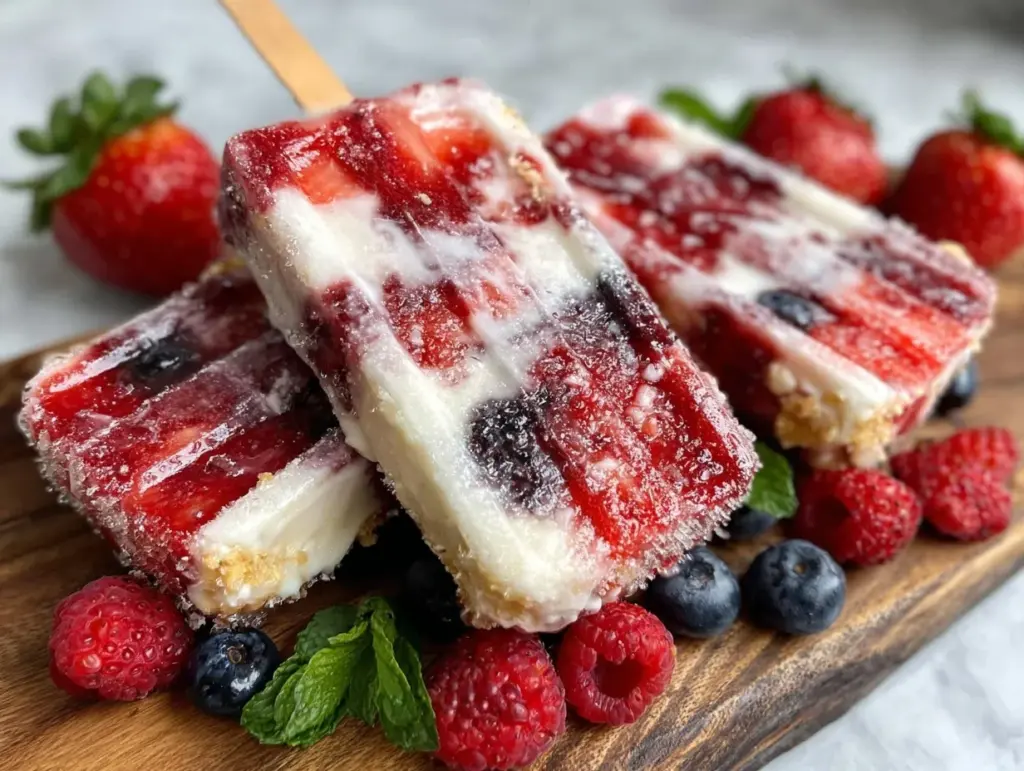
“You know that feeling when summer sneaks up, and suddenly the only thing on your mind is something cold, sweet, and a little bit wild? That was me last July, standing in my tiny kitchen with a half-melted bag of frozen berries and a blender that had seen better days. I wasn’t actually planning to make popsicles that night—honestly, I was just trying to salvage a smoothie disaster. But what came out of that messy experiment turned into these Refreshing Firecracker Popsicles with Juicy Fruit Layers, and let me tell you, they’ve stuck around in my freezer ever since.
It’s funny how the best recipes sometimes come from complete accidents. I forgot to add the sugar at first, and the layers didn’t quite set like I imagined. Then the neighbor dropped by with a basket of fresh strawberries, and suddenly, the popsicles got this vibrant punch that was impossible to resist. Maybe you’ve been there—caught between a craving and a kitchen chaos moment.
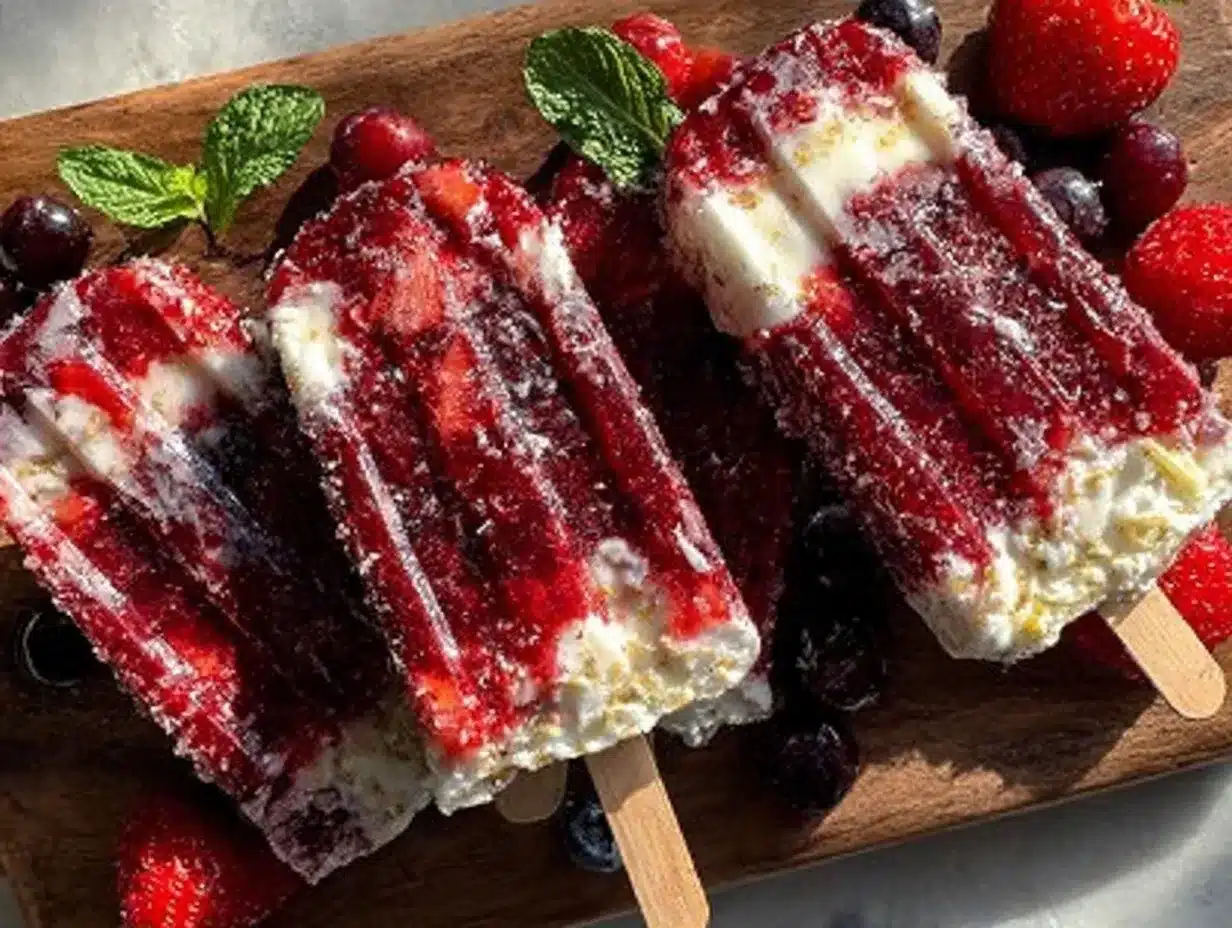
These popsicles aren’t just pretty to look at with their red, white, and blue layers—they’re a total treat for your taste buds. They remind me of those Fourth of July celebrations as a kid, but with a grown-up twist that’s both refreshing and juicy. Plus, they’re ridiculously easy to make at home, which means no more hunting for the perfect summer snack at the store. Honestly, I never thought I’d get so excited about popsicles, but these firecracker beauties changed the game for me.”
Why You’ll Love This Recipe
Let me just say—this recipe has been tested more times than I can count (including some “oops” batches), and it keeps winning for a bunch of reasons:
- Quick & Easy: You can whip these up in about 20 minutes, then just let nature and your freezer do the rest.
- Simple Ingredients: No exotic stuff here. Most of it’s probably hanging out in your fridge or pantry right now.
- Perfect for Summer Fun: Whether it’s a backyard party or a casual Tuesday, these popsicles bring that festive vibe effortlessly.
- Crowd-Pleaser: Kids adore the juicy, colorful layers, and adults sneak them right off the kids’ plates.
- Unbelievably Delicious: The combo of sweet, tangy, and fresh fruit layers keeps every bite exciting—no boring popsicles here!
What sets this recipe apart is the layering technique that creates those distinct juicy fruit sections, making each popsicle feel like a mini fruit explosion. Plus, no artificial flavors or colors—just the real deal. And honestly, the way the flavors meld as they freeze? It’s like a little fireworks show in your mouth, perfect for anyone who appreciates a fun twist on classic summer treats.
What Ingredients You Will Need
This recipe uses straightforward, fresh ingredients that bring bright, juicy flavor without much fuss. Most are pantry staples or easy-to-find fresh produce, making this an excellent choice for last-minute popsicle cravings.
- Fresh Strawberries (about 1 cup, hulled and sliced) – For the vibrant red layer, look for ripe but firm berries to avoid mushy texture.
- Blueberries (1 cup, fresh or frozen) – Adds that deep blue pop; frozen works fine if fresh aren’t available.
- Plain Greek Yogurt (1 cup, full-fat or 2%) – Creates the creamy white middle layer and adds a tangy balance.
- Honey (2 tablespoons) – Natural sweetener that blends nicely with the yogurt and fruit.
- Fresh Lemon Juice (1 tablespoon) – Brightens up the fruit layers, especially the blueberries.
- Water (1/2 cup) – Used to thin out the fruit purees for better freezing and texture.
- Vanilla Extract (1 teaspoon) – Mixed into the yogurt layer for subtle flavor depth.
Ingredient Tips: I usually pick organic fruit when I can, but if not, just give them a quick rinse and pat dry to keep flavors fresh. For a dairy-free version, swap Greek yogurt with coconut yogurt—trust me, it’s just as dreamy!
Equipment Needed
- Blender or Food Processor: Essential for pureeing the fruit layers smoothly. I’ve tried hand-mashing, but it just doesn’t give that silky texture.
- Popsicle Molds: Silicone molds work best for easy release, but plastic ones with sticks will do just fine.
- Measuring Cups and Spoons: For accuracy, especially when balancing sweet and tart.
- Mixing Bowls: At least two, to keep the yogurt separate from the fruit purees while layering.
- Spatula: Helpful for scraping down the sides of the blender and spreading layers evenly.
If you don’t have popsicle molds, small paper cups and wooden sticks can work in a pinch. Just make sure to cover the cups tightly with foil and poke the sticks through. Oh, and a quick tip: rinse your blender immediately after making the fruit purees—trust me, it saves you from scrubbing later!
Preparation Method
- Prepare the Fruit Layers: Start by pureeing the strawberries with half the water and half the lemon juice until smooth (about 1-2 minutes). Pour through a fine mesh sieve if you want a super smooth texture, but I usually skip this step to keep some natural fiber.
- Make the Blueberry Puree: Repeat the process with blueberries, the remaining water, and lemon juice. Blend well until smooth and slightly runny for easy layering.
- Sweeten the Yogurt: In a bowl, mix Greek yogurt with honey and vanilla extract until fully combined. Taste and adjust sweetness if needed.
- Layer the Popsicles: Pour a couple of tablespoons of strawberry puree into each mold, filling about one-third of the way. Freeze for 30-45 minutes until partially firm but still tacky.
- Add the Yogurt Layer: Spoon the sweetened yogurt over the strawberry layer, filling another third of the mold. Tap gently to settle and freeze again for another 30-45 minutes.
- Top with Blueberry Puree: Finish with the blueberry mixture, filling to the top. Insert popsicle sticks and freeze for at least 4 hours or overnight for best results.
- Remove and Enjoy: To unmold, run warm water on the outside of the molds for a few seconds. The popsicles should slide out easily, revealing their juicy, layered glory.
Pro tip: Don’t rush the freezing between layers! Letting each layer set just enough keeps the colors distinct and prevents blending. Also, if you notice any layers cracking, a quick gentle press with a spatula before freezing can smooth things out.
Cooking Tips & Techniques
Making layered popsicles might seem tricky, but a few tricks from my kitchen mishaps can save you time and frustration.
- Balance Your Liquids: If your fruit puree is too thick, it won’t layer smoothly. Add water gradually until it pours easily but still tastes rich.
- Freeze in Increments: Partial freezing between layers is key. I learned this the hard way after one big melt-and-mix disaster!
- Use Silicone Molds: They make unmolding a breeze. If you only have plastic, warm water is your best friend for easy release.
- Sweetness Check: Fruits vary in sweetness, so taste each puree before adding honey. You can always add more, but not less.
- Be Patient: It’s tempting to rush with a freezer blast, but slow freezing keeps the texture creamy rather than icy.
I once tried layering all at once and ended up with a muddy swirl—lesson learned! Also, keep a kitchen towel handy; the molds can get drippy when you’re transferring them to the freezer.
Variations & Adaptations
This recipe is super adaptable, so you can make it your own depending on what you have or your dietary needs.
- Fruit Swap: Try mango and raspberry layers for a tropical twist. Just adjust the lemon juice to balance sweetness.
- Dairy-Free Option: Use coconut or almond yogurt instead of Greek yogurt. It gives a lovely creaminess without dairy.
- Spice It Up: Add a pinch of chili powder or fresh mint to the strawberry layer for a surprising kick or refreshing hint.
- Kids’ Favorite: Use apple juice instead of water in the fruit purees for a sweeter, more kid-friendly version.
- Adult Version: Mix a splash of sparkling water or even a little vodka into the blueberry layer for a boozy treat (only for responsible adults, of course!).
I once added a swirl of homemade chia seed jam between the layers—total game changer for texture and flavor!
Serving & Storage Suggestions
These popsicles are best served straight from the freezer, when they’re firm but still juicy. They look fantastic on a colorful platter or even tucked into a glass filled with crushed ice for a party-ready presentation.
Pair them with a light summer salad or a glass of iced herbal tea to keep things fresh and balanced. They’re great as a cool-down treat after a hot day or a fun dessert for a casual barbecue.
Store leftover popsicles in an airtight container or tightly covered popsicle mold in the freezer. They keep well for up to two weeks, though honestly, they rarely last that long in my house.
When reheating (if you want a softer texture), leave them at room temperature for about 5 minutes or briefly under warm running water. The flavors actually deepen a bit as they thaw, so sometimes a slightly softened popsicle is even better.
Nutritional Information & Benefits
Each Refreshing Firecracker Popsicle contains approximately:
| Calories | 90-110 per popsicle |
|---|---|
| Protein | 3-4 grams (thanks to the Greek yogurt layer) |
| Fat | 2-3 grams (mostly from yogurt) |
| Carbohydrates | 18-22 grams (natural sugars from fruit and honey) |
The fresh berries provide antioxidants and vitamins C and K, while the yogurt adds probiotics and calcium, making these popsicles a bit more nourishing than your average frozen treat. For those watching carbs, swapping honey with a sugar-free sweetener or reducing the amount can help.
Keep in mind these popsicles are gluten-free and can easily be made dairy-free, fitting a variety of dietary needs. Personally, I love how they feel like a little burst of wellness wrapped in a fun, colorful package.
Conclusion
To wrap it up, these Refreshing Firecracker Popsicles with Juicy Fruit Layers are the kind of summer snack you’ll find yourself craving again and again. They’re simple, playful, and packed with real fruit flavor that feels both nostalgic and fresh.
Whether you stick to the classic strawberry-yogurt-blueberry combo or try your own spins, these popsicles invite you to play with color, texture, and taste. I love making them because they bring a little brightness to even the hottest days—and honestly, because they’re fun to eat! So go ahead, grab your blender and popsicle molds, and give this recipe a shot. You might just find your new favorite summer treat.
Don’t forget to share your own twists or questions in the comments—I’d love to hear how your firecrackers turned out!
FAQs
How long do these popsicles take to freeze completely?
Generally, they need at least 4 hours or overnight to freeze solid, especially to keep the layers distinct.
Can I make these popsicles without yogurt?
Yes! You can replace the yogurt layer with a coconut milk blend or even a simple coconut cream for a dairy-free and creamy alternative.
What if I don’t have popsicle molds?
Small paper cups and wooden sticks work well. Just cover the cups with foil before inserting the sticks to keep them upright while freezing.
Can I use frozen fruit instead of fresh?
Absolutely! Frozen fruit works fine—just thaw slightly and drain excess liquid before pureeing for best texture.
How do I prevent the layers from mixing together?
Freeze each layer until it’s partially set but still tacky before adding the next. Patience is key here to keep those beautiful layers intact.
Pin This Recipe!
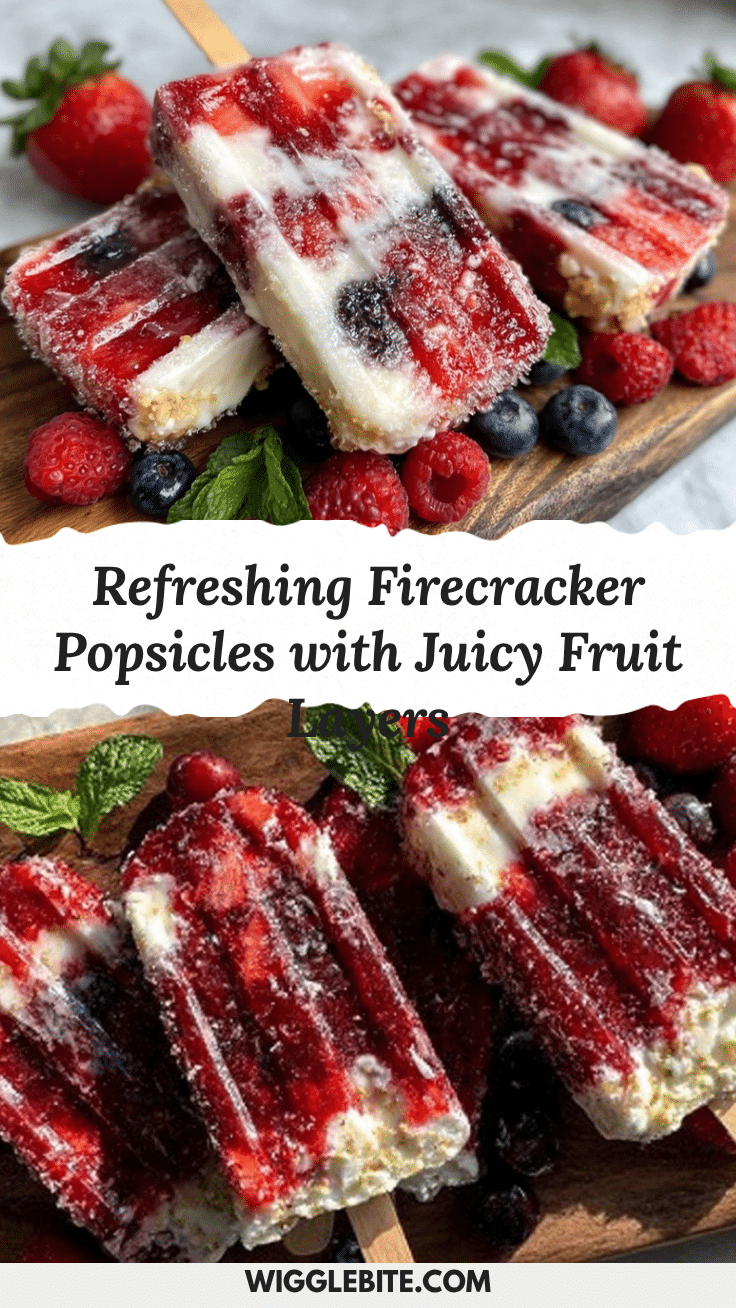
Refreshing Firecracker Popsicles with Juicy Fruit Layers
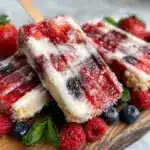
These colorful layered popsicles combine fresh strawberries, creamy Greek yogurt, and blueberries for a refreshing and juicy summer treat that’s easy to make at home.
- Prep Time: 15 minutes
- Cook Time: 4 hours 30 minutes
- Total Time: 4 hours 45 minutes
- Yield: 6 popsicles 1x
- Category: Dessert
- Cuisine: American
Ingredients
- 1 cup fresh strawberries, hulled and sliced
- 1 cup blueberries, fresh or frozen
- 1 cup plain Greek yogurt (full-fat or 2%)
- 2 tablespoons honey
- 1 tablespoon fresh lemon juice
- 1/2 cup water
- 1 teaspoon vanilla extract
Instructions
- Puree the strawberries with half the water and half the lemon juice until smooth (about 1-2 minutes). Optionally strain through a fine mesh sieve for a smoother texture.
- Puree the blueberries with the remaining water and lemon juice until smooth and slightly runny.
- Mix Greek yogurt with honey and vanilla extract until fully combined. Adjust sweetness to taste.
- Pour about 2 tablespoons of strawberry puree into each popsicle mold, filling about one-third of the way. Freeze for 30-45 minutes until partially firm but still tacky.
- Spoon the sweetened yogurt over the strawberry layer, filling another third of the mold. Tap gently to settle and freeze again for 30-45 minutes.
- Top with the blueberry puree, filling to the top. Insert popsicle sticks and freeze for at least 4 hours or overnight.
- To unmold, run warm water on the outside of the molds for a few seconds and gently remove the popsicles.
Notes
Freeze each layer until partially set to keep layers distinct. Use silicone molds for easy unmolding. For dairy-free, substitute Greek yogurt with coconut or almond yogurt. Add water gradually to thin purees for smooth layering. Run warm water on molds to release popsicles easily.
Nutrition
- Serving Size: 1 popsicle
- Calories: 90110
- Sugar: 1518
- Sodium: 4060
- Fat: 23
- Saturated Fat: 11.5
- Carbohydrates: 1822
- Fiber: 23
- Protein: 34
Keywords: popsicles, summer treat, layered popsicles, fruit popsicles, Greek yogurt, healthy dessert, refreshing snack