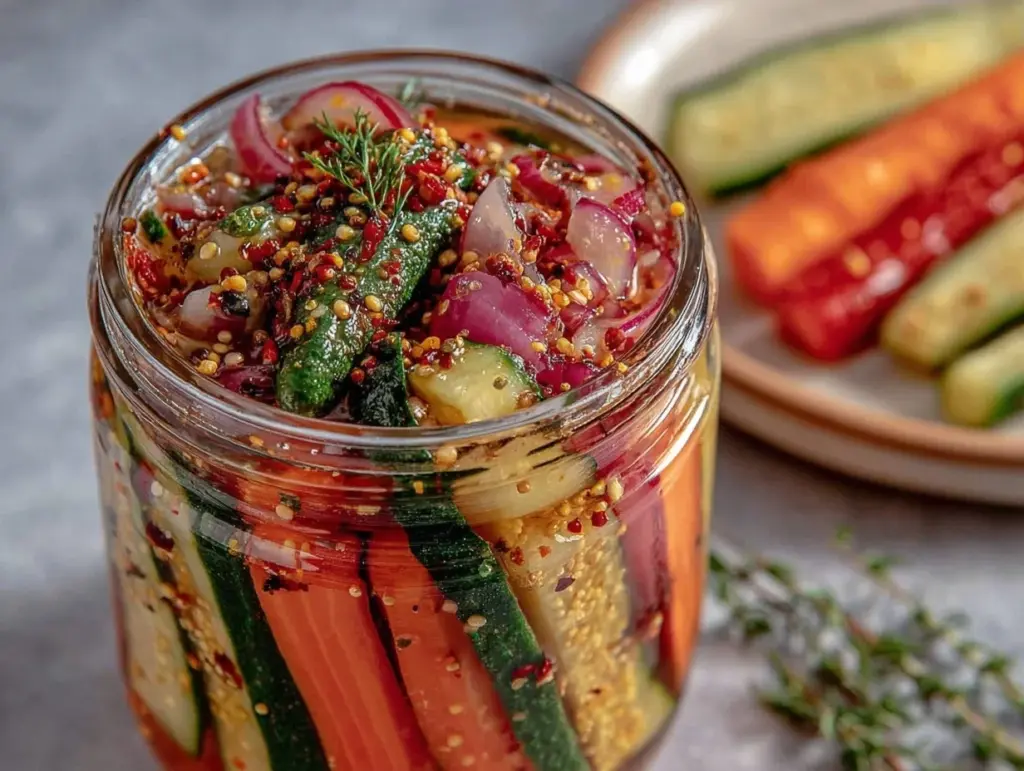
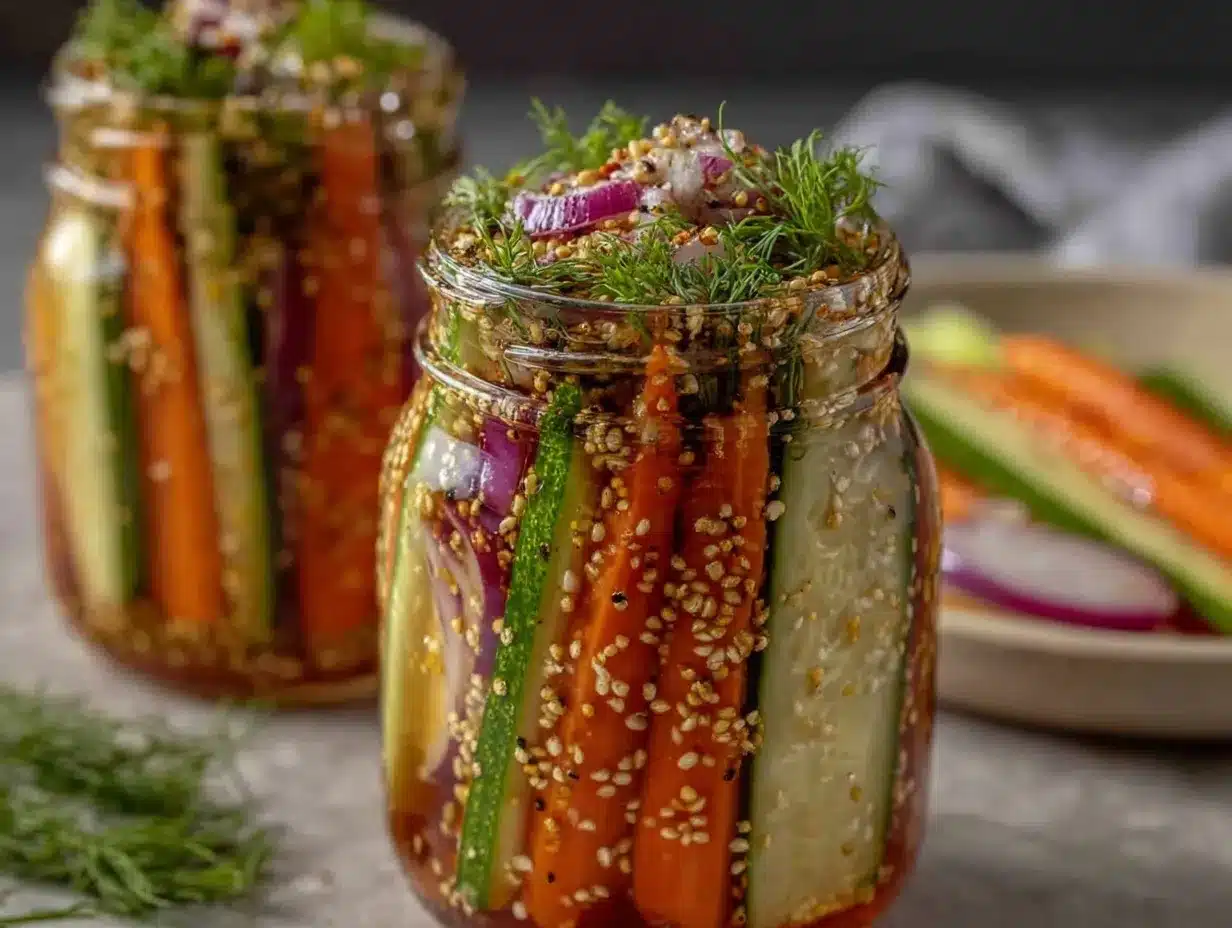
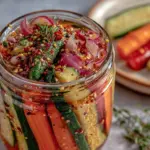
Let me just say, the first time that tangy aroma of vinegar, garlic, and fresh dill hit my kitchen, I knew I was in for something special. There’s a sharp, mouthwatering zing in the air that makes you pause, inhale deeply, and smile—because you know you’re about to taste something that’s not just good, but addictive. The colors pop like confetti in the jar: crunchy carrots, radiant radishes, crisp cucumbers, and that punchy red onion. It’s a rainbow of veggies, all soaking up the zesty brine, promising a flavor explosion in every bite.
Honestly, my first batch of these quick pickled vegetables was a result of pure curiosity (and a fridge full of produce that needed a purpose). I remember standing over the stove, watching the vinegar bubble while thinking, “Can it really be this easy?” When I tasted that first pickle—wow. It was the kind of moment you want to share with everyone you know. My kids couldn’t stop snagging spears out of the jar, and my husband started suggesting these pickles as the answer to every dinner dilemma. “Something’s missing? Add those pickled veggies!” became a regular line at our table.
Years ago, my grandma used to spend days canning pickles, but I never realized you could get that same punchy, homemade flavor in just 15 minutes. If I’d known then what I know now, these would have become a staple way sooner. Let’s face it, there’s nothing like the pure, nostalgic comfort of a good pickle—especially one that’s dangerously easy to make. The recipe is perfect for potlucks, lively summer BBQs, or just jazzing up your Pinterest-worthy lunch bowl. And yes, I’ve tested this recipe more times than I can count (in the name of research, of course). It’s now my go-to for gifting, family gatherings, and those “I need something crunchy” moments. It feels like a bright, tangy hug in a jar—and you’re going to want to bookmark this one.
Why You’ll Love This Quick Pickled Vegetables Recipe
If you’ve ever hesitated to make homemade pickles, let me assure you: this quick pickled vegetables recipe has been tested, tweaked, and taste-approved by picky eaters, enthusiastic snackers, and even my chef friends. I’ve made countless batches, experimenting with every veggie you can imagine—each time, the results are consistently awesome.
- Quick & Easy: Comes together in under 15 minutes (seriously, you’ll spend more time slicing veggies than waiting for the brine).
- Simple Ingredients: No specialty store runs required—just basic pantry staples and fresh produce you probably already have.
- Perfect for Any Occasion: Great as a zesty side dish at picnics, backyard BBQs, busy weeknight dinners, or even as a crunchy snack.
- Crowd-Pleaser: Kids love the bright colors and tangy taste, adults appreciate the punchy flavor and versatility.
- Unbelievably Delicious: These pickles have that crave-worthy snap and zing; the balance of salty, sweet, and sour is spot on.
What really sets this recipe apart? I use a slightly higher ratio of vinegar to water with a touch of sugar and a generous pinch of salt. The result: a brine that’s bold but not harsh, letting the natural flavors of the veggies shine through. Adding fresh herbs and spices (think dill, mustard seeds, peppercorns) makes each bite more interesting. And unlike traditional pickling, there’s no waiting days for flavor—just slice, brine, and enjoy.
This isn’t just another jar of pickles—it’s the best version I’ve ever made. You know that moment when you take a bite, close your eyes, and just savor? That’s what you get here. It’s comfort food made lighter and faster, without sacrificing that soul-soothing satisfaction. Perfect for impressing your friends (without stressing) or turning a basic dinner into something seriously memorable.
What Ingredients You Will Need
This quick pickled vegetables recipe is all about fresh, crunchy produce and a zippy brine. Most ingredients are easy to find, and you can swap in whatever veggies you have on hand. Here’s what you’ll need—and why each one matters.
- For the Vegetables:
- Cucumbers (Persian or English, sliced into spears or rounds) – for that classic crispness
- Carrots (peeled and sliced on the bias) – add sweetness and snap
- Radishes (thinly sliced) – bring a peppery bite and bright color
- Red onion (thinly sliced) – packs a punch and looks beautiful
- Cauliflower florets (optional) – mild flavor, great crunch
- Bell peppers (any color, sliced thin) – sweet and vibrant
- Jalapeños or chili peppers (optional, sliced) – for a spicy kick
- For the Brine:
- White vinegar (1 cup / 240 ml) – delivers the bold tang; I prefer Heinz for consistency
- Water (1 cup / 240 ml) – balances the acidity
- Granulated sugar (2 tablespoons / 25 g) – rounds out the flavors
- Kosher salt (2 teaspoons / 12 g) – pulls out veggie moisture and boosts taste
- Fresh garlic cloves (2, smashed) – for aromatic depth
- Fresh dill sprigs (2-3) – classic pickle flavor, but you can sub parsley or thyme
- Whole black peppercorns (1 teaspoon / 3 g) – adds warmth
- Mustard seeds (optional, ½ teaspoon / 2 g) – for a subtle tangy bite
- Optional Flavor Boosters:
- Bay leaf (1) – for a hint of earthiness
- Coriander seeds (½ teaspoon / 2 g) – adds citrus notes
- Crushed red pepper flakes (¼ teaspoon / 1 g) – if you like it spicy
Feel free to mix and match veggies—this recipe is forgiving. If you’re out of fresh dill, dried works in a pinch (use 1 teaspoon). No sugar? Try honey or maple syrup. For gluten-free pickled vegetables, all ingredients here are naturally safe, just double-check your vinegar brand.
In the summer, I swap in fresh green beans or asparagus. In winter, try turnips or fennel for a seasonal twist. If you’re watching sodium, cut the salt by half and taste before adding more. I’ve found that using firmer veggies (like carrots and cauliflower) gives the best crunch, but honestly, anything goes—just avoid super-soft veggies like tomatoes, which tend to get mushy.
Equipment Needed
You don’t need fancy gear for this quick pickled vegetables recipe. Most of the time, I reach for what’s already in my kitchen drawer.
- Large heatproof jars or containers: Mason jars are perfect, but you can use any glass container with a tight lid (even recycled pasta sauce jars work!).
- Small saucepan: For heating the brine—any basic pan will do.
- Sharp knife: Essential for slicing veggies thin and even (I love my Victorinox chef’s knife for this).
- Cutting board: Pick one with a groove to catch veggie juices—it helps keep the mess down.
- Measuring cups and spoons: For precise brine ratios.
- Tongs or a fork: Handy for packing veggies into jars and fishing them out later.
If you don’t have glass jars, use any non-reactive container (avoid plastic if possible; the vinegar can leave an aftertaste). I’ve found that wide-mouth jars make packing veggies easier and help them soak up the brine faster. For quick cleanup, rinse your jars with hot water before filling. If you’re using a fancy mandoline for slicing, just watch your fingers—been there, done that!
Preparation Method
- Prep the Vegetables: Wash all veggies thoroughly. Slice cucumbers, carrots, radishes, onions, and any other chosen vegetables to about ¼ inch (0.6 cm) thick. For spears, aim for uniform sizes so they pickle evenly. Total prep: 5 minutes.
- Pack the Jars: Layer the sliced vegetables tightly into clean, heatproof jars. Add garlic cloves, fresh dill sprigs, peppercorns, and any optional spices (bay leaf, mustard seeds, etc.) between layers for even flavor. Don’t overpack—leave a bit of room at the top for brine. (Personal tip: press veggies lightly so the brine can reach every nook.)
- Prepare the Brine: In a small saucepan, combine 1 cup (240 ml) white vinegar, 1 cup (240 ml) water, 2 tablespoons (25 g) sugar, and 2 teaspoons (12 g) kosher salt. Heat over medium flame, stirring until sugar and salt dissolve. Once the mixture simmers (not boiling), remove from heat. This takes about 3-4 minutes. (Watch for tiny bubbles around the edges—it’s ready!)
- Pour the Brine: Carefully pour the hot brine over the packed vegetables, filling the jars to cover everything but leaving about ½ inch (1 cm) at the top. Use a spoon to press veggies down if they float. (Warning: The jars will get hot—use a kitchen towel or oven mitt to steady them.)
- Let Cool & Pickle: Allow jars to cool at room temperature, uncovered, for 10-15 minutes. Once cool, seal tightly with lids. Shake the jars gently to distribute the spices. The pickles are ready to eat after 15 minutes but get even better after an hour or overnight in the fridge.
- Troubleshooting: If your veggies float, try packing them tighter or adding a small slice of onion on top as a “weight.” Cloudy brine? It’s usually just from garlic—totally safe. Mushy veggies? Next time, use firmer produce and avoid overcooking the brine.
- Personal Tips: For extra flavor, add a slice of lemon or orange peel. If you want extra-crispy pickles, chill your veggies before pickling. When making multiple jars, prep all veggies first and set up a “pickling station”—it’s a game changer for efficiency!
Cooking Tips & Techniques
After dozens of batches, here are some tricks I’ve picked up for making quick pickled vegetables shine every single time.
- Slice Evenly: Uniform slices help every piece pickle at the same rate. If you’re in a hurry, stack veggies and cut a bunch at once.
- Hot Brine, Cold Veggies: Pouring hot brine over chilled veggies gives you that signature snap. If the brine is too cool, the veggies might not absorb enough flavor.
- Don’t Overfill: Leave some breathing room in the jar—packed too tight, veggies won’t pickle evenly, and the brine can get cloudy.
- Experiment with Herbs: Fresh dill is classic, but fresh thyme, cilantro, or rosemary are fun twists. I once tried tarragon—unexpected but delicious.
- Common Mistakes: Using soft veggies or overcooking the brine leads to mushy pickles. I learned (the hard way) to always use crisp, fresh produce.
- Multitasking: While the brine heats, slice your veggies. That way, you’re never waiting around, and everything comes together in a flash.
- Consistency: Always taste the brine before pouring—adjust sugar or salt to your liking. If you want more tang, add a splash of apple cider vinegar to the mix.
- Efficiency Tip: Set up a “pickling station” with jars, pre-measured spices, and veggies lined up. It makes the process feel like a breeze, especially for big batches.
Honestly, the best advice I can give? Have fun with it. Every batch is a chance to tweak and experiment. Even if you mess up, you’ll probably still end up with something crunchy and delicious!
Variations & Adaptations
One of the coolest things about this quick pickled vegetables recipe is how easy it is to customize. Whether you’re swapping veggies, changing up the brine, or adapting for allergies, there’s a version for everyone.
- Dietary Variations: For a sugar-free option, use stevia or leave the sweetener out entirely. For low-sodium, halve the salt and add more herbs for flavor.
- Seasonal Swaps: Spring: add asparagus spears or snap peas. Fall: try sliced turnips or daikon radish. Winter: fennel and carrots are extra crisp.
- Flavor Customizations: Go spicy by adding more jalapeños or a dash of sriracha to the brine. Love garlic? Double up and let it infuse overnight.
- Cooking Method Adjustments: If you want softer pickles, let the veggies sit in hot brine for 5 extra minutes before sealing. Prefer extra-crunchy? Chill jars in the fridge immediately after adding brine.
- Allergen Substitutions: Most ingredients are allergen-friendly, but you can swap out any herb or spice that doesn’t work for your diet. For nightshade allergies, skip bell peppers and jalapeños.
- Personal Favorite: I once tossed in a handful of fresh mint with the dill—unexpected but insanely refreshing alongside grilled lamb.
Seriously, don’t be afraid to play around. The base recipe is solid, but every tweak brings something new to the table!
Serving & Storage Suggestions
Serve these quick pickled vegetables cold, straight from the fridge for ultimate crunch. They’re perfect stacked high on sandwiches, scattered over salads, or just piled onto a snack board with cheese and crackers.
- Presentation: For Pinterest-worthy flair, arrange pickles in a colorful bowl or on a platter with fresh herbs. A sprinkle of sesame seeds looks gorgeous.
- Pairings: Try with grilled meats, tacos, rice bowls, or alongside roasted potatoes. They also pair well with iced tea, lemonade, or a crisp lager.
- Storage: Keep in airtight containers in the fridge for up to 2 weeks. The flavor gets bolder after 24 hours—if you can wait that long!
- Freezer: Not recommended—veggies lose their crunch.
- Reheating: No need! These are meant to be enjoyed cold. If you want a warm pickle, let them sit out for 10 minutes before serving.
- Flavor Development: The brine deepens over time. I’ve noticed that by day three, the veggies taste even more vibrant and complex.
Honestly, I’ve never had a batch last more than a week—they disappear fast. If you’re planning for a party, double the recipe. Trust me.
Nutritional Information & Benefits
These quick pickled vegetables are naturally low-calorie and packed with vitamins from all those fresh veggies. Each serving (about ½ cup/120 g) delivers roughly:
- Calories: 35
- Fat: 0 g
- Carbs: 7 g (mostly from veggies and a touch of sugar)
- Fiber: 2 g
- Sodium: 250 mg (can be reduced for low-sodium diets)
- Vitamin C, Vitamin A, potassium—from carrots, peppers, and radishes
There’s no gluten, dairy, or nuts in the basic recipe, so it’s safe for most diets. Be mindful of sodium if you’re watching your intake—pickles always pack a salty punch. I love knowing I can snack on these guilt-free, plus the probiotic boost from vinegar is a bonus for gut health (though not as strong as fermented pickles).
From a wellness perspective, these pickled vegetables are a smart way to make veggies crave-worthy. If you’re trying to eat more greens, this is honestly one of my favorite tricks!
Conclusion
So why should you try this quick pickled vegetables recipe? It’s fast, easy, and brings that punchy, zesty flavor to just about any meal. Forget waiting days for pickles—this is pure satisfaction in 15 minutes. You can switch up the veggies, tweak the brine, or add your favorite herbs. That’s the beauty of it: totally customizable, always delicious.
Personally, I love the sense of accomplishment every time I line up those colorful jars on the fridge shelf. It feels like a homemade win, but without the fuss or the mess. If you’re craving something crunchy, tangy, and seriously addictive, give these quick pickled vegetables a shot.
Let me know in the comments—what’s your favorite veggie to pickle? Have you tried a wild variation? If you make this recipe, tag me on Pinterest or share your twist—I’m always looking for new ideas! Bookmark this one, and happy pickling!
FAQs
How long do quick pickled vegetables need to sit before eating?
You can eat them after just 15 minutes, but the flavor gets even better after an hour or overnight in the fridge.
Can I use apple cider vinegar instead of white vinegar?
Absolutely! Apple cider vinegar adds a fruity tang—just swap 1:1 for white vinegar in the brine.
What vegetables work best for quick pickling?
Cucumbers, carrots, radishes, onions, bell peppers, and cauliflower all work great. Firmer veggies hold up best and stay crunchy.
Can I reuse the brine for another batch?
It’s best to make fresh brine each time—old brine can lose its flavor and become cloudy. For safety and taste, start fresh.
Are quick pickled vegetables good for meal prep?
Definitely! They keep in the fridge for up to 2 weeks and add a zesty, crunchy element to salads, sandwiches, and bowls all week long.
Pin This Recipe!
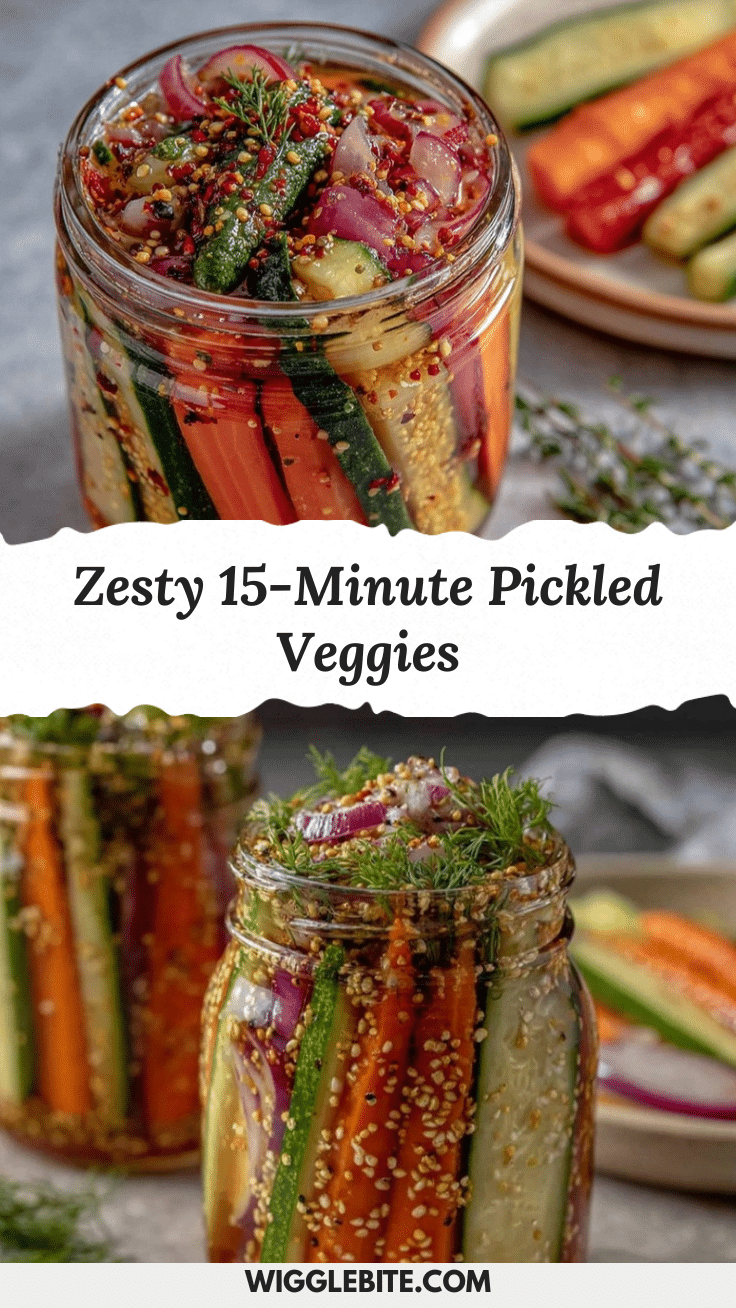
Quick Pickled Vegetables Recipe – Easy 15-Minute Zesty Side Dish
This quick pickled vegetables recipe delivers a tangy, crunchy, and colorful side dish in just 15 minutes. Perfect for snacking, potlucks, or adding a zesty punch to any meal, it’s endlessly customizable and always delicious.
- Prep Time: 10 minutes
- Cook Time: 5 minutes
- Total Time: 15 minutes
- Yield: 4 cups (about 8 servings) 1x
- Category: Side Dish
- Cuisine: American
Ingredients
- 1 cup (240 ml) white vinegar (or apple cider vinegar)
- 1 cup (240 ml) water
- 2 tablespoons (25 g) granulated sugar (or honey/maple syrup)
- 2 teaspoons (12 g) kosher salt
- 2 fresh garlic cloves, smashed
- 2–3 fresh dill sprigs (or 1 teaspoon dried dill)
- 1 teaspoon (3 g) whole black peppercorns
- 1/2 teaspoon (2 g) mustard seeds (optional)
- 1 bay leaf (optional)
- 1/2 teaspoon (2 g) coriander seeds (optional)
- 1/4 teaspoon (1 g) crushed red pepper flakes (optional)
- 1 Persian or English cucumber, sliced into spears or rounds
- 2 carrots, peeled and sliced on the bias
- 4–5 radishes, thinly sliced
- 1/2 red onion, thinly sliced
- 1 cup cauliflower florets (optional)
- 1 bell pepper (any color), sliced thin
- 1 jalapeño or chili pepper, sliced (optional)
Instructions
- Wash all vegetables thoroughly. Slice cucumbers, carrots, radishes, onions, and any other chosen vegetables to about 1/4 inch thick. For spears, aim for uniform sizes.
- Layer the sliced vegetables tightly into clean, heatproof jars. Add garlic cloves, dill sprigs, peppercorns, and any optional spices between layers for even flavor. Leave a bit of room at the top for brine.
- In a small saucepan, combine vinegar, water, sugar, and salt. Heat over medium flame, stirring until sugar and salt dissolve. Once the mixture simmers (not boiling), remove from heat (about 3-4 minutes).
- Carefully pour the hot brine over the packed vegetables, filling the jars to cover everything but leaving about 1/2 inch at the top. Use a spoon to press veggies down if they float.
- Allow jars to cool at room temperature, uncovered, for 10-15 minutes. Once cool, seal tightly with lids. Shake the jars gently to distribute the spices.
- Pickles are ready to eat after 15 minutes but get even better after an hour or overnight in the fridge.
- Store in the refrigerator for up to 2 weeks. Serve cold for best crunch.
Notes
For extra-crispy pickles, chill your veggies before pickling. Experiment with herbs like thyme, cilantro, or rosemary. Adjust sugar and salt to taste. Avoid soft veggies like tomatoes. For low-sodium, halve the salt. Pickles taste best after a few hours in the fridge and keep for up to 2 weeks.
Nutrition
- Serving Size: 1/2 cup (120 g)
- Calories: 35
- Sugar: 3
- Sodium: 250
- Carbohydrates: 7
- Fiber: 2
- Protein: 1
Keywords: quick pickled vegetables, easy pickles, refrigerator pickles, zesty side dish, homemade pickles, summer recipes, gluten-free, vegan, meal prep, healthy snacks