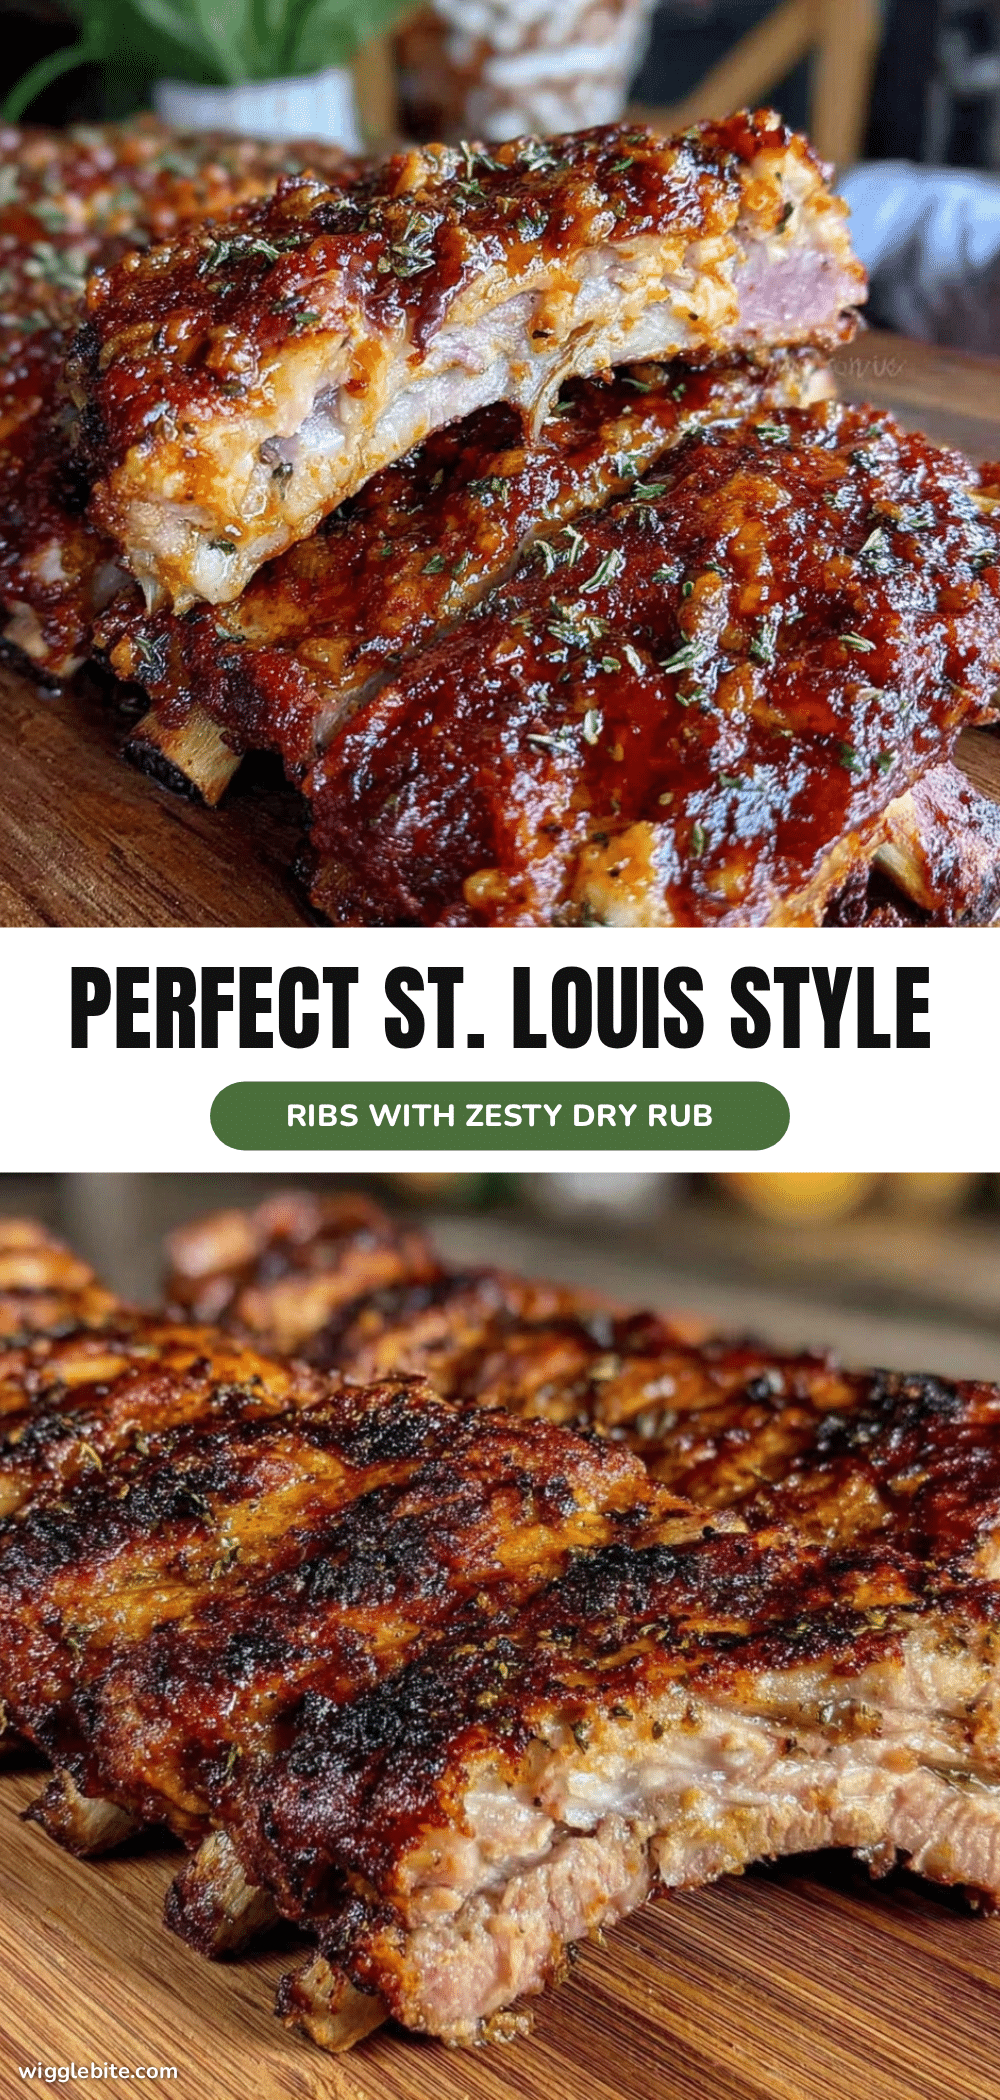
“You sure you want to try that rub?” my buddy chuckled, eyeing the mound of spices I was throwing together. I shrugged, half-expecting my first go at this homemade dry rub to fall flat. But honestly, the smell that filled the kitchen — smoky, spicy, with that hint of sweetness — made me pause. That was the moment I knew these Perfect St. Louis Style Ribs would be something special.
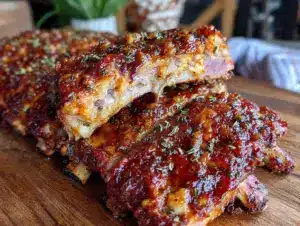
It wasn’t a grand BBQ plan or a fancy grill party that led me here. Just a random Sunday afternoon, a rack of ribs on sale, and a craving for something with a little kick but no fuss. The ribs came home with me, and the rub was a last-minute mix, cobbled from pantry staples and a couple of new spices I’d been meaning to try. I was skeptical that a dry rub could outshine a sauce slathered BBQ, but after that first bite — tender meat that pulled back easily from the bone, crispy edges with a zesty flavor punch — I was hooked.
Since then, I’ve made these ribs more than I can count, tweaking the rub just enough to keep it interesting but never complicated. It’s a recipe that fits right into those moments when you want something hearty, satisfying, and totally doable without hours of prep. Plus, it’s a crowd-pleaser that’s perfect alongside classic sides or even on its own, just waiting for a cold drink and good company.
So, if you ever wondered how to get that perfect balance of spice, sweetness, and smoky depth on your St. Louis style ribs — this recipe’s got you. No over-the-top ingredients, no mystery shortcuts, just straightforward flavor with a homemade touch that keeps everyone coming back for seconds.
Why You’ll Love This Recipe
After countless kitchen experiments and backyard cookouts, this Perfect St. Louis Style Ribs recipe stands out because it’s genuinely approachable and reliably delicious. Here’s why it keeps landing on my rotation:
- Quick & Easy: The dry rub comes together in under 10 minutes, and the ribs cook low and slow for about 3 hours, letting you relax or prep other dishes without stress.
- Simple Ingredients: No exotic spices or hard-to-find items here. Most of these seasonings are pantry staples, making it a perfect go-to for impromptu gatherings.
- Perfect for Any Occasion: Whether it’s a laid-back weekend lunch, a summer BBQ, or game day feast, these ribs bring crowd-pleasing flavor every time.
- Crowd-Pleaser: I’ve had kids and grown-ups alike ask for this recipe again. The balance of savory, sweet, and spicy hits all the right notes.
- Unbelievably Delicious: The dry rub forms a crusty, flavorful bark that locks in juiciness while delivering a zesty tang that’s just right.
What sets this recipe apart is the dry rub’s unique twist — a blend that includes smoked paprika for that classic BBQ smokiness, a touch of mustard powder for subtle heat, and brown sugar to caramelize into a perfect glaze. It’s not just another rib recipe; it’s a flavor profile perfected through trial and a handful of backyard cookouts.
Honestly, this recipe has earned a spot in my heart because it transforms a simple rack of ribs into a dish that feels special without fuss. It’s comfort food that invites you to savor the moment, whether alone or with friends. And hey, if you’re craving something different, pairing these ribs with a side like the cozy stuffed pork chops with cornbread sage dressing creates a hearty feast that’s sure to impress.
What Ingredients You Will Need
This recipe keeps things straightforward with a mix of spices and a good rack of ribs. The ingredients work together to build flavor in layers, making these ribs stand out without complicated steps or hard-to-find items.
- St. Louis Style Pork Ribs – About 2 to 3 pounds (900 g to 1.4 kg), trimmed of excess fat. These ribs have a rectangular shape, perfect for even cooking.
For the Zesty Homemade Dry Rub:
- Paprika (2 tablespoons) – Smoked paprika adds that deep BBQ flavor. I prefer La Chinata for its authentic smokiness.
- Brown Sugar (2 tablespoons) – Light or dark, it caramelizes beautifully and balances the spices.
- Salt (1 tablespoon) – Kosher salt works best for even seasoning.
- Black Pepper (1 teaspoon) – Freshly ground for a sharper bite.
- Garlic Powder (1 teaspoon) – Adds that subtle garlicky warmth.
- Onion Powder (1 teaspoon) – Gives a mild sweetness and depth.
- Cayenne Pepper (1/2 teaspoon) – Just enough to add a little zing without overpowering.
- Mustard Powder (1 teaspoon) – A secret weapon for tang and complexity.
- Chili Powder (1 teaspoon) – Brings a mild smoky heat that rounds out the rub.
Optional for Serving:
- BBQ Sauce – For those who like a little extra glaze, but honestly, these ribs shine on their own.
- Fresh Herbs – A sprinkle of chopped parsley or cilantro for color and freshness.
If you want a gluten-free version, all these spices are naturally gluten-free, but double-check your chili powder and paprika brands to be sure. For a twist, you can swap brown sugar with coconut sugar for a slightly different flavor note. This dry rub is forgiving and flexible, so feel free to adjust spice levels to your taste.
Equipment Needed
- Oven or Grill: You can cook these ribs low and slow in your oven or on a grill. I’ve used both with great results. For indoor cooking, a conventional oven works perfectly.
- Baking Sheet and Aluminum Foil: If roasting in the oven, a rimmed baking sheet with foil helps with easy cleanup and keeps the ribs moist when wrapped.
- Mixing Bowl: For combining the dry rub spices evenly.
- Measuring Spoons: Accurate measuring is key for the perfect balance of flavors in the dry rub.
- Basting Brush (Optional): If you decide to add BBQ sauce towards the end, a silicone brush helps coat ribs evenly without mess.
- Sharp Knife: To trim excess fat or silver skin if needed.
If you don’t have a grill, no worries — the oven method works just as well and offers consistent, tender results. For those using a smoker or charcoal grill, the dry rub stands up beautifully to smoky heat, too. And if you’re curious about quick weeknight pork options, you might find the crispy air fryer bone-in pork chops handy to keep in your recipe arsenal.
Preparation Method
- Prep the Ribs (10 minutes): Remove the membrane from the back of the ribs. Slide a butter knife under the silver skin and carefully peel it off. This step is crucial for tender ribs that soak in the flavors without a tough barrier.
- Make the Dry Rub (5 minutes): In a medium bowl, combine 2 tablespoons paprika, 2 tablespoons brown sugar, 1 tablespoon kosher salt, 1 teaspoon black pepper, 1 teaspoon garlic powder, 1 teaspoon onion powder, ½ teaspoon cayenne pepper, 1 teaspoon mustard powder, and 1 teaspoon chili powder. Stir until evenly mixed.
- Apply the Rub (5 minutes): Pat the ribs dry with paper towels. Generously coat both sides of the ribs with the dry rub, pressing it in so it adheres well. Don’t be shy here — the seasoning is what brings the magic.
- Let It Rest (Optional, 30 minutes to overnight): For best flavor, wrap the seasoned ribs in plastic wrap and refrigerate for at least 30 minutes or up to overnight. This lets the spices penetrate deeply. I’ve done it both ways — and honestly, even a quick rub before cooking works.
- Preheat Oven or Grill (15 minutes): Set your oven to 275°F (135°C) or prepare your grill for indirect heat at the same temperature range. Low and slow is the key to tender ribs.
- Cook the Ribs (2.5 to 3 hours): Place ribs bone-side down on a foil-lined baking sheet or grill grate. If using the oven, cover with foil to trap moisture. Cook for about 2.5 to 3 hours until the meat is tender and pulls back slightly from the bones. You want the ribs to be soft but not falling apart.
- Optional Glaze (10 minutes): If you like, brush your favorite BBQ sauce over the ribs and cook uncovered for an additional 10-15 minutes at 350°F (175°C) to set the sauce with a sticky finish.
- Rest and Serve (5 minutes): Let the ribs rest for a few minutes before slicing between the bones. This keeps the juices locked in.
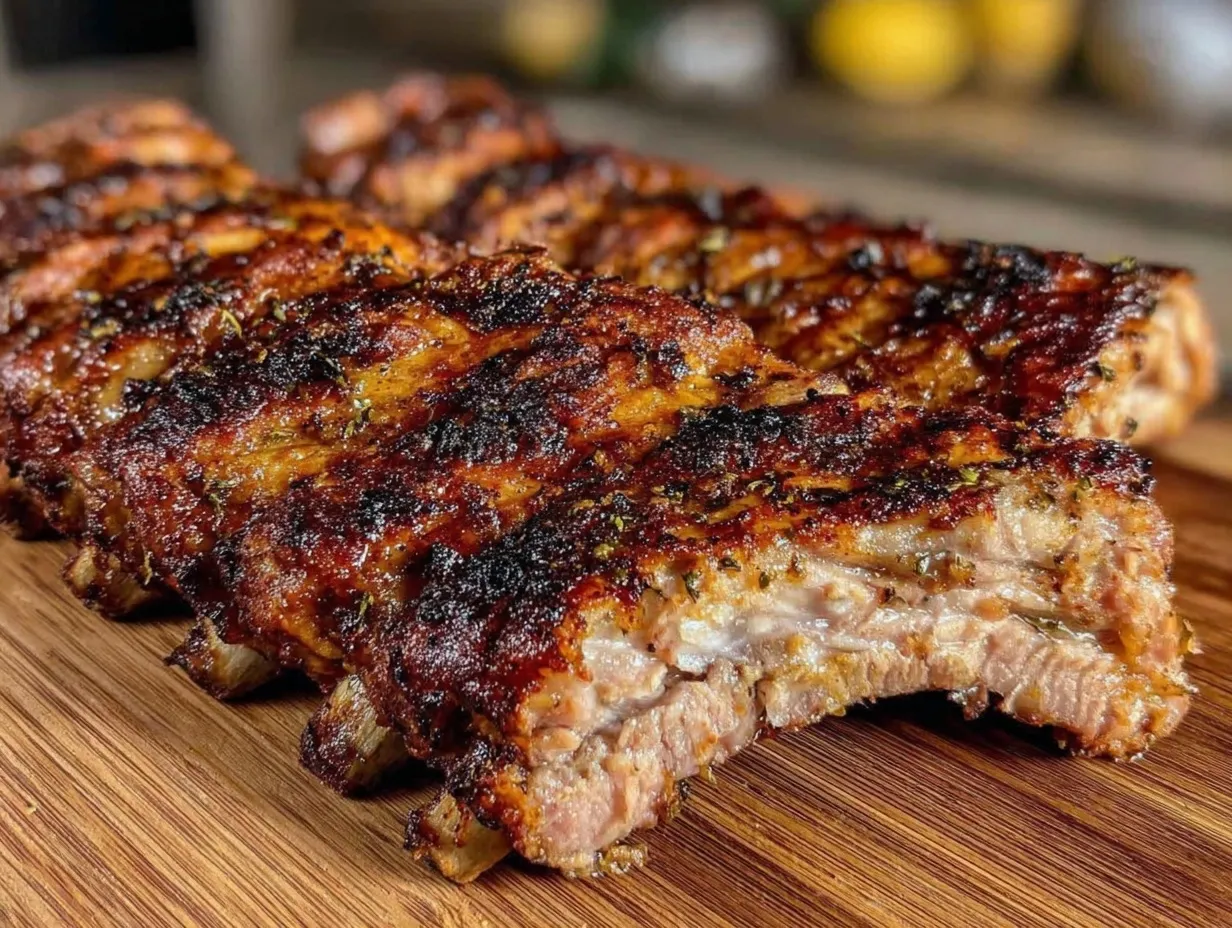
Watch for these signs: The ribs should have a nice bark (that crispy, spiced crust), and when you wiggle them, the meat should feel tender but still hold together. If you poke a little, the juices might look clear or slightly pink but not bloody.
In my experience, wrapping the ribs tightly with foil during the first part of cooking makes a humongous difference. It’s like a little steam bath that keeps the meat juicy. When I’m in a rush, I sometimes finish the ribs under the broiler for a few minutes to crisp up the edges instead of glazing — a neat trick for that caramelized finish.
Cooking Tips & Techniques
Getting Perfect St. Louis Style Ribs isn’t rocket science, but some tips can really save you from common pitfalls:
- Don’t Skip the Membrane Removal. I’ve seen ribs turn out tough and chewy just because the silver skin was left on. It’s a thin layer but makes a huge difference.
- Low and Slow Is Your Friend. High heat dries ribs out fast. Keep the temperature around 275°F (135°C) for that tender, pull-apart texture.
- Patience Pays Off. Resist the urge to rush. This recipe takes time to develop flavors and tenderness, but it’s hands-off mostly, so you can multitask.
- Use a Meat Thermometer. When in doubt, check for an internal temperature of about 190°F to 203°F (88°C to 95°C). At this point, the connective tissue breaks down nicely.
- Rest Before Slicing. Letting ribs rest for 5-10 minutes after cooking helps redistribute juices and prevents dryness.
- Experiment with Finishing. If you like a sticky glaze, add BBQ sauce near the end. For a smoky crust without sauce, try finishing on a hot grill or under the broiler briefly.
- Make Ahead and Reheat. These ribs actually taste great reheated — wrap tightly and warm in a low oven to keep moist.
My biggest lesson? Don’t overdo the cayenne if you’re serving kids or spice-averse friends. I’ve learned this the hard way after a few too many fiery batches! And if you’re feeling adventurous, pairing these ribs with a refreshing side like the fresh cucumber tomato salad with feta adds a nice cool contrast that balances the spices beautifully.
Variations & Adaptations
This recipe’s dry rub is flexible, so you can tailor it to match different tastes and dietary needs:
- Sweet & Smoky: Add 1 teaspoon smoked sugar or a dash of maple syrup drizzle after cooking for a sweeter profile with rich smoky notes.
- Spicy Kick: Double the cayenne and add a pinch of chipotle powder for a smoky heat that has a real punch.
- Herb-Infused: Mix in dried rosemary or thyme to the rub for a fragrant herbal twist that pairs well with oven cooking.
- Low-Sodium: Cut back on salt and boost flavor with smoked paprika and garlic powder; you can also add a splash of apple cider vinegar during cooking for tang.
- Gluten-Free: Confirm all spices are gluten-free (most are) and avoid sauces with wheat-based thickeners.
One of my favorite variations is adding a little ground coffee to the rub — it sounds odd, but it adds depth and a subtle earthiness. I tried it once for a backyard cookout, and folks kept guessing what the secret ingredient was!
Serving & Storage Suggestions
Serve these Perfect St. Louis Style Ribs warm off the grill or oven. They’re fantastic with classic sides like coleslaw, baked beans, or even a creamy mac and cheese. For a lighter contrast, a simple green salad works wonders.
Leftovers? Wrap tightly in foil or airtight containers and store in the refrigerator for up to 4 days. You can freeze cooked ribs too — just wrap well and freeze for up to 3 months.
When reheating, do it gently in a low oven (around 275°F / 135°C) wrapped in foil to maintain moisture. You can finish under the broiler for a minute or two if you want to refresh that crust.
Flavors tend to deepen overnight, so ribs often taste even better the next day. This makes them ideal for meal prep or casual weekend bites. And if you’re looking to round out your pork repertoire, consider the savory brown sugar glazed pork chops with easy apple compote for a sweet-savory complement that pairs beautifully.
Nutritional Information & Benefits
A serving of these St. Louis style ribs (about 4 oz / 113 g cooked meat) typically offers:
| Nutrient | Amount |
|---|---|
| Calories | 320-350 kcal |
| Protein | 28-30 g |
| Fat | 22-25 g |
| Carbohydrates | 3-5 g (mainly from brown sugar) |
| Sodium | Varies depending on salt added |
Key benefits come from the protein-rich pork ribs, which support muscle repair and energy. The spices in the dry rub bring antioxidant properties—paprika, garlic, and chili powders all contribute beneficial compounds.
For those watching carbs or calories, this recipe is fairly moderate, especially if you skip added BBQ sauce. It’s naturally gluten-free and can be adapted for lower sodium or spicier versions.
Personally, I appreciate how this recipe blends indulgence with mindful ingredients. It’s satisfying without being over the top, and it fits well alongside healthier sides or simple salads for balance.
Conclusion
Perfecting St. Louis Style Ribs with this zesty homemade dry rub has been a rewarding journey — from that first skeptical rub to a recipe I reach for often when I want serious flavor without fuss. It’s approachable, dependable, and full of personality.
Feel free to make it your own by adjusting spice levels or serving with your favorite sides. Whether you’re cooking for family, friends, or just yourself, these ribs bring a little celebration to everyday meals.
Give it a try, and if you love pork as much as I do, you might find yourself coming back to this recipe again and again — just like I do. And when you do, I’d love to hear how you made it yours!
FAQs About Perfect St. Louis Style Ribs with Zesty Homemade Dry Rub
How long should I cook St. Louis style ribs for tender results?
Cooking low and slow at about 275°F (135°C) for 2.5 to 3 hours usually yields tender, juicy ribs. The key is to let the connective tissues break down without drying the meat.
Can I use this dry rub on other types of ribs or meat?
Absolutely! This rub works great on baby back ribs, beef ribs, or even pork chops. Adjust the amount depending on the meat size.
Do I have to add BBQ sauce after cooking?
Nope! These ribs are flavorful enough on their own thanks to the dry rub. Adding sauce is optional if you want a saucier finish.
What’s the best way to remove the membrane on ribs?
Slide a knife or your fingers under the silver membrane on the bone side of the ribs and gently peel it off. Using a paper towel helps get a good grip.
Can I prepare the ribs in advance and reheat later?
Yes! You can apply the dry rub the night before and refrigerate. Cooked ribs also reheat well in a low oven wrapped in foil to keep them moist.
Pin This Recipe!
Perfect St Louis Style Ribs Recipe with Easy Zesty Homemade Dry Rub
This recipe features tender, flavorful St. Louis style pork ribs coated with a smoky, spicy, and sweet homemade dry rub. Cooked low and slow, these ribs develop a crispy bark and juicy interior, perfect for any occasion.
- Prep Time: 20 minutes
- Cook Time: 3 hours
- Total Time: 3 hours 20 minutes
- Yield: 4 servings 1x
- Category: Main Course
- Cuisine: American
Ingredients
- 2 to 3 pounds St. Louis Style Pork Ribs, trimmed of excess fat
- 2 tablespoons smoked paprika
- 2 tablespoons brown sugar
- 1 tablespoon kosher salt
- 1 teaspoon freshly ground black pepper
- 1 teaspoon garlic powder
- 1 teaspoon onion powder
- 1/2 teaspoon cayenne pepper
- 1 teaspoon mustard powder
- 1 teaspoon chili powder
- Optional for serving: BBQ sauce
- Optional for serving: Fresh herbs (parsley or cilantro)
Instructions
- Remove the membrane from the back of the ribs by sliding a butter knife under the silver skin and carefully peeling it off.
- In a medium bowl, combine paprika, brown sugar, kosher salt, black pepper, garlic powder, onion powder, cayenne pepper, mustard powder, and chili powder. Stir until evenly mixed.
- Pat the ribs dry with paper towels. Generously coat both sides of the ribs with the dry rub, pressing it in so it adheres well.
- Optionally, wrap the seasoned ribs in plastic wrap and refrigerate for at least 30 minutes or up to overnight to let the spices penetrate deeply.
- Preheat oven or grill to 275°F (135°C) for low and slow cooking.
- Place ribs bone-side down on a foil-lined baking sheet or grill grate. If using the oven, cover with foil to trap moisture.
- Cook ribs for about 2.5 to 3 hours until the meat is tender and pulls back slightly from the bones.
- Optional: Brush your favorite BBQ sauce over the ribs and cook uncovered for an additional 10-15 minutes at 350°F (175°C) to set the sauce.
- Let the ribs rest for 5 minutes before slicing between the bones to keep the juices locked in.
Notes
Removing the membrane is crucial for tender ribs. Cooking low and slow at 275°F ensures juicy, tender meat. Wrapping ribs in foil during cooking traps moisture and creates a steam bath effect. Optional BBQ sauce glaze can be added near the end for a sticky finish. Use a meat thermometer to check for internal temperature of 190°F to 203°F for perfect tenderness. Ribs reheat well wrapped in foil at low temperature to maintain moisture.
Nutrition
- Serving Size: 4 oz (113 g) cooked
- Calories: 335
- Sugar: 3
- Fat: 23.5
- Saturated Fat: 8
- Carbohydrates: 4
- Fiber: 0.5
- Protein: 29
Keywords: St Louis style ribs, dry rub ribs, smoked ribs, BBQ ribs, homemade dry rub, easy ribs recipe, pork ribs, low and slow cooking