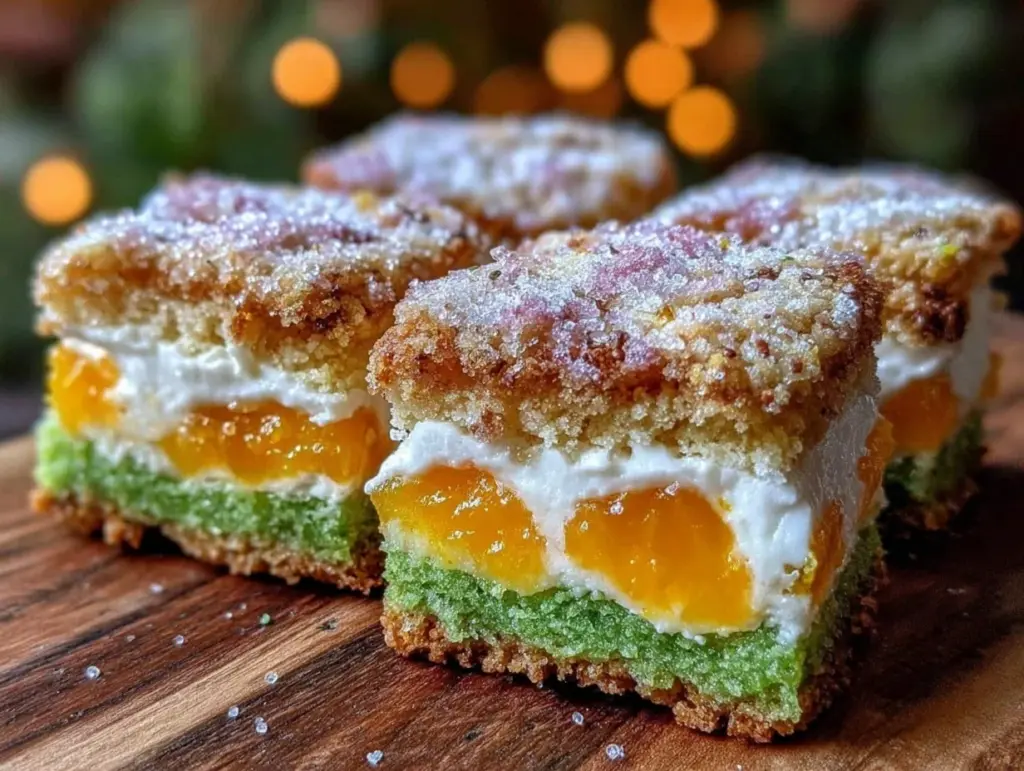
Let me tell you, the sight and scent of these Perfect Irish Flag Cookies fresh from the oven can brighten even the gloomiest March day. The crisp edges, the gentle crunch, and the sweet, buttery aroma swirling around your kitchen—it’s pure magic. The first time I baked these cookies was on a chilly St. Patrick’s Day afternoon years ago when I was knee-high to a grasshopper, helping my grandma with her holiday treats. I was instantly hooked, the kind of moment where you pause, take a deep breath, and just smile because you know you’re onto something truly special.
Back then, the idea of crafting those iconic Irish flag colors in cookie form was sheer delight. Honestly, my family couldn’t stop sneaking them off the cooling rack (and I can’t really blame them). These cookies quickly became a festive staple for our celebrations, potlucks, and even last-minute gifts for neighbors. You know what? I wish I’d discovered this recipe years ago—it’s dangerously easy and brings pure, nostalgic comfort every time.
Perfect Irish Flag Cookies are just right for brightening up your St. Patrick’s Day cookie board or adding a cheerful touch to any festive gathering. After testing this recipe multiple times (in the name of research, of course), it’s become my go-to treat for celebrating Irish heritage or simply indulging in a sweet, colorful bite. Trust me, you’re going to want to bookmark this one.
Why You’ll Love This Recipe
Honestly, there’s a lot to love about these Perfect Irish Flag Cookies, and I’m happy to share why this recipe stands out from the rest. Having tested it over several St. Patrick’s Days and family parties, I can say it’s a winner every time.
- Quick & Easy: These cookies come together in under 30 minutes, perfect for last-minute celebrations or when you want a sweet treat without fuss.
- Simple Ingredients: You likely already have everything in your pantry—no special shopping trip required.
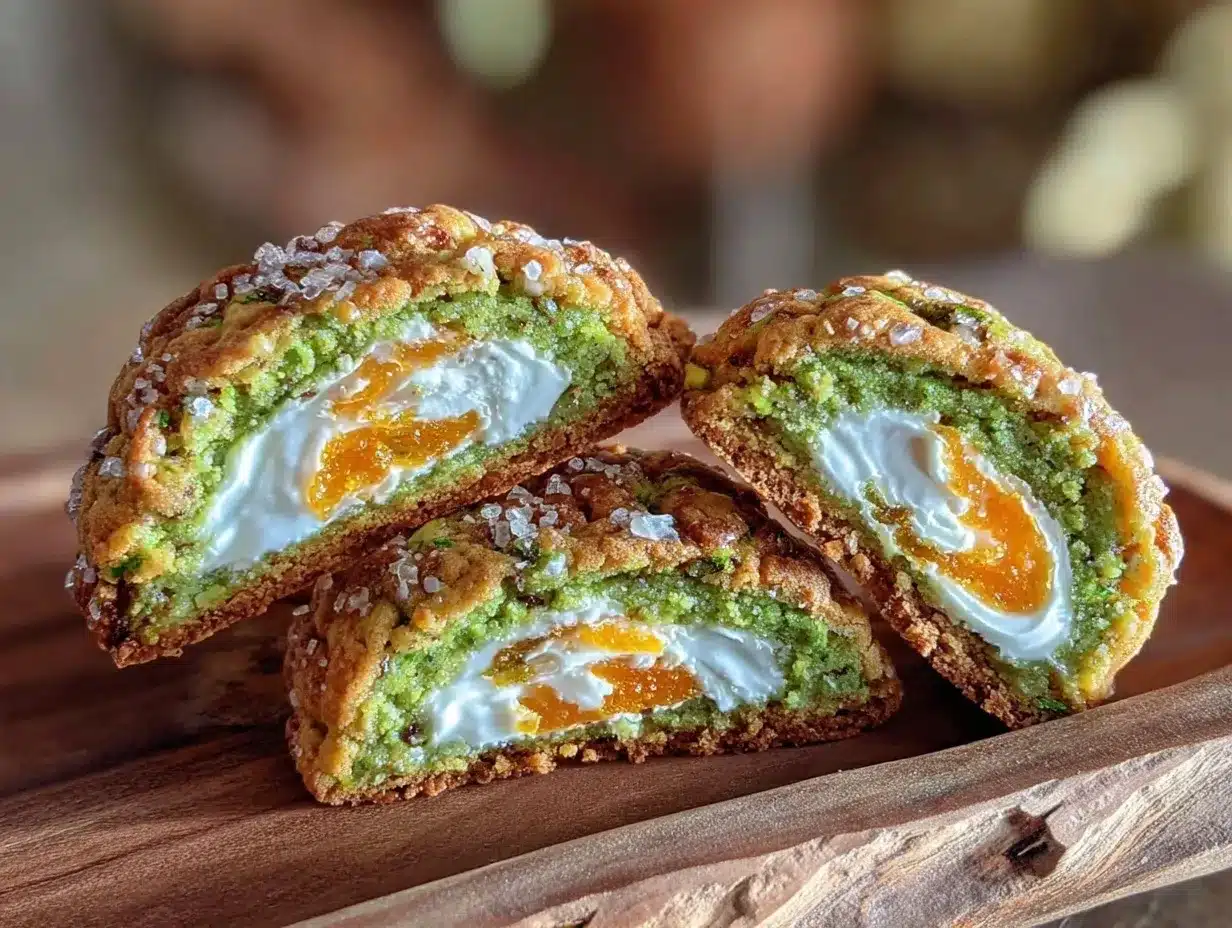
- Perfect for St. Patrick’s Day: The iconic green, white, and orange colors add festive cheer that’s just right for holiday parties, school events, or cozy afternoons with family.
- Crowd-Pleaser: Kids and adults alike can’t get enough of the buttery texture and sweet glaze.
- Unbelievably Delicious: The balance of crispy edges with a slightly soft center, plus the subtle vanilla undertone, makes these cookies irresistible.
This recipe isn’t just another cookie—it’s the best version, thanks to a few special touches like a simple glaze that perfectly mimics the Irish flag colors without overwhelming sweetness. It’s the kind of recipe that makes you close your eyes after the first bite and savor the moment. Whether you’re impressing guests or just treating yourself, these cookies bring a little piece of Ireland right to your kitchen.
What Ingredients You Will Need
This recipe uses simple, wholesome ingredients to deliver bold flavor and that satisfying cookie texture without any fuss. Most are pantry staples, with a few colorful accents to bring the Irish flag to life.
- For the Cookie Dough:
- 1 cup (227g) unsalted butter, softened (adds richness and tenderness)
- 1 cup (200g) granulated sugar
- 1 large egg, room temperature
- 1 teaspoon pure vanilla extract (for warmth and aroma)
- 2 ½ cups (315g) all-purpose flour (I recommend Gold Medal for best texture)
- ½ teaspoon baking powder
- ¼ teaspoon salt
- For the Irish Flag Glaze:
- 1 ½ cups (180g) powdered sugar
- 2–3 tablespoons milk (use dairy-free milk if needed)
- ½ teaspoon vanilla extract
- Green food coloring (gel-based works best for vibrant color)
- Orange food coloring (or substitute with natural carrot juice for a subtle hue)
Feel free to swap the all-purpose flour for almond flour if you want a gluten-free version, but keep in mind the texture will be a bit different (more crumbly). For the glaze, I usually use AmeriColor gel colors—they give the brightest, most consistent colors without thinning the glaze. If you prefer natural colorings, spinach powder and carrot juice are great alternatives.
Equipment Needed
- Mixing bowls (large and medium-sized)
- Electric mixer or sturdy whisk (I prefer a stand mixer to save my wrists)
- Measuring cups and spoons (for precise baking)
- Baking sheets lined with parchment paper or silicone baking mats (prevents sticking and easy cleanup)
- Cooling racks (essential for letting cookies cool evenly)
- Small bowls for glaze colors
- Spoons or small offset spatula for spreading glaze (a small paintbrush works well too)
If you don’t have a stand mixer, a good old-fashioned hand mixer or even vigorous whisking works fine, though it might take a bit longer. Parchment paper is a budget-friendly option that saves a lot of hassle, and silicone mats are a great investment if you bake often. Don’t forget a cooling rack—the cookies need to cool before glazing, or the icing will melt and run.
Preparation Method
- Prep Your Ingredients and Workspace: Begin by softening the butter to room temperature—it should be soft but not melted (about 20 minutes on the counter). Preheat your oven to 350°F (175°C). Line two baking sheets with parchment paper or silicone mats.
- Mix the Butter and Sugar: In a large bowl, beat 1 cup (227g) softened unsalted butter with 1 cup (200g) granulated sugar until light and fluffy, about 3 to 5 minutes. You’ll notice the mixture become pale and creamy—that’s your cue that it’s aerated perfectly.
- Add the Egg and Vanilla: Crack in 1 large egg and add 1 teaspoon vanilla extract. Beat until fully combined, scraping the bowl occasionally. The batter might look slightly glossy now, which is a good sign.
- Combine Dry Ingredients: In a separate bowl, whisk together 2 ½ cups (315g) all-purpose flour, ½ teaspoon baking powder, and ¼ teaspoon salt. This ensures even distribution of leavening.
- Incorporate Dry Ingredients: Gradually add the dry mixture to the wet ingredients, mixing on low speed or folding with a spatula. Stop as soon as the dough comes together—you don’t want to overmix, or your cookies might turn tough.
- Shape the Cookies: Roll the dough into a log approximately 12 inches (30 cm) long and about 2 inches (5 cm) in diameter. Wrap it tightly in plastic wrap and chill in the fridge for at least 30 minutes. Chilling firms up the dough, making slicing easier and helping the cookies hold their shape.
- Slice and Bake: Remove the dough from the fridge and slice into ¼-inch (0.6 cm) thick rounds. Place them 2 inches (5 cm) apart on your prepared baking sheets. Bake in the preheated oven for 12–14 minutes, or until the edges turn a delicate golden brown. Watch closely toward the end—the difference between perfect and overbaked is just a couple of minutes.
- Cool Completely: Transfer cookies to cooling racks to cool completely before glazing. This step is crucial to prevent your glaze from melting and running.
- Prepare the Glaze: In a bowl, whisk 1 ½ cups (180g) powdered sugar, 2 tablespoons milk, and ½ teaspoon vanilla extract until smooth. Divide the glaze evenly into three bowls. Add green food coloring to one, orange to another, and leave the third plain for white. Adjust milk quantity slightly if needed for perfect spreading consistency.
- Glaze the Cookies: Using a spoon or small spatula, gently spread each color glaze on the cookies in three vertical stripes to mimic the Irish flag: green on the left, white in the middle, and orange on the right. Don’t worry about perfect lines—rustic charm works here! Let the glaze set for at least 30 minutes before serving.
Cooking Tips & Techniques
Let’s face it: baking cookies that look great and taste amazing can sometimes feel like a balancing act. Here are some tips I’ve learned through trial, error, and plenty of taste-testing.
- Butter Temperature Matters: Softened—not melted—butter is key for the perfect dough texture. If it’s too soft, the cookies spread too much; too cold, and the dough won’t mix well.
- Don’t Skip Chilling: Chilling the dough helps keep the cookie shape crisp and prevents excessive spreading. I’ve learned this the hard way when cookies turned into thin crisps instead of thick rounds.
- Watch Your Oven: Oven temps vary, so keep an eye on the cookies around the 10-minute mark. They bake quickly, and a few extra minutes can change texture drastically.
- Glaze Consistency: Your glaze should be thick enough to spread but not runny. If it’s too thin, add more powdered sugar; too thick, add a tiny splash of milk.
- Multitasking Tip: While cookies bake, prep your glaze colors to save time. Just make sure cookies are completely cool before glazing!
Variations & Adaptations
One of the best things about this recipe is how easy it is to tweak based on your preferences or dietary needs. Here are a few ideas I’ve tried and loved:
- Gluten-Free Version: Swap all-purpose flour with a 1:1 gluten-free baking blend. You’ll want to chill the dough a bit longer to help with structure.
- Vegan Adaptation: Use vegan butter and substitute the egg with ¼ cup unsweetened applesauce or a flax egg. The cookies come out just as tasty, with a slight chewiness.
- Natural Coloring: Instead of food coloring, try spinach powder for green and a light carrot juice reduction for orange. It gives a subtle but lovely tint and adds a bit of nutrition.
- Flavor Twist: Add a teaspoon of finely grated lemon zest to the dough for a fresh citrus note that pairs wonderfully with the sweetness.
I once added a sprinkle of coarse sea salt on top before baking—it created a surprising salty-sweet combo that had my family begging for more!
Serving & Storage Suggestions
These Perfect Irish Flag Cookies are best served at room temperature, allowing the glaze to retain its crisp texture. They pair beautifully with a warm cup of tea or a glass of cold milk, making them a cozy afternoon treat.
For festive occasions, arrange them on a platter with a few shamrock leaves or green accents to really bring the celebration vibe. They’re also great packed in clear cellophane bags tied with green and orange ribbons for gifting.
Store leftover cookies in an airtight container at room temperature for up to 4 days. If you want to keep them longer, pop them in the freezer for up to 3 months. To reheat, simply let them come to room temperature naturally—avoid microwaving, as it can soften the glaze undesirably.
Interestingly, the flavors mellow and the texture softens slightly after a day, offering a different but equally delightful eating experience.
Nutritional Information & Benefits
Each cookie (assuming 24 cookies per batch) contains approximately:
| Calories | Fat | Carbohydrates | Protein |
|---|---|---|---|
| 120 kcal | 6g | 16g | 1g |
While these cookies are a sweet treat, the use of real butter and fresh ingredients provides some wholesome goodness. Vanilla extract adds aroma without calories, and when natural food colorings are used, you get a touch of antioxidants from spinach or carrot powders.
This recipe can be adapted for gluten-free or vegan diets, making it accessible to many. Just keep in mind the sugar content and enjoy these treats in moderation as part of a balanced diet.
Conclusion
These Perfect Irish Flag Cookies truly capture the spirit of St. Patrick’s Day with every bite. They’re simple to make, fun to decorate, and bring a festive splash of color to any celebration. Honestly, it’s one of those recipes that feels like a warm hug—comforting, nostalgic, and downright delicious.
Don’t hesitate to make them your own, whether by tweaking flavors, colors, or going for a dietary adaptation. I love how versatile and joyful these cookies are, and I hope they find a special place in your holiday traditions too.
If you try this recipe, please drop a comment below or share your photos—nothing makes me happier than seeing your festive baking successes! Here’s to sweet moments, good company, and cookies that bring a little Irish luck to your day.
FAQs About Perfect Irish Flag Cookies
Can I make these cookies ahead of time?
Absolutely! You can bake the cookies up to 3 days in advance and store them in an airtight container. Glaze them the day you want to serve for freshest appearance.
What if I don’t have food coloring?
You can use natural alternatives like spinach powder for green and carrot juice for orange, or simply leave the glaze white for a classic sugar cookie look.
Can I freeze the cookie dough?
Yes, wrap the dough log tightly in plastic wrap and freeze for up to 2 months. Thaw overnight in the fridge before slicing and baking.
How do I make these cookies vegan?
Use vegan butter and replace the egg with ¼ cup applesauce or a flax egg (1 tablespoon ground flaxseed mixed with 3 tablespoons water).
Why are my cookies spreading too much?
Most likely, the butter was too soft or the dough wasn’t chilled long enough. Make sure to chill the dough for at least 30 minutes before slicing and baking.
Pin This Recipe!
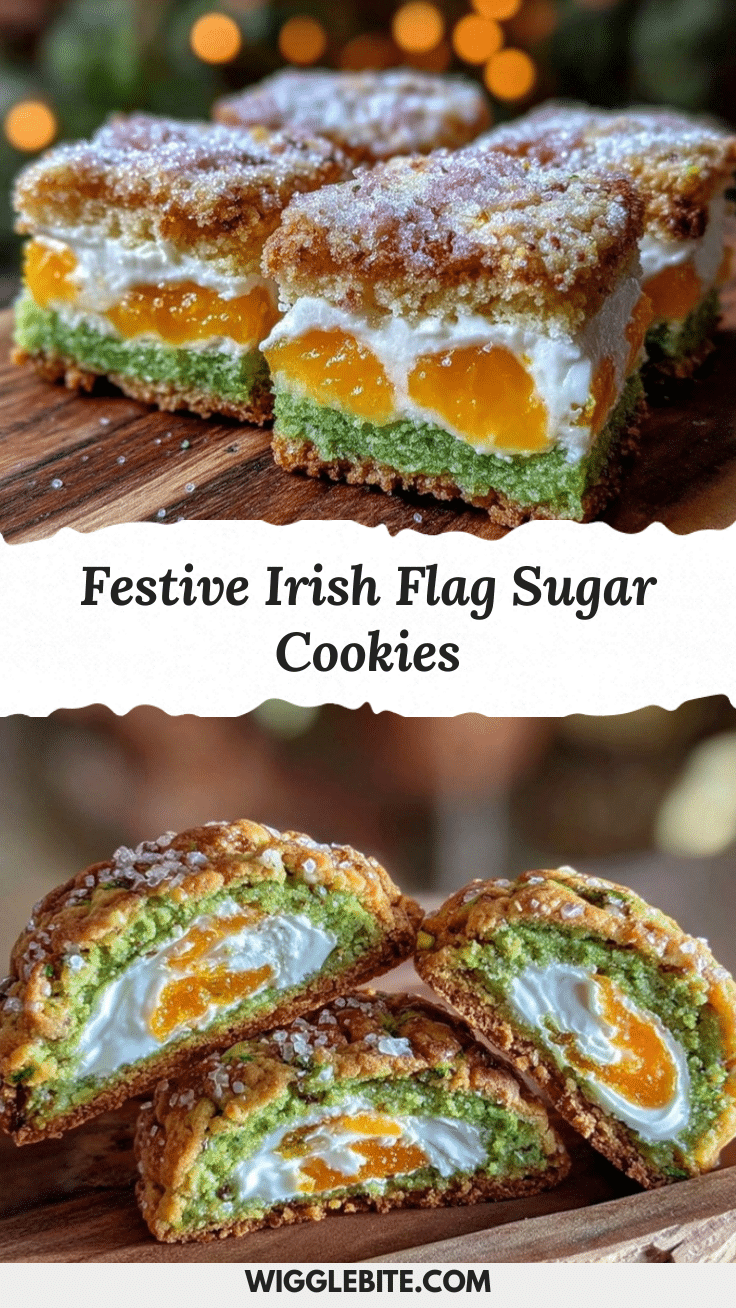
Perfect Irish Flag Cookies
These Perfect Irish Flag Cookies are a quick and easy homemade treat featuring the iconic green, white, and orange colors of the Irish flag. They offer a buttery texture with crisp edges and a sweet glaze, perfect for St. Patrick’s Day celebrations.
- Prep Time: 25 minutes
- Cook Time: 14 minutes
- Total Time: 39 minutes
- Yield: 24 cookies 1x
- Category: Dessert
- Cuisine: Irish
Ingredients
- 1 cup (227g) unsalted butter, softened
- 1 cup (200g) granulated sugar
- 1 large egg, room temperature
- 1 teaspoon pure vanilla extract
- 2 ½ cups (315g) all-purpose flour
- ½ teaspoon baking powder
- ¼ teaspoon salt
- 1 ½ cups (180g) powdered sugar
- 2–3 tablespoons milk (dairy-free milk optional)
- ½ teaspoon vanilla extract
- Green food coloring (gel-based recommended)
- Orange food coloring (or natural carrot juice)
Instructions
- Soften butter to room temperature (about 20 minutes). Preheat oven to 350°F (175°C). Line two baking sheets with parchment paper or silicone mats.
- In a large bowl, beat softened butter and granulated sugar until light and fluffy, about 3 to 5 minutes.
- Add egg and vanilla extract; beat until fully combined.
- In a separate bowl, whisk together flour, baking powder, and salt.
- Gradually add dry ingredients to wet ingredients, mixing on low speed or folding until dough just comes together.
- Roll dough into a 12-inch long log about 2 inches in diameter. Wrap tightly in plastic wrap and chill for at least 30 minutes.
- Slice chilled dough into ¼-inch thick rounds. Place 2 inches apart on prepared baking sheets.
- Bake for 12–14 minutes until edges are lightly golden. Transfer cookies to cooling racks to cool completely.
- Prepare glaze by whisking powdered sugar, milk, and vanilla extract until smooth. Divide into three bowls and color one green, one orange, and leave one plain white.
- Spread glaze on cooled cookies in three vertical stripes: green on left, white in middle, orange on right. Let glaze set for at least 30 minutes before serving.
Notes
Use softened but not melted butter for best dough texture. Chill dough at least 30 minutes to prevent spreading. Watch cookies closely near end of baking to avoid overbaking. Adjust glaze thickness with powdered sugar or milk as needed. Cookies should be completely cool before glazing to prevent melting. For gluten-free, substitute all-purpose flour with gluten-free blend and chill longer. For vegan, use vegan butter and replace egg with ¼ cup applesauce or flax egg.
Nutrition
- Serving Size: 1 cookie
- Calories: 120
- Fat: 6
- Carbohydrates: 16
- Protein: 1
Keywords: Irish flag cookies, St. Patrick's Day cookies, festive cookies, homemade cookies, colorful cookies, easy cookie recipe