“You know that moment when you walk into a friend’s house and the smell, the colors, the whole vibe just pulls you right in? That’s exactly what happened one chilly Saturday afternoon last fall. I was stopping by my neighbor, Lisa, who always has this knack for throwing together the most unexpected treats. That day, she wasn’t baking a cake or whipping up cookies—no, she had something way cooler: a dessert charcuterie board. Honestly, I’d never thought of dessert like that before—like an art project you can eat.
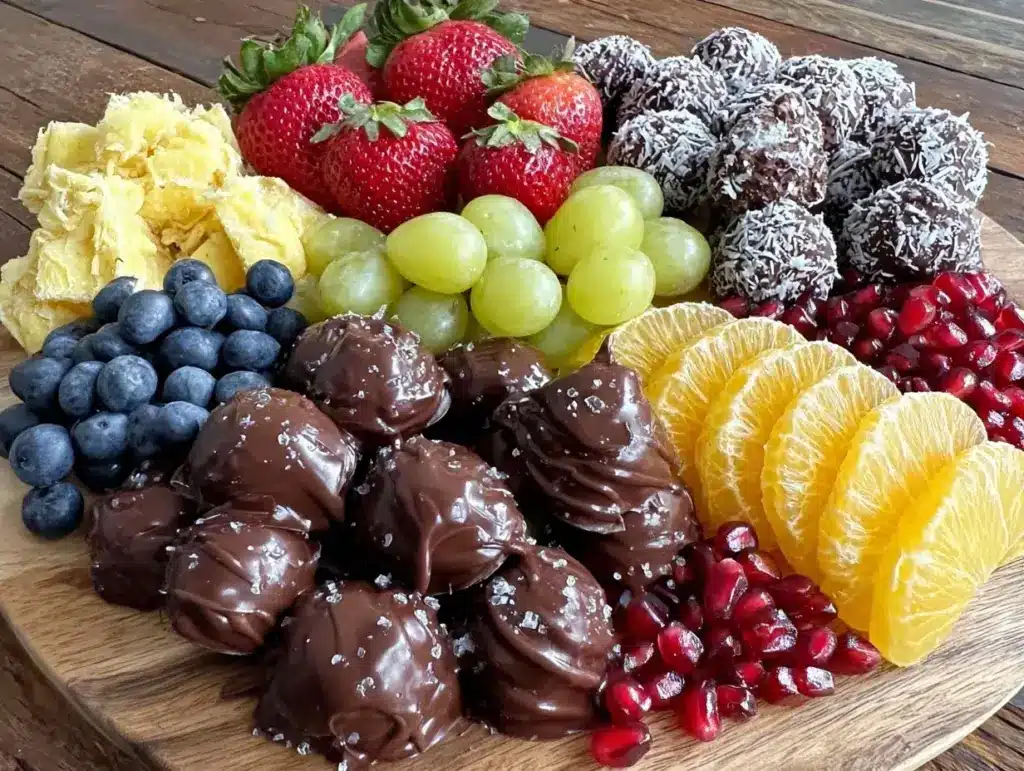
She had this cracked ceramic platter, the kind with a little chip on the edge, which made everything look even more charming. The board was bursting with glossy dark chocolate chunks, juicy fresh berries, and little clusters of nuts. I was halfway through a story about my latest kitchen disaster when I realized I’d been silently nibbling for ten minutes. That’s when I knew I had to make my own perfect dessert charcuterie board with chocolate and fresh fruit—and share how you can too.
Maybe you’ve been there, standing in the grocery aisle wondering how to impress without spending hours. This recipe is the answer. It’s not just about throwing things together; it’s about creating a feast for the eyes and the taste buds. Plus, it’s fun, flexible, and—let me tell you—impossibly delicious.
Why You’ll Love This Recipe
Having played around with dessert boards for years (and yes, making a few messes along the way), I can say this version is a crowd-pleaser. It’s the kind of treat that’s as good for a casual get-together as it is for a fancy date night.
- Quick & Easy: You can have it ready in under 30 minutes, which means no stressing if guests pop in unexpectedly.
- Simple Ingredients: No need for exotic items; most are pantry staples or easy to grab at your local store.
- Perfect for Entertaining: Whether it’s a brunch, movie night, or holiday gathering, this board steals the show without stealing your time.
- Crowd-Pleaser: Kids love the sweet and fruity mix, and adults appreciate the sophisticated touch of dark chocolate paired with fresh fruit.
- Unbelievably Delicious: The combo of textures—crunchy nuts, smooth chocolate, juicy fruit—creates a mouthwatering experience.
What sets this dessert charcuterie board apart is the balance—no one flavor overwhelms the other. I’ve experimented with blending rich chocolate with tart berries and creamy dips, finding just the right harmony that makes each bite a little moment of joy. Honestly, it’s the kind of dessert that makes you close your eyes and smile after the first taste.
What Ingredients You Will Need
This recipe uses simple, wholesome ingredients to deliver bold flavor and satisfying texture without the fuss. Most of the items are easy to find year-round, and you can even swap a few depending on what’s fresh or on hand.
- Chocolate
- Dark chocolate chunks or bars (70% cocoa recommended for rich flavor)
- Milk chocolate pieces (optional, for a sweeter touch)
- White chocolate chips (optional, adds visual contrast)
- Fresh Fruit
- Strawberries, hulled and halved
- Red and green grapes, whole
- Blueberries (seasonal, small and sweet)
- Raspberries (delicate and tart)
- Fresh figs, quartered (if in season; adds a lovely softness)
- Nuts & Seeds
- Almonds, toasted (adds crunch and warmth)
- Walnuts, roughly chopped
- Pistachios, shelled (optional, for color and flavor)
- Cheese (optional, for a sweet-savory balance)
- Mascarpone or cream cheese, served in a small bowl
- Goat cheese logs, sliced
- Dips & Extras
- Honey or maple syrup (for drizzling)
- Dark chocolate sauce or ganache (store-bought or homemade)
- Fresh mint leaves (for garnish and freshness)
- Mini cookies or biscotti (adds texture variety)
For best results, I recommend brands like Ghirardelli for chocolate, and if you can find fresh, organic fruit, that really shines here. If you’re looking for dairy-free options, swap mascarpone with coconut cream or almond-based spreads. Also, frozen berries can work in a pinch, but fresh always tastes better.
Equipment Needed
- Large serving board or platter – Wooden or marble boards work beautifully; I personally love using a rustic wooden board for that cozy vibe.
- Small bowls or ramekins – For dips, nuts, and cheese.
- Sharp knife – For slicing fruit and cheese cleanly.
- Tongs or small spoons – Helpful for serving fruit and nuts without mixing flavors.
- Toaster oven or skillet (optional) – To toast nuts if you want extra crunch and aroma.
If you don’t have a fancy board, no worries! A large plate or even a clean cutting board works just fine. Just make sure it’s clean and sturdy. I once made this on a baking sheet lined with parchment paper when I forgot my board—worked like a charm, though not quite as pretty.
Preparation Method
- Prepare the fruit (10 minutes): Rinse all fresh fruit under cold water. Hull and halve the strawberries, quarter the figs if using, and pat dry gently with a kitchen towel to avoid excess moisture.
- Toast the nuts (optional, 5 minutes): Heat a dry skillet over medium heat. Add almonds and walnuts, stirring frequently until fragrant and lightly browned. Remove and cool completely.
- Arrange the chocolate (5 minutes): Break the dark and milk chocolate into bite-sized chunks. Place them in small clusters or piles across the board for easy picking.
- Place the fruit (10 minutes): Distribute the fruit evenly, mixing colors and shapes to make the board visually interesting. Keep similar fruits separated to avoid them blending flavors too much.
- Add cheese and dips (5 minutes): Spoon mascarpone or cream cheese into ramekins. If using goat cheese, slice and fan out the pieces. Add a small bowl of honey or chocolate sauce for dipping.
- Fill in gaps (5 minutes): Sprinkle toasted nuts, pistachios, and mini cookies in any empty spaces to create texture and depth. Garnish with fresh mint leaves for a pop of color.
- Final touches: Drizzle a little honey or maple syrup over the fruit clusters if you like extra sweetness. Serve immediately or keep chilled for up to an hour before guests arrive.
Pro tip: When arranging, try to balance the heavier items (like cheese bowls) with lighter ones (berries) to keep the board steady. And don’t forget to leave some space between different flavors so your guests can pick and choose without mixing everything together.
Cooking Tips & Techniques
Honestly, the secret to a great dessert charcuterie board is in the details and the layering. Here are some tips I’ve picked up from trial, error, and a few happy accidents:
- Keep fruit dry: Excess moisture can make chocolate soggy or cause nuts to lose crunch. Pat fruit dry after washing.
- Mix textures: Combine creamy, crunchy, juicy, and smooth elements for an exciting bite every time.
- Use quality chocolate: The flavor difference between a cheap chocolate bar and a good one is night and day. Don’t skip on this.
- Toast nuts lightly: This enhances flavor without overpowering the other ingredients. Watch closely to avoid burning!
- Arrange thoughtfully: Visual appeal matters. Think about color contrast and spacing so the board looks inviting, not messy.
- Multitask when prepping: While nuts toast, prep fruit or slice cheese to save time.
- Don’t overcrowd: Less is more. A crowded board can be overwhelming and less enjoyable.
I once tried to speed things up by skipping the nut toasting and, well, the board was a little flat. Trust me, those small details add up to big flavor wins.
Variations & Adaptations
- Seasonal twist: Swap out berries for stone fruits like peaches or nectarines in summer, or add pomegranate seeds and persimmons in fall.
- Diet-friendly: Use dairy-free chocolate and coconut yogurt-based dip to accommodate lactose intolerance or vegan diets.
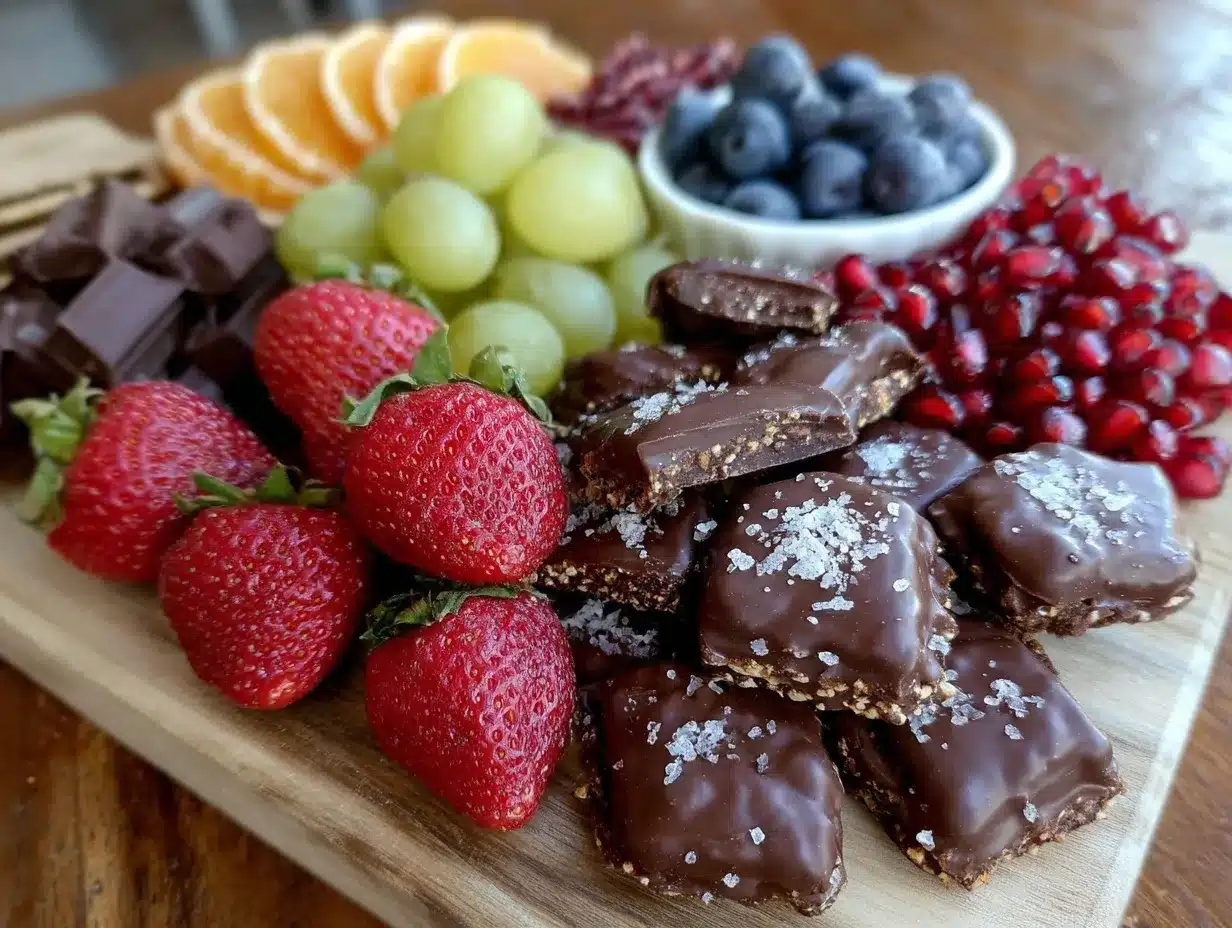
- Flavor infusion: Sprinkle a pinch of sea salt or chili flakes on the chocolate for a surprising kick.
- Alternative bases: Use mini pancakes or waffles instead of cookies for a brunch-style dessert board.
- Personal favorite: I once added a splash of balsamic glaze over strawberries—sounds odd, but it was incredible.
Feel free to swap ingredients based on what you love or what’s available. The beauty is in the customization.
Serving & Storage Suggestions
Serve your dessert charcuterie board at room temperature for the best flavor and texture. Cold chocolate can lose some of its richness, and chilled fruit can feel less juicy.
Pair it with a glass of sparkling wine, coffee, or even a fruity iced tea. It’s a conversation starter and a sweet finish to any meal.
If you need to store leftovers, wrap tightly with plastic wrap and keep refrigerated for up to 24 hours. Reheat nuts lightly in a skillet before serving again to refresh their crunch. Chocolate may harden in the fridge, so let the board sit out for 10-15 minutes before eating.
Flavors actually deepen a bit if you let the fruit and cheese mingle for a short while, so a little patience pays off.
Nutritional Information & Benefits
On average, a serving of this dessert charcuterie board (about 1/6 of the whole board) contains:
| Calories | Fat | Carbs | Protein |
|---|---|---|---|
| 320 kcal | 20 g | 25 g | 5 g |
Dark chocolate is rich in antioxidants and can support heart health when enjoyed in moderation. Fresh fruit provides vitamins, fiber, and natural sweetness without added sugars. Nuts add healthy fats and protein, which help keep you satisfied.
This dessert can fit into gluten-free and low-carb diets with simple swaps, like using gluten-free cookies or skipping the cookies altogether. Just watch for nut allergies—always a good idea to check with guests.
From a wellness perspective, this board offers a balanced treat that feels indulgent but delivers real nutrients too.
Conclusion
If you’re looking for a dessert that’s easy to assemble, visually stunning, and irresistibly tasty, this perfect dessert charcuterie board with chocolate and fresh fruit is your new best friend. It’s flexible enough to suit any occasion and forgiving enough for those “I forgot to bake” moments.
Make it your own—tweak the ingredients, add your favorite nuts or fruits, and don’t be afraid to experiment with unexpected flavors. I love this board because it brings people together, sparks conversation, and, honestly, makes dessert feel like a celebration every time.
Try it out, share your creations, and let me know what twists you added. There’s nothing better than seeing how you make this recipe your own. Happy nibbling!
FAQs
What types of chocolate work best for a dessert charcuterie board?
Dark chocolate with at least 70% cocoa provides rich flavor and pairs beautifully with fresh fruit. Milk and white chocolate can be added for variety and sweetness. Choose good quality bars or chunks for best taste.
Can I prepare the dessert charcuterie board ahead of time?
Yes, you can prep most ingredients a few hours in advance and assemble just before serving. Keep fruit dry and chilled separately to avoid sogginess.
What fruit is best for this kind of dessert board?
Fresh berries, grapes, and figs are fantastic choices due to their vibrant colors and juicy textures. Seasonal fruits like stone fruits or pomegranate seeds work well too.
How should I store leftovers?
Wrap the board tightly and refrigerate leftovers for up to 24 hours. Allow chocolate and fruit to come to room temperature before serving again for the best flavor.
Can this dessert be made vegan or dairy-free?
Absolutely! Use dairy-free chocolate and swap mascarpone or cream cheese for coconut cream or plant-based spreads. Check labels to ensure all ingredients fit your dietary needs.
Pin This Recipe!
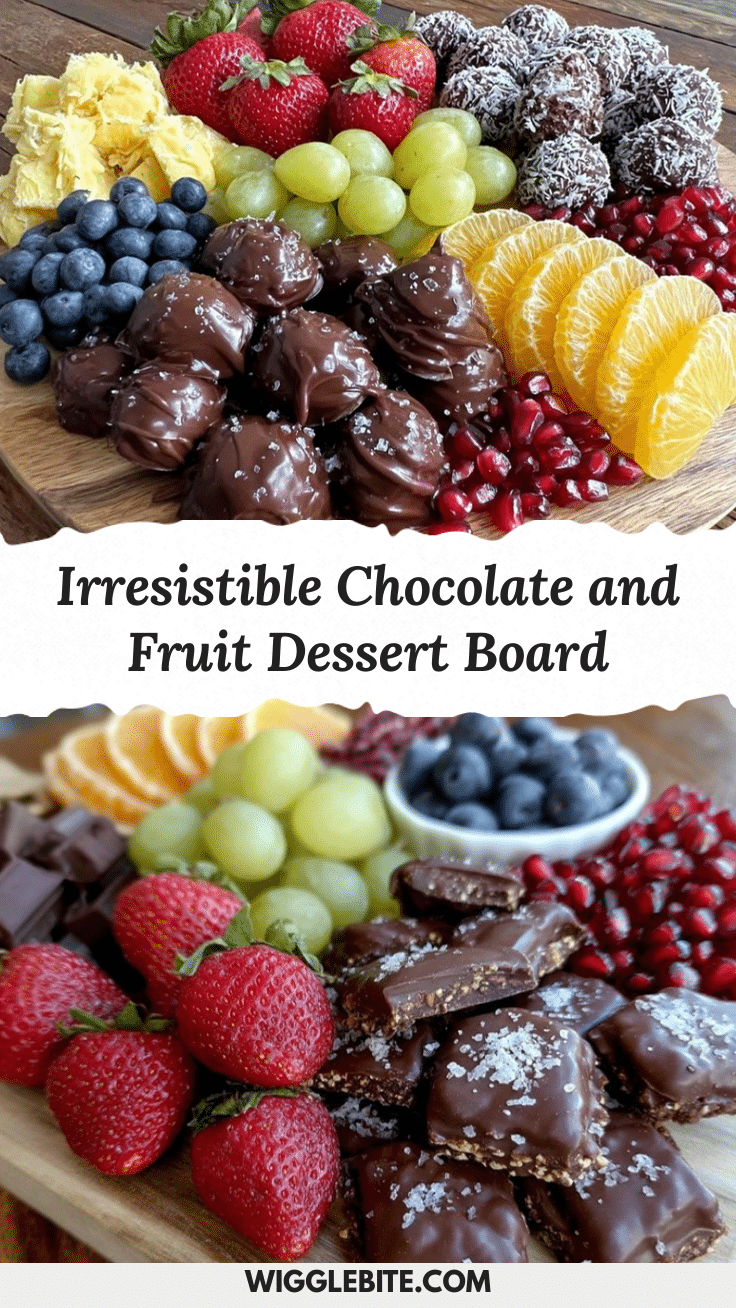
Perfect Dessert Charcuterie Board Ideas with Chocolate and Fresh Fruit to Impress

A visually stunning and irresistibly tasty dessert charcuterie board featuring a balanced mix of dark chocolate, fresh fruit, nuts, and optional cheeses and dips. Quick and easy to assemble, perfect for entertaining.
- Prep Time: 15 minutes
- Cook Time: 5 minutes
- Total Time: 20 minutes
- Yield: 6 servings
- Category: Dessert
- Cuisine: American
Ingredients
- Dark chocolate chunks or bars (70% cocoa recommended)
- Milk chocolate pieces (optional)
- White chocolate chips (optional)
- Strawberries, hulled and halved
- Red and green grapes, whole
- Blueberries (seasonal)
- Raspberries
- Fresh figs, quartered (if in season)
- Almonds, toasted
- Walnuts, roughly chopped
- Pistachios, shelled (optional)
- Mascarpone or cream cheese (optional)
- Goat cheese logs, sliced (optional)
- Honey or maple syrup (for drizzling)
- Dark chocolate sauce or ganache (store-bought or homemade)
- Fresh mint leaves (for garnish)
- Mini cookies or biscotti
Instructions
- Rinse all fresh fruit under cold water. Hull and halve the strawberries, quarter the figs if using, and pat dry gently with a kitchen towel to avoid excess moisture.
- Toast the almonds and walnuts in a dry skillet over medium heat, stirring frequently until fragrant and lightly browned. Remove and cool completely (optional).
- Break the dark and milk chocolate into bite-sized chunks and place them in small clusters or piles across the board.
- Distribute the fruit evenly, mixing colors and shapes to make the board visually interesting. Keep similar fruits separated to avoid blending flavors.
- Spoon mascarpone or cream cheese into ramekins. Slice and fan out goat cheese pieces if using. Add a small bowl of honey or chocolate sauce for dipping.
- Fill in gaps with toasted nuts, pistachios, and mini cookies to create texture and depth. Garnish with fresh mint leaves.
- Drizzle honey or maple syrup over the fruit clusters if desired. Serve immediately or keep chilled for up to an hour before serving.
Notes
Keep fruit dry to avoid soggy chocolate and loss of nut crunch. Toast nuts lightly for enhanced flavor. Arrange items thoughtfully to balance flavors and textures. Can be customized with seasonal fruits or dairy-free alternatives.
Nutrition
- Serving Size: About 1/6 of the who
- Calories: 320
- Fat: 20
- Carbohydrates: 25
- Protein: 5
Keywords: dessert charcuterie board, chocolate dessert, fresh fruit dessert, easy dessert, entertaining dessert, party dessert, chocolate and fruit, nuts and cheese board