Introduction
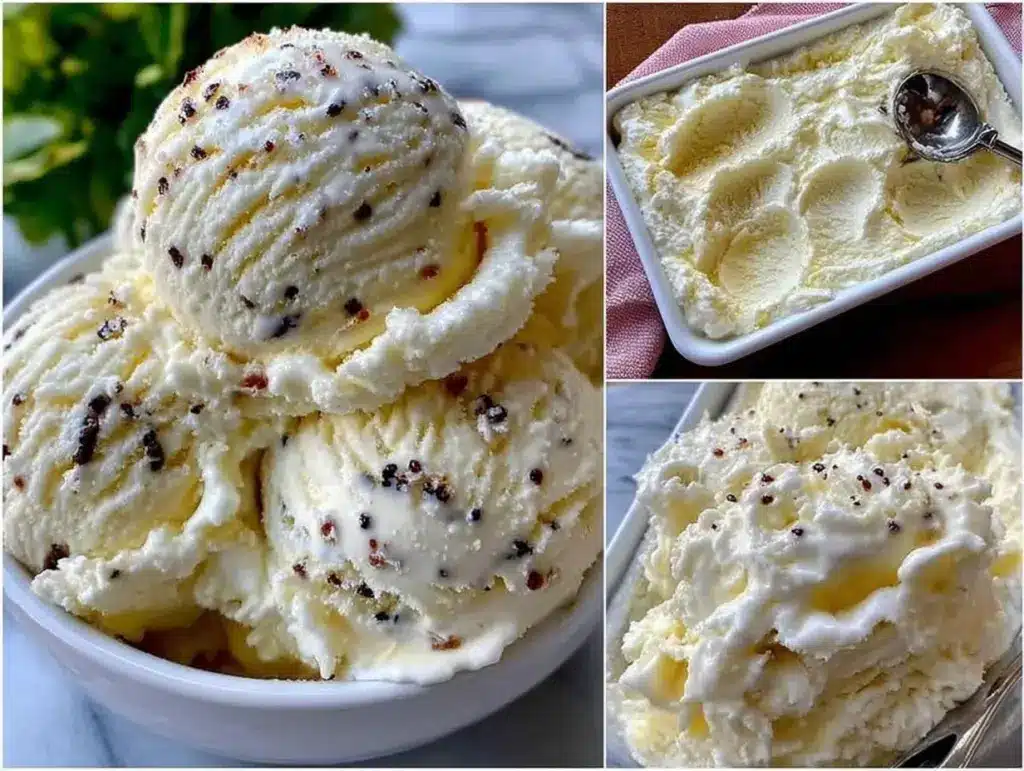
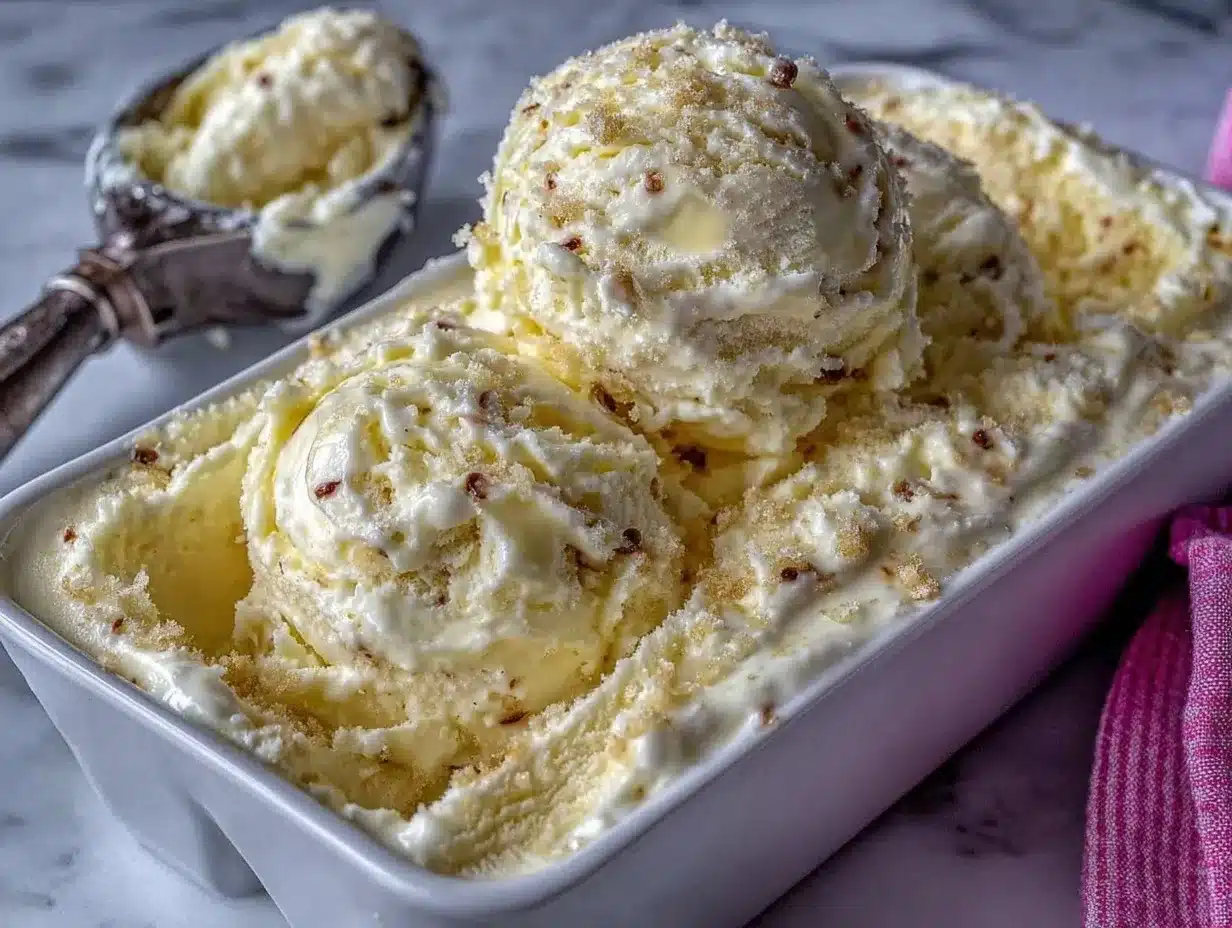
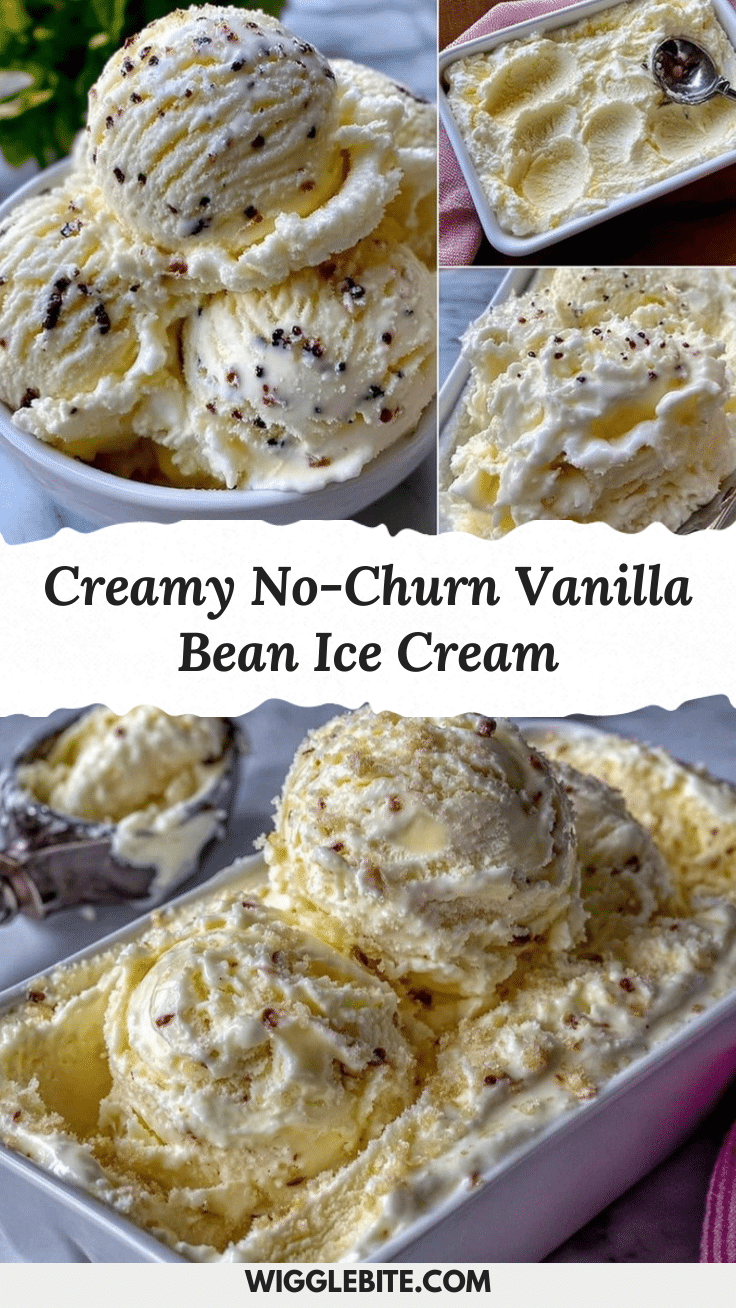
There’s something downright magical about the aroma of real vanilla bean swirling through chilled, creamy clouds. Picture this: you pull a container of homemade no-churn vanilla bean ice cream from your freezer, and as you scoop, flecks of fragrant vanilla dot the silky surface. The first spoonful is cool, luscious, and sweet—melting instantly, leaving behind that signature warmth of pure vanilla flavor. My kitchen fills with the gentle scent of sweet cream and vanilla, and honestly, it’s better than any perfume.
The first time I whipped up this creamy no-churn vanilla bean ice cream, I was searching for a simple dessert to impress my family on a sweltering summer afternoon. We were all tired, cranky, and desperate for something cold (and, let’s face it, a little fancy). I took a leap, split open a plump vanilla bean, and watched those tiny black seeds transform plain cream into something truly special. It was the kind of moment where you pause, take a deep breath, and just smile because you know you’re onto something wonderful.
Growing up, homemade ice cream was a “special occasion only” treat—mostly because we didn’t own an ice cream machine. But when I found out you could make creamy, scoopable ice cream with zero churning, it felt like a revelation. Suddenly, I could recreate those childhood summers (and sneak spoonfuls straight from the container) any time I wanted. My kids, by the way, couldn’t stop sneaking tastes off the spatula—my youngest even declared it “the best ice cream ever,” which is high praise from a picky eight-year-old.
This no-churn vanilla bean ice cream is dangerously easy, swoon-worthy, and perfect for every occasion. Whether you need a quick dessert for a potluck, a sweet treat for your kids, or a way to brighten up your Pinterest dessert board, this recipe fits the bill. I’ve tested it more times than I care to admit (in the name of research, of course), and it’s now a staple for family gatherings, gifting, and those moments when you just need a little comfort. It truly feels like a creamy, cold hug—and you’re going to want to bookmark this one.
Why You’ll Love This Creamy No-Churn Vanilla Bean Ice Cream
Let me tell you, after years of experimenting with different ice cream recipes—some successes, some, well, not so much—this one stands out for all the right reasons. It’s been tested, tweaked, and devoured by family, friends, and even my pickiest neighbors. Here’s why this easy, creamy homemade dessert will win you over:
- Quick & Easy: No ice cream machine, no eggs, no fuss. Just a bowl, a whisk, and ten minutes of prep. Perfect for last-minute cravings or busy summer afternoons.
- Simple Ingredients: You probably have everything you need on hand—nothing fancy, nothing hard to pronounce. It’s pantry-friendly, and you can find real vanilla beans at most supermarkets these days.
- Perfect for Every Occasion: Whether it’s a backyard barbecue, a birthday party, or just a Tuesday night, this no-churn vanilla bean ice cream fits right in. It’s elegant enough for guests but comforting enough for a solo treat.
- Crowd-Pleaser: I’ve served this to folks from ages two to ninety, and it always disappears in record time. The flavor is classic, and the creamy texture makes it irresistible.
- Unbelievably Delicious: Real vanilla bean gives this ice cream a rich, floral depth, while the no-churn method keeps it light and silky. It’s the kind of treat that makes you close your eyes and just savor the moment.
Now, what sets this recipe apart from the rest? For starters, using a whole vanilla bean (not just extract) delivers that signature flavor with a gorgeous visual flair—tiny specks of vanilla in every bite. And thanks to the sweetened condensed milk, you get that smooth, scoopable texture without any icy crystals or gritty bits.
More than just a dessert, this creamy no-churn vanilla bean ice cream is like a time machine—simple, nostalgic, and a little bit magical. It’s comfort food you don’t have to feel guilty about, made with real ingredients you can pronounce. Whether you’re impressing your friends, treating your kids, or just spoiling yourself, this recipe is a guaranteed hit. If you ask me, it’s the best kind of homemade treat: easy, utterly delicious, and full of memories waiting to happen.
What Ingredients You Will Need
This creamy no-churn vanilla bean ice cream recipe uses just a handful of ingredients to deliver bold vanilla flavor and a dreamy, silky texture. Most of these are simple pantry staples, and a trip to the baking aisle should cover anything you don’t have. Here’s what you’ll need:
- For the Ice Cream Base:
- Heavy whipping cream (2 cups / 480 ml) – Use cold cream straight from the fridge for best results. I love using Organic Valley or Horizon for consistently smooth texture.
- Sweetened condensed milk (1 can / 14 oz / 397 g) – This provides sweetness and keeps the ice cream soft and scoopable. Eagle Brand is always reliable.
- Vanilla bean (1 large, plump pod) – Split lengthwise and scrape out the tiny black seeds. These flecks make the ice cream look and taste gourmet. If you can’t find beans, double the extract below.
- Pure vanilla extract (1 tablespoon / 15 ml) – A touch of extract boosts the vanilla note. Nielsen-Massey is my go-to for a rich, authentic flavor.
- Pinch of salt (about 1/4 teaspoon / 1 g) – Just enough to balance the sweetness and make the vanilla pop.
- Optional Mix-Ins or Toppings:
- Mini chocolate chips (1/2 cup / 85 g) – For a classic twist
- Chopped roasted nuts (pecans, almonds, or hazelnuts; 1/2 cup / 60 g) – Adds crunch
- Fresh berries (1 cup / 150 g) – For a burst of tartness
- Caramel or fudge swirl (1/3 cup / 80 ml) – For extra decadence
Ingredient notes and swaps:
- Vanilla Bean: If vanilla beans are out of reach, use 1–2 tablespoons of vanilla bean paste or increase the extract. I’ve tried it both ways—nothing beats the real thing, but paste comes close.
- Dairy-Free: For a dairy-free version, use full-fat coconut cream (chilled and whipped) and vegan sweetened condensed coconut milk. The result is a little more tropical but still delicious.
- Sugar-Free: Try using a sugar-free condensed milk (like the one from Nature’s Charm) for a lower-carb treat.
- Mix-Ins: The base is a blank canvas—fold in cookie crumbs, swirls of jam, or even crushed candies for something different.
You don’t need fancy ingredients—just good-quality vanilla and a little patience. Trust me, this recipe is as easy as it gets, and the results are pure, creamy bliss.
Equipment Needed
- Large mixing bowl – A chilled stainless steel bowl works best for whipping cream. I sometimes stick mine in the freezer for ten minutes before starting.
- Electric hand mixer or stand mixer – Either does the trick! If you’re feeling energetic, a sturdy balloon whisk and some elbow grease will work, but your arm might get tired.
- Rubber spatula – For gently folding the whipped cream into the condensed milk mixture without losing all that lovely air.
- Measuring cups and spoons – Precision is key for perfect sweetness.
- Sharp paring knife – To split and scrape the vanilla bean.
- Loaf pan or freezer-safe container (about 9×5 inches / 23×13 cm) – Metal pans freeze fastest, but any airtight container works. I use a classic glass loaf pan lined with parchment for easy cleanup.
- Parchment paper or plastic wrap – To press on the surface and prevent freezer burn.
No ice cream machine needed! If you don’t have an electric mixer, just whisk the cream by hand (it might take a workout). Any freezer-safe container is fine—recycled yogurt tubs, bread pans, or even large glass jars. For easy scooping, keep a sturdy ice cream scoop handy and rinse it in hot water between scoops. If you want to splurge, insulated ice cream tubs keep your treat fresher for longer, but honestly, ours never lasts that long!
How to Make Creamy No-Churn Vanilla Bean Ice Cream
-
Prep Your Equipment and Ingredients (5 minutes)
- Chill your mixing bowl and beaters in the freezer for 10-15 minutes. Make sure your heavy cream is very cold.
- Gather all ingredients. Split the vanilla bean lengthwise with a sharp paring knife, then use the flat side of the blade to scrape out the tiny seeds.
-
Make the Vanilla Base (5 minutes)
- In a large bowl, combine the sweetened condensed milk, scraped vanilla bean seeds, vanilla extract, and salt. Stir until well mixed—this is where you’ll see those beautiful black flecks!
-
Whip the Cream (3–5 minutes)
- Pour 2 cups (480 ml) of cold heavy cream into the chilled mixing bowl. Using an electric mixer on medium-high speed, whip until stiff peaks form (the cream should hold its shape and not slide off the beaters).
- If whipping by hand, keep whisking until the cream is pillowy and thick—don’t over-whip, or it’ll turn grainy.
- Troubleshooting: If the cream gets lumpy or turns to butter, just start over with new cream (been there, done that!).
-
Combine and Fold (2 minutes)
- Gently spoon about one-third of the whipped cream into the vanilla base. Using a rubber spatula, fold it in to lighten the mixture.
- Add the remaining whipped cream in two more additions, folding gently until no streaks remain. The mixture should be thick, creamy, and full of visible vanilla bean specks.
- Don’t stir too aggressively—gentle folding keeps the ice cream light and airy!
-
Add Mix-Ins (Optional) (1 minute)
- If you want to add chocolate chips, nuts, or a swirl of caramel, fold them in now. I once folded in crushed Oreo cookies, and the kids went wild for it.
-
Freeze (6 hours or overnight)
- Pour the mixture into a 9×5-inch (23×13 cm) loaf pan or another freezer-safe container. Smooth the top with a spatula.
- Press a sheet of parchment paper or plastic wrap directly onto the surface to help prevent ice crystals. Cover the container tightly with a lid or foil.
- Freeze for at least 6 hours, or until firm. Overnight is even better for easy scooping.
-
Serve and Enjoy!
- Let the ice cream sit at room temperature for 5–10 minutes before scooping for the creamiest texture. Use a hot, wet scoop for picture-perfect servings (great for Pinterest snaps, by the way!).
- Scoop into bowls, cones, or straight from the pan—no judgment here!
Personal tip: Sometimes I double the batch and keep a secret stash in the back of the freezer. You never know when a vanilla ice cream craving will strike!
Pro Tips & Techniques for Perfect No-Churn Vanilla Bean Ice Cream
- Chill Everything: Cold cream, a chilled bowl, and cold beaters help whip air into the cream quickly, giving your ice cream that dreamy, scoopable texture. The one time I forgot to chill my bowl, the cream took forever to whip and the ice cream turned out a bit dense.
- Don’t Over-Whip: Stop whipping the cream as soon as stiff peaks form. Over-whipping makes the base grainy. If you accidentally go too far, fold in a bit of unwhipped cream to smooth things out.
- Use Real Vanilla: The difference between real vanilla bean and just extract is huge. Those little black vanilla specks are both beautiful and fragrant—totally worth the extra step.
- Fold, Don’t Stir: Folding in the whipped cream gently keeps the mixture light. Stirring too hard knocks out the air, leading to a heavier ice cream.
- Customize with Mix-Ins: Add your favorite cookies, nuts, or swirls after folding. I once mixed in homemade salted caramel—divine!
- Troubleshooting: If your ice cream is icy, it might have sat uncovered in the freezer or the base wasn’t fully mixed. Pressing parchment directly onto the surface helps prevent this.
- Serving Tip: Let the ice cream warm up slightly before scooping. If it’s rock-hard, a few minutes on the counter does wonders (and makes those perfect Pinterest-worthy scoops!).
- Consistency Every Time: Measure ingredients precisely, especially the condensed milk. Too much makes it overly sweet and soft, too little and it’s hard as a rock.
Honestly, I learned most of these tips the hard way—after a few gritty, icy batches and some “interesting” flavor experiments. But once you nail the basics, this recipe comes out creamy, silky, and packed with vanilla flavor every single time.
Variations & Adaptations
- Dairy-Free/Vegan: Swap heavy cream for full-fat coconut cream (chilled overnight) and use sweetened condensed coconut milk. The result is a little more tropical but still so creamy!
- Low-Sugar/Low-Carb: Use sugar-free condensed milk and add a splash of sugar-free vanilla syrup. You might need to experiment with different brands for the best texture.
- Flavor Swaps: Replace half the vanilla with almond extract for a fun twist, or fold in 1/2 cup (85 g) of mini chocolate chips for a stracciatella-style treat. Swirl in 1/3 cup (80 ml) of fruit preserves (like raspberry or blueberry) for a ripple effect.
- Seasonal Touches: In summer, fold in fresh diced strawberries or peaches. In fall, sprinkle in a little cinnamon and nutmeg for a “vanilla spice” ice cream.
- Allergy-Friendly: For nut allergies, skip any nutty mix-ins and check your extract for cross-contamination. For gluten-free, the base is naturally gluten-free—just watch out for add-ins.
- Personal Favorite: One time, I folded in crushed gingersnaps and a swirl of lemon curd—so good, and it tasted like sunshine in a scoop.
No-churn vanilla bean ice cream is a blank canvas. Let your imagination run wild! Whether you’re keeping it classic or adding a personal twist, you’ll end up with a dessert you love.
Serving & Storage Suggestions
- Serving Temperature: For the best creamy texture, let the ice cream sit at room temperature for 5–10 minutes before scooping. It softens just enough for those perfect swirls.
- Presentation Ideas: Serve in classic waffle cones, pretty glass bowls, or even sandwiched between cookies for homemade ice cream sandwiches. I sometimes top mine with a sprinkle of flaky sea salt or a drizzle of caramel for extra flair.
- Pairings: This ice cream is dreamy on its own, but it also pairs beautifully with fresh berries, fruit crisps, or warm brownies. I love a scoop alongside a hot espresso for an instant affogato.
- Storage: Store tightly covered in the freezer for up to 2 weeks. Press parchment paper or plastic wrap directly onto the surface to minimize ice crystals and keep it creamy.
- Reheating/Softening: If the ice cream is too hard, let it rest on the counter for a few minutes or microwave for 5-second bursts (be careful not to melt it!).
- Flavor Development: The vanilla flavor deepens after a day in the freezer—if you can wait that long. Honestly, it’s pretty hard not to sneak a scoop right away.
Whether you serve it in a fancy dish or straight from the pan, this no-churn vanilla bean ice cream is always a hit.
Nutritional Information & Benefits
A typical serving (about 1/2 cup / 100 g) of this creamy no-churn vanilla bean ice cream contains approximately:
- Calories: 260
- Total fat: 16g (saturated fat: 10g)
- Carbohydrates: 27g (sugars: 25g)
- Protein: 4g
- Sodium: 70mg
The main nutritional benefit comes from the use of real vanilla bean, which contains antioxidants and a natural, comforting aroma. Heavy cream provides calcium and vitamin A, while keeping things satisfyingly rich. If you need a gluten-free treat, you’re in luck—this recipe is naturally gluten-free (just check your mix-ins).
Potential allergens include dairy (cream, condensed milk) and, depending on your add-ins, nuts or gluten. From a personal wellness perspective, I love that this dessert is made from real, simple ingredients—no artificial stuff, just old-fashioned comfort in a bowl. As with all treats, moderation is key!
Conclusion
If you’re craving a creamy, dreamy homemade dessert that’s a breeze to make and guaranteed to win hearts, this no-churn vanilla bean ice cream is the way to go. It’s a recipe I return to again and again for its simplicity, classic flavor, and the way it brings everyone together—whether it’s a backyard barbecue or a cozy movie night.
Don’t be afraid to put your own spin on it! Add your favorite mix-ins, go dairy-free, or keep it classic—there’s no wrong way to enjoy this treat. Personally, I love how the vanilla bean flavor shines through and how easy it is to whip up a batch on a whim.
If you try this recipe, I’d love to hear how it turns out! Drop a comment below, share your favorite variations, or pin it to your dessert board for next time. Here’s to many scoops of happiness—one creamy, vanilla-flecked spoonful at a time.
FAQs About Creamy No-Churn Vanilla Bean Ice Cream
Can I make this ice cream without vanilla beans?
Absolutely! You can use 1–2 tablespoons of vanilla bean paste or just double the vanilla extract. The flavor will still be wonderful—just with fewer vanilla specks.
How long does no-churn ice cream last in the freezer?
It stays creamy and delicious for up to 2 weeks if tightly covered. Just press parchment paper or plastic wrap on top to keep ice crystals away.
What if I don’t have a loaf pan?
No problem! Any freezer-safe airtight container works—recycled yogurt tubs, glass storage containers, or even a cake pan.
Can I make this recipe dairy-free?
Yes! Substitute the cream with full-fat coconut cream and use sweetened condensed coconut milk. The texture will be just as creamy, with a hint of coconut flavor.
Why is my ice cream icy instead of creamy?
Usually, ice crystals form if the base isn’t fully mixed or the container isn’t sealed. Always cover the surface tightly and fold the mixture gently for the best texture.
Pin This Recipe!
No-Churn Vanilla Bean Ice Cream

This easy, creamy homemade vanilla bean ice cream requires no ice cream machine and delivers bold vanilla flavor with a dreamy, silky texture. It’s perfect for summer gatherings, family treats, or anytime you crave a classic dessert.
- Prep Time: 10 minutes
- Cook Time: 0 minutes
- Total Time: 6 hours 10 minutes
- Yield: 8 servings 1x
- Category: Dessert
- Cuisine: American
Ingredients
- 2 cups heavy whipping cream (cold)
- 1 can (14 oz) sweetened condensed milk
- 1 large vanilla bean (split and seeds scraped)
- 1 tablespoon pure vanilla extract
- 1/4 teaspoon salt
- Optional: 1/2 cup mini chocolate chips
- Optional: 1/2 cup chopped roasted nuts (pecans, almonds, or hazelnuts)
- Optional: 1 cup fresh berries
- Optional: 1/3 cup caramel or fudge swirl
Instructions
- Chill your mixing bowl and beaters in the freezer for 10-15 minutes. Make sure your heavy cream is very cold.
- Gather all ingredients. Split the vanilla bean lengthwise and scrape out the seeds.
- In a large bowl, combine sweetened condensed milk, vanilla bean seeds, vanilla extract, and salt. Stir until well mixed.
- Pour cold heavy cream into the chilled mixing bowl. Whip with an electric mixer on medium-high speed until stiff peaks form.
- Gently fold one-third of the whipped cream into the vanilla base to lighten the mixture.
- Add the remaining whipped cream in two more additions, folding gently until no streaks remain.
- If desired, fold in any mix-ins (chocolate chips, nuts, berries, caramel, etc.).
- Pour the mixture into a 9×5-inch loaf pan or freezer-safe container. Smooth the top.
- Press parchment paper or plastic wrap directly onto the surface. Cover tightly.
- Freeze for at least 6 hours or overnight until firm.
- Let the ice cream sit at room temperature for 5–10 minutes before scooping. Serve and enjoy!
Notes
For best results, chill all equipment and ingredients before starting. Use real vanilla bean for the richest flavor and beautiful specks. Fold whipped cream gently to keep the ice cream light and airy. Press parchment or plastic wrap directly on the surface to prevent ice crystals. Store tightly covered for up to 2 weeks. The base is naturally gluten-free; check mix-ins for allergens. For dairy-free, use coconut cream and sweetened condensed coconut milk.
Nutrition
- Serving Size: 1/2 cup (about 100g)
- Calories: 260
- Sugar: 25
- Sodium: 70
- Fat: 16
- Saturated Fat: 10
- Carbohydrates: 27
- Protein: 4
Keywords: no-churn ice cream, vanilla bean ice cream, homemade ice cream, easy dessert, summer treat, creamy ice cream, gluten-free dessert