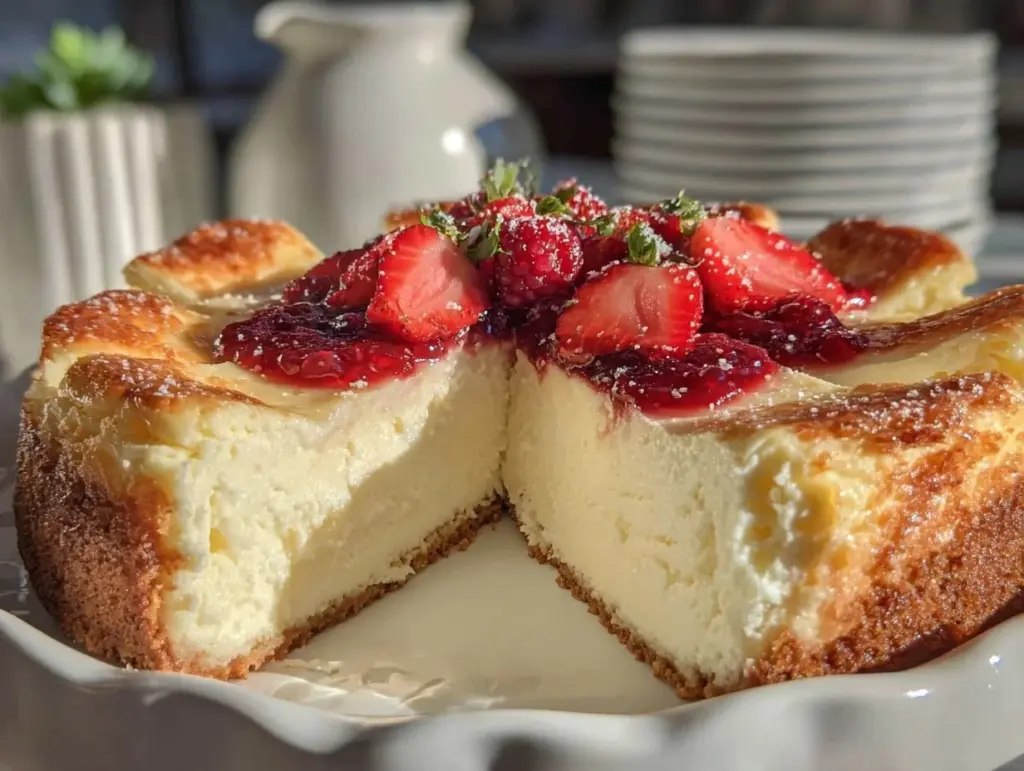
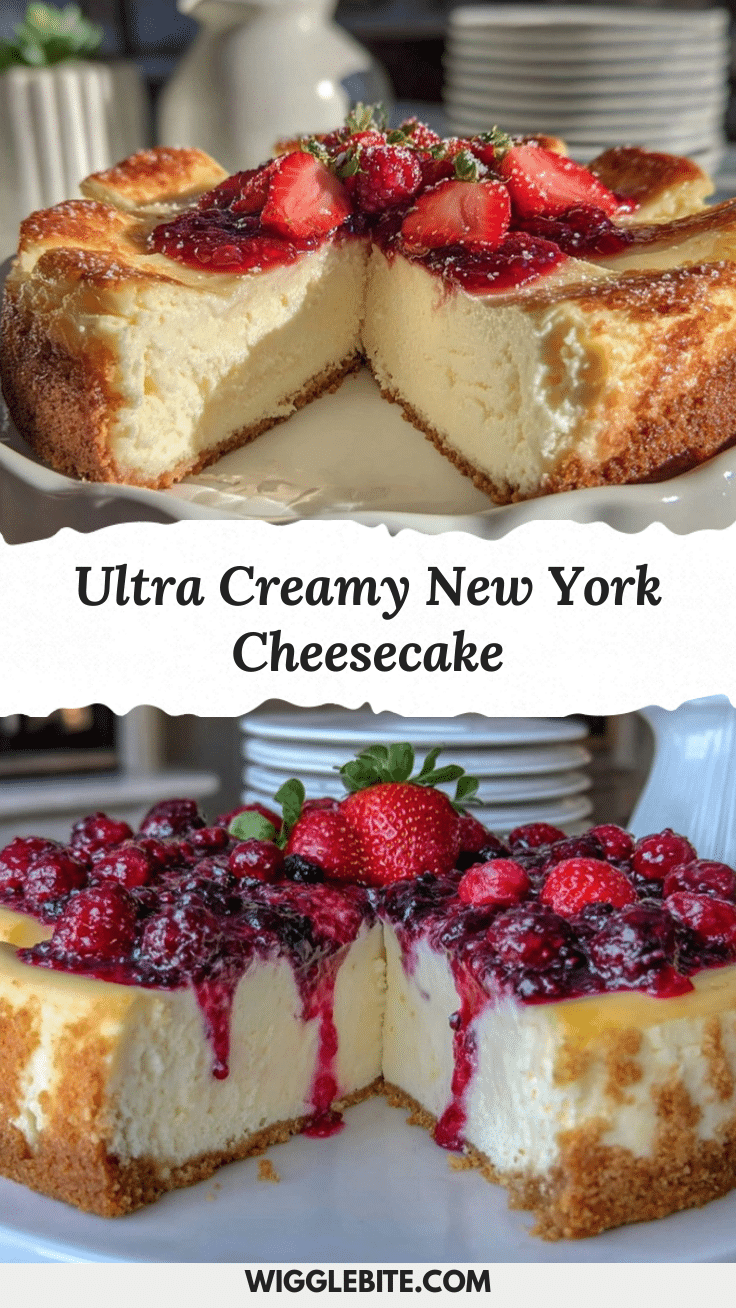
Let me set the scene: the aroma of warm, buttery graham cracker crust swirling through my kitchen, that unmistakable creamy scent promising pure indulgence. The first time I pulled my New York Style Cheesecake from the oven, I swear, the golden top had a slight jiggle that made my heart skip a beat. You know that moment when you cut into a slice, and the knife glides through like silk? That’s the kind of cheesecake we’re talking about here—velvety, rich, and impossibly smooth. Honestly, it’s hard not to feel a little giddy just thinking about it.
Years ago, when I was knee-high to a grasshopper, my grandma made cheesecakes for every birthday and holiday. She had this knack for getting the texture just right—never dry, never stodgy, always creamy. I’ve spent countless rainy weekends trying to recreate that magic, tweaking the recipe, testing different brands of cream cheese, and fussing over baking times. Let’s face it, there’s something about New York Style Cheesecake that just feels like a warm hug, straight from the oven.
My family has become cheesecake fanatics. The minute it cools, I catch them sneaking bites from the edges (and yes, I’m guilty too). It’s now my go-to for potlucks, birthday parties, or honestly, any excuse I can come up with. Every time I bring it out, people ask for the recipe. And I always laugh and say, “It’s dangerously easy—just a few pantry staples and a little patience.” If you’re searching for a crowd-pleasing dessert that brightens up your Pinterest board and delivers pure, nostalgic comfort, this creamy New York Style Cheesecake with Graham Cracker Crust is a must-try. I tested it so many times in the name of research, of course, and now it’s a staple for family gatherings, gifting, and those moments when you just need something sweet. You’re going to want to bookmark this one, trust me.
Why You’ll Love This Recipe
If you’re anything like me, you want a cheesecake that actually tastes like cheesecake—not some rubbery, dense block but a creamy, luscious slice with just the right amount of tang and sweetness. Over years of dessert-making (and plenty of taste tests), I’ve found the secrets to getting that signature New York texture. Here’s why this New York Style Cheesecake recipe is a game-changer:
- Quick & Easy: Comes together in about 30 minutes of hands-on time (plus baking), perfect for busy weeknights or last-minute celebrations.
- Simple Ingredients: You probably have everything you need—cream cheese, sugar, eggs, vanilla, and graham crackers. No fancy shopping required.
- Perfect for All Occasions: Whether it’s a birthday, potluck, holiday brunch, or just a Tuesday night, this cheesecake fits right in. It’s elegant enough for guests and familiar enough for family.
- Crowd-Pleaser: Kids love the sweet, buttery crust, adults rave about the creamy filling, and honestly, there’s never any leftovers.
- Unbelievably Delicious: The balance of tangy cream cheese, rich eggs, and a hint of vanilla is next-level comfort food. Every bite is smooth, never grainy or dry.
What sets this recipe apart is the little details: blending the cream cheese until it’s truly smooth, using full-fat dairy for richness, and baking gently in a water bath for that classic, crack-free top. I’ve tested shortcuts, swapped ingredients, and even made mini versions. This one nails it every time—never too sweet, never too heavy. It’s comfort food, but with a touch of New York sophistication. Make this for your next gathering, and watch as people close their eyes after the first bite—seriously, it’s that good. Whether you’re a cheesecake newbie or a seasoned pro, this New York Style Cheesecake will become your new favorite.
What Ingredients You Will Need
This creamy New York Style Cheesecake uses simple, classic ingredients to deliver bold flavor and that signature dense-yet-creamy texture. Most of these are pantry staples or easy to grab at any grocery store. Here’s what you’ll need:
For the Graham Cracker Crust
- Graham crackers – 2 cups (about 16 full crackers), finely crushed (classic base, I like Nabisco brand for consistency)
- Granulated sugar – 1/4 cup (adds sweetness and helps binding)
- Unsalted butter – 1/2 cup (115g), melted (for rich flavor and crisp texture)
- A pinch of salt (balances the sweetness, optional but recommended)
For the Creamy Cheesecake Filling

- Cream cheese – 32 ounces (900g), full-fat, room temperature (Philadelphia is my go-to for ultra-smooth texture)
- Granulated sugar – 1 1/4 cups (250g) (sweetens and helps structure)
- Eggs – 4 large, room temperature (adds richness and stability)
- Sour cream – 1 cup (240g), room temperature (for tang and extra creaminess)
- Heavy cream – 1/2 cup (120ml), room temperature (makes it silky and prevents dryness)
- Vanilla extract – 2 teaspoons (for that classic flavor)
- Lemon zest – 1 teaspoon (optional, but brightens up the flavor)
Optional Toppings
- Fresh berries (strawberries, blueberries, raspberries—use seasonal favorites)
- Berry compote or jam (for a sweet, fruity finish)
- Whipped cream (classic and always welcome)
If you need a gluten-free crust, swap the graham crackers for gluten-free cookies or almond flour. For dairy-free adaptations, use plant-based cream cheese and sour cream—just note, the texture will change a bit. The recipe is flexible, but quality ingredients do make a difference (trust me, I’ve tried every cream cheese out there). If you want a lighter texture, swap in Greek yogurt for sour cream. In summer, top with fresh berries. In winter, try a spiced cranberry compote. It’s the kind of recipe that lets you play around and still nails that classic cheesecake vibe.
Equipment Needed
You don’t need fancy equipment to make this New York Style Cheesecake—just a few trusty kitchen tools. Here’s what I use every time:
- 9-inch (23cm) springform pan (essential for easy release and classic cheesecake shape)
- Large mixing bowls (for crust and filling—glass or metal work fine)
- Electric mixer or stand mixer (helps get that perfectly smooth cream cheese)
- Rubber spatula (for scraping down the bowl and spreading the filling)
- Measuring cups and spoons (accuracy matters—especially for baking!)
- Aluminum foil (for wrapping the pan, prevents water from leaking in during the water bath)
- Baking sheet or roasting pan (for the water bath—it helps the cheesecake bake evenly)
- Wire cooling rack (to cool the cheesecake gently after baking)
- Sharp knife (for smooth slicing—run it under hot water for best results)
If you don’t have a springform pan, you can use a deep cake pan lined with parchment and carefully lift out the cheesecake. I’ve tried both, but springform pans make life easier. For budget-friendly options, basic mixers and foil work just fine—no need for professional-grade gear. One tip: wrap your springform pan tightly in two layers of foil to avoid any soggy crust disasters. Trust me on this one! Keep your mixer clean and dry, and it’ll last for years.
Preparation Method
- Prepare the Crust: Preheat your oven to 350°F (175°C). In a large bowl, combine 2 cups (about 16 crackers) of finely crushed graham crackers, 1/4 cup (50g) sugar, 1/2 cup (115g) melted butter, and a pinch of salt. Mix until evenly combined and the texture resembles damp sand. Press the mixture firmly into the bottom of a 9-inch (23cm) springform pan. Use the bottom of a measuring cup to pack it down tightly. Bake for 10 minutes until golden and fragrant. Cool completely while you make the filling.
- Make the Filling: In a stand mixer (or with a hand mixer), beat 32 ounces (900g) cream cheese on medium speed until completely smooth—about 3-4 minutes. Scrape down the sides often; lumps here can haunt your final texture! Add 1 1/4 cups (250g) sugar and beat again until creamy, about 2 minutes. Toss in 4 large eggs, one at a time, mixing until just blended. Overmixing at this stage can make the cheesecake dense—so keep it gentle.
- Add the Creams and Flavor: Mix in 1 cup (240g) sour cream, 1/2 cup (120ml) heavy cream, 2 teaspoons vanilla extract, and 1 teaspoon lemon zest (if using). Blend until just smooth. The mixture should look glossy and thick, with no streaks of egg or cream cheese.
- Prepare for Baking: Pour the filling over your cooled crust. Gently tap the pan on the counter to release any air bubbles. Wrap the outside of the pan tightly with two layers of foil to keep water out. Place the pan into a large roasting pan and fill the roasting pan with about 1 inch (2.5cm) of hot water—this water bath helps prevent cracks. (If you skip the water bath, be ready for a few cracks. Still delicious!)
- Bake: Bake at 350°F (175°C) for 50-60 minutes. The edges should be set, but the center will still wobble slightly when gently shaken. Don’t overbake—a little jiggle means creamy results! If the top starts to brown too quickly, tent loosely with foil.
- Cool Gradually: Once baked, turn off the oven and crack the door open. Let the cheesecake cool inside for 1 hour. This slow cooling prevents sudden temperature change, which can cause cracks.
- Chill: Transfer the pan to a wire rack and cool to room temperature. Then refrigerate at least 4 hours (overnight is best). Patience pays off—the texture gets even creamier as it sets.
- Release & Serve: Run a thin knife around the edge before removing the springform. Slice with a sharp, hot knife for clean cuts (wipe between slices). Top with berries, whipped cream, or your favorite compote.
Preparation Notes: Always use room temperature ingredients for the filling—cold cream cheese can cause lumps. If you forget, let it sit out a bit or microwave it in short bursts until soft. Watch for air bubbles in the batter; tapping the pan helps. If cracks happen, just cover with fruit or whipped cream—no one will notice. I’ve learned the hard way that rushing the cooling step leads to a cheesecake that’s more likely to crack or collapse, so take it slow. For efficiency, prep your toppings while the cheesecake chills.
Cooking Tips & Techniques
After years of trial and (sometimes hilarious) error, I can tell you a few things that truly make a New York Style Cheesecake come out perfect every time. Here’s the inside scoop:
- Room Temperature Everything: If your cream cheese or eggs are cold, you’ll get lumps. Take everything out an hour before starting. If you forget, a quick warm water bath for the eggs and a few seconds in the microwave for the cream cheese helps.
- Don’t Overmix Once Eggs Are In: Overbeating after adding eggs incorporates too much air, which can cause cracks and a soufflé-like texture. Mix gently until just combined.
- Water Bath Is Your Friend: It’s tempting to skip this, but it keeps the bake gentle and even. Double-wrap your springform pan in foil—I’ve had soggy crust disasters from leaks, and trust me, it’s not fun.
- Watch the Jiggle: The cheesecake should wobble slightly in the center when done. Don’t wait for it to set completely in the oven, or it’ll be dry.
- Slow Cooling: Letting your cheesecake cool in the oven with the door cracked reduces the risk of cracks. I used to rush this step and ended up with a cratered top, so patience really does pay off.
- Hot Knife for Slicing: For picture-perfect slices, run your knife under hot water, dry it, and wipe between cuts.
I’ve learned that multitasking here means prepping toppings while the cheesecake chills, cleaning up as you go, and setting out serving plates before slicing. Consistency comes from measuring precisely and trusting your senses—look for a glossy, creamy batter and that signature jiggle in the oven. If you ever hit a snag, a little whipped cream on top covers a multitude of baking sins!
Variations & Adaptations
New York Style Cheesecake is a classic, but you can easily change things up to suit your cravings or dietary needs. Here are some tried-and-true variations:
- Gluten-Free Option: Swap out regular graham crackers for gluten-free cookies or almond flour. The crust stays crisp, and the flavor is just as good. I’ve made this for gluten-sensitive friends, and it’s always a hit.
- Berry Swirl Cheesecake: Drop spoonfuls of berry jam or compote into the batter before baking and swirl with a knife for a fruity twist. Raspberries and blueberries work like a charm.
- Lemon or Lime Zest: Add extra citrus zest for a brighter, tangier cheesecake. This works especially well in spring and summer when fresh citrus is everywhere.
- Chocolate Cheesecake: Blend 1/2 cup (100g) melted chocolate into the filling for a decadent variation. Top with chocolate shavings or drizzle for a dessert that’s pure indulgence.
- Dairy-Free Adaptation: Use plant-based cream cheese and sour cream, plus coconut cream in place of heavy cream. The texture is a bit different—softer, slightly less dense—but still delicious.
You can also bake this in muffin tins for individual servings (reduce bake time to 20-25 minutes). For nut lovers, add crushed pecans or walnuts to the crust. I’ve experimented with almond extract instead of vanilla for a subtle twist. If you’re allergic to eggs, try an egg replacer, but be warned—the texture won’t be quite as classic. Customizing is half the fun, so don’t be afraid to tweak and make it your own!
Serving & Storage Suggestions
This cheesecake is best served chilled, straight from the fridge. I like to let it sit out for about 10 minutes before slicing—makes for cleaner cuts and softer texture. For a show-stopping presentation, add a mound of fresh berries and a dollop of whipped cream on top. A drizzle of berry compote or chocolate sauce turns each slice into a Pinterest-worthy dessert.
Pair with a cup of strong coffee, a glass of dessert wine, or even a scoop of vanilla ice cream for extra indulgence. If you’re serving at a party, pre-slice and garnish each piece so guests can grab and go. For brunch, small squares work beautifully alongside fruit salad or pastries.
Leftovers store well in the fridge for up to 5 days—just cover tightly with plastic wrap or pop into an airtight container. For longer storage, wrap individual slices and freeze up to 2 months. Thaw overnight in the fridge before serving. When reheating, use gentle heat (microwave at 50% power for 10-15 seconds per slice), but honestly, cheesecake is almost always best enjoyed cold. The flavors get richer the next day, so don’t be afraid to make ahead!
Nutritional Information & Benefits
Each slice of New York Style Cheesecake (about 1/12 of the cake) is approximately:
- Calories: 420
- Fat: 29g
- Carbohydrates: 32g
- Protein: 8g
- Sugar: 24g
Cream cheese and eggs are great sources of protein and healthy fats, providing lasting energy and satiety. Sour cream adds probiotics, while lemon zest offers a dose of vitamin C. For those watching carbs or gluten, use almond flour and sugar substitutes. This recipe contains common allergens—dairy, eggs, and wheat (unless you use gluten-free crust). I find that a small slice is plenty satisfying, making it a sensible treat. Homemade desserts like this are my favorite way to enjoy sweets without all the processed stuff.
Conclusion
If you’re searching for an easy, creamy, and classic bake, this New York Style Cheesecake with Graham Cracker Crust is truly worth trying. The crowd-pleasing flavor, silky texture, and just-right sweetness mean it’s always the first dessert to disappear at my gatherings. I love how flexible it is—perfect for customizing with seasonal fruit, chocolate, or a little citrus zing.
Honestly, this is the recipe I reach for when I want something special but don’t want to fuss. Whether you’re baking for a celebration or just need a little comfort food, it’ll never let you down. I hope you’ll give it a go, share your tweaks, and let me know how it turned out in the comments below. Bookmark it, pin it, and don’t be shy—make it your own!
Thanks for stopping by and happy baking! May your cheesecake always be creamy, your crust always crisp, and your kitchen always filled with smiles.
Frequently Asked Questions
How do I prevent my cheesecake from cracking?
Use a water bath, make sure your cream cheese is room temperature, and cool the cheesecake slowly in the oven with the door cracked. If cracks do happen, just cover with fruit or whipped cream—no one will know!
Can I make this cheesecake ahead of time?
Yes! This New York Style Cheesecake actually tastes better after chilling overnight. Make it a day ahead and keep it refrigerated until serving.
What if I don’t have a springform pan?
You can use a deep cake pan lined with parchment paper. Just lift out the cheesecake carefully after chilling. It’s a bit trickier but totally doable.
Can I freeze leftover cheesecake?
Absolutely. Wrap slices tightly in plastic wrap and freeze for up to 2 months. Thaw overnight in the fridge before enjoying.
Is there a way to make this recipe gluten-free?
Yes, just swap the graham crackers for gluten-free cookies or almond flour in the crust. The rest of the recipe is naturally gluten-free.
Pin This Recipe!
New York Style Cheesecake Recipe Easy Creamy Bake with Graham Cracker Crust
This classic New York Style Cheesecake features a rich, creamy filling atop a buttery graham cracker crust. It’s easy to make, crowd-pleasing, and perfect for any celebration or cozy night in.
- Prep Time: 30 minutes
- Cook Time: 60 minutes
- Total Time: 6 hours 30 minutes
- Yield: 12 servings 1x
- Category: Dessert
- Cuisine: American
Ingredients
- 2 cups graham crackers (about 16 full crackers), finely crushed
- 1/4 cup granulated sugar
- 1/2 cup (1 stick) unsalted butter, melted
- Pinch of salt
- 32 ounces (4 packages) full-fat cream cheese, room temperature
- 1 1/4 cups granulated sugar
- 4 large eggs, room temperature
- 1 cup sour cream, room temperature
- 1/2 cup heavy cream, room temperature
- 2 teaspoons vanilla extract
- 1 teaspoon lemon zest (optional)
- Fresh berries (optional, for topping)
- Berry compote or jam (optional, for topping)
- Whipped cream (optional, for topping)
Instructions
- Preheat oven to 350°F (175°C). In a large bowl, combine crushed graham crackers, 1/4 cup sugar, melted butter, and a pinch of salt. Mix until evenly combined and the texture resembles damp sand.
- Press the mixture firmly into the bottom of a 9-inch springform pan. Use the bottom of a measuring cup to pack it down tightly. Bake for 10 minutes until golden and fragrant. Cool completely.
- In a stand mixer or with a hand mixer, beat cream cheese on medium speed until completely smooth, about 3-4 minutes. Scrape down the sides often.
- Add 1 1/4 cups sugar and beat again until creamy, about 2 minutes.
- Add eggs one at a time, mixing until just blended. Do not overmix.
- Mix in sour cream, heavy cream, vanilla extract, and lemon zest (if using). Blend until just smooth.
- Pour the filling over the cooled crust. Gently tap the pan on the counter to release air bubbles.
- Wrap the outside of the pan tightly with two layers of foil. Place the pan into a large roasting pan and fill the roasting pan with about 1 inch of hot water.
- Bake at 350°F for 50-60 minutes. The edges should be set, but the center will still wobble slightly.
- Turn off the oven and crack the door open. Let the cheesecake cool inside for 1 hour.
- Transfer the pan to a wire rack and cool to room temperature. Refrigerate at least 4 hours, preferably overnight.
- Run a thin knife around the edge before removing the springform. Slice with a sharp, hot knife for clean cuts. Top with berries, whipped cream, or compote as desired.
Notes
Always use room temperature ingredients for a smooth filling. Don’t overmix after adding eggs to avoid cracks. A water bath helps prevent cracking and ensures even baking. Cool gradually for best texture. For gluten-free, use almond flour or gluten-free cookies for the crust. Cheesecake is best served chilled and can be made ahead or frozen.
Nutrition
- Serving Size: 1 slice (1/12 of cak
- Calories: 420
- Sugar: 24
- Sodium: 320
- Fat: 29
- Saturated Fat: 17
- Carbohydrates: 32
- Fiber: 1
- Protein: 8
Keywords: cheesecake, New York style, creamy, graham cracker crust, easy dessert, classic bake, party dessert, holiday, birthday, comfort food