“You know that feeling when you’re rummaging through your pantry late on a Wednesday night, hoping for a sweet fix, and suddenly inspiration strikes?” That’s exactly how these mint chocolate chip shamrock cookies came to be. I was actually aiming to bake a simple chocolate chip cookie, but someone (me, obviously) grabbed peppermint extract instead of vanilla. The kitchen smelled like a candy cane factory, and honestly, I was skeptical at first. But as the cookies baked, that unmistakable cool mint aroma filled the air, and I couldn’t wait to try them.
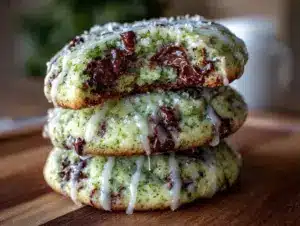
It was the afternoon of St. Patrick’s Day last year, and my neighbor, Mrs. O’Malley, popped in just as I was pulling these out of the oven. She glanced at the green glaze on top, smiled, and said, “That’s a clever twist on a classic!” I had to admit, she might be onto something. These cookies are soft, chewy, and packed with little bursts of chocolate chips, all wrapped up in a festive shamrock shape with a shiny green glaze that’s just too pretty to resist.
Maybe you’ve been there, staring at your cookie cutters wondering how to make something that feels both special and easy. These cookies have become my go-to for last-minute gatherings, and honestly, they’ve stolen the show more than once. The cracked bowl I forgot to wash before baking was the only mess I made that day, but the cookies? They were perfect. If you’re ready to make a treat that’s as fun to bake as it is to eat, let me walk you through how to make these irresistible mint chocolate chip shamrock cookies with green glaze.
Why You’ll Love This Recipe
Here’s the deal — this isn’t just another cookie recipe tossed on the internet. It’s the one I keep coming back to when I want something quick, festive, and downright delicious. After trying countless versions (some total flops, believe me), I settled on this blend that really hits all the right notes.
- Quick & Easy: From mixing to glazing, you’re looking at under an hour total. Perfect for busy weeknights or spontaneous celebrations.
- Simple Ingredients: No need for specialty shops — just pantry staples and a splash of mint extract.
- Perfect for St. Patrick’s Day or Any Festive Occasion: The shamrock shape + green glaze screams party vibes.
- Crowd-Pleaser: Kids and adults alike can’t get enough of the chewy texture and minty chocolate combo.
- Unbelievably Delicious: The chocolate chips melt just right, and that mint flavor is subtle but refreshing.
This recipe stands out because of the fresh green glaze that’s simple to whip up but adds a pop of color and sweetness that’s just right—not too overpowering. Plus, shaping the cookies into shamrocks makes baking feel like a festive event rather than a chore. Honestly, it’s the kind of recipe that makes you close your eyes and savor that first bite. Whether you’re looking to impress guests without breaking a sweat or just want a cozy treat, this one’s for you.
What Ingredients You Will Need
This recipe uses simple, wholesome ingredients to deliver bold flavor and satisfying texture without the fuss. Most are pantry staples, and the green glaze brings that festive flair without complicated steps.
- For the Cookies:
- 2 ½ cups all-purpose flour (I recommend King Arthur Flour for consistency)
- ½ teaspoon baking soda
- ½ teaspoon salt
- ¾ cup unsalted butter, softened (use Land O’Lakes for best creaminess)
- ¾ cup granulated sugar
- ½ cup light brown sugar, packed
- 1 large egg, room temperature
- 1 teaspoon pure peppermint extract (don’t substitute with oil — it’s too strong)
- 1 teaspoon vanilla extract
- 1 ½ cups mini semisweet chocolate chips (Nestlé Toll House mini chips melt beautifully)
- Green food coloring (optional, for a subtle tint in the dough)
- For the Green Glaze:
- 1 cup powdered sugar, sifted
- 2-3 tablespoons milk (use whole milk or almond milk for a dairy-free option)
- ½ teaspoon peppermint extract
- A few drops green gel food coloring (this gives the glaze a vibrant green without watering it down)
Tip: If you want a gluten-free twist, swap the all-purpose flour with a 1:1 gluten-free baking flour blend. For a dairy-free version, use coconut oil instead of butter and your favorite non-dairy milk for the glaze.
Equipment Needed
- Mixing bowls (one large for dough, one small for glaze)
- Electric mixer or stand mixer (hand mixer works too, but mixer saves your wrists!)
- Measuring cups and spoons (accurate measuring is key here)
- Rolling pin (a small one is fine; I use a silicone one that’s easy to clean)
- Shamrock cookie cutter (about 3 to 4 inches wide – Wilton makes a great set)
- Baking sheets lined with parchment paper or silicone baking mats (keeps cookies from sticking and helps with even baking)
- Cooling rack
- Small whisk or fork (for mixing the glaze)
If you don’t have a cookie cutter, you can cut shamrock shapes freehand with a knife, but honestly, the cutter makes life so much easier and the cookies look way more festive. For budget-friendly options, check thrift stores or online marketplaces for cutters and mats — they last forever if cared for properly.
Preparation Method

- Preheat your oven to 350°F (175°C) and line two baking sheets with parchment paper or silicone mats. This helps the cookies bake evenly and not stick.
- In a medium bowl, whisk together the all-purpose flour, baking soda, and salt. Set aside. This dry mix is the backbone of your cookie’s texture.
- In a large bowl, beat the softened butter with both sugars until the mixture is light and fluffy. This usually takes about 3-4 minutes with an electric mixer on medium speed — patience here pays off for that perfect chewiness.
- Add the egg, peppermint extract, and vanilla extract to the butter-sugar mix. Beat until fully combined. You’ll notice the dough smells wonderfully minty at this point.
- Gradually add the dry ingredients to the wet, mixing on low speed just until combined. Over-mixing can make cookies tough, so stop as soon as you see no more flour.
- If desired, add a few drops of green food coloring to the dough and gently mix to create a soft green hue that peeks through the chocolate chips.
- Fold in the mini chocolate chips evenly with a spatula. It’s best to do this by hand to avoid breaking the chips or overworking the dough.
- Lightly flour your work surface and rolling pin. Roll the dough out to about ¼-inch (0.6 cm) thickness. If the dough is sticky, chill it wrapped in plastic wrap for 15 minutes before rolling.
- Use the shamrock cookie cutter to cut shapes and place them about 2 inches (5 cm) apart on the prepared baking sheets.
- Bake in the preheated oven for 10-12 minutes, or until edges are just starting to turn golden. The centers might look slightly underbaked — that’s perfect for a chewy texture.
- Remove cookies from the oven and let them cool on the baking sheet for 5 minutes before transferring to a wire rack to cool completely. This prevents breakage.
- While cookies cool, prepare the glaze: whisk powdered sugar, milk, peppermint extract, and green gel food coloring in a small bowl until smooth and glossy. Adjust milk to get your desired thickness — it should be pourable but not runny.
- Once cookies are completely cool, spoon or drizzle the green glaze over the top. You can also use a small offset spatula to spread it evenly. Let the glaze set at room temperature for about 20 minutes before serving.
Pro tip: If you forget the peppermint extract at step four like I once did, don’t panic! You can mix some into the glaze for a double mint effect. Just don’t skip it completely — mint is the star here.
Cooking Tips & Techniques
One of the trickiest parts of cookie baking is getting the texture just right. I’ve learned that soft butter straight from the fridge won’t cream properly with sugar, so always let it sit out for at least 30 minutes beforehand. If your kitchen runs warm, 20 minutes in the fridge after mixing the dough helps prevent spreading.
Also, rolling the dough evenly is key — uneven thickness means some cookies will burn while others stay doughy. I like to check thickness with a ruler; ¼ inch is the sweet spot.
When baking, don’t open the oven door too often. The sudden temperature change can cause cookies to flatten or bake unevenly. If your oven runs hot, try reducing the temperature by 10°F (5°C) and adding a minute or two to baking time.
For the glaze, gel food coloring works better than liquid because it doesn’t thin out the glaze. If yours gets too runny, add a bit more powdered sugar to thicken it up.
Lastly, always cool your cookies before glazing. Warm cookies will melt the glaze, creating a mess instead of that glossy finish.
Variations & Adaptations
- Dietary Swap: Use almond flour and dairy-free butter for a gluten- and dairy-free cookie. The texture will be a bit different but still delicious.
- Flavor Twist: Add a teaspoon of finely grated orange zest to the dough for a mint-orange duo that’s surprisingly good.
- Chocolate Upgrade: Swap semisweet chips for white chocolate chips or chunks of Andes mint for an extra minty kick.
- Glaze Variations: Replace the mint extract in the glaze with lemon or lime juice and zest for a citrus green glaze that’s fresh and tangy.
- Shape Alternatives: If shamrocks aren’t your thing, heart or star-shaped cutters work just as well and look festive too.
Personally, I once tried adding crushed peppermint candies on top of the glaze before it set, and honestly, it added a nice crunch and extra mint punch. Just be sure to warn guests about the texture surprise!
Serving & Storage Suggestions
Serve these cookies at room temperature to enjoy the full flavor and chewy texture. They pair wonderfully with a hot cup of cocoa, coffee, or even a sparkling mint julep if you’re feeling fancy. Presentation-wise, stacking them on a bright green plate or wrapping them in clear cellophane tied with a ribbon makes a charming gift.
Store leftover cookies in an airtight container at room temperature for up to 4 days. If you want to keep them longer, freeze the unglazed cookies in a single layer on a baking sheet, then transfer to a freezer bag for up to 3 months. Thaw completely before glazing and serving.
Reheat briefly in a warm oven (300°F/150°C) for 3-4 minutes to bring back that fresh-baked softness. Over time, the mint flavor in the glaze develops a bit more — so these cookies actually taste better a day after baking.
Nutritional Information & Benefits
Each cookie (depending on size) contains approximately 150-180 calories, with moderate amounts of fat and sugar — so enjoy in moderation! The peppermint extract offers a refreshing breath-friendly benefit, and the chocolate chips provide antioxidants from cacao.
For those watching carbs, you can reduce sugar slightly or swap some flour for almond flour. These cookies are naturally nut-free unless you choose to add nuts as a variation.
From a wellness perspective, indulging in a small treat like this can lift your mood and make celebrations feel special — and honestly, that counts for something in self-care!
Conclusion
If you’re craving a cookie that’s festive, flavorful, and fun to make, these mint chocolate chip shamrock cookies with green glaze should be on your radar. They balance the cool, refreshing mint with melty chocolate chips and a cheerful green finish that brightens any day.
Feel free to tweak the flavors or shapes to suit your style — cooking (and baking) should be as creative as you want it to be. I love how these cookies bring a little joy and a lot of smiles to my kitchen, and I hope you’ll enjoy making and sharing them as much as I do.
Don’t forget to leave a comment below if you try them, share your own twists, or have questions. Happy baking, and may your kitchen be filled with delicious memories!
FAQs
Can I make these cookies vegan?
Yes! Use dairy-free butter and a flax egg (1 tablespoon ground flaxseed + 3 tablespoons water) instead of a regular egg, and swap milk in the glaze for a plant-based version.
How do I keep the cookies soft longer?
Store them in an airtight container with a slice of bread inside. The bread helps maintain moisture and keeps cookies chewy.
Can I use regular chocolate chips instead of mini ones?
Absolutely! Regular chips work fine, though mini chips distribute more evenly and create little pockets of chocolate throughout.
Is it okay to skip the green food coloring?
Yes, the cookies will still taste amazing without the color. The glaze’s green tint adds festivity but isn’t necessary for flavor.
Can I prepare the dough ahead of time?
Definitely! Chill the dough wrapped in plastic wrap for up to 24 hours before rolling and cutting. It actually helps develop flavor and makes rolling easier.
Pin This Recipe!
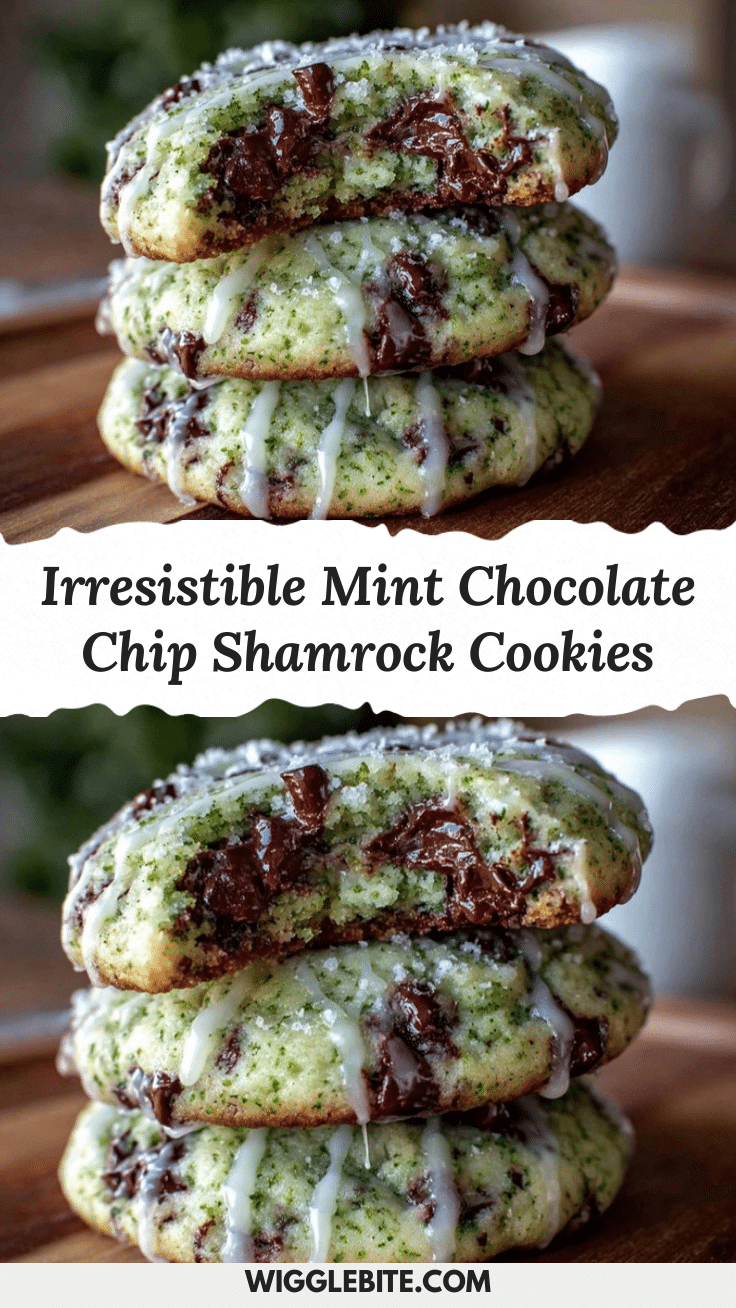
Mint Chocolate Chip Shamrock Cookies
Soft, chewy mint chocolate chip cookies shaped like shamrocks and topped with a festive green glaze. Perfect for St. Patrick’s Day or any celebration.
- Prep Time: 20 minutes
- Cook Time: 12 minutes
- Total Time: 45 minutes
- Yield: 24 cookies 1x
- Category: Dessert
- Cuisine: American
Ingredients
- 2 ½ cups all-purpose flour
- ½ teaspoon baking soda
- ½ teaspoon salt
- ¾ cup unsalted butter, softened
- ¾ cup granulated sugar
- ½ cup light brown sugar, packed
- 1 large egg, room temperature
- 1 teaspoon pure peppermint extract
- 1 teaspoon vanilla extract
- 1 ½ cups mini semisweet chocolate chips
- Green food coloring (optional)
- 1 cup powdered sugar, sifted
- 2–3 tablespoons milk (whole or almond milk)
- ½ teaspoon peppermint extract (for glaze)
- A few drops green gel food coloring
Instructions
- Preheat oven to 350°F (175°C) and line two baking sheets with parchment paper or silicone mats.
- In a medium bowl, whisk together flour, baking soda, and salt. Set aside.
- In a large bowl, beat softened butter with granulated and brown sugars until light and fluffy, about 3-4 minutes.
- Add egg, peppermint extract, and vanilla extract to the butter-sugar mixture and beat until combined.
- Gradually add dry ingredients to wet ingredients, mixing on low speed just until combined.
- If desired, add a few drops of green food coloring and gently mix to tint the dough.
- Fold in mini chocolate chips evenly with a spatula.
- Lightly flour work surface and rolling pin. Roll dough to about ¼-inch thickness. Chill dough for 15 minutes if sticky.
- Use shamrock cookie cutter to cut shapes and place 2 inches apart on baking sheets.
- Bake for 10-12 minutes until edges start to turn golden; centers may look slightly underbaked.
- Cool cookies on baking sheet for 5 minutes, then transfer to wire rack to cool completely.
- Prepare glaze by whisking powdered sugar, milk, peppermint extract, and green gel food coloring until smooth and pourable.
- Once cookies are cool, drizzle or spread glaze over the top and let set at room temperature for about 20 minutes before serving.
Notes
Use softened butter at room temperature for best creaming results. Chill dough if sticky before rolling. Gel food coloring is preferred for glaze to avoid thinning. Cool cookies completely before glazing to prevent melting. For gluten-free, substitute flour with 1:1 gluten-free blend; for dairy-free, use coconut oil and non-dairy milk.
Nutrition
- Serving Size: 1 cookie
- Calories: 165
- Sugar: 14
- Sodium: 110
- Fat: 8
- Saturated Fat: 5
- Carbohydrates: 22
- Fiber: 1
- Protein: 2
Keywords: mint chocolate chip cookies, shamrock cookies, St. Patrick's Day cookies, green glaze cookies, festive cookies, homemade cookies