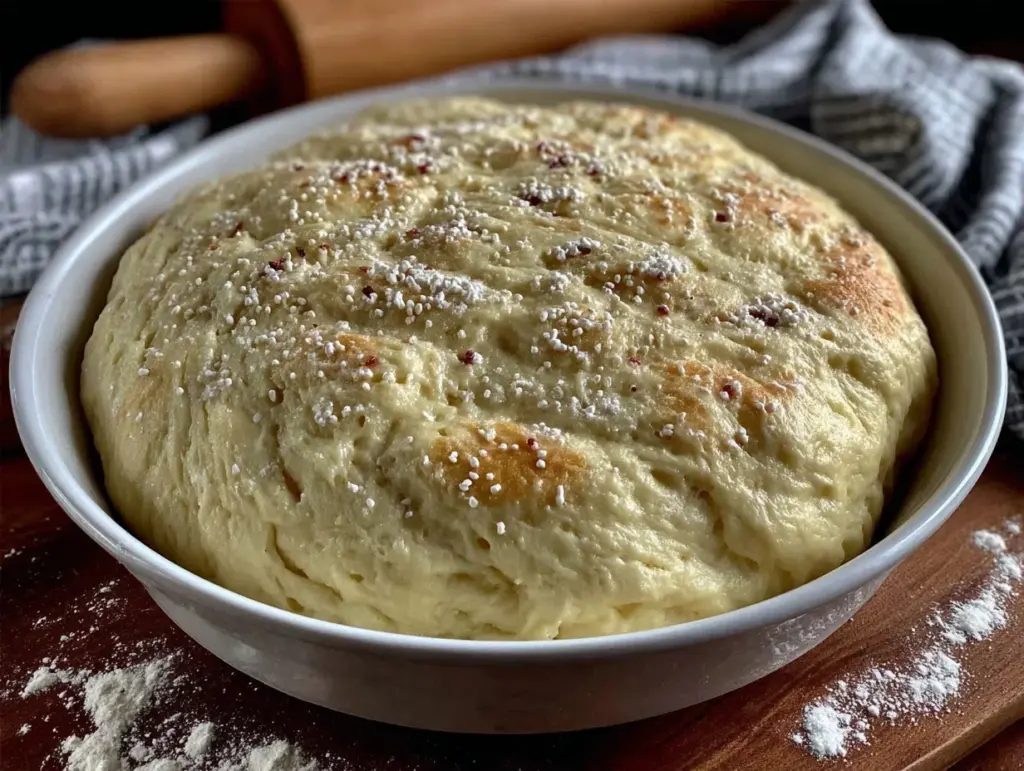
Let’s picture this: the savory, slightly yeasty aroma of homemade pizza dough rising gently in your kitchen, filling the air with pure anticipation. The first time I made this fluffy homemade pizza dough, I was hunched over my countertop, flour dust on my shirt, nervously eyeing the clock—hoping I’d have dinner on the table before my family’s “hangry” threshold hit. As soon as I pulled that golden, pillowy crust from the oven, I just stopped, closed my eyes, and grinned. The edges were crisp but chewy, the inside soft and light—honestly, it was the kind of moment where you pause, take a deep breath, and just smile because you know you’re onto something truly special.
This fluffy homemade pizza dough recipe has roots in my childhood, when my grandma would let me “help” by poking little craters into the dough (even though she’d fix them right after). Years later, after one too many disappointing delivery pizzas and failed attempts with store-bought crusts, I decided to recreate that nostalgic texture—cloudlike, but with enough chew to hold up to any topping you can imagine. If only I’d known back then how easy it could be—no overnight proofing, no fancy flours, just an hour and a bit of patience.
Now, my family can’t keep their hands off the crust before it even hits the sauce. My kids sneak bites from the edges, and my partner always insists on “testing” a corner (for quality control, naturally). Friends have requested the recipe for casual Friday nights and birthday parties, and it’s become a staple for family movie nights and impromptu get-togethers. Honestly, it’s dangerously easy—perfect for last-minute cravings, surprise guests, or just because you need a slice of comfort. You’re going to want to bookmark this one, trust me. After dozens of batches (all in the name of research, of course), I can promise this fluffy homemade pizza dough delivers every time. It’s pure, nostalgic comfort—and a warm hug in pizza form.
Why You’ll Love This Fluffy Homemade Pizza Dough Recipe
After years of trial and error in my own kitchen (and plenty of pizza disasters along the way), I’ve landed on a homemade pizza dough recipe that truly checks all the boxes. If you’re looking for a pizza crust that’s impossibly fluffy, quick to make, and foolproof—even if you’re a dough newbie—this is your new go-to. Here’s why it stands out from every other recipe I’ve tried:
- Quick & Easy: You’ll have soft, fluffy pizza dough ready for baking in about an hour—no overnight waiting, no complicated steps. Perfect for busy weeknights or those “pizza emergencies.”
- Simple Ingredients: Literally everything you need is probably in your pantry right now. No hunting for special flours or elusive Italian yeast.
- Perfect for Any Occasion: This dough shines whether you’re hosting a laid-back pizza night, feeding a crowd at a birthday bash, or whipping up a personal pie for a cozy evening in.
- Crowd-Pleaser: I’ve yet to meet someone (toddler or grandparent) who doesn’t love this crust. It’s that classic pizza shop flavor and texture, but fresher and better.
- Unbelievably Delicious: The texture is that perfect sweet spot—light, airy, and chewy, with a golden, slightly crispy bottom. It’s the kind of dough that makes you want to eat the crust first.
So what makes my homemade pizza dough recipe different? For starters, I use just the right amount of warm water to keep things hydrated but not sticky, and a gentle knead that even kids can help with. No stand mixer required (though you can use one if you’re feeling fancy). The secret is a slightly higher yeast ratio and a warm, draft-free place to let the dough puff up quickly—resulting in that signature fluffy, bakery-style crust. I’ve played with oil types, flour blends, and even oven rack positions to get it just right. Trust me, this isn’t just another basic dough—it’s my best version, and it’s been tested (and devoured) by all ages and appetites.
Honestly, this dough is about more than just pizza—it’s about those little moments of joy that come from sharing something homemade. The look on my kids’ faces when they get to stretch their own mini crusts? Priceless. It’s comfort food made simple, with a little kitchen magic and a lot of love. Give it a try and watch your pizza nights turn into something truly memorable.
What Ingredients You Will Need
This fluffy homemade pizza dough comes together with simple, everyday ingredients—no trips to specialty stores or complicated shopping lists. Each one plays an important role in creating the perfect pillowy crust, with just the right amount of chew and flavor. Here’s what you’ll need for one large (or two medium) pizzas:
- Bread flour (3 cups / 375g): Go for bread flour if you want a chewier and fluffier texture, but all-purpose flour works well too if that’s what you have on hand. (King Arthur or Gold Medal are my favorites.)
- Warm water (1 cup / 240ml, about 110°F/43°C): Just warm to the touch, not hot! This helps the yeast wake up and get bubbly.
- Active dry yeast (2¼ tsp / 7g, or one packet): Regular yeast works fine, but instant yeast shaves off a few minutes of rise time. I usually use Red Star or Fleischmann’s.
- Sugar (1 tbsp / 13g): Feeds the yeast and adds a hint of sweetness to the dough. You can swap in honey if you like.
- Olive oil (2 tbsp / 30ml): Adds flavor and keeps the dough tender. I like extra virgin for a nice aroma.
- Salt (1½ tsp / 9g): Don’t skimp on salt—it really brings out the flavor in the crust. Kosher or fine sea salt both work nicely.
- Optional: Cornmeal for dusting: Not technically in the dough, but a sprinkle on your baking sheet or pizza stone keeps the crust crisp and prevents sticking (and adds that pizzeria feel).
Ingredient tips:
- Flour: Bread flour gives you that classic, chewy texture. For a slightly softer bite, you can use half all-purpose and half bread flour.
- Yeast: If using instant yeast, you can add it straight to the flour and skip the proofing step. For active dry yeast, always dissolve it in warm water first.
- Sugar: If you prefer a savory crust, reduce to 1 tsp (4g) or skip altogether, but I find a touch makes the flavor pop.
- Oil: Avocado oil or melted butter also work for a subtle twist in flavor.
- Gluten-free option: Use a 1:1 gluten-free flour blend (like Bob’s Red Mill), but add ½ tsp xanthan gum for better structure.
- Dairy-free: This recipe is naturally dairy-free—no swaps needed!
These ingredients are pantry staples at my house, and I bet you’ve got most of them tucked away already. I’ve tested with all sorts of brands and combos, and honestly, it’s hard to mess this up. The dough is forgiving—so you can adjust for what you have, and it’ll still bake up fluffy and delicious every time.
Equipment Needed
You really don’t need a fancy setup for this homemade pizza dough. In fact, I’ve made countless batches with nothing more than a big bowl and my own two hands. Here’s what works best:
- Large mixing bowl: For combining and proofing the dough. Glass or stainless steel is easiest to clean.
- Measuring cups and spoons: Precision helps—especially with flour and water. If you have a kitchen scale, even better for accuracy.
- Wooden spoon or silicone spatula: For mixing the dough before it comes together.
- Clean kitchen towel or plastic wrap: To cover the bowl while the dough rises. (A shower cap works in a pinch!)
- Sturdy work surface: For kneading—lightly floured countertop or a large cutting board.
- Rolling pin (optional): I usually use my hands to stretch the dough, but a rolling pin gives more even results if you’re after a perfect circle.
- Baking sheet or pizza stone: Both work great. If you use a pizza stone, preheat it with the oven for a crispier crust.
- Parchment paper or cornmeal: To prevent sticking when transferring the dough.
Equipment tips: If you have a stand mixer with a dough hook, let it knead for 5 minutes on medium speed, but hand-kneading gives you more control (and a little workout). I’ve used everything from thrift-store rolling pins to wine bottles in a pinch. For cleaning sticky dough off bowls, a plastic bench scraper does wonders. And if you’re on a budget? All you truly need is a bowl, your hands, and an oven—pizza night, here you come!
How to Make Fluffy Homemade Pizza Dough (Step-by-Step)

-
Proof the yeast (5 minutes):
Pour 1 cup (240ml) warm water into your large mixing bowl. Sprinkle in 2¼ teaspoons (7g) active dry yeast and 1 tablespoon (13g) sugar. Stir gently, then let it sit for 5 minutes. You’ll see bubbles and foam forming on top—if nothing happens, your yeast might be old (start over with a new packet). -
Add oil and salt:
Mix in 2 tablespoons (30ml) olive oil and 1½ teaspoons (9g) salt. The oil gives the dough tenderness, and the salt brings out the flavor. I like to swirl them in with a wooden spoon. -
Mix in the flour:
Add 3 cups (375g) bread flour, one cup at a time. Stir after each addition until a shaggy dough forms. If the dough feels very sticky, sprinkle in another tablespoon or two (8–16g) of flour. -
Knead the dough (8–10 minutes):
Turn the dough out onto a lightly floured surface. Knead with the heels of your hands, pushing and folding, until the dough is smooth and elastic—about 8–10 minutes. It should feel soft, not sticky, and bounce back when poked. If using a stand mixer, knead with a dough hook on medium speed for 5–6 minutes.
Tip: If the dough sticks to your hands, dust with a little more flour, but don’t overdo it—too much flour = tough crust. -
First rise (30–40 minutes):
Place the dough in a greased bowl. Cover with a clean towel or plastic wrap. Set in a warm, draft-free spot (I use my oven with the light on, but turned off). Let rise for 30–40 minutes, until doubled in size. If your kitchen is cold, it might take a bit longer—give it time. -
Shape the dough:
Punch down the risen dough to release air bubbles. Turn it out onto a floured surface and shape it into a ball. Divide in half for two medium pizzas, or keep whole for one large pizza. Let rest for 5 minutes (this relaxes the gluten and makes stretching easier). -
Preheat the oven:
Heat your oven to 475°F (245°C). If you’re using a pizza stone, place it in the oven while it heats. Line a baking sheet with parchment or sprinkle with cornmeal. -
Stretch and top:
Use your hands or a rolling pin to stretch the dough to your desired thickness (about 12–14 inches for a large, 10 inches for medium). Crimp the edges for a thicker crust if you like. Transfer to your prepared pan. Add sauce, cheese, and your favorite toppings.
Warning: Don’t overload with sauce or toppings—too much moisture can make the crust soggy. -
Bake (12–15 minutes):
Bake in the preheated oven for 12–15 minutes, until the crust is golden brown and the cheese is bubbling. If baking more than one pizza, rotate halfway through for even color. -
Cool and slice:
Let your pizza rest for 2–3 minutes before slicing. This helps the cheese set and keeps your slices neat. Enjoy while warm!
Troubleshooting tips:
If your dough tears during stretching, let it rest for a few minutes—it’s probably just tense. If it feels dry, rub a little olive oil on your hands while working. And if you forget about the dough during the rise, don’t panic—a little extra time won’t hurt.
Cooking Tips & Techniques for the Fluffiest Pizza Dough
Let’s face it—dough can be intimidating. But honestly, a few tried-and-true tips make all the difference with this homemade pizza dough recipe. Here’s what I’ve learned (sometimes the hard way):
- Water temperature matters: If your water’s too hot, you’ll kill the yeast; too cold and the dough won’t rise. Aim for just warm-to-the-touch (about 110°F/43°C). I use the “baby bottle test”—if it’s comfy on your wrist, you’re good to go.
- Don’t rush the rise: I’ve tried shortcuts, and the dough always ends up flat or tough. Give it a full 30–40 minutes, or until doubled in size. If your kitchen is chilly, set the bowl near a sunny window or on top of the fridge.
- Flour, but not too much: It’s tempting to keep adding flour if the dough is sticky, but less is more. A sticky dough bakes up lighter and fluffier. Trust the process—it will smooth out as you knead.
- Hand-stretch for airiness: Rolling pins are fine, but gently stretching with your hands keeps more air in the dough. Try pressing from the center out and letting gravity help. If the dough shrinks back, let it rest a few minutes.
- Don’t overload your pizza: Too many toppings = soggy bottom (not the good kind). Less is more, especially with sauce and cheese. Save heavy toppings for after baking if you want extra crunch.
- High heat for best results: Crank your oven as hot as it’ll go (475°F/245°C or higher). A preheated pizza stone or an inverted baking sheet makes a big difference for crispy bottoms. If you want extra color, broil for the last minute—but watch closely!
- Practice makes perfect: My first pizzas were every shape but round. Keep at it—each batch gets easier, and the flavor is always worth it. The dough is forgiving, so don’t sweat the small stuff.
I’ve had dough stick, tear, and even fall on the floor (oops). But with these tips, you’ll get that fluffy, pizzeria-style crust every single time. And if you’re cooking with kids, let them help—fingerprints in the dough only add character!
Variations & Adaptations
One of my favorite things about this homemade pizza dough recipe is how easy it is to tweak for any craving or dietary need. Here are a few ways to make it your own:
- Gluten-Free Fluffy Pizza Dough: Swap the bread flour for a 1:1 gluten-free flour blend (like Cup4Cup or Bob’s Red Mill) and add ½ tsp xanthan gum. The texture will be a bit softer, but still plenty fluffy.
- Whole Wheat Crust: Substitute up to half the bread flour with white whole wheat flour for a nutty, heartier flavor. Add an extra tablespoon of water if the dough feels dry.
- Herb-Infused Dough: Stir 1 tsp each dried oregano and basil into the flour for a fragrant, Italian-inspired crust. Sometimes I toss in a pinch of garlic powder for even more flavor.
Seasonal twist: In summer, I like to brush the crust with olive oil and sprinkle with fresh rosemary before baking—pairs perfectly with garden tomatoes and mozzarella.
Different baking methods: For a grill-fired pizza, lightly oil your grill grates, stretch the dough thin, and cook over medium-high heat for 2–3 minutes per side before topping. For a crispier crust, par-bake the dough for 5 minutes before adding sauce and toppings.
Allergen-friendly swaps: This dough is naturally dairy- and nut-free. For egg allergies (some pizza doughs use eggs), you’re safe here. For a lower-carb version, sub in part almond flour (about ½ cup/60g) and reduce water slightly—it’s not quite as fluffy, but still tasty.
Personally, my favorite spin is a garlic-parmesan crust—just brush the edges with melted butter and sprinkle with grated cheese before baking. It’s always a hit!
Serving & Storage Suggestions
Here’s how to get the most out of your fluffy homemade pizza dough—whether you’re serving a crowd or saving leftovers for a midnight snack.
- Serving: Pizza is best enjoyed hot from the oven. Let it cool for a few minutes to set the cheese, then slice and serve. I love a sprinkle of fresh basil or chili flakes for a little extra flair.
- Presentation: For that “Pinterest-worthy” look, drizzle with a little olive oil and scatter fresh herbs on top. Serve on a wooden board or pizza peel for extra rustic charm.
- Beverage pairings: Try with a light red wine, sparkling water, or a crisp lemonade for family-friendly vibes.
- Storage: Leftover dough can be wrapped tightly and stored in the fridge for up to 2 days. Let it come to room temp before stretching. Baked pizza keeps in an airtight container in the fridge for 3–4 days.
- Freezing: For make-ahead convenience, wrap the dough (after the first rise) in plastic wrap and freeze for up to 2 months. Thaw overnight in the fridge, then let rise at room temp before using.
- Reheating: Warm leftover slices in a hot skillet or toaster oven for a crispy bottom. The microwave works in a pinch, but you’ll lose some crunch.
- Flavor development: The dough’s flavor actually improves after a night in the fridge. If you want a tangier, chewier crust, let it cold-proof for up to 24 hours (but it’s not necessary for great results).
Nutritional Information & Benefits
Here’s a general estimate for one slice (1/8 of a large pizza) of this fluffy homemade pizza dough, crust only (toppings not included):
- Calories: ~140
- Fat: 2g
- Carbohydrates: 26g
- Protein: 4g
- Sodium: 220mg
This recipe is naturally dairy-free and nut-free. For a gluten-free version, use a certified GF flour blend. The olive oil adds heart-healthy fats, and using whole-wheat flour boosts fiber and nutrients. Pizza dough can fit into a balanced diet—especially when paired with veggie toppings and lean proteins. As always, check ingredient labels if you have allergies or dietary needs. In my own kitchen, I love knowing exactly what’s in my crust—no preservatives, just simple, wholesome ingredients you can feel good about.
Conclusion
So, why should you give this fluffy homemade pizza dough recipe a try? Because it’s easy, fast, and absolutely delicious—delivering that classic pizzeria flavor and texture right in your own kitchen, any night of the week. With just a handful of pantry staples and about an hour, you’ll have a crust that’s light, airy, and ready for all your favorite toppings.
Don’t be afraid to put your own spin on it—try different herbs, swap flours, or experiment with sauces and cheeses. I love this recipe because it brings people together and makes pizza night feel like a special occasion (even if it’s just a Tuesday). If you make this dough, let me know how it goes! Drop a comment, share your photos, or tell me what wild topping combos you try next.
From my kitchen to yours—happy pizza making! I hope this becomes a staple in your home, just like it has in mine.
Frequently Asked Questions
How long does it take to make this homemade pizza dough from start to finish?
From mixing to baking, you’ll need about an hour—5 minutes for mixing, 10 minutes for kneading, 30–40 minutes for rising, and 12–15 minutes for baking. It’s quick enough for a weeknight dinner!
Can I freeze this pizza dough?
Absolutely! After the first rise, wrap the dough tightly in plastic wrap and freeze for up to 2 months. Thaw overnight in the fridge, then let it come to room temp and rise before using.
What if my dough doesn’t rise?
Check your yeast—it might be expired or the water may have been too hot or cold. Try again with fresh yeast and warm (not hot) water. Make sure your dough is in a warm spot for rising.
Can I make this dough gluten-free?
Yes! Substitute the bread flour for a gluten-free 1:1 blend and add ½ tsp xanthan gum. The crust will be a bit softer but still delicious and fluffy.
Why is my crust not fluffy?
If your crust turns out flat, it’s usually from under-kneading, using old yeast, or not letting it rise long enough. Next time, knead until smooth and elastic, use fresh yeast, and don’t rush the proofing stage.
Pin This Recipe!

Homemade Pizza Dough Recipe Easy Fluffy Crust Ready in 1 Hour
This homemade pizza dough yields a fluffy, chewy, and golden crust in just one hour. It’s easy, foolproof, and perfect for pizza nights, parties, or last-minute cravings.
- Prep Time: 15 minutes
- Cook Time: 15 minutes
- Total Time: 1 hour
- Yield: 1 large pizza or 2 medium pizzas (8 servings) 1x
- Category: Main Course
- Cuisine: Italian
Ingredients
- 3 cups bread flour (375g) or all-purpose flour
- 1 cup warm water (240ml, about 110°F)
- 2¼ teaspoons active dry yeast (7g, or one packet)
- 1 tablespoon sugar (13g) or honey
- 2 tablespoons olive oil (30ml)
- 1½ teaspoons salt (9g)
- Optional: Cornmeal for dusting
Instructions
- Pour 1 cup warm water into a large mixing bowl. Sprinkle in yeast and sugar, stir gently, and let sit for 5 minutes until bubbly and foamy.
- Mix in olive oil and salt with a wooden spoon.
- Add bread flour one cup at a time, stirring after each addition until a shaggy dough forms. If sticky, add 1-2 tablespoons more flour.
- Turn dough onto a lightly floured surface and knead for 8–10 minutes until smooth and elastic. (Or knead with a stand mixer and dough hook for 5–6 minutes.)
- Place dough in a greased bowl, cover with a towel or plastic wrap, and let rise in a warm spot for 30–40 minutes until doubled.
- Punch down dough, turn onto a floured surface, and shape into a ball. Divide for two medium pizzas or keep whole for one large. Let rest for 5 minutes.
- Preheat oven to 475°F (245°C). If using a pizza stone, place it in the oven. Line a baking sheet with parchment or sprinkle with cornmeal.
- Stretch dough by hand or with a rolling pin to desired thickness (12–14 inches for large, 10 inches for medium). Crimp edges if desired. Transfer to prepared pan and add sauce, cheese, and toppings.
- Bake for 12–15 minutes until crust is golden and cheese is bubbling. Rotate pizzas halfway if baking more than one.
- Let pizza rest for 2–3 minutes before slicing and serving.
Notes
For gluten-free dough, use a 1:1 gluten-free flour blend and add ½ tsp xanthan gum. For whole wheat, substitute half the flour with white whole wheat and add extra water if needed. Hand-stretching keeps the dough airy. Don’t overload with toppings to avoid soggy crust. Dough can be refrigerated for up to 2 days or frozen for up to 2 months after the first rise.
Nutrition
- Serving Size: 1 slice (1/8 of a la
- Calories: 140
- Sugar: 1
- Sodium: 220
- Fat: 2
- Saturated Fat: 0.3
- Carbohydrates: 26
- Fiber: 1
- Protein: 4
Keywords: pizza dough, homemade pizza, fluffy crust, easy pizza dough, quick pizza dough, bread flour pizza, weeknight pizza, dairy-free pizza, nut-free pizza, pizza night