Let me just say, the aroma of rich chocolate wafting through my kitchen when these fudgy homemade brownies are baking is pure magic. There’s something about the deep, buttery scent mixing with cocoa that stops you in your tracks—it’s almost impossible not to hover by the oven, counting down the minutes. And the first time I pulled out a pan of brownies with those perfect glossy, crinkled tops, it was a moment of true discovery. I was instantly hooked (and honestly, a little proud). You know that feeling when the anticipation builds, you take a deep breath, and realize you’ve stumbled onto something that deserves a permanent spot in your family’s recipe box?
These brownies aren’t just a sweet treat—they’re a piece of my childhood. I remember my grandma letting me lick the spoon (back when I was knee-high to a grasshopper), and how the whole house would hum with excitement when brownies were in the oven. Years ago, I started tinkering with recipes, trying to recreate that nostalgic comfort but with a grown-up twist. I wish I’d discovered this exact method years ago, trust me—it would’ve saved me a lot of mediocre brownie batches!
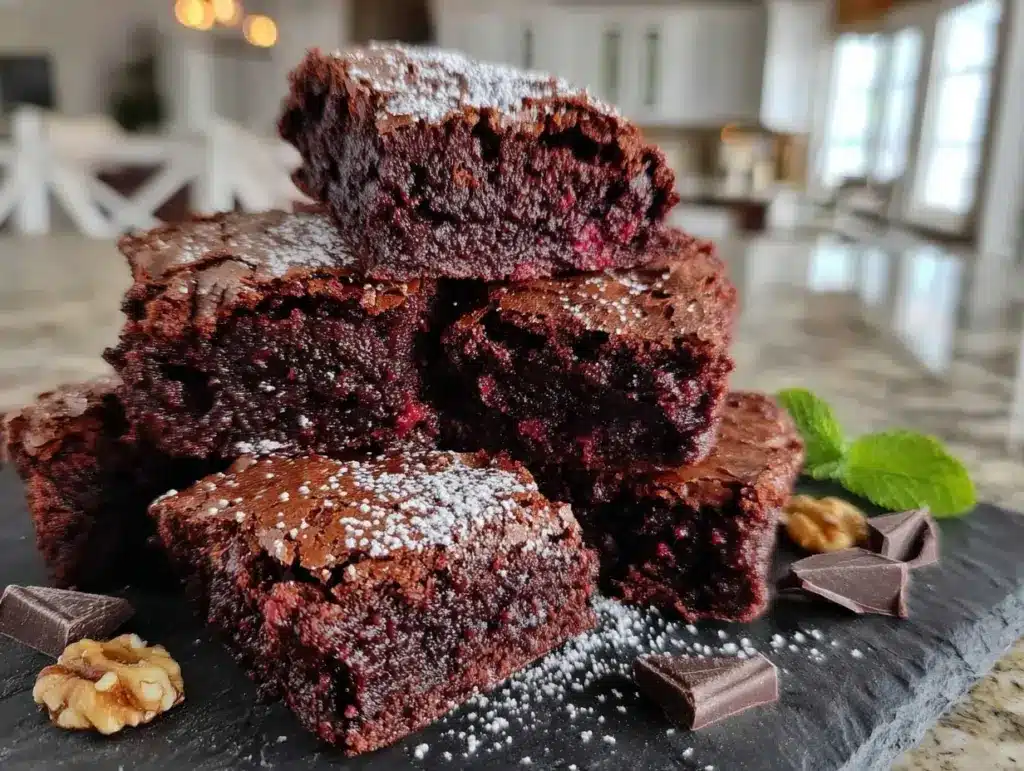
Family gatherings, bake sales, or even just a rainy weekend—these brownies always steal the show. My kids can’t stop sneaking them off the cooling rack (and honestly, neither can my husband). The glossy, crinkled tops are almost hypnotic, and every bite is dense, fudgy, and outrageously chocolatey. It’s dangerously easy to whip up a pan, making them perfect for potlucks, midnight cravings, or when you want to brighten up your Pinterest cookie board. This recipe became my go-to after countless rounds of “research” (you know, for science), and now it’s a staple for gifting, sharing, and those moments when only chocolate will do.
Honestly, these fudgy homemade brownies with glossy crinkled tops feel like a warm hug, and you’re going to want to bookmark this one. You’ll see—one bite, and you’ll know you’ve found something special.
Why You’ll Love This Fudgy Homemade Brownies Recipe
- Quick & Easy: These brownies come together in under 45 minutes (including bake time). Perfect for busy weeknights or last-minute chocolate emergencies.
- Simple Ingredients: No need for a fancy grocery list. If you’ve got cocoa powder, butter, and sugar, you’re halfway there—no chocolate bars required!
- Perfect for All Occasions: Whether it’s brunch, potluck, birthday parties, or holiday mornings, these brownies fit right in.
- Crowd-Pleaser: Kids and grown-ups devour these. Expect rave reviews and a request for your “secret” recipe.
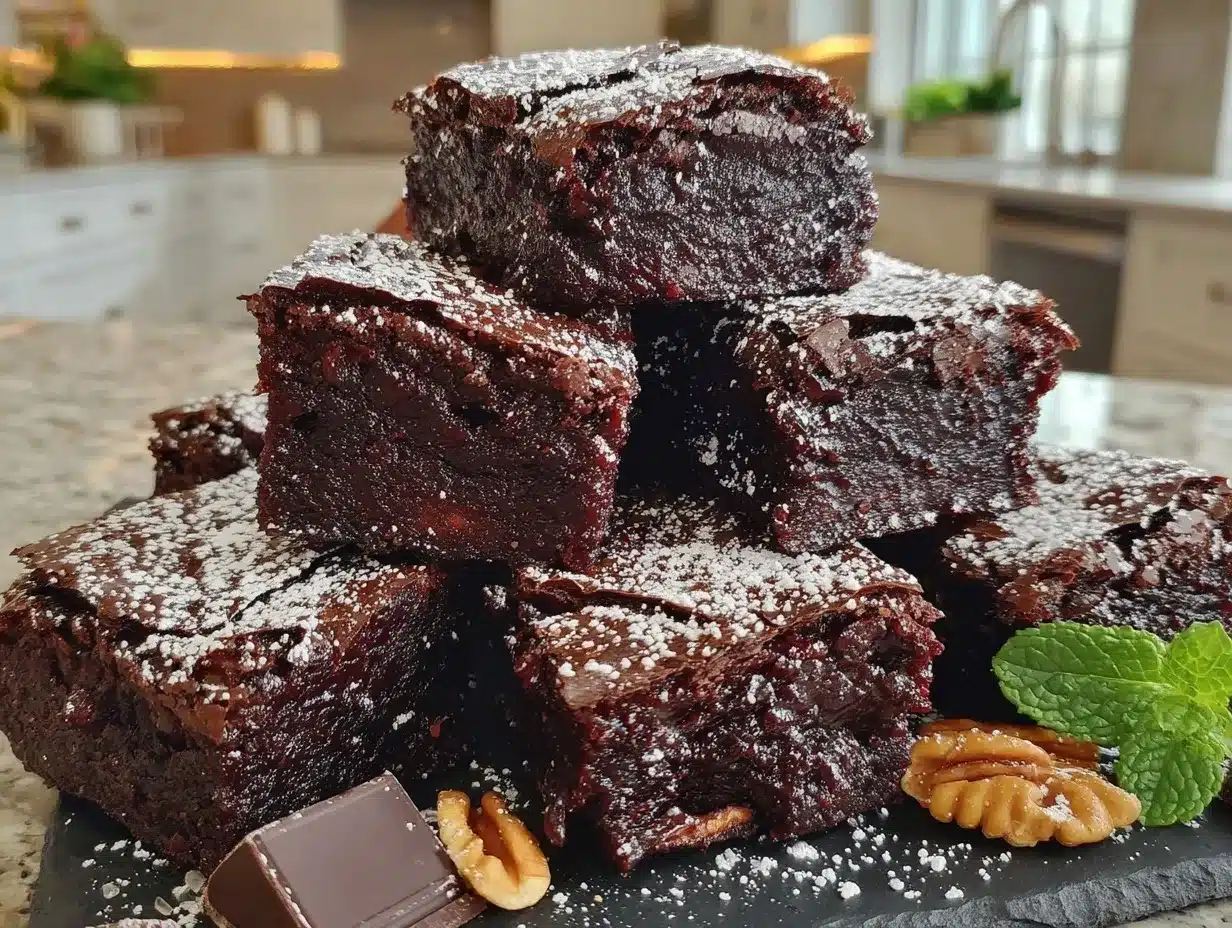
- Unbelievably Delicious: The fudgy middle and shiny, crinkled tops deliver that classic bakery-style treat with a homemade twist.
What sets these brownies apart? It’s all in the technique and ingredients. Whisking the eggs and sugar just enough creates those signature crinkled tops, while using both melted chocolate and cocoa powder gives you double the chocolate flavor. There’s no cakey disappointment here—just chewy edges, gooey centers, and that perfect crackly crust. I tested this recipe more times than I care to admit (all in the name of getting it just right), and every time that first bite makes me close my eyes and smile. It’s comfort food with a little bit of nostalgia and a whole lot of chocolate.
If you’re looking to impress guests without any stress—or just want to turn a simple weeknight into something memorable—this fudgy homemade brownies recipe is your answer. Trust me, once you try it, you’ll never reach for a box mix again.
What Ingredients You Will Need
This recipe uses straightforward, wholesome ingredients to deliver that bold, classic brownie flavor and texture without fuss. Most of these are pantry staples, and a few simple swaps can make them fit any dietary need.
- For the Brownie Batter:
- 1/2 cup (115g) unsalted butter, melted (adds richness; use plant-based butter for dairy-free)
- 3/4 cup (150g) granulated sugar
- 1/4 cup (55g) light brown sugar (for chewiness and a hint of caramel)
- 2 large eggs, room temperature (essential for glossy, crinkled tops)
- 1 tsp pure vanilla extract (I love Nielsen-Massey for flavor depth)
- 1/2 cup (60g) unsweetened cocoa powder (Dutch-process or natural—both work; I prefer Ghirardelli)
- 1/2 cup (90g) semi-sweet chocolate chips (melted for extra fudginess; Guittard is my go-to)
- 1/4 tsp fine sea salt (balances the sweetness; don’t skip this!)
- 2/3 cup (85g) all-purpose flour (King Arthur gives great texture; use gluten-free blend if needed)
- Optional Add-Ins:
- 1/2 cup (60g) chopped walnuts or pecans (for crunch—toast them for extra flavor)
- 1/3 cup (55g) extra chocolate chunks or chips (for chocolate lovers)
Ingredient Tips: Room temperature eggs make a big difference for getting those shiny tops and chewy texture. If you want a deeper chocolate flavor, try combining natural and Dutch cocoa. For a gluten-free option, swap the flour for almond flour or a certified gluten-free blend (Bob’s Red Mill is reliable).
Substitutions: You can use coconut oil instead of butter for a dairy-free version—just expect a slightly different flavor. For a lower-sugar option, substitute half the granulated sugar with a stevia blend, but the texture may change a bit. If you’re out of chocolate chips, chopped chocolate bars work in a pinch (they melt even silkier).
Seasonal Swap: In summer, add a handful of fresh raspberries to the batter for a fruity twist. During the holidays, a sprinkle of crushed peppermint candies on top is a festive touch.
Equipment Needed
- 8×8-inch (20x20cm) square baking pan (metal pans give the best chewy edges; glass pans work but may need a few extra minutes baking)
- Mixing bowls (one medium for wet, one small for dry)
- Whisk (for eggs and sugar; a hand mixer is fine too, but don’t overmix)
- Rubber spatula (for folding in the flour and scraping the bowl clean)
- Measuring cups and spoons (accuracy matters for brownies!)
- Parchment paper (makes lifting out brownies a breeze; foil works in a pinch, but I prefer parchment for easy cleanup)
- Small saucepan or microwave-safe bowl (for melting chocolate and butter together)
If you don’t have an 8×8 pan, a 9×9 will do—just reduce baking time by a few minutes. I’ve tried all sorts of pans, but metal always gives that classic, chewy edge. Don’t forget to check your oven temperature with an inexpensive thermometer—brownies are picky about heat!
For maintenance, wash mixing bowls and spatulas right away to avoid sticky batter crust. If you’re on a budget, dollar store measuring cups work just fine. Honestly, brownies don’t judge your equipment (just your technique!).
Preparation Method
- Preheat your oven: Set it to 350°F (175°C). Line your 8×8-inch pan with parchment paper, leaving a little overhang for easy lifting—trust me, this is a lifesaver when it’s time to cut.
- Melt the butter and chocolate chips: In a small saucepan over low heat, melt 1/2 cup (115g) unsalted butter and 1/2 cup (90g) semi-sweet chocolate chips together, stirring until smooth. (You can use a microwave-safe bowl and heat in 20-second bursts, stirring between each.) Let cool for 2-3 minutes. The mixture should be glossy and silky, but not hot to the touch.
- Mix the sugars and eggs: In a medium bowl, whisk together 3/4 cup (150g) granulated sugar, 1/4 cup (55g) brown sugar, and 2 large eggs. Whisk vigorously for about 1-2 minutes—this is what gives you those shiny, crinkled tops. The mixture should turn pale and slightly thick.
- Add vanilla and salt: Whisk in 1 tsp vanilla extract and 1/4 tsp fine sea salt. (If you love a little extra flavor, add a pinch more vanilla.)
- Combine chocolate mixture: Pour the cooled butter-chocolate mixture into the egg-sugar mixture, whisking gently until fully combined. The batter will look rich and dark—don’t be tempted to taste just yet!
- Sift dry ingredients: Over a small bowl, sift 1/2 cup (60g) cocoa powder and 2/3 cup (85g) all-purpose flour together. Sifting helps avoid lumps and keeps the brownies fudgy. (Don’t skip this step—lumpy cocoa is a bummer!)
- Fold in dry ingredients: Using a rubber spatula, gently fold the flour-cocoa mixture into the wet ingredients. Mix just until you see no streaks—over-mixing will make brownies tough. The batter should be thick and glossy.
- Add-ins (optional): Fold in 1/2 cup (60g) chopped walnuts or extra chocolate chips if you like. For a fruity twist, gently fold in a handful of fresh raspberries.
- Pour and spread: Scrape the batter into your prepared pan, smoothing it out with a spatula. Tap the pan gently on the counter to release air bubbles.
- Bake: Slide the pan into the oven and bake for 28-32 minutes. Check at 28 minutes—insert a toothpick in the center. If it comes out with moist crumbs (not wet batter), it’s perfect. If you like super gooey brownies, err on the shorter side.
- Cool: Let brownies cool in the pan on a wire rack for at least 20 minutes (toughest part, I know). Lift out using the parchment overhang and place on a cutting board.
- Slice and enjoy: For clean edges, use a sharp knife cleaned between cuts. The top should be glossy and crinkled, and the inside fudgy and dense.
Troubleshooting: If your brownies aren’t crinkled on top, try whisking the eggs and sugars longer next time. If the center is too gooey, bake 2-3 minutes longer. For dry brownies, check oven temp—overbaking is the usual suspect. My biggest tip: underbake just slightly, then let them cool completely for the best texture.
Cooking Tips & Techniques
After dozens of brownie batches (some a little too dry, others a gooey mess), I’ve picked up a few tricks you’ll want to keep in your back pocket:
- Don’t Overmix: Once you add flour, fold gently. Overmixing means cakey brownies—not what we’re here for.
- Whisk Eggs and Sugar Well: This step is crucial for those shiny, crinkly tops. Don’t rush it—two minutes of whisking is worth every second.
- Melting Chocolate: Use low heat or short microwave bursts. If it gets too hot, it can seize or separate. Let it cool before mixing with eggs, or you’ll scramble them (I’ve learned that the hard way!).
- Check Early: Ovens vary. Start checking brownies a couple of minutes before the shortest suggested time. A toothpick with moist crumbs means fudgy perfection.
- Cool Completely: I know, patience isn’t easy. But brownies firm up as they cool—cutting them hot leads to messy, mushy pieces.
- Clean Knife Between Cuts: For Pinterest-worthy squares, wipe your knife after each slice. It’s a small extra step, but your brownies will look bakery-perfect.
I’ve burned a batch or two by forgetting to set a timer (rookie mistake). Now, I always use my phone as a backup alarm. Also, if you’re multitasking, prep all ingredients before you start—brownie batter doesn’t wait around for missing eggs!
Consistency comes down to whisking, gentle mixing, and watching your oven like a hawk the last few minutes. Trust your senses—the smell, the look of the crinkled top, and a gentle jiggle in the pan are all clues you’re on the right track.
Variations & Adaptations
- Gluten-Free: Swap the all-purpose flour with almond flour or a 1:1 gluten-free baking blend. Texture will be a tad lighter, but still fudgy and delicious.
- Dairy-Free: Use coconut oil or plant-based butter, and a dairy-free chocolate chip brand (Enjoy Life is a good pick). The result is surprisingly rich, with a slight coconut flavor.
- Flavor Twists: Add 1/2 tsp espresso powder for deeper chocolate flavor. Or swirl in 2 tbsp peanut butter before baking for a nutty kick.
- Seasonal Mix-ins: Fresh berries in spring, crushed candy canes in winter, or a sprinkle of sea salt flakes before baking for a gourmet touch.
- Different Pans: Double the recipe for a 9×13-inch pan—just add 5-8 minutes to the bake time. For brownie bites, use a mini muffin tin and bake only 12-15 minutes.
I’ve tried adding a caramel swirl (just dollop and swirl with a knife before baking)—it’s sticky, gooey, and totally decadent. For nut-free brownies, just skip the nuts and add extra chocolate chips. These brownies are endlessly customizable, so don’t be afraid to play around and make them yours.
Serving & Storage Suggestions
Serve these brownies slightly warm for maximum gooeyness, or chilled for a dense, chewy bite. Honestly, they’re good at any temperature! For a pretty presentation, dust with powdered sugar or top with a scoop of vanilla ice cream.
- Pairing Ideas: Enjoy with a glass of cold milk, hot coffee, or even a fruity iced tea. These brownies sit perfectly beside fresh berries or whipped cream if you’re feeling fancy.
- Storing: Store leftovers in an airtight container at room temperature for up to 4 days. For longer storage, freeze individually wrapped squares for up to 2 months. Thaw at room temp or microwave for 10-15 seconds.
- Reheating: Pop in the microwave for 10-20 seconds for that just-baked warmth. They also reheat well in a low oven (300°F/150°C) for about 5 minutes.
- Flavor Develops: Brownies get even fudgier by the next day as the flavors settle. If you can resist, let them sit overnight—trust me, it’s worth it.
Nutritional Information & Benefits
Each brownie (assuming 16 squares) is about 180 calories, with 9g fat, 24g carbs, and 2g protein. Chocolate provides antioxidants, and using nuts adds healthy fats. Swapping to almond flour makes these gluten-free and boosts the protein a bit.
This recipe does contain dairy, eggs, and gluten unless adapted. For nut allergies, skip nuts entirely—the brownies are plenty rich on their own. If you’re watching sugar, reduce sugar by 1/4 cup without losing too much moisture.
From a personal wellness perspective, I see these brownies as an occasional treat—something to savor and share. With real ingredients and simple swaps, you can fit them into most diets with a little tweaking.
Conclusion
These fudgy homemade brownies with glossy crinkled tops are honestly everything you want in a chocolate treat. They’re simple, reliable, and taste like pure comfort. Whether you serve them at a birthday party or sneak a square after dinner, they’re guaranteed to make people smile.
Don’t be afraid to switch up the mix-ins or play with flavors—brownies are forgiving, and your perfect version is out there. I make this recipe every time I want something decadent but easy, and it never disappoints. There’s just something about that shiny top and dense middle that feels like a celebration.
If you try these brownies, let me know in the comments how they turned out! Share your tweaks, your family’s feedback, or even a fun serving idea. Bookmark the recipe, pin it for later, and spread the chocolate love. Happy baking!
Frequently Asked Questions
How do I get glossy, crinkled tops on my brownies?
The key is whisking the eggs and sugars vigorously for 1-2 minutes. This creates a shiny crust as the sugar dissolves and caramelizes during baking.
Can I make these fudgy homemade brownies gluten-free?
Absolutely! Use a 1:1 gluten-free flour blend or almond flour for a gluten-free version. The texture will be a little lighter but still deliciously fudgy.
Why do my brownies turn out cakey instead of fudgy?
Cakey brownies happen when you overmix after adding the flour or bake too long. Fold gently and bake just until a toothpick comes out with moist crumbs.
Can I freeze these brownies?
Yes! Wrap individual squares tightly in plastic wrap and freeze for up to two months. Thaw at room temperature or reheat briefly in the microwave.
What’s the best way to cut brownies cleanly?
Let them cool completely, then use a sharp knife cleaned between each cut. For extra clean edges, chill the brownies in the fridge before slicing.
Pin This Recipe!
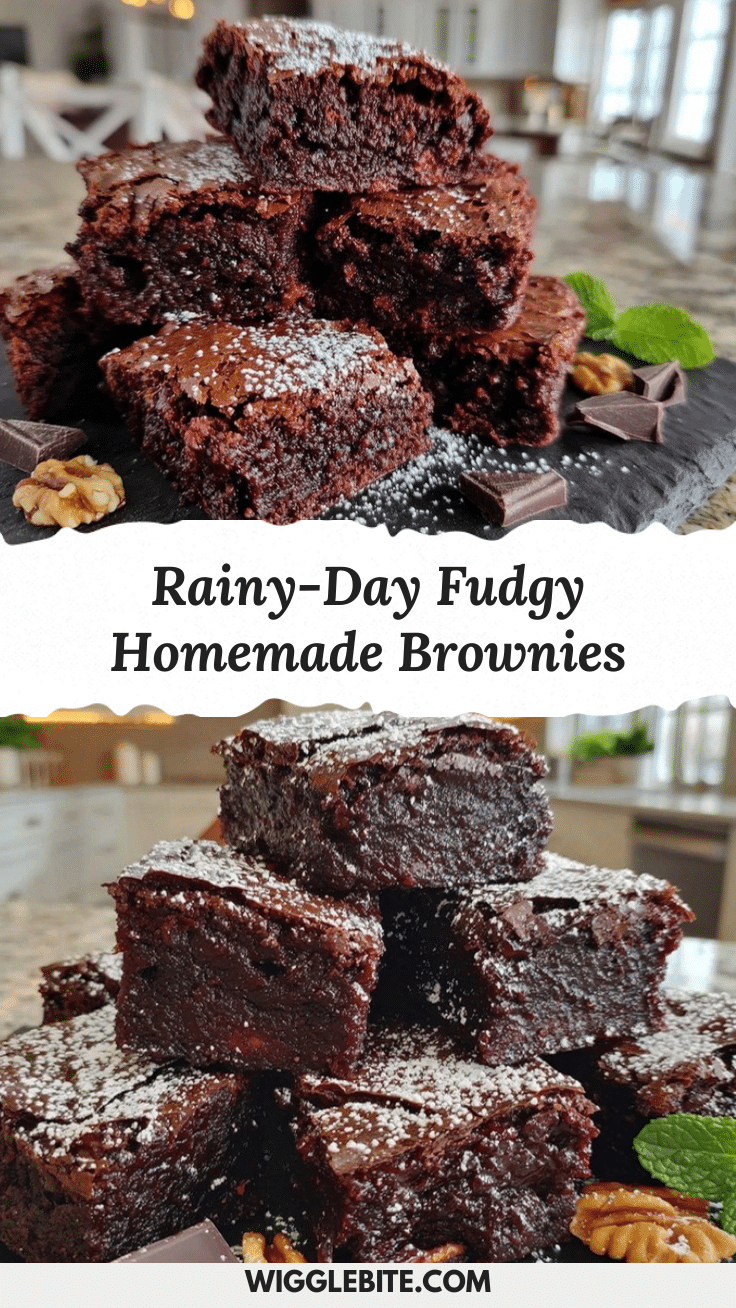
Fudgy Homemade Brownies with Glossy Crinkled Tops
These brownies are dense, fudgy, and outrageously chocolatey with signature glossy, crinkled tops. Quick and easy to make, they’re perfect for family gatherings, bake sales, or a cozy night in.
- Prep Time: 15 minutes
- Cook Time: 30 minutes
- Total Time: 45 minutes
- Yield: 16 brownies 1x
- Category: Dessert
- Cuisine: American
Ingredients
- 1/2 cup (115g) unsalted butter, melted
- 3/4 cup (150g) granulated sugar
- 1/4 cup (55g) light brown sugar
- 2 large eggs, room temperature
- 1 tsp pure vanilla extract
- 1/2 cup (60g) unsweetened cocoa powder
- 1/2 cup (90g) semi-sweet chocolate chips, melted
- 1/4 tsp fine sea salt
- 2/3 cup (85g) all-purpose flour
- Optional: 1/2 cup (60g) chopped walnuts or pecans
- Optional: 1/3 cup (55g) extra chocolate chunks or chips
Instructions
- Preheat oven to 350°F (175°C). Line an 8×8-inch pan with parchment paper, leaving an overhang for easy lifting.
- In a small saucepan over low heat (or microwave-safe bowl), melt butter and chocolate chips together, stirring until smooth. Let cool for 2-3 minutes.
- In a medium bowl, whisk together granulated sugar, brown sugar, and eggs vigorously for 1-2 minutes until pale and slightly thick.
- Whisk in vanilla extract and sea salt.
- Pour the cooled butter-chocolate mixture into the egg-sugar mixture, whisking gently until fully combined.
- Sift cocoa powder and flour together over a small bowl.
- Using a rubber spatula, gently fold the flour-cocoa mixture into the wet ingredients just until no streaks remain.
- Fold in optional add-ins (nuts, extra chocolate chips, or fresh raspberries).
- Scrape batter into prepared pan and smooth out with a spatula. Tap pan gently to release air bubbles.
- Bake for 28-32 minutes. Check at 28 minutes; a toothpick inserted in the center should come out with moist crumbs.
- Cool brownies in pan on a wire rack for at least 20 minutes. Lift out using parchment overhang and place on a cutting board.
- Slice with a sharp knife cleaned between cuts. Enjoy!
Notes
For best results, whisk eggs and sugars vigorously for glossy tops. Don’t overmix after adding flour to keep brownies fudgy. Start checking for doneness a couple minutes before the shortest bake time. Brownies firm up as they cool; for clean slices, chill before cutting. Customize with nuts, berries, or flavor swirls.
Nutrition
- Serving Size: 1 brownie (1/16 of 8
- Calories: 180
- Sugar: 18
- Sodium: 70
- Fat: 9
- Saturated Fat: 5
- Carbohydrates: 24
- Fiber: 2
- Protein: 2
Keywords: brownies, fudgy brownies, homemade brownies, chocolate dessert, easy brownies, glossy brownies, crinkled tops, bake sale, potluck, kid-friendly, classic brownies