“I wasn’t expecting to learn a pizza dough trick from my accountant, of all people,” I told Sarah as we sat munching on a slice in my cramped kitchen last Thursday night. You know, sometimes the best culinary gems come from the most unexpected places. That evening, while she was waiting on some paperwork, Sarah shared her secret to a pizza dough that wasn’t just good—it was crispy, light, and had this subtle tang that made every bite memorable. The magic ingredient? Sourdough discard.
Honestly, I’d always thought sourdough discard was just something to toss or compost, but that night, my perspective completely changed. We got a little messy (I knocked over a jar of flour, of course), but after a couple of hours of hands-on fun, we pulled out a pizza crust that had this perfect crunch and chew that’s hard to find in regular doughs. It wasn’t just good for a quick fix; it felt like something crafted with intention and love.
Maybe you’ve been there—the craving for homemade pizza but not wanting to fuss with complicated dough recipes or extra trips to the store. This easy crispy sourdough discard pizza dough recipe is exactly that kind of recipe. It’s simple, forgiving, and uses something you might already have sitting in your fridge. Plus, it gives that wonderful sourdough flavor without the wait for a full starter feed.
That first bite transported me back to those Friday night pizza parties in college, but with a grown-up twist. It’s the kind of recipe that sticks with you—not just because it tastes fantastic, but because it makes you feel like a kitchen wizard, turning something that could be waste into pure, crispy joy.
Why You’ll Love This Recipe
This easy crispy sourdough discard pizza dough recipe is a game-changer for anyone who loves homemade pizza but hates the fuss. I’ve tested this over and over, tweaking hydration levels and baking times, to find the perfect balance of crispy edges and tender crumb. Here’s why it’s become a staple in my kitchen:
- Quick & Easy: Ready to bake in under 2 hours, with minimal active prep time—great for those weekday pizza cravings.
- Simple Ingredients: Uses pantry staples plus your sourdough discard, so no extra trips to the store.
- Perfect for Any Occasion: Whether it’s a casual family dinner or a laid-back weekend hangout, this dough delivers.
- Crowd-Pleaser: Always gets compliments for its crispy texture and that unmistakable tangy flavor.
- Unbelievably Delicious: The crispy crust with a slight chew is exactly what you want in a pizza base.
What sets this recipe apart is the clever use of sourdough discard, which adds flavor and a slight tang without the long ferment. Plus, the dough is easy to handle and shape, even if you’re new to baking. I love how forgiving it is—once, I forgot to add salt until halfway through kneading, and while the flavor was a bit flat, the texture still came out spot-on. It’s that kind of recipe that makes you feel confident in the kitchen.
Bottom line: This isn’t just another pizza dough—it’s my go-to for turning leftover sourdough into something crispy, tasty, and totally satisfying.
What Ingredients You Will Need
This recipe uses simple, wholesome ingredients that come together to create a bold flavor and satisfyingly crispy texture without any fuss. Most of these are pantry staples, and the star is of course the sourdough discard, which adds that lovely tang and complexity. Here’s what you’ll need:
- Sourdough discard: 1 cup (240 ml), unfed and at room temperature (I use my 100% hydration discard; it works beautifully)
- All-purpose flour: 2 ½ cups (300 g), plus extra for dusting (King Arthur flour gives a nice chew)
- Warm water: ¾ cup (180 ml), around 100°F (38°C) to activate the yeast gently
- Instant yeast: 1 teaspoon (3 g) – optional but helps with rise and crispness
- Olive oil: 2 tablespoons (30 ml), plus extra for greasing (adds richness and crisp edges)
- Salt: 1 teaspoon (6 g), fine sea salt preferred for even seasoning
- Sugar: ½ teaspoon (2 g), balances flavor and boosts yeast activity
If you don’t have instant yeast, you can skip it, but the dough may take longer to rise. For a gluten-free twist, swapping the all-purpose flour for a gluten-free blend with xanthan gum works well, but expect a different texture. And if you’re out of olive oil, a neutral oil like avocado or canola will do just fine.
Equipment Needed
- Mixing bowl: Large, to comfortably mix and knead the dough without mess. I prefer glass or stainless steel.
- Measuring cups and spoons: For accurate ingredient measurement. Kitchen scales are even better if you have one!
- Wooden spoon or dough whisk: Helpful for initial mixing before kneading by hand.
- Plastic wrap or a clean kitchen towel: To cover the dough while it rises.
- Baking sheet or pizza stone: A pizza stone gives the crispiest crust, but a heavy baking sheet works fine too.
- Rolling pin (optional): If you prefer rolling out the dough instead of stretching by hand.
- Oven mitts: Safety first when handling hot pans or stones.
If you don’t own a pizza stone, don’t sweat it. Placing the dough on a preheated baking sheet helps mimic that crispy bottom. Also, I keep my mixing bowls seasoned by wiping them clean but never soaking too long, which saves me time during cleanup.
Preparation Method
- Activate the yeast (if using): In your mixing bowl, combine warm water (180 ml) with the instant yeast and sugar. Stir gently and let it sit for 5-10 minutes until it becomes frothy. If you skip yeast, just mix the water and sugar.
- Mix wet ingredients: Add the sourdough discard (240 ml) and olive oil (30 ml) into the yeast mixture. Stir until combined.
- Add dry ingredients: Gradually add the all-purpose flour (300 g) and salt (6 g) to the wet mix. Use a wooden spoon or dough whisk to bring the dough together. It will be sticky—that’s normal!
- Knead the dough: Dust a clean surface with flour. Turn the dough out and knead for about 8-10 minutes, adding small amounts of flour as needed to prevent sticking. The dough should be smooth and elastic but still slightly tacky. If it feels too dry, splash a bit of water. (Pro tip: I like to do this while my favorite playlist runs; it makes the time fly.)
- First rise: Lightly oil the mixing bowl and place the dough back inside. Cover tightly with plastic wrap or a damp towel and let it rise in a warm spot for 1 to 1.5 hours, or until doubled in size. (I often use my oven, turned off but with the oven light on—it’s perfect.)
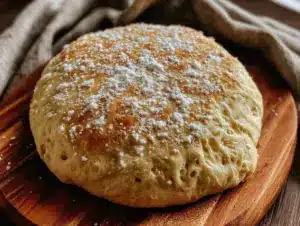
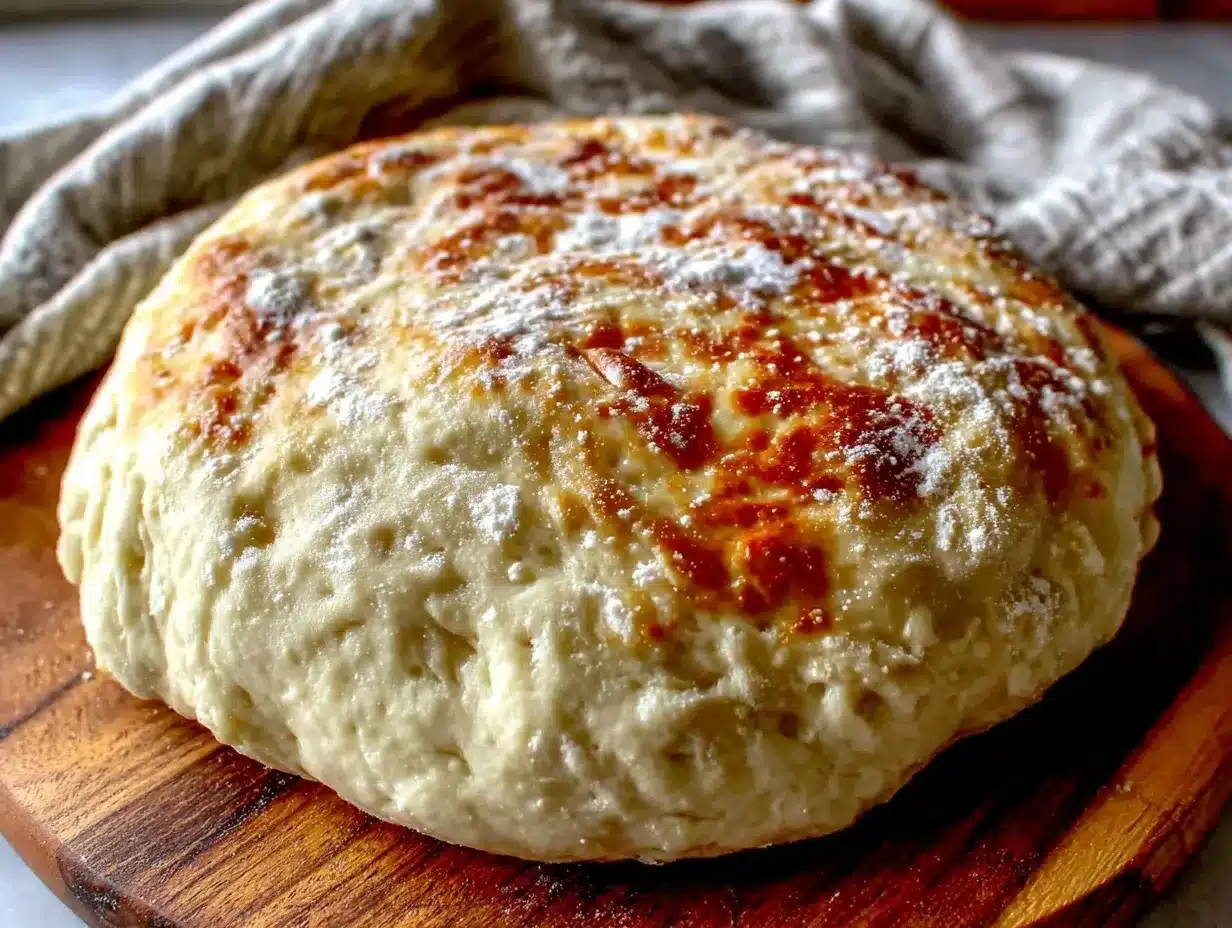
- Shape the dough: After rising, punch down the dough gently to release air. Transfer to a floured surface and shape into a round or rectangle, depending on your baking sheet or pizza stone size. You can roll it out or stretch it by hand, gently pulling the edges to your desired thickness. Remember, crispy crusts love thinner dough!
- Preheat your oven: Crank your oven up to 475°F (245°C) at least 30 minutes before baking. If using a pizza stone, place it in while preheating to get it scorching hot.
- Add toppings and bake: Transfer the shaped dough to a parchment-lined baking sheet or pizza peel if using a stone. Add your favorite sauce, cheese, and toppings. Bake for 12-15 minutes until the crust is golden and crispy around the edges. Watch closely towards the end to prevent burning.
- Cool and serve: Let the pizza cool for 5 minutes before slicing—this helps set the crust and toppings. Enjoy the crispy, tangy goodness!
Common hiccup: If your dough seems too sticky to handle after rising, dust liberally with flour but avoid adding too much, or it could get tough. Also, if your oven isn’t heating evenly, rotating the pizza halfway through baking helps.
Cooking Tips & Techniques
One trick I swear by is using a pizza stone or steel—it really makes the crust crisp like wood-fired oven style. Preheat it thoroughly to get that instant sear on the dough bottom. If you don’t have one, a heavy baking sheet flipped upside down works surprisingly well.
Don’t rush the kneading—developing gluten takes time, and that’s what gives you that perfect chew. I remember one night I skipped kneading because I was in a hurry, and the crust came out crumbly. Lesson learned the hard way!
For crispier edges, brush a little olive oil around the crust before baking. It adds flavor and helps browning.
Timing is key: try to bake the pizza right after shaping for the best rise and texture. If you’re multitasking, keep the dough covered so it doesn’t dry out. If you want a chewier crust, let the dough rest 10 minutes after shaping before adding toppings.
Also, keep an eye on oven temps—home ovens can be unpredictable. Using an oven thermometer is a cheap way to avoid under- or over-baking.
Variations & Adaptations
- Gluten-Free Version: Swap the all-purpose flour for a gluten-free blend with xanthan gum. The texture won’t be quite the same, but it’s tasty and still crispy.
- Whole Wheat Upgrade: Replace half the flour with whole wheat for a nuttier, heartier crust. You may need to add a bit more water, as whole wheat absorbs more moisture.
- Herbed Crust: Mix dried herbs like oregano, thyme, or rosemary into the dough for extra flavor in every bite.
- No Yeast Option: Skip the yeast if you want to avoid it; just expect a denser dough with less rise. The sourdough discard still brings flavor.
- Personal Favorite: Once, I added a bit of roasted garlic into the dough, and it brought such a lovely depth that my family kept asking for more.
You can also experiment with baking methods—try grilling the pizza for a smoky twist or baking individual-sized rounds for fun, quick snacks.
Serving & Storage Suggestions
This pizza is best enjoyed fresh out of the oven when the crust is at its crispiest and toppings are bubbling. I like to slice it thin and serve with a crisp green salad and a cold beer or sparkling water.
Leftovers? No worries. Store any uneaten pizza in an airtight container in the fridge for up to 3 days. To reheat, pop slices in a hot skillet on medium heat for a few minutes—this keeps the crust crisp better than a microwave.
You can also freeze the baked pizza for up to 2 months. Wrap slices tightly in foil and place in a freezer bag. When ready to eat, thaw in the fridge overnight and reheat in the oven or skillet.
Over time, the tangy flavor of the sourdough crust tends to mellow slightly, so leftovers are still delicious but in a different way, perfect for a quick lunch.
Nutritional Information & Benefits
Here’s an approximate breakdown per serving (assuming 8 slices):
| Calories | 200-250 kcal |
|---|---|
| Carbohydrates | 35 g |
| Protein | 6 g |
| Fat | 5 g |
| Fiber | 2 g |
The sourdough discard adds some probiotics and lactic acid bacteria benefits, even if it’s unfed. Plus, using olive oil contributes heart-healthy fats. This recipe can be adapted to be gluten-free or whole grain, boosting fiber and nutrient content. Just watch out for allergens like gluten and yeast if you have sensitivities.
Personally, I like how this pizza feels like a treat without being indulgent. It’s comforting but balanced, making it easier to enjoy without guilt.
Conclusion
This easy crispy sourdough discard pizza dough recipe is one of those rare finds that takes something you might toss and turns it into the centerpiece of a delicious meal. Whether you’re a sourdough enthusiast or just looking for a quick way to homemade pizza, it’s reliable, flavorful, and fun to make. Don’t be afraid to play with toppings and techniques—you might find a new favorite too.
I love how this recipe connects me to simple ingredients and old-fashioned methods, all while fitting perfectly into a busy life. Give it a try, tweak it your way, and let me know how your pizza nights turn out. Seriously, I’d love to hear your variations or any happy kitchen accidents you have along the way!
So grab your sourdough discard (or start saving it now), preheat that oven, and get ready for some crispy, tangy homemade pizza magic.
FAQs
Can I make this pizza dough without sourdough discard?
Yes! You can use regular yeast dough, but the sourdough discard adds unique flavor and a slight tang that’s hard to replicate. Without discard, it’s a more traditional pizza crust.
How long can I store the dough before baking?
You can refrigerate the dough for up to 24 hours after the first rise. Just cover it tightly and let it slowly ferment for deeper flavor. Bring to room temperature before shaping.
What if my dough is too sticky to handle?
Lightly flour your hands and work surface, but avoid adding too much flour as it can toughen the dough. A little stickiness is normal and helps create a tender crust.
Can I freeze the dough before baking?
Yes, shape the dough into a ball and wrap it tightly in plastic wrap and foil. Freeze for up to 2 months. Thaw overnight in the fridge before using.
What toppings work best with this sourdough pizza dough?
Anything goes! Classic tomato sauce and mozzarella work beautifully, but I love experimenting with fresh veggies, spicy sausage, or even a drizzle of honey and goat cheese for a sweet-savory twist.
Pin This Recipe!

Easy Crispy Sourdough Discard Pizza Dough Recipe for Perfect Homemade Pizza

A quick and easy pizza dough recipe using sourdough discard that yields a crispy, light crust with a subtle tang. Perfect for homemade pizza lovers looking for a simple, flavorful dough without long fermentation.
- Prep Time: 20 minutes
- Cook Time: 15 minutes
- Total Time: 1 hour 45 minutes
- Yield: 8 slices (about 4 servings) 1x
- Category: Main Course
- Cuisine: Italian
Ingredients
- 1 cup (240 ml) sourdough discard, unfed and at room temperature (100% hydration discard recommended)
- 2 ½ cups (300 g) all-purpose flour, plus extra for dusting
- ¾ cup (180 ml) warm water, around 100°F (38°C)
- 1 teaspoon (3 g) instant yeast (optional)
- 2 tablespoons (30 ml) olive oil, plus extra for greasing
- 1 teaspoon (6 g) fine sea salt
- ½ teaspoon (2 g) sugar
Instructions
- Activate the yeast (if using): In a mixing bowl, combine warm water (180 ml) with instant yeast and sugar. Stir gently and let sit for 5-10 minutes until frothy. If skipping yeast, just mix water and sugar.
- Mix wet ingredients: Add sourdough discard (240 ml) and olive oil (30 ml) into the yeast mixture. Stir until combined.
- Add dry ingredients: Gradually add all-purpose flour (300 g) and salt (6 g) to the wet mix. Use a wooden spoon or dough whisk to bring the dough together; it will be sticky.
- Knead the dough: Dust a clean surface with flour. Turn dough out and knead for 8-10 minutes, adding small amounts of flour as needed to prevent sticking. Dough should be smooth, elastic, and slightly tacky. Add water if too dry.
- First rise: Lightly oil the mixing bowl and place dough inside. Cover tightly with plastic wrap or damp towel and let rise in a warm spot for 1 to 1.5 hours until doubled in size.
- Shape the dough: Punch down dough to release air. Transfer to floured surface and shape into round or rectangle. Roll or stretch by hand to desired thickness (thinner for crispier crust).
- Preheat oven: Heat oven to 475°F (245°C) at least 30 minutes before baking. Place pizza stone inside if using.
- Add toppings and bake: Transfer shaped dough to parchment-lined baking sheet or pizza peel if using stone. Add sauce, cheese, and toppings. Bake for 12-15 minutes until crust is golden and crispy.
- Cool and serve: Let pizza cool for 5 minutes before slicing to set crust and toppings. Enjoy!
Notes
If dough is too sticky after rising, dust with flour but avoid adding too much to prevent toughness. Use a pizza stone or preheated heavy baking sheet for crispier crust. Brush olive oil around crust before baking for better browning. Rotate pizza halfway through baking if oven heats unevenly. Dough can be refrigerated up to 24 hours after first rise or frozen for up to 2 months.
Nutrition
- Serving Size: 1 slice (1/8 of pizz
- Calories: 225
- Sugar: 1
- Sodium: 400
- Fat: 5
- Saturated Fat: 0.7
- Carbohydrates: 35
- Fiber: 2
- Protein: 6
Keywords: sourdough discard, pizza dough, crispy pizza crust, homemade pizza, easy pizza dough, quick pizza dough, sourdough pizza