
“You know that moment when you’re halfway through making cookies and suddenly the idea hits you—why not turn these into ice cream sandwiches?” That’s exactly how these easy chewy chocolate chip cookie ice cream sandwiches for kids came to be in my kitchen last summer. It was a scorching Wednesday afternoon, and my niece Mia was over, bouncing off the walls with a sugar craving that just wouldn’t quit. I was half-distracted, juggling a cracked mixing bowl and a phone call, when I realized I’d forgotten the eggs for the cookies. Instead of running to the store, I improvised and tweaked the recipe a bit. Honestly, it was a bit of a mess at first—flour dust everywhere, a sticky countertop, and a very impatient kid—but what came out was surprisingly delicious.
These chewy chocolate chip cookie ice cream sandwiches aren’t just your run-of-the-mill summer treat. They’ve got this perfect balance: the cookies are soft and a little gooey, not rock-hard like some store-bought versions, and the ice cream melts just right between them. I mean, I wasn’t expecting to create a new favorite, but here we are. Maybe you’ve been there too—wanting something quick, fun, and utterly kid-approved that even the adults won’t resist.
What’s more, this recipe has stuck with me because it’s so simple and forgiving. It’s the kind of recipe I pull out when friends drop by unannounced, or when I want to treat Mia with something homemade but fuss-free. So, if you’re ready to bring a bit of joy (and maybe a little mess) into your kitchen, keep reading. These ice cream sandwiches might just become your new go-to summer classic.
Why You’ll Love This Recipe
Let me tell you, this recipe is a total winner for so many reasons I’ve discovered after making it countless times with kids around (and yes, a few sneaky adults too!). Here’s why it stands out:
- Quick & Easy: Everything comes together in under 30 minutes, perfect for busy afternoons or last-minute dessert cravings.
- Simple Ingredients: No need to hunt down fancy items. If you’ve got basic pantry staples like flour, sugar, and chocolate chips, you’re good to go.
- Perfect for Kid-Friendly Fun: Little hands can help with mixing and assembling, making it a great activity to share.
- Crowd-Pleaser: The chewy cookie texture pairs beautifully with creamy ice cream, and it gets rave reviews every time from kids and adults alike.
- Unbelievably Delicious: The secret is in the soft, chewy cookies that hold the ice cream just right—no crumbly mess, just pure enjoyment.
What sets this recipe apart? I tweak the cookie dough just enough to keep it chewy but sturdy, using a touch of brown sugar for that deep caramel flavor. Plus, you don’t need to chill the dough forever—just enough to handle it easily. The ice cream choice is totally flexible, but I recommend a creamy vanilla bean or maybe a fun swirl for extra flair. Honestly, this isn’t just another cookie sandwich recipe—it’s the one you’ll want to make again and again because it hits that perfect spot between nostalgic comfort and playful summer treat.
What Ingredients You Will Need
This recipe uses simple, wholesome ingredients that come together to make those chewy chocolate chip cookies the perfect ice cream sandwich base. Most of these are pantry staples, and if you need to swap a few things, I’ve got you covered.
- For the Cookie Dough:
- 1 cup (225g) unsalted butter, softened (I like using Land O’Lakes for consistency)
- 3/4 cup (150g) granulated sugar
- 3/4 cup (165g) packed brown sugar (adds chewiness and depth)
- 2 large eggs, room temperature
- 2 teaspoons vanilla extract (real vanilla makes a difference)
- 2 1/4 cups (280g) all-purpose flour
- 1 teaspoon baking soda
- 1/2 teaspoon salt
- 2 cups (340g) semi-sweet chocolate chips (I prefer Ghirardelli for melt and taste)
- For the Ice Cream Sandwiches:
- 1 quart (approx. 950ml) vanilla ice cream, slightly softened (or your child’s favorite flavor)
If you want to switch things up, you can swap all-purpose flour with almond flour for a gluten-free option, although the texture will be a bit different. For dairy-free versions, use coconut oil instead of butter and your favorite dairy-free ice cream.
Equipment Needed
- Mixing bowls (one large and one medium-sized)
- Electric mixer or sturdy wooden spoon (electric mixer speeds things up, but a strong arm works too!)
- Measuring cups and spoons (accuracy matters, especially for baking soda and salt)
- Baking sheets (lined with parchment paper or silicone baking mats for easy cleanup)
- Cooling rack (trust me, cookies need to cool properly or your sandwiches get messy)
- Spoon or small ice cream scoop (to portion the ice cream evenly)
- Plastic wrap or wax paper (for wrapping assembled sandwiches)
If you don’t have an electric mixer, no worries—mixing by hand is totally doable. Just be sure your butter is really soft to make the mixing easier. Parchment paper is a lifesaver here, preventing the cookies from sticking and keeping your baking sheets pristine. I also recommend having a timer handy to avoid over-baking.
Preparation Method

- Preheat your oven to 375°F (190°C). Line two baking sheets with parchment paper or silicone mats. This preps your workspace and prevents sticking.
- Cream the butter and sugars: In a large bowl, beat 1 cup softened unsalted butter with 3/4 cup granulated sugar and 3/4 cup packed brown sugar until fluffy and light in color. This usually takes about 3-4 minutes with an electric mixer. The texture should be soft and airy—that’s the secret to chewy cookies.
- Add eggs and vanilla: Beat in 2 large eggs, one at a time, then mix in 2 teaspoons vanilla extract. The batter might look a little curdled here, but that’s normal.
- Combine dry ingredients: In a separate bowl, whisk together 2 1/4 cups all-purpose flour, 1 teaspoon baking soda, and 1/2 teaspoon salt. Gradually add this dry mix to the wet ingredients, stirring gently until just combined. Don’t overmix; some streaks of flour are okay.
- Stir in chocolate chips: Fold in 2 cups semi-sweet chocolate chips evenly through the dough. You’ll want every bite to have some chocolatey goodness.
- Scoop and shape cookies: Using a tablespoon or cookie scoop, drop dough onto the prepared baking sheets, spacing them about 2 inches apart. Flatten each mound slightly with the back of a spoon or your fingers—cookies spread better this way.
- Bake: Place the trays in the oven and bake for 9-11 minutes. Cookies should be golden around the edges but still soft in the center. The smell wafting through the kitchen is the best timer you’ll get.
- Cool completely: Transfer cookies to a wire rack and let them cool fully. This step is crucial—warm cookies will melt your ice cream and make sandwiches messy.
- Assemble sandwiches: Once cooled, scoop about 2 tablespoons (30g) of slightly softened ice cream onto the flat side of one cookie. Gently press another cookie on top to form a sandwich. For a clean finish, wipe any excess ice cream from the edges.
- Freeze before serving: Wrap each sandwich individually in plastic wrap or wax paper and freeze for at least 1 hour. This firms up the ice cream and melds flavors.
Pro tip: If your kitchen gets warm, pop the cookie dough in the fridge for 15 minutes before baking to prevent spreading too much. And hey, if you accidentally burn one batch (been there!), just scrape off the worst and use the rest—it’s all part of the fun.
Cooking Tips & Techniques
Getting the perfect chewy chocolate chip cookie ice cream sandwiches takes a little know-how, but nothing too fancy. Here’s what I’ve learned from many batches (and a few flops):
- Don’t skip softening the butter: Cold butter makes the dough tough, and melted butter makes cookies flat. Room temp is where it’s at.
- Brown sugar is your friend: It locks in moisture and gives that classic chewiness you want. I always use a mix of granulated and brown sugar.
- Flatten the dough balls gently: This helps cookies bake evenly and keeps them from puffing up too much, which is important for sandwich assembly.
- Watch the bake time closely: Cookies continue cooking a bit after you take them out. Pull them when edges are golden but centers look soft and shiny.
- Ice cream softness matters: If it’s too hard, sandwiches are tough to assemble; too soft, and it melts too quickly. Let it sit out for 5 minutes before scooping.
- Wrap individually: This avoids freezer burn and keeps sandwiches fresh for days (if they last that long!).
One time, I tried using a tablespoon of flour extra because I thought it’d make dough easier to handle—ended up with crumbly cookies. Lesson learned: stick to the measurements! Also, multitasking helps; while cookies bake, prep your ice cream for faster assembly.
Variations & Adaptations
These ice cream sandwiches are versatile and can easily adapt to your family’s preferences or dietary needs:
- Flavor swaps: Use peanut butter chips or white chocolate chips instead of semi-sweet for a twist kids love.
- Seasonal additions: Stir in chopped dried cranberries or toasted nuts during fall and winter for a cozy vibe.
- Gluten-free option: Substitute all-purpose flour with a gluten-free blend. The texture changes a bit but still delicious.
- Dairy-free version: Swap butter for coconut oil and use dairy-free ice cream like almond or oat-based.
- Mini sandwiches: Make smaller cookies and use mini ice cream scoops for bite-sized treats perfect for parties.
Personally, I’ve tried mixing in a teaspoon of cinnamon and a pinch of sea salt on top of the ice cream—it’s a game changer! Feel free to experiment, and maybe your kids will come up with their own fun combos.
Serving & Storage Suggestions
These chewy chocolate chip cookie ice cream sandwiches are best enjoyed chilled but not frozen rock-solid. Serve them straight from the freezer for a refreshing treat, or let sit on the counter 5 minutes for a softer bite.
- For presentation, stack on a pretty plate with a sprinkle of mini chocolate chips or a dusting of powdered sugar.
- Pair with a cold glass of milk, homemade lemonade, or even a scoop of fruit sorbet for contrast.
- Store leftovers wrapped individually in the freezer for up to 5 days. After that, cookie texture may change and ice cream can develop ice crystals.
- Reheat cookies separately for 10 seconds in the microwave if you want fresh-baked warmth before assembling.
Flavors tend to meld in the freezer, making sandwiches taste even better after a day or two. Just be sure to keep them wrapped tight to avoid freezer smells sneaking in.
Nutritional Information & Benefits
Each ice cream sandwich clocks in at roughly 250-300 calories depending on ice cream choice. They contain a good mix of carbs for energy and fats for satiety, making them a satisfying snack or dessert.
- Butter and chocolate chips provide healthy fats and antioxidants from cocoa.
- Using real vanilla and brown sugar adds natural flavor without artificial additives.
- Gluten-free and dairy-free versions make this treat accessible to many dietary needs.
- Portion control is easy with individual sandwiches, helping avoid overindulgence.
From my experience, sharing these with kids encourages trying new textures and flavors, which is a win in my book. Plus, making them together introduces simple baking skills and kitchen confidence.
Conclusion
Honestly, these easy chewy chocolate chip cookie ice cream sandwiches for kids have become a staple in my summer repertoire. They strike that perfect balance between chewy, sweet, and cool, plus they’re straightforward enough to make on a whim. I love how they bring smiles to faces and invite little helpers into the kitchen without the stress.
Feel free to tweak the ingredients and ice cream flavors to suit your family’s tastes—this recipe is all about fun and flexibility. If you give it a try, I’d love to hear how your version turned out or if you added your own spin. Go ahead, make a little mess, and enjoy every bite of this kid-approved treat!
Don’t forget to share this recipe with friends who might need a quick, yummy dessert that’s sure to impress their little ones (and adults too). Happy baking and even happier eating!
FAQs
Can I make the cookies ahead of time?
Yes! You can bake the cookies a day or two in advance and store them in an airtight container at room temperature. Assemble the ice cream sandwiches just before serving for best texture.
What’s the best ice cream for these sandwiches?
Vanilla is classic and versatile, but feel free to use any flavor your kids love. Just make sure it’s slightly softened for easy scooping.
How do I keep the ice cream from melting too fast?
Work quickly when assembling and freeze sandwiches immediately. Also, keeping the ice cream slightly firm but scoopable helps prevent melting.
Can I freeze the assembled sandwiches for later?
Absolutely! Wrap each sandwich tightly and freeze for up to 5 days. Let them thaw a few minutes before eating for a softer bite.
What if I don’t have brown sugar?
You can use all granulated sugar, but the cookies might be less chewy and flavorful. If you have molasses, adding a tablespoon can mimic brown sugar’s depth.
Pin This Recipe!
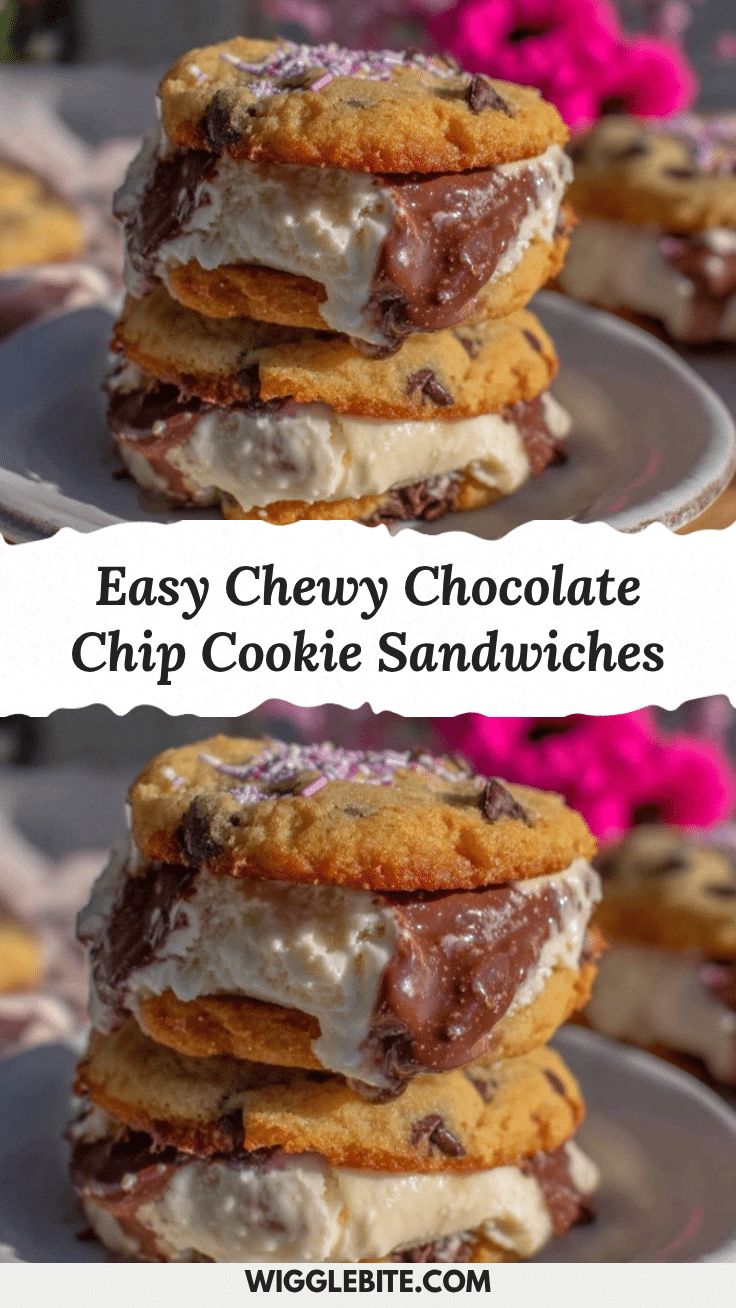
Easy Chewy Chocolate Chip Cookie Ice Cream Sandwiches Recipe for Kids

These chewy chocolate chip cookie ice cream sandwiches are a quick, kid-friendly summer treat featuring soft, gooey cookies paired with creamy ice cream. Perfect for fun baking sessions and crowd-pleasing desserts.
- Prep Time: 15 minutes
- Cook Time: 11 minutes
- Total Time: 26 minutes
- Yield: 12 sandwiches 1x
- Category: Dessert
- Cuisine: American
Ingredients
- 1 cup (225g) unsalted butter, softened
- 3/4 cup (150g) granulated sugar
- 3/4 cup (165g) packed brown sugar
- 2 large eggs, room temperature
- 2 teaspoons vanilla extract
- 2 1/4 cups (280g) all-purpose flour
- 1 teaspoon baking soda
- 1/2 teaspoon salt
- 2 cups (340g) semi-sweet chocolate chips
- 1 quart (approx. 950ml) vanilla ice cream, slightly softened
Instructions
- Preheat your oven to 375°F (190°C). Line two baking sheets with parchment paper or silicone mats.
- In a large bowl, beat 1 cup softened unsalted butter with 3/4 cup granulated sugar and 3/4 cup packed brown sugar until fluffy and light in color, about 3-4 minutes.
- Beat in 2 large eggs, one at a time, then mix in 2 teaspoons vanilla extract.
- In a separate bowl, whisk together 2 1/4 cups all-purpose flour, 1 teaspoon baking soda, and 1/2 teaspoon salt. Gradually add this dry mix to the wet ingredients, stirring gently until just combined.
- Fold in 2 cups semi-sweet chocolate chips evenly through the dough.
- Using a tablespoon or cookie scoop, drop dough onto the prepared baking sheets, spacing about 2 inches apart. Flatten each mound slightly with the back of a spoon or fingers.
- Bake for 9-11 minutes until cookies are golden around edges but still soft in the center.
- Transfer cookies to a wire rack and let cool completely.
- Once cooled, scoop about 2 tablespoons (30g) of slightly softened ice cream onto the flat side of one cookie. Gently press another cookie on top to form a sandwich. Wipe any excess ice cream from edges.
- Wrap each sandwich individually in plastic wrap or wax paper and freeze for at least 1 hour before serving.
Notes
If kitchen is warm, chill dough for 15 minutes before baking to prevent spreading. Use room temperature butter for best texture. Flatten dough balls slightly before baking. Let ice cream soften for 5 minutes before assembling. Wrap sandwiches individually to avoid freezer burn. Cookies can be baked ahead and stored at room temperature; assemble just before serving. For gluten-free, substitute flour with gluten-free blend; for dairy-free, use coconut oil and dairy-free ice cream.
Nutrition
- Serving Size: 1 ice cream sandwich
- Calories: 275
- Sugar: 22
- Sodium: 150
- Fat: 14
- Saturated Fat: 8
- Carbohydrates: 34
- Fiber: 2
- Protein: 3
Keywords: chocolate chip cookie, ice cream sandwich, kid-friendly dessert, chewy cookies, summer treat, easy dessert, homemade ice cream sandwich