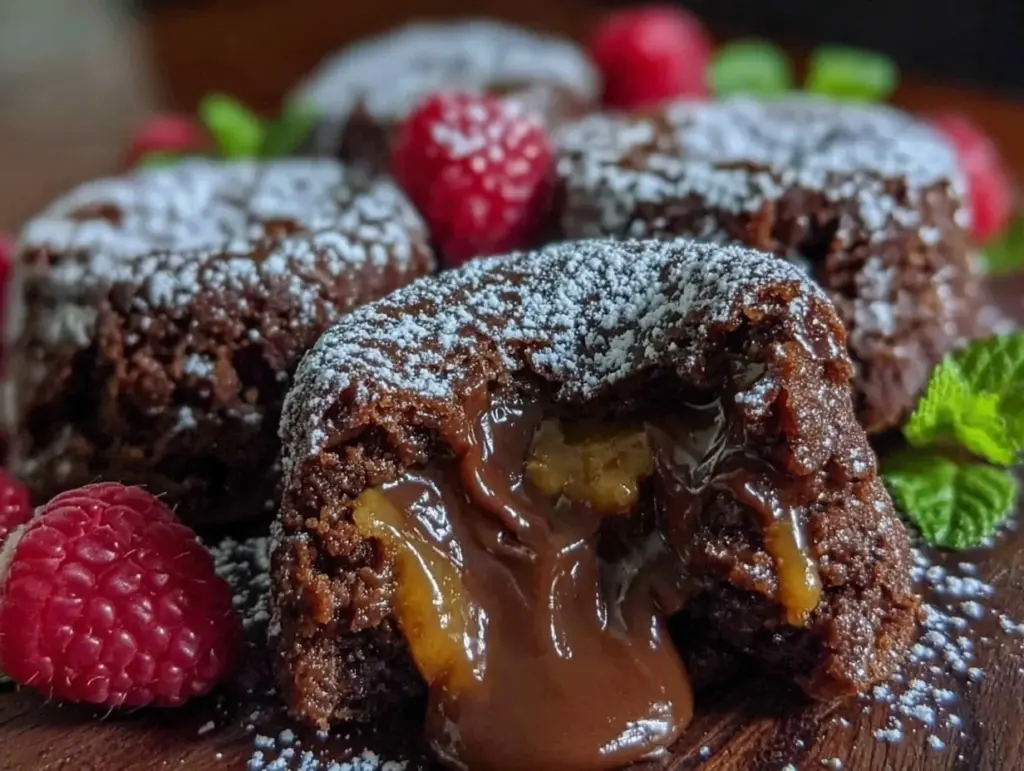
Let me tell you, the moment you cut into a decadent molten lava cake and watch that rich, gooey chocolate center ooze out is something truly magical. The warm, bittersweet aroma of melted chocolate mingles with a hint of vanilla, making it nearly impossible to wait even a second before digging in. The first time I baked these molten lava cakes, I was instantly hooked—the kind of moment where you pause, take a deep breath, and just smile because you know you’re onto something truly special.
Years ago, when I was knee-high to a grasshopper, my grandma used to make simple chocolate treats, but she never quite cracked the molten lava cake code. I stumbled upon this recipe during a rainy weekend, trying to recreate that luxurious dessert I’d tasted at a fancy restaurant. Honestly, I wish I’d found it sooner! My family couldn’t stop sneaking these cakes off the cooling rack (and I can’t really blame them). It’s dangerously easy to make and delivers pure, nostalgic comfort with every bite.
This decadent molten lava cakes recipe with a gooey chocolate center is perfect for impressing guests at dinner parties, treating your kids to a sweet surprise, or brightening up your Pinterest cookie board. After testing it multiple times in the name of research, of course, it has become a staple for family gatherings and gifting. Trust me, this warm, luscious dessert feels like a warm hug on a plate—you’re going to want to bookmark this one.
Why You’ll Love This Recipe
Honestly, molten lava cakes aren’t just good—they’re the kind of dessert that makes you close your eyes after the first bite. Here’s why this recipe stands out:
- Quick & Easy: Comes together in under 30 minutes, perfect for busy weeknights or last-minute cravings.
- Simple Ingredients: No fancy grocery trips needed; you likely already have everything in your kitchen.
- Perfect for Special Occasions: Great for date nights, holiday dinners, or anytime you want to wow your guests.
- Crowd-Pleaser: Always gets rave reviews from kids and adults alike—seriously, it’s hard not to smile while eating this.
- Unbelievably Delicious: The silky cake exterior combined with a molten chocolate center is next-level comfort food.
This recipe isn’t just another chocolate cake. The secret lies in the perfectly timed baking and a luscious chocolate center that remains gooey without being undercooked. I’ve tested different chocolates and found using a high-quality bittersweet chocolate bar adds the best depth of flavor. Plus, it’s adaptable for different dietary needs without losing that signature gooey texture.
Whether you’re impressing guests without stress or turning a simple meal into a memorable experience, this molten lava cakes recipe delivers soul-soothing satisfaction that’s hard to beat.
What Ingredients You Will Need
This recipe uses simple, wholesome ingredients to deliver bold chocolate flavor and a satisfyingly gooey texture without fuss. Most are pantry staples, and substitutions are easy if needed.
- Bittersweet Chocolate: 6 oz (170g) high-quality bar, chopped (I recommend Ghirardelli for best melting)
- Unsalted Butter: 1/2 cup (115g), plus extra for greasing ramekins
- Granulated Sugar: 1 cup (200g), for sweetness and structure
- Large Eggs: 3, room temperature (helps with emulsification and rise)
- All-Purpose Flour: 1/2 cup (65g), sifted (use gluten-free flour blend if needed)
- Vanilla Extract: 1 teaspoon, for subtle warmth
- Salt: A pinch, to balance sweetness
Optional toppings:
- Powdered sugar for dusting
- Fresh berries for garnish
- Vanilla ice cream or whipped cream to serve alongside
For a dairy-free version, swap butter with coconut oil and use dairy-free chocolate bars. In summer, fresh raspberries on top add a bright, tangy contrast to the rich chocolate. You know, keeping it flexible makes this recipe even more special.
Equipment Needed
To make these molten lava cakes, you’ll need a few kitchen essentials:
- Ramekins: 4 to 6 small (6-ounce or 180ml) ramekins or oven-safe custard cups. If you don’t have ramekins, use a muffin tin but grease very well.
- Mixing Bowls: At least two—one for melting chocolate and butter, another for whisking eggs and sugar.
- Whisk or Electric Mixer: For beating eggs and sugar until fluffy.
- Double Boiler or Microwave-Safe Bowl: For melting chocolate and butter gently.
- Spatula: To fold in flour without deflating the batter.
- Oven and Oven Mitts: Preferably with a reliable temperature gauge—oven temps can vary and affect the lava center.
If you’re on a budget, small metal cups or even silicone muffin cups can work as substitutes for ramekins. Just remember to grease them thoroughly. Personally, I like ceramic ramekins because they hold heat well and give a nice crust to the cakes.
Preparation Method
- Preheat your oven to 425°F (220°C). Grease the ramekins generously with butter and lightly dust with cocoa powder to prevent sticking. This step is crucial to ensure the cakes come out cleanly.
- Melt the chocolate and butter together. Use a double boiler or microwave in 30-second bursts, stirring between each until smooth. The mixture should be glossy and fully combined. Set aside to cool slightly (about 5 minutes).
- In a separate bowl, whisk the eggs and granulated sugar. Beat vigorously for 3-4 minutes until the mixture is pale, thick, and slightly frothy. This aeration helps the cakes rise and develop a light texture.
- Stir vanilla extract into the melted chocolate mixture. Then gently fold the chocolate into the egg mixture using a spatula. Take care not to deflate the eggs—you want to keep as much air in the batter as possible.
- Sift the flour and salt over the batter. Fold carefully until just combined. Overmixing here can lead to a dense cake rather than a tender shell.
- Divide the batter evenly among the prepared ramekins. Fill them about 3/4 full to allow space for the cakes to rise.
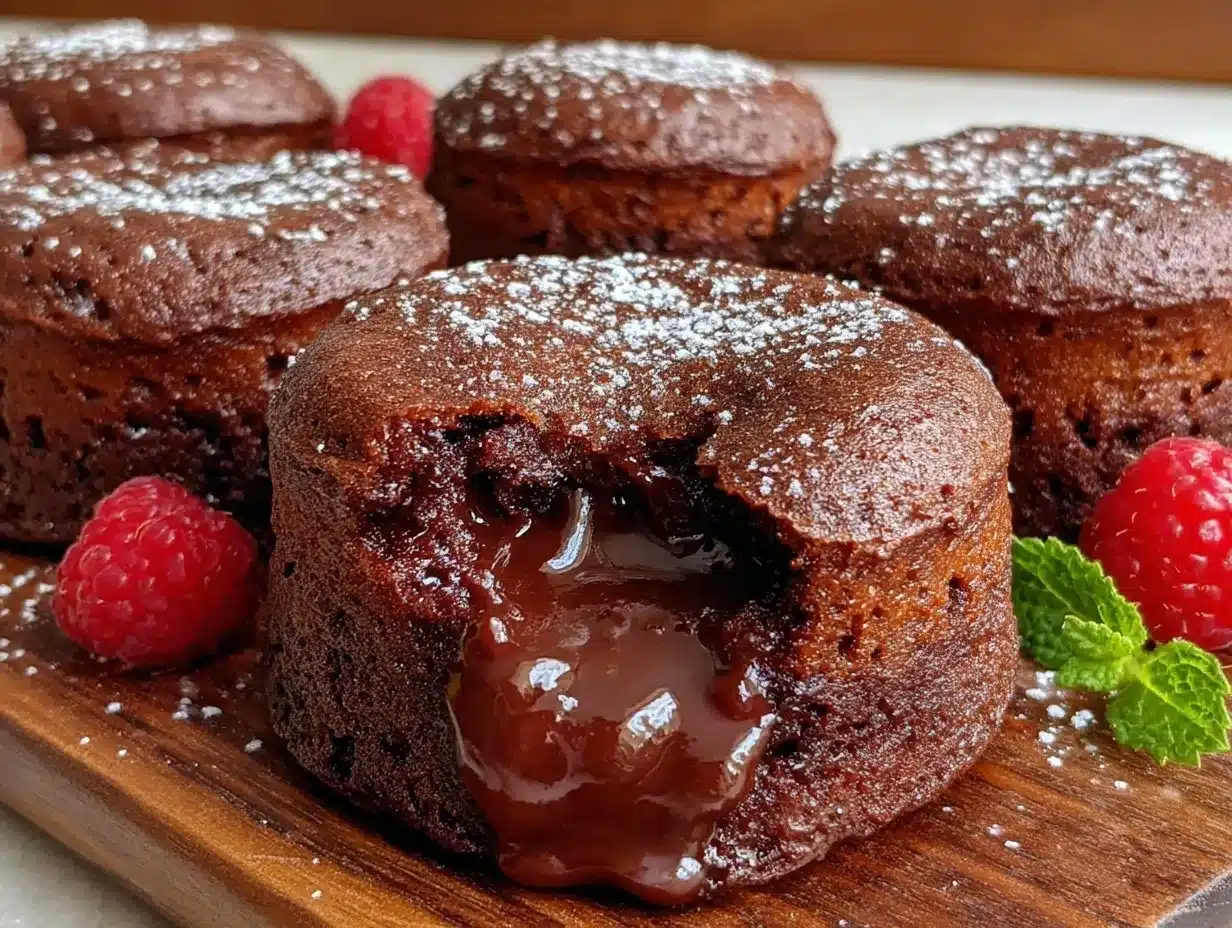
- Bake for 12-14 minutes. The edges should be set and firm, but the center should still look soft and slightly jiggly. This is the key to that gooey, molten middle.
- Remove from oven and let the cakes rest for 1 minute. Run a knife around the edges to loosen, then carefully invert onto dessert plates.
- Serve immediately. Dust with powdered sugar and add a scoop of vanilla ice cream if you like. The contrast between warm cake and cold ice cream is divine.
If your cakes come out fully set in the center, your oven might be running hot—try reducing the bake time by a minute or two next time. Conversely, if the center is too runny, add a minute or so. It takes a bit of practice but trust me, it’s worth it.
Cooking Tips & Techniques
Getting the perfect molten lava cake is part science, part art. Here are some tips I picked up through a few too many burnt fingers and undercooked centers:
- Use room temperature eggs. They whip better and create a lighter batter, which helps the cake rise nicely.
- Don’t skip sifting the flour. It prevents lumps and keeps the texture delicate.
- Watch your bake time like a hawk. Even a minute too long can turn that luscious center into a fudgy cake rather than molten lava.
- Grease and dust ramekins thoroughly. Nothing’s worse than your cake sticking and breaking apart when you try to unmold.
- Use high-quality chocolate. It really makes a difference in flavor and texture—don’t settle for cheap chips if you can help it.
- Multitask smartly. While the cakes bake, prep your toppings or get plates ready to serve. Timing is everything since these are best enjoyed fresh and warm.
- Be gentle folding ingredients. You want to keep as much air in the batter as possible, so use a light hand.
Variations & Adaptations
This decadent molten lava cakes recipe is pretty flexible, so you can tweak it to suit your needs or taste buds:
- White Chocolate Lava Cakes: Swap bittersweet chocolate for quality white chocolate bars. You’ll get a sweet, creamy center that’s equally indulgent.
- Vegan Version: Use coconut oil instead of butter, flax eggs (1 tbsp ground flaxseed + 3 tbsp water per egg), and dairy-free chocolate. Baking times might vary slightly.
- Spicy Chocolate: Add a pinch of cayenne pepper or cinnamon to the batter for a warm, surprising kick that pairs beautifully with the chocolate.
- Seasonal Twist: Fold in fresh raspberries or swirl in a spoonful of salted caramel before baking for extra flavor layers.
I once tried a peanut butter molten lava cake by dropping a small dollop of peanut butter in the center before baking — talk about a crowd-pleaser! The gooey peanut butter melded perfectly with the chocolate, and it was gone before I could snap a photo.
Serving & Storage Suggestions
Molten lava cakes are best served warm, straight from the oven. The gooey center starts to set as it cools, so timing is everything. Dust with powdered sugar for a pretty presentation, and consider adding fresh berries or a scoop of vanilla ice cream or whipped cream on the side.
If you want to prepare ahead, you can assemble the batter in the ramekins and refrigerate for up to 24 hours. When ready to bake, add a minute or two to the baking time. Leftover cakes can be stored in an airtight container in the refrigerator for up to 2 days, but the molten center won’t be quite the same once cooled.
To reheat, pop them in a 350°F (175°C) oven for about 5-7 minutes or microwave in short bursts, watching carefully to avoid overcooking. The flavors actually deepen if you let them sit a little, but honestly, fresh is best for that iconic lava flow.
Nutritional Information & Benefits
Estimated per serving (based on 6 servings):
| Calories | 320 kcal |
|---|---|
| Fat | 20g (mostly from butter and chocolate) |
| Carbohydrates | 34g |
| Protein | 5g |
Using high-quality bittersweet chocolate adds antioxidants and a richer flavor profile. This dessert is definitely a treat, but with simple ingredients and no artificial additives, it’s a comforting indulgence you can feel good about enjoying occasionally. For gluten-free needs, swap the flour with an almond or gluten-free all-purpose blend, and for dairy-free, substitute butter and chocolate accordingly.
Conclusion
Honestly, if you want a show-stopping dessert that’s surprisingly easy to make, this decadent molten lava cakes recipe with a gooey chocolate center is your answer. It’s flexible, fast, and packed with rich chocolate goodness that will satisfy any sweet tooth. You can customize this recipe to suit your dietary preferences or flavor cravings, making it a versatile favorite in your dessert repertoire.
Personally, I love how it brings people together—whether it’s a romantic night in or a festive family gathering, it feels like a little celebration with every bite. Give it a try, and don’t be shy about sharing your variations or serving ideas in the comments below. Happy baking!
FAQs
How can I tell when my molten lava cakes are done baking?
The edges should be firm and set, but the center will look soft and slightly jiggly. If the center is fully set, the lava won’t flow out.
Can I prepare the batter ahead of time?
Yes! You can fill the ramekins and refrigerate for up to 24 hours. Just add a couple of extra minutes to the baking time when ready to bake.
What chocolate should I use for the best molten lava cakes?
High-quality bittersweet chocolate bars work best for rich flavor and smooth melting. Avoid cheap chocolate chips, which can be grainy.
Can I make this recipe gluten-free?
Absolutely. Just swap the all-purpose flour for a gluten-free flour blend or almond flour for a naturally gluten-free option.
How do I prevent the cakes from sticking to the ramekins?
Grease the ramekins well with butter and dust them lightly with cocoa powder before adding the batter. This helps the cakes release easily after baking.
Pin This Recipe!
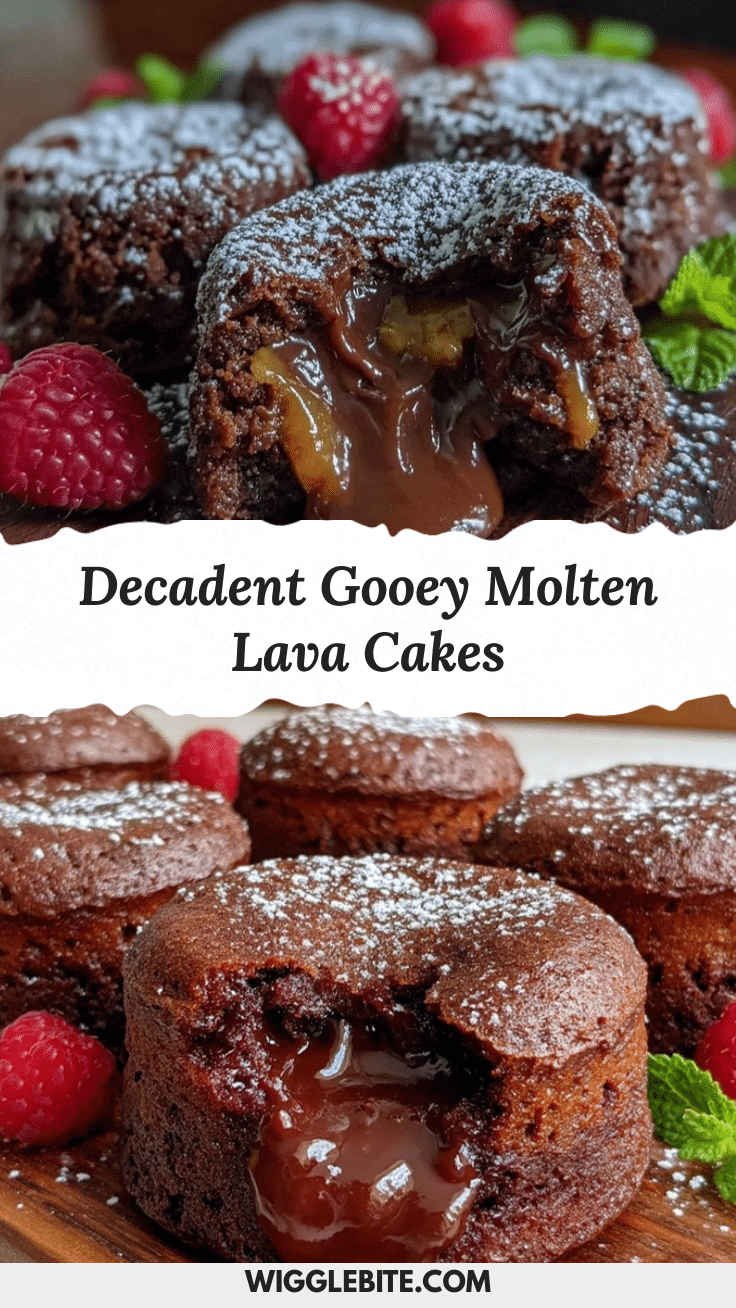
Decadent Molten Lava Cakes Recipe Easy Homemade Gooey Chocolate Center

This decadent molten lava cakes recipe features a warm, luscious dessert with a gooey chocolate center that is quick and easy to make, perfect for impressing guests or treating your family.
- Prep Time: 10 minutes
- Cook Time: 14 minutes
- Total Time: 24 minutes
- Yield: 6 servings 1x
- Category: Dessert
- Cuisine: American
Ingredients
- 6 oz (170g) high-quality bittersweet chocolate bar, chopped
- 1/2 cup (115g) unsalted butter, plus extra for greasing ramekins
- 1 cup (200g) granulated sugar
- 3 large eggs, room temperature
- 1/2 cup (65g) all-purpose flour, sifted (use gluten-free flour blend if needed)
- 1 teaspoon vanilla extract
- Pinch of salt
- Optional toppings: powdered sugar for dusting, fresh berries for garnish, vanilla ice cream or whipped cream to serve alongside
Instructions
- Preheat your oven to 425°F (220°C). Grease the ramekins generously with butter and lightly dust with cocoa powder to prevent sticking.
- Melt the chocolate and butter together using a double boiler or microwave in 30-second bursts, stirring between each until smooth. Set aside to cool slightly (about 5 minutes).
- In a separate bowl, whisk the eggs and granulated sugar vigorously for 3-4 minutes until pale, thick, and slightly frothy.
- Stir vanilla extract into the melted chocolate mixture. Gently fold the chocolate into the egg mixture using a spatula, taking care not to deflate the eggs.
- Sift the flour and salt over the batter. Fold carefully until just combined.
- Divide the batter evenly among the prepared ramekins, filling them about 3/4 full.
- Bake for 12-14 minutes until the edges are set and firm but the center is still soft and slightly jiggly.
- Remove from oven and let the cakes rest for 1 minute. Run a knife around the edges to loosen, then carefully invert onto dessert plates.
- Serve immediately, dusted with powdered sugar and with optional vanilla ice cream or whipped cream.
Notes
Use room temperature eggs for better aeration. Grease and dust ramekins thoroughly with butter and cocoa powder to prevent sticking. Watch bake time carefully to keep the center molten. High-quality bittersweet chocolate is recommended for best flavor and texture. For dairy-free, substitute butter with coconut oil and use dairy-free chocolate. For gluten-free, use a gluten-free flour blend.
Nutrition
- Serving Size: 1 molten lava cake
- Calories: 320
- Fat: 20
- Carbohydrates: 34
- Protein: 5
Keywords: molten lava cake, chocolate dessert, easy chocolate cake, gooey chocolate center, homemade lava cake, quick dessert, dinner party dessert