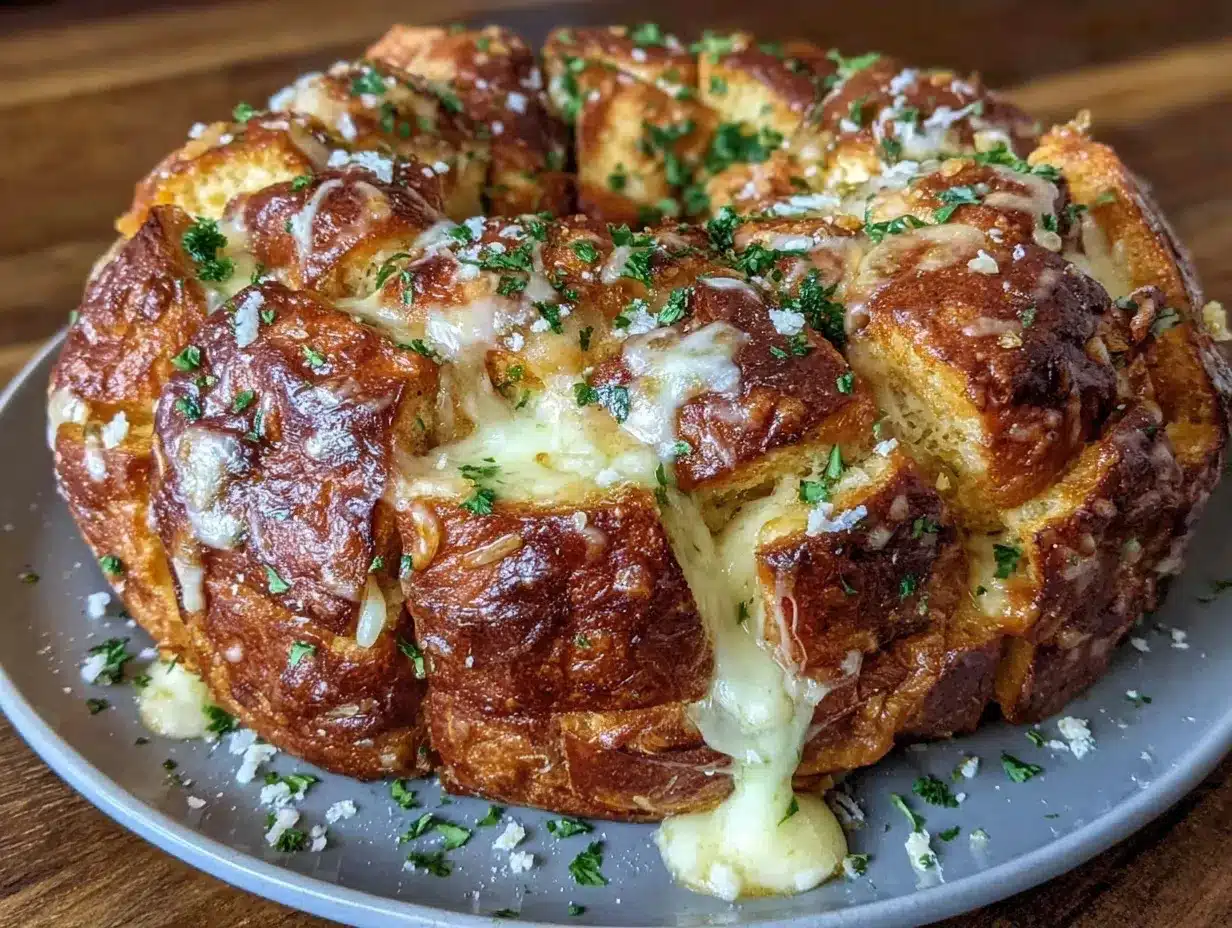
Picture this: the unmistakable aroma of golden, garlicky butter filling your kitchen, the sound of crust crackling as you tear off a piece, gooey cheese stretching from slice to slice—honestly, it’s the kind of thing that makes neighbors peek over the fence and kids race to the table. The first time I made this crispy cheesy garlic pull-apart bread, I remember standing in front of my oven, nose practically pressed to the glass, counting down the minutes. When I finally pulled it out, all bubbly and fragrant, I just had to pause—taking that deep, satisfied breath, knowing I’d stumbled onto something magical.
This bread takes me back to weekends at my grandma’s house—when I was knee-high to a grasshopper, she’d bake her famous garlic bread for Sunday dinners. But this? This is the heartier, cheesier, “please pass me another piece” version I wish I’d known about years ago. I first discovered the idea at a potluck, watching the loaf disappear slice by cheesy slice before I could even snag a second helping. My family’s reaction? Let’s just say it’s impossible to keep their hands off the cooling rack (and I can’t really blame them—who could resist crispy edges and melty cheese?).
Honestly, this crispy cheesy garlic pull-apart bread is dangerously easy, pure nostalgic comfort, and just the thing for potlucks, game nights, birthday parties, or those evenings when you want to brighten up your Pinterest board with something truly crowd-pleasing. I’ve tested it more times than I care to admit (in the name of research, of course), and it’s become a staple for family gatherings and gifting to friends. If you love buttery, cheesy, garlicky goodness in every bite, you’re going to want to bookmark this one. It feels like a warm hug in bread form, every single time.
Why You’ll Love This Crispy Cheesy Garlic Pull-Apart Bread
There’s something almost magical about tear-and-share bread. As someone who’s baked more loaves than I can count, I can confidently say this crispy cheesy garlic pull-apart bread is in a league of its own. After countless test runs, taste tests, and a few “oops, I ate half the loaf myself” moments, I’ve nailed down why you’re about to fall head over heels for this recipe:
- Quick & Easy: Comes together in under 15 minutes of prep—seriously. It’s the kind of thing you can whip up when surprise guests show up or when you’re craving something cheesy at midnight.
- Simple Ingredients: No specialty store runs required. You probably have everything you need—think bakery bread, garlic, butter, cheese, and a few pantry staples.
- Perfect for Sharing: It’s made to pull apart, so everyone gets their fair share (unless you want to keep it all to yourself—no judgment here!). Ideal for parties, potlucks, cozy movie nights, or as a game day appetizer.
- Crowd-Pleaser: Kids, teens, picky eaters, and adults—everyone lights up when this comes out of the oven. Even folks who claim they “don’t like bread” can’t resist a cheesy, crispy chunk.
- Unbelievably Delicious: The crust gets perfectly crunchy, the cheese melts into gooey ribbons, and the garlic butter soaks into every nook and cranny. It’s comfort food at its absolute best.
This isn’t just any pull-apart bread. I use a special scoring technique (learned after a few sad, collapsed loaves), and a blend of cheeses that melts beautifully without turning greasy. There’s a reason this bread gets requested for every family birthday and backyard barbecue—and it’s not just because it looks good on a Pinterest board.
If you’re after a recipe that delivers mouthwatering flavor, irresistible texture, and that “wow, did you really make this?” reaction, this crispy cheesy garlic pull-apart bread hits all the marks. Whether you’re feeding a crowd or just treating yourself to something special, it’s the kind of bread that makes you close your eyes and savor every bite. Trust me—your future self will thank you for adding this recipe to your lineup.
What Ingredients You Will Need
This crispy cheesy garlic pull-apart bread recipe brings together basic, reliable ingredients for a bold, crave-worthy flavor and that signature stretchy-cheese moment. Here’s what you’ll need (no fancy stuff, promise):
- 1 large crusty loaf of bread (sourdough, Italian, or French—about 1 lb/450g; make sure it’s unsliced for best results)
- For the Garlic Butter:
- 1/2 cup (115g) unsalted butter (softened to room temp—Kerrygold is my favorite for that rich flavor)
- 4–6 garlic cloves (minced or pressed; adjust to taste—fresh is best, but jarred works in a pinch)
- 1/2 tsp kosher salt (or to taste)
- 1/4 tsp black pepper
- 2 tbsp fresh parsley (finely chopped; sub dried parsley if that’s what you have)
- 1/2 tsp dried Italian seasoning (optional; adds depth and a little herby kick)
- For the Cheese Filling:
- 1 1/2 cups (170g) shredded mozzarella cheese (use part-skim or whole milk; pre-shredded is fine, but shredding your own melts better)
- 1/2 cup (50g) shredded sharp cheddar cheese (for that tangy bite—swap for Monterey Jack if you prefer)
- 1/4 cup (25g) grated Parmesan cheese (adds salty, nutty flavor—use Pecorino Romano if you like it sharper)
- Optional Extras:
- Red pepper flakes (for a little heat—totally optional, but highly recommended if you like a kick!)
- Chopped chives or green onions (for garnish and extra flavor)
- Grated lemon zest (never a bad idea if you want some brightness)
Ingredient Tips: For best results, use a bread that’s at least a day old—slightly stale bread holds up better when you score it. If you need gluten-free, a sturdy gluten-free loaf works just fine. For dairy-free, swap in plant-based butter and cheese (Violife or Miyoko’s are good brands).
Honestly, this recipe is so forgiving. I’ve used everything from basic supermarket Italian bread to fancy local sourdough, and it’s always a hit. If you’re cleaning out the fridge, toss in a handful of whatever cheese you have—it’s hard to go wrong!
Equipment Needed
- Bread knife: A sharp, serrated knife is a must for scoring the loaf without crushing it. If you don’t have one, a very sharp chef’s knife can work, but go slow and gentle.
- Cutting board: Use one large enough to hold your whole loaf. (I learned the hard way not to have half the loaf sliding off!)
- Mixing bowl: For making your garlic butter and tossing the cheese blend.
- Small spatula or butter knife: To spread the garlic butter into all those scored nooks and crannies.
- Baking sheet: Line with parchment for easy cleanup. If you don’t have parchment, foil works too—just watch for sticking cheese.
- Aluminum foil: To tent the bread for the first bake (keeps the cheese from burning).
- Oven mitts: I’ve grabbed a hot pan bare-handed once—never again! Keep those hands safe.
If you’re on a budget, don’t stress. I’ve made this with dollar-store knives and thrifted baking sheets, and it still turned out perfect. Just treat your tools with care—sharp knives and a sturdy pan will make your life easier. If you want to get fancy, a silicone basting brush is nice for the garlic butter, but fingers work in a pinch (and are more fun, honestly!).
How to Make Crispy Cheesy Garlic Pull-Apart Bread
-
Prep Your Ingredients (5 minutes):
- Preheat your oven to 375°F (190°C). Line a baking sheet with parchment paper for easy cleanup.
- Make sure your butter is softened. If it’s cold, zap it in the microwave for 10–15 seconds (just until spreadable, not melted!).
- Shred your cheeses and mince your garlic if you haven’t already.
-
Score the Bread (5 minutes):
- Place your loaf on the cutting board. Using a serrated knife, cut rows into the bread about 1 inch (2.5 cm) apart, stopping just before you reach the bottom—don’t slice all the way through! Rotate the loaf and repeat, creating a crosshatch pattern (like a hedgehog, but tastier).
- Personal tip: If the bread is super fresh, pop it in the fridge for 10 minutes to firm up. This helps avoid squishing the loaf while scoring.
- If you do accidentally cut through in spots, no worries—just squish it back together on the baking sheet. It’ll bake up fine!
-
Make the Garlic Butter (2 minutes):
- In a small bowl, mix together the softened butter, minced garlic, salt, pepper, parsley, and Italian seasoning. Stir until well combined and fragrant.
- If you like a little heat, toss in a pinch of red pepper flakes.
-
Fill the Bread (5 minutes):
- Gently pry apart the bread sections and use a small spatula or butter knife to slather the garlic butter into every nook and cranny. Don’t be shy—it’s the key to flavor in every bite.
- Next, stuff the shredded mozzarella, cheddar, and Parmesan into the spaces. Press the cheese down so it’s tucked well inside (the more, the merrier!).
-
Bake (20–25 minutes):
- Transfer the stuffed loaf to your prepared baking sheet. Tent loosely with aluminum foil (this keeps the cheese from burning and helps the insides get all melty).
- Bake for 15 minutes, then remove the foil and bake another 8–10 minutes, until the top is crispy and the cheese is bubbling and golden.
- Sensory cue: The bread should be deeply golden, cheese sizzling, and your kitchen will smell amazing.
-
Garnish and Serve:
- Let cool for 2–3 minutes, then sprinkle with extra parsley, chives, or a little lemon zest if you want a fresh touch.
- Serve hot, right off the baking sheet. Pull apart pieces and watch the cheese stretch (the best part!).
If your cheese isn’t melting well, try covering with foil for a bit longer, or use freshly shredded cheese for better meltability. Don’t stress if things aren’t perfectly neat—honestly, the rustic look is part of the charm. If you have leftovers (unlikely, but possible), wrap tightly and reheat in the oven to get that crispiness back.
Cooking Tips & Techniques
After plenty of trial, error, and a few “oops, I forgot the foil” moments, I’ve picked up some tricks for making the perfect crispy cheesy garlic pull-apart bread every single time:
- Don’t Cut All the Way Through: The secret to pull-apart bread is stopping your knife just before the bottom crust. If you do slice through, just piece it together on the baking sheet—it’ll still bake up beautifully.
- Use Room Temperature Butter: Soft butter spreads easily and soaks into the bread. Cold butter will tear the bread (trust me, I’ve wrestled with it before!).
- Fresh Garlic is Best: The flavor is stronger and more aromatic, though jarred garlic works in a pinch if you’re in a rush.
- Shred Your Own Cheese: Pre-shredded cheese contains anti-caking agents that can make the final bread less gooey. Grating your own takes an extra minute but makes a world of difference.
- Don’t Skimp on the Cheese or Butter: It’s all about indulgence here. If you’re worried about calories, just remember you’re sharing (hopefully!).
- Adjust the Bake Time: Ovens vary—if your bread isn’t crispy after the suggested time, give it a couple more minutes uncovered. Just watch it closely to avoid burnt edges.
- Let It Rest Briefly: I know, it smells incredible, but letting it cool for a minute or two makes it easier to pull apart without scalding your fingers.
- Multitasking Tip: While the bread bakes, whip up a quick salad or set out dipping sauces—garlic butter, marinara, or ranch are all winners.
My first few tries, I underbaked and ended up with soggy bottoms (not fun!). Now I know to bake uncovered at the end for that signature crunch. If you want a cheesier bread, don’t be afraid to add an extra handful of mozzarella—there’s no such thing as too much cheese here.
Variations & Adaptations
One of the best things about this crispy cheesy garlic pull-apart bread recipe is how easily you can make it your own. Here are some of my favorite twists:
- Herb Lovers: Add fresh basil, oregano, or thyme into the butter mix for even more flavor. Rosemary is amazing in the fall and winter.
- Spicy Kick: Mix a teaspoon of chili flakes or diced jalapeños into the cheese blend for heat lovers. Pepper Jack cheese is a fun swap, too.
- Gluten-Free: Use your favorite gluten-free crusty loaf. Just check the bake time—it can be a little shorter since GF bread tends to be drier.
- Dairy-Free/Vegan: Swap in plant-based butter and cheese (Violife and Daiya both work). Use nutritional yeast for a nutty, cheesy flavor if you want to skip cheese entirely.
- Seasonal Veggies: Tuck in finely chopped sun-dried tomatoes, sautéed mushrooms, or roasted bell peppers for added texture and flavor.
- Breakfast Version: Add cooked bacon crumbles and a sprinkle of green onion for a brunch twist—trust me, it’s a hit alongside scrambled eggs.
One time when I was out of mozzarella, I used a mix of Swiss and provolone—it gave the bread an almost French onion soup vibe (so good!). If you’re baking for someone with nut allergies, just double-check your bread ingredients and cheese, but the recipe is generally nut-free as written. This is one recipe you’ll never get bored of—mix and match until you find your signature combo!
Serving & Storage Suggestions
This bread is best served fresh from the oven, hot and melty. Set it on a wooden board or a rustic tray and let everyone pull apart their own piece—it’s interactive, fun, and makes for a gorgeous presentation (hello, Pinterest!).
- Serving Ideas: Pair with a marinara dipping sauce, ranch, or garlic butter for extra indulgence. It’s also amazing alongside pasta, soup, or salad—or as the centerpiece of a party snack spread.
- Best Temperature: Serve warm for stretchy cheese and the crispiest crust. If you’re prepping ahead for a party, bake it, then reheat in the oven at 350°F (175°C) for 10 minutes before serving.
Got leftovers? Wrap tightly in foil and store in the fridge for up to 2 days. To reheat, pop in a 350°F (175°C) oven, uncovered, for 10–12 minutes to restore that crunch. I don’t recommend microwaving—it’ll make the bread soggy. You can freeze the unbaked, stuffed loaf—just wrap well and bake from frozen, adding an extra 10 minutes covered before uncovering to crisp.
Honestly, the flavors get even better the next day, but I can’t promise you’ll have any left to test that theory!
Nutritional Information & Benefits
Here’s a rough breakdown for one serving (about 1/8th of the loaf):
- Calories: ~290
- Protein: 10g
- Carbs: 28g
- Fat: 15g
- Sugar: 1g
- Fiber: 1g
This crispy cheesy garlic pull-apart bread is rich and indulgent, but also offers some protein and calcium thanks to the cheese. Use whole grain bread for more fiber, or swap in lower-fat cheese to lighten things up. It’s vegetarian as written, and you can easily make it gluten-free or dairy-free with the swaps above. Watch out for dairy and gluten if you have allergies—read your labels carefully.
From a wellness perspective, I see this as a “sometimes food”—perfect for celebrations, gatherings, or when you just need a little comfort. Sharing it with friends makes the experience even sweeter!
Conclusion
When it comes to party food, cozy night-in treats, or just something to make your family smile, this crispy cheesy garlic pull-apart bread truly hits the spot. It’s easy, adaptable, and always gets rave reviews—plus, who can say no to stretchy cheese and crispy edges?
Don’t be afraid to tweak the recipe to your tastes—try different cheeses, add herbs, or sneak in some veggies. That’s the beauty of this bread: it’s forgiving and fun, never fussy. Personally, I love it for the nostalgic, buttery comfort, and the way it brings everyone together (even my picky eaters!).
If you try this recipe, I’d love to hear how it went—drop a comment, share your favorite twist, or tag me in your Pinterest photos. There’s always a spot at the table for more bread lovers. Happy baking, and may your kitchen always smell this good!
FAQs About Crispy Cheesy Garlic Pull-Apart Bread
Can I make crispy cheesy garlic pull-apart bread ahead of time?
Absolutely! Assemble the loaf, wrap tightly in foil, and refrigerate up to 12 hours. Bake just before serving for the crispiest result.
What bread works best for pull-apart garlic bread?
A crusty, unsliced loaf like sourdough, Italian, or French bread is perfect. Day-old bread holds up best to scoring and stuffing with cheese.
Can I freeze this bread before or after baking?
Yes! Freeze the unbaked, stuffed loaf tightly wrapped. Bake from frozen, adding about 10 minutes to the covered bake time. Leftover baked bread can be wrapped and frozen for up to 1 month—reheat in the oven for best texture.
What cheeses melt best for this recipe?
Mozzarella is classic for stretch, cheddar adds sharpness, and Parmesan gives a salty kick. You can use any good melting cheese—Swiss, provolone, or Gouda work great too.
How do I keep the bread from getting soggy?
Don’t overdo the butter, and bake uncovered at the end for a crispy crust. Using day-old bread helps, too! If it’s still soggy, add a few extra minutes in the oven until golden and crisp.
Pin This Recipe!

Crispy Cheesy Garlic Pull-Apart Bread
This crispy cheesy garlic pull-apart bread is a crowd-pleasing, buttery, garlicky comfort food perfect for sharing at parties, potlucks, or cozy nights in. With gooey cheese, crunchy crust, and fragrant garlic butter, it’s dangerously easy and always a hit.
- Prep Time: 15 minutes
- Cook Time: 25 minutes
- Total Time: 40 minutes
- Yield: 8 servings 1x
- Category: Appetizer
- Cuisine: American
Ingredients
- 1 large crusty loaf of bread (sourdough, Italian, or French, about 1 lb/450g, unsliced)
- 1/2 cup (1 stick, 115g) unsalted butter, softened
- 4–6 garlic cloves, minced or pressed
- 1/2 teaspoon kosher salt
- 1/4 teaspoon black pepper
- 2 tablespoons fresh parsley, finely chopped (or 2 teaspoons dried parsley)
- 1/2 teaspoon dried Italian seasoning (optional)
- 1 1/2 cups (170g) shredded mozzarella cheese
- 1/2 cup (50g) shredded sharp cheddar cheese
- 1/4 cup (25g) grated Parmesan cheese
- Red pepper flakes (optional, to taste)
- Chopped chives or green onions (optional, for garnish)
- Grated lemon zest (optional, for garnish)
Instructions
- Preheat oven to 375°F (190°C). Line a baking sheet with parchment paper.
- Soften butter if needed. Shred cheeses and mince garlic.
- Place loaf on cutting board. Using a serrated knife, score the bread in a crosshatch pattern, cutting rows about 1 inch apart but not all the way through.
- In a mixing bowl, combine softened butter, garlic, salt, pepper, parsley, and Italian seasoning. Mix until well combined. Add red pepper flakes if desired.
- Gently pry apart bread sections and spread garlic butter into all nooks and crannies using a spatula or butter knife.
- Stuff shredded mozzarella, cheddar, and Parmesan into the scored spaces, pressing cheese down well.
- Transfer loaf to prepared baking sheet. Tent loosely with aluminum foil.
- Bake for 15 minutes covered, then remove foil and bake another 8–10 minutes until top is crispy and cheese is bubbling and golden.
- Let cool for 2–3 minutes. Garnish with extra parsley, chives, or lemon zest if desired.
- Serve hot, pulling apart pieces to enjoy the stretchy cheese.
Notes
Use day-old bread for best texture. For gluten-free or dairy-free, substitute with sturdy gluten-free bread and plant-based butter/cheese. Shred your own cheese for best melt. If bread is very fresh, chill briefly before scoring. Leftovers can be wrapped and reheated in the oven for crispiness. Add herbs, veggies, or different cheeses for variations.
Nutrition
- Serving Size: 1/8th loaf
- Calories: 290
- Sugar: 1
- Sodium: 450
- Fat: 15
- Saturated Fat: 9
- Carbohydrates: 28
- Fiber: 1
- Protein: 10
Keywords: pull-apart bread, garlic bread, cheesy bread, party food, appetizer, comfort food, easy recipe, sharing, potluck, game night