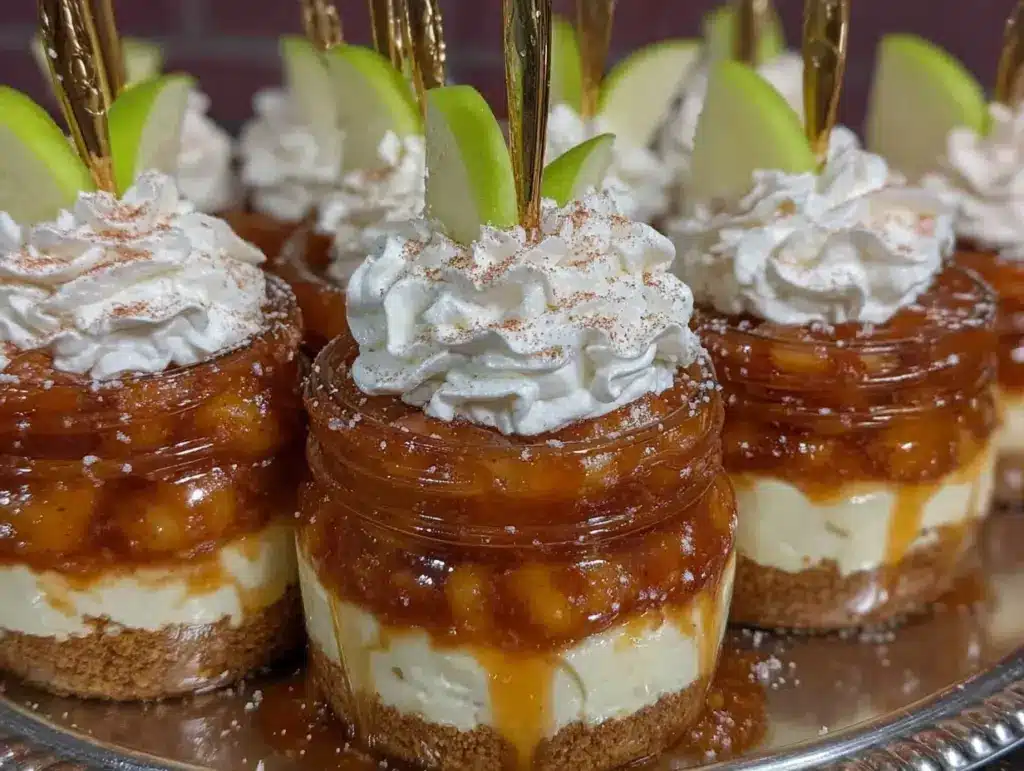
Let me paint you a picture—the moment I pop open the lid on one of these Creamy No Bake Salted Caramel Apple Pie Cheesecake Jars, the aroma of cinnamon-spiced apples and rich caramel hits me right in the nose. It’s like autumn bottled up and ready to be devoured. The velvety cheesecake layer, swirled with tangy cream cheese and just a hint of vanilla, sits nestled beneath a crown of golden caramel apples and buttery graham cracker crumbs. I’ll be honest, the first time I made these jars, I wasn’t expecting my kitchen to smell this magical. It’s the kind of moment where you pause, take a deep breath, and just smile because you know you’re onto something truly special.
Years ago, when I was knee-high to a grasshopper, my grandma would bake apple pies every fall (always with a pinch more cinnamon than the recipe called for). We’d crowd around the oven, impatiently waiting for the bubbling juices to peek through the lattice crust. These cheesecake jars are my little tribute to those cozy afternoons—except now, I get to skip the oven and whip up a batch whenever a craving strikes. I stumbled onto this recipe one rainy weekend, trying to recreate that nostalgic combination of gooey apples and creamy cheesecake, but with less fuss. What I wish I’d known sooner? How dangerously easy these jars are to put together!
My family couldn’t stop sneaking spoonfuls off the countertop (and I can’t really blame them). The layers are so inviting—first the buttery crunch, then the cheesecake creaminess, topped with salted caramel apple goodness. Honestly, you know you’re in for a treat when dessert disappears faster than you can say “apple pie.” These jars are perfect for potlucks, a sweet treat for your kids, or even just to brighten up your Pinterest cookie board. After testing these at least five times “in the name of research, of course,” I can say they’ve become a staple for family gatherings, gifting, and those nights when I want pure, nostalgic comfort. It feels like a warm hug in jar form, and you’re going to want to bookmark this one—you’ll thank me later!
Why You’ll Love This Recipe
- Quick & Easy: Comes together in under 30 minutes (seriously, you’ll be spooning into these jars before you know it), perfect for busy weeknights or last-minute cravings.
- Simple Ingredients: No fancy grocery trips required—just pantry staples like cream cheese, apples, caramel sauce, graham crackers, and a dash of cinnamon. You probably have everything on hand right now.
- Perfect for Fall Gatherings: These cheesecake jars are the ultimate easy fall dessert, ideal for Thanksgiving, Halloween parties, or cozy Sunday dinners. Not only do they look gorgeous on a dessert table, but they travel well too!
- Crowd-Pleaser: Adults rave about the salted caramel twist, and kids love the layers and individual jars (less fighting over who gets the biggest slice!).
- Unbelievably Delicious: The combination of creamy no bake cheesecake, buttery graham crackers, spiced apple pie filling, and salted caramel is next-level comfort food. It’s the kind of dessert that makes you close your eyes after the first bite.
What makes these Creamy No Bake Salted Caramel Apple Pie Cheesecake Jars different from the rest? For starters, I use a trick I learned while working at a local bakery—blending the cream cheese mixture with a touch of Greek yogurt for extra tang and creaminess. Plus, layering the apples with a sprinkle of flaky sea salt and homemade (or store-bought, if you’re in a hurry) caramel sauce gives every spoonful that sweet-salty balance you just can’t get enough of. I’ve tested dozens of cheesecake recipes, and this one is hands down my favorite. No oven, no water bath, no cracked tops—just pure, spoonable bliss.
This recipe isn’t just good—it’s the kind that feels like a little celebration every time you eat it. Whether you’re making these jars for a dinner party, holiday gift, or just a Tuesday night pick-me-up, they’re guaranteed to turn a simple meal into something memorable. Let’s face it, sometimes you need a dessert that looks fancy but doesn’t require hours in the kitchen. These jars deliver!
What Ingredients You Will Need
This recipe uses simple, wholesome ingredients to deliver bold flavor and satisfying texture without the fuss. Most are pantry staples—so you won’t have to run all over town searching for anything exotic. If you want, you can swap and tweak as needed. Here’s what you’ll need:
- For the Graham Cracker Base:
- 1 1/2 cups (150g) graham cracker crumbs (or digestive biscuits, crushed)
- 1/4 cup (60g) unsalted butter, melted
- 2 tbsp (25g) granulated sugar
- For the Creamy Cheesecake Layer:
- 8 oz (225g) cream cheese, softened (full-fat recommended for best texture)
- 1/2 cup (120g) Greek yogurt (adds tang and creaminess—swap with sour cream if you prefer)
- 1/2 cup (60g) powdered sugar
- 1 tsp vanilla extract
- Pinch of salt
- For the Apple Pie Filling:
- 2 medium apples, peeled, cored, and diced (Granny Smith or Honeycrisp work great)
- 2 tbsp (30g) unsalted butter
- 3 tbsp (40g) brown sugar
- 1 tsp ground cinnamon
- 1/4 tsp ground nutmeg (optional, for extra warmth)
- 1 tbsp (15ml) water
- Pinch of salt
- For the Salted Caramel Sauce:
- 1/2 cup (120ml) salted caramel sauce (store-bought or homemade)
- Flaky sea salt, for sprinkling (adds that irresistible salty-sweet pop)
- Optional Toppings:
- Whipped cream
- Extra caramel drizzle
- Chopped pecans or walnuts
- Mini apple slices for garnish
Ingredient tips: For the apples, I like to use tart varieties like Granny Smith—they hold their shape and balance out the sweetness. If you want a gluten-free version, swap the graham crackers for gluten-free cookies. For dairy-free, use coconut yogurt and vegan cream cheese (I’ve tested this—works pretty well, though the texture is slightly softer). If you’re feeling extra fancy, make your own caramel sauce—it’s easier than you think! I always reach for Kerrygold butter for the base and Philadelphia cream cheese for the filling because the flavor is just unbeatable. In summer, you can swap in fresh peaches or berries for a different twist. Oh, and if you’re out of brown sugar, coconut sugar works in a pinch!
Equipment Needed
- Mixing bowls: You’ll need one large and one medium bowl for the cheesecake and apple filling.
- Electric mixer or handheld whisk: For blending the cream cheese mixture—trust me, it’s worth using an electric mixer for that super creamy texture.
- Small saucepan: To cook down the apples and make them all gooey and caramelized.
- Measuring cups and spoons: Precision makes perfect, especially for the cheesecake layer.
- Rubber spatula: Helps scrape every last bit of goodness from the bowl.
- Jars or ramekins (6-8 oz/180-240ml each): Mason jars, Weck jars, or even old jam jars work. If you’re short on jars, use small glasses or bowls.
If you don’t have a mixer, a sturdy whisk and some elbow grease will get the job done. I’ve made these in every type of jar imaginable—recycled yogurt pots, fancy Weck jars, and even disposable plastic cups for big parties. When using glass jars, make sure they’re clean and dry to avoid any sogginess. For the saucepan, a nonstick works best and makes cleanup easier. Honestly, you don’t need anything fancy or expensive. Just keep your mixer’s beaters clean (a quick rinse after blending the cheesecake saves time), and if you’re using jars with lids, those are handy for storing leftovers.
Preparation Method
- Prep the Graham Cracker Base: In a medium bowl, mix 1 1/2 cups (150g) graham cracker crumbs, 1/4 cup (60g) melted butter, and 2 tbsp (25g) sugar until the mixture looks like wet sand and holds together when pressed. Spoon about 2-3 tablespoons into the bottom of each jar and gently press down to form an even layer. (Tip: Use the back of a spoon or a small glass to tamp it down. If it feels too dry, add a splash more melted butter.) Set aside.
- Make the Creamy Cheesecake Layer: In a large bowl, beat 8 oz (225g) softened cream cheese until smooth (about 1 minute). Add 1/2 cup (120g) Greek yogurt, 1/2 cup (60g) powdered sugar, 1 tsp vanilla extract, and a pinch of salt. Beat until light and fluffy, scraping down the sides as needed—should take 2-3 minutes. (If you notice lumps, let the mixture sit for a few minutes, then whisk again. Texture should be silky, not runny.)
- Prepare the Apple Pie Filling: Peel, core, and dice 2 medium apples. In a small saucepan over medium heat, melt 2 tbsp (30g) butter. Add the apples, 3 tbsp (40g) brown sugar, 1 tsp cinnamon, 1/4 tsp nutmeg, 1 tbsp (15ml) water, and a pinch of salt. Stir and cook for 5-7 minutes, until the apples are soft but not mushy and the sauce is syrupy. Remove from heat and let cool slightly. (If the mixture looks dry, add another splash of water; if it’s too soupy, simmer a minute longer.)
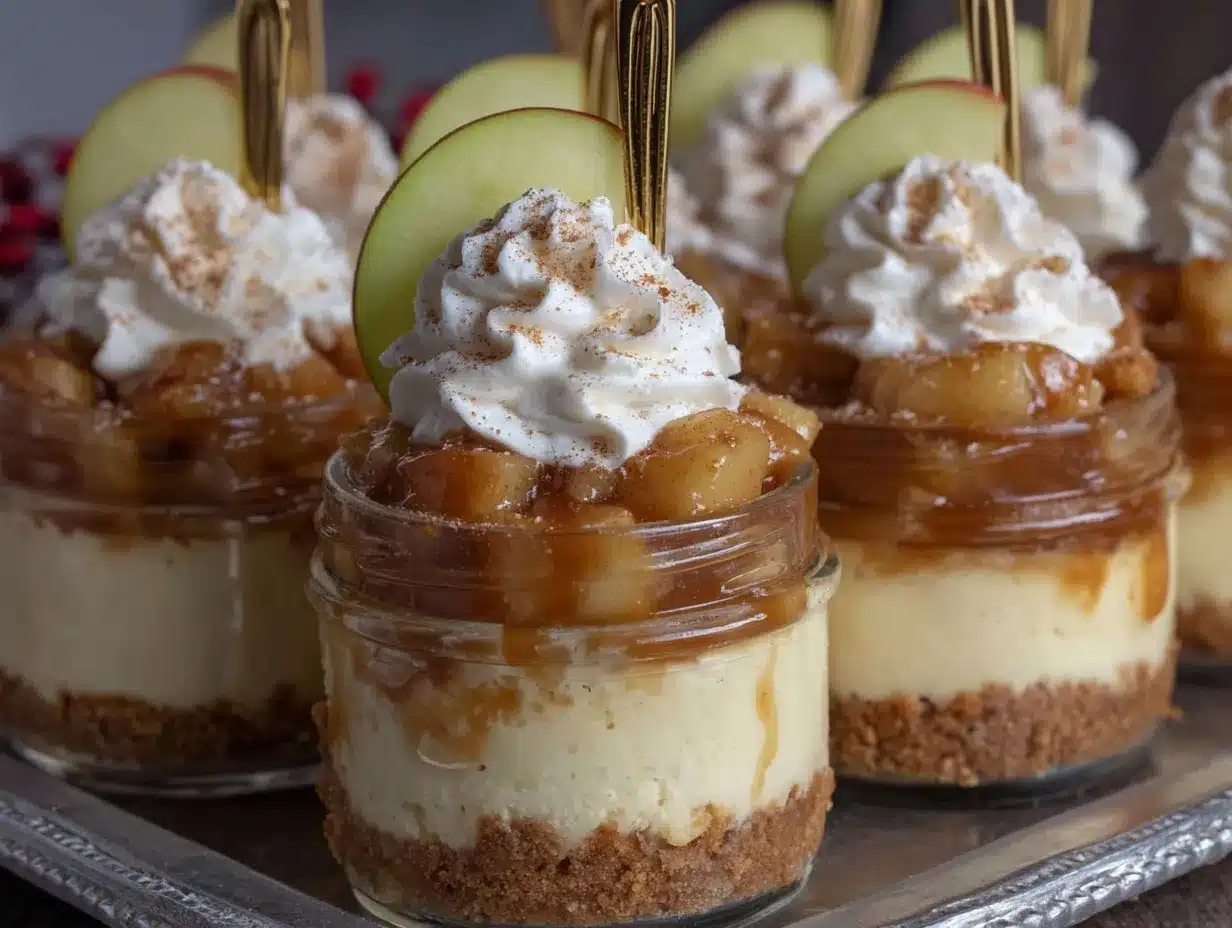
- Layer the Jars: Spoon a generous layer of cheesecake mixture over the graham cracker base in each jar (about 3-4 tablespoons). Smooth the top with a spatula. Add a layer of cooled apple pie filling (about 2 tablespoons per jar). Drizzle 1-2 teaspoons of salted caramel sauce over the apples, then sprinkle a pinch of flaky sea salt.
- Garnish and Chill: Optional: Top with whipped cream, extra caramel drizzle, chopped nuts, or mini apple slices. Cover jars with lids or plastic wrap and chill in the refrigerator for at least 1 hour to let the flavors meld (though, honestly, I’ve eaten them right away and they’re still dreamy).
Notes & Troubleshooting: If your cheesecake layer feels too loose, chill for 20 minutes before layering. Apples too tart? Add a dash more sugar. Caramel sauce too thick? Microwave for 10 seconds to loosen. For efficiency, prep the apple filling while the graham cracker base sets—multi-tasking makes this recipe super fast. And if your layers get a little messy, don’t worry—these jars are meant to be rustic and irresistible!
Cooking Tips & Techniques
Over the years, I’ve picked up a few tricks that really bring out the best in these Creamy No Bake Salted Caramel Apple Pie Cheesecake Jars. Here’s what I’ve learned (sometimes the hard way!):
- Softening Cream Cheese: Let your cream cheese sit at room temperature for at least 30 minutes before mixing. Cold cream cheese will make the filling lumpy and harder to blend. If you forget, microwave in 10-second bursts until just soft.
- Perfect Apple Texture: Don’t overcook the apples! They should be tender but still have a slight bite. Mushy apples will make the filling too wet. I always taste a piece about halfway through cooking to check.
- Layering for Looks: Use a piping bag or zip-top bag with a corner snipped off to layer the cheesecake mixture neatly into the jars (especially handy if you’re making these for a party and want them picture-perfect for Pinterest!).
- Salted Caramel Balance: Sprinkle flaky sea salt over the caramel right before serving. I learned the hard way that mixing salt into the caramel sauce can make it taste uneven. A light sprinkle on top is ideal.
- Consistency Issues: If your cheesecake layer seems runny, chill it longer or add a tablespoon more powdered sugar. Too stiff? Add a splash of milk or yogurt.
- Multi-tasking: Start the apple filling while prepping the cheesecake layer, then melt your butter for the base in the same pan—fewer dishes, faster prep!
- My Failures: Once, I used low-fat cream cheese and the filling turned out grainy—stick with full-fat for best results. And, don’t skip the chilling step if you want the layers to hold up nicely!
Honestly, these tips make a world of difference. I wish I’d known them when I first started making these jars. They’re the secret to consistent, crave-worthy results every time.
Variations & Adaptations
One of the best things about these cheesecake jars is how endlessly customizable they are. Here’s how you can switch things up to suit your needs (and cravings):
- Gluten-Free: Swap graham crackers for gluten-free cookies or almond flour “crust.” I’ve tried this with Schär gluten-free graham-style crackers—works beautifully!
- Dairy-Free: Use vegan cream cheese and coconut yogurt for the filling. Sub in coconut oil for the base instead of butter. The flavor is a bit more tropical, but still delicious.
- Seasonal Fruit Swaps: In spring, use diced strawberries or peaches instead of apples. In winter, pears with a touch of cardamom make an elegant twist.
- Nutty Crunch: Add a handful of toasted pecans, walnuts, or hazelnuts between the layers for extra crunch.
- Chocolate Lovers: Mix mini chocolate chips into the cheesecake layer or drizzle jars with chocolate sauce instead of caramel.
- Spice It Up: Add a pinch of ginger or allspice to the apple filling for a little kick.
- Single Large Dish: Don’t have jars? Layer everything in a 9×9 inch (23x23cm) dish and scoop out servings with a spoon.
Personally, my favorite variation is swapping the apples for juicy summer peaches, then topping with cinnamon whipped cream and a sprinkle of nutmeg. It’s a whole new dessert! Don’t be afraid to experiment—this recipe is super forgiving. Allergens are easy to tweak, and flavor combos are endless.
Serving & Storage Suggestions
For serving, I love these cheesecake jars slightly chilled—just out of the fridge, the layers are firm and the caramel sauce is gooey but not runny. If you’re feeling fancy, add whipped cream and a little extra caramel just before serving. These look gorgeous lined up on a dessert tray or packed in a picnic basket!
Pair with a mug of spiced chai, hot apple cider, or coffee for the perfect cozy treat. They also play well with a scoop of vanilla ice cream if you want to go all out. For big gatherings, make mini jars so everyone can grab their own.
Storage: Cover jars tightly with lids or plastic wrap and refrigerate for up to 3 days. The flavors actually get even better as they meld overnight. For longer storage, freeze without toppings for up to 1 month—thaw in the fridge before serving. Reheat apple filling separately in the microwave if needed, but the rest is best served cold. If the graham base gets a little soft, just top with extra crumbs before serving and no one will know. These jars are built for make-ahead convenience!
Nutritional Information & Benefits
Each Creamy No Bake Salted Caramel Apple Pie Cheesecake Jar (approx. 8 oz/240ml) contains an estimated:
- Calories: 390
- Fat: 23g
- Carbohydrates: 42g
- Protein: 6g
- Sugar: 30g
Apples are a great source of fiber and vitamin C, while Greek yogurt adds protein and gut-friendly probiotics. If you opt for lower-sugar or dairy-free ingredients, these jars can fit into a variety of wellness goals. Allergens include dairy, gluten, and nuts (if using toppings)—always check labels if making for friends with sensitivities. Personally, I love that you can adjust the sweetness and use real fruit for a little health boost. These jars are pure comfort with a touch of wholesome goodness!
Conclusion
If you’re craving a dessert that’s cozy, creamy, and bursting with fall flavor, these Creamy No Bake Salted Caramel Apple Pie Cheesecake Jars are absolutely worth a try. They’re easy, endlessly adaptable, and guaranteed to put a smile on anyone’s face—whether you’re serving them at a holiday feast or sneaking spoonfuls after dinner. Customize the layers, swap in your favorite fruits, or tweak for dietary needs—these jars are made for you.
I keep coming back to this recipe because it just feels special every time. It’s a little jar of nostalgia, comfort, and sweet fun. I’d love to hear your twists—leave a comment, share your photos, or tell me how you adapted the recipe! Bookmark this one and come back whenever you need a quick, crowd-pleasing dessert. Happy spooning!
FAQs
Can I make these cheesecake jars ahead of time?
Absolutely! Make them up to 2 days in advance and keep refrigerated. They taste even better after the flavors meld overnight.
What apples work best for this recipe?
I recommend Granny Smith for tartness or Honeycrisp for sweetness. Use what you have—just make sure they’re firm and fresh.
Can I use store-bought caramel sauce?
Yes, store-bought caramel works perfectly. If you want a richer flavor, homemade is great but not required.
How do I make these gluten-free?
Swap the graham crackers for gluten-free cookies or almond flour. All other ingredients are naturally gluten-free (check your caramel sauce label).
Can I freeze these jars?
Yes, freeze without toppings for up to 1 month. Thaw in the fridge before serving and add whipped cream or extra caramel just before eating.
Pin This Recipe!
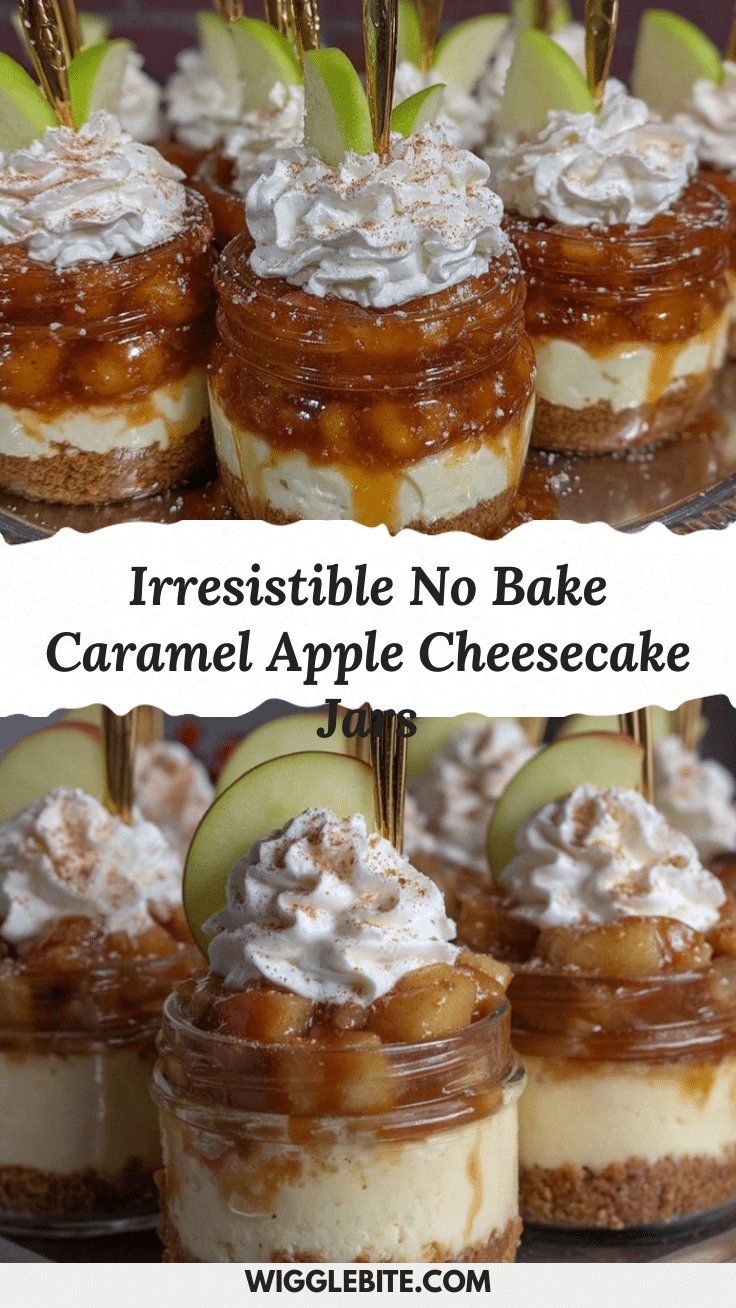
Creamy No Bake Salted Caramel Apple Pie Cheesecake Jars
These easy, no-bake cheesecake jars feature layers of buttery graham cracker crumbs, creamy vanilla cheesecake, cinnamon-spiced apple pie filling, and a drizzle of salted caramel. Perfect for fall gatherings, potlucks, or a cozy dessert at home.
- Prep Time: 15 minutes
- Cook Time: 10 minutes
- Total Time: 25 minutes (plus 1 hour chilling)
- Yield: 6 servings 1x
- Category: Dessert
- Cuisine: American
Ingredients
- 1 1/2 cups graham cracker crumbs (or digestive biscuits, crushed)
- 1/4 cup unsalted butter, melted
- 2 tablespoons granulated sugar
- 8 ounces cream cheese, softened (full-fat recommended)
- 1/2 cup Greek yogurt (or sour cream)
- 1/2 cup powdered sugar
- 1 teaspoon vanilla extract
- Pinch of salt
- 2 medium apples, peeled, cored, and diced (Granny Smith or Honeycrisp)
- 2 tablespoons unsalted butter
- 3 tablespoons brown sugar
- 1 teaspoon ground cinnamon
- 1/4 teaspoon ground nutmeg (optional)
- 1 tablespoon water
- Pinch of salt
- 1/2 cup salted caramel sauce (store-bought or homemade)
- Flaky sea salt, for sprinkling
- Whipped cream (optional)
- Extra caramel drizzle (optional)
- Chopped pecans or walnuts (optional)
- Mini apple slices for garnish (optional)
Instructions
- In a medium bowl, mix graham cracker crumbs, melted butter, and granulated sugar until the mixture resembles wet sand. Spoon 2-3 tablespoons into the bottom of each jar and press down to form an even layer. Set aside.
- In a large bowl, beat softened cream cheese until smooth (about 1 minute). Add Greek yogurt, powdered sugar, vanilla extract, and a pinch of salt. Beat until light and fluffy, scraping down the sides as needed (2-3 minutes).
- Peel, core, and dice apples. In a small saucepan over medium heat, melt butter. Add apples, brown sugar, cinnamon, nutmeg (if using), water, and a pinch of salt. Stir and cook for 5-7 minutes until apples are soft but not mushy and sauce is syrupy. Remove from heat and let cool slightly.
- Spoon a generous layer of cheesecake mixture over the graham cracker base in each jar (about 3-4 tablespoons). Smooth the top. Add a layer of cooled apple pie filling (about 2 tablespoons per jar). Drizzle 1-2 teaspoons of salted caramel sauce over the apples, then sprinkle a pinch of flaky sea salt.
- Top with whipped cream, extra caramel drizzle, chopped nuts, or mini apple slices if desired. Cover jars and chill in the refrigerator for at least 1 hour before serving.
Notes
For best results, use full-fat cream cheese and tart apples like Granny Smith. Chill the cheesecake layer if it feels loose before assembling. Apples should be tender but not mushy. For gluten-free, use gluten-free cookies for the base. These jars can be made ahead and stored in the fridge for up to 3 days or frozen (without toppings) for up to 1 month.
Nutrition
- Serving Size: 1 jar (about 8 oz/24
- Calories: 390
- Sugar: 30
- Sodium: 220
- Fat: 23
- Saturated Fat: 13
- Carbohydrates: 42
- Fiber: 3
- Protein: 6
Keywords: no bake, cheesecake jars, caramel apple, fall dessert, easy dessert, apple pie, salted caramel, Thanksgiving, potluck, mason jar dessert