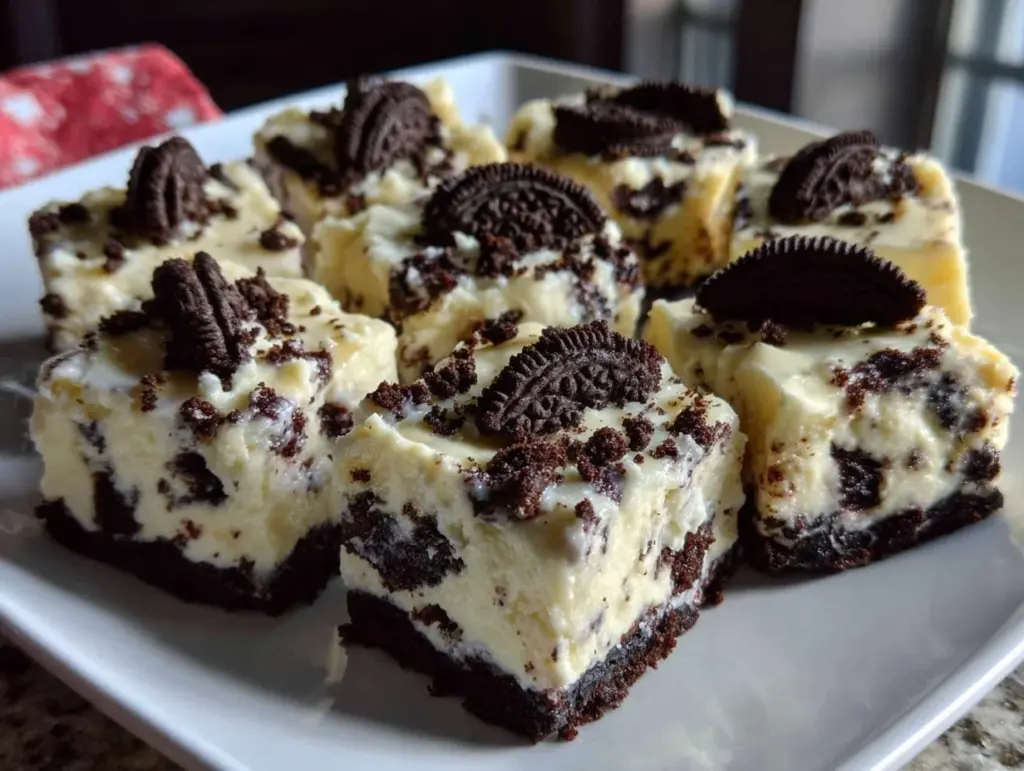
“You know that moment when you’re juggling a busy weeknight, and suddenly, a craving for something rich, creamy, and utterly satisfying hits out of nowhere? That’s exactly how these creamy no-bake Oreo cheesecake bars came to life in my kitchen one Friday evening. Honestly, I wasn’t even planning a dessert. I was just trying to whip up something quick before a surprise visitor showed up—my neighbor Claire, who has a serious sweet tooth and a knack for turning simple treats into celebrations.”
Claire didn’t bring a fancy dessert or a store-bought cake; instead, she pulled out this unassuming pan of Oreo cheesecake bars, claiming they were her “go-to quick fix.” I was skeptical at first—no baking? Creamy cheesecake with Oreos that didn’t involve an oven? But one bite, and I was hooked. That cracked bowl on the counter from my rushed mixing and the slightly off-timed fridge chill didn’t matter one bit. The texture was dreamy, the Oreo crust gave just the right crunch, and the flavor was pure comfort without feeling heavy.
I mean, maybe you’ve been there—needing a dessert that’s fuss-free, fast, and a bit indulgent without the usual oven drama. These bars stuck with me because they’re the kind of recipe you keep coming back to, whether it’s a last-minute gathering or a quiet night when you want something sweet but don’t want to spend hours in the kitchen. Let me tell you, creamy no-bake Oreo cheesecake bars have made their way to the top of my dessert list, and I’m pretty sure they’ll find a special spot in your heart too.
Why You’ll Love This Recipe
This recipe has been tested and approved by friends, family, and yes, my sometimes skeptical neighbor Claire. It’s a classic dessert made ridiculously easy and approachable, perfect for anyone who wants that creamy cheesecake experience without heating up the whole house.
- Quick & Easy: Ready in under 30 minutes plus chilling time—ideal for busy nights or spontaneous dessert cravings.
- Simple Ingredients: No exotic pantry hunts here. You likely already have Oreos, cream cheese, and a few basics on hand.
- Perfect for Entertaining: Great choice for potlucks, casual get-togethers, or even a treat-yourself weekend indulgence.
- Crowd-Pleaser: Kids and adults alike rave about the smooth texture and familiar Oreo crunch.
- Unbelievably Delicious: That creamy, luscious filling paired with a chocolatey crust? It’s pure comfort in every bite.
What sets this recipe apart is the balance—no overly sweet filling, just the right tang from cream cheese combined with crushed Oreos in both crust and topping. Plus, blending the filling just right gives it that velvety smoothness that’s hard to beat. Honestly, it’s the kind of dessert that makes you close your eyes after the first bite and think, “Yep, this is exactly what I needed.”
What Ingredients You Will Need
This recipe uses simple, wholesome ingredients to deliver bold flavor and satisfying texture without the fuss. Most of these are pantry staples, and if not, they’re easy to find at any grocery store.
- Oreos: About 24 whole cookies, crushed (I prefer Nabisco’s classic Oreos for the perfect balance of crunch and sweetness).
- Unsalted Butter: 6 tablespoons (85g), melted (adds richness and helps bind the crust).
- Cream Cheese: 16 ounces (450g), softened to room temperature (use full-fat for best creaminess).
- Powdered Sugar: 1 cup (120g), sifted (sweetens the cheesecake filling without graininess).
- Vanilla Extract: 1 teaspoon (pure vanilla extract adds depth).
- Heavy Whipping Cream: 1 cup (240ml), chilled (whipped to soft peaks for airy, creamy texture).
- Optional Toppings: Extra crushed Oreos or mini chocolate chips for garnish.
For substitutions: If you want a dairy-free version, swap cream cheese with a plant-based alternative like Kite Hill, and use coconut cream instead of heavy cream. Gluten-free Oreo-style cookies work great for a gluten-free crust too.
Equipment Needed
- 8×8-inch (20×20 cm) baking pan: For shaping the bars. Glass or metal works fine.
- Mixing bowls: One large for crust, one medium for filling.
- Electric mixer or stand mixer: To whip the cream and cream cheese filling until smooth and fluffy.
- Food processor or rolling pin: To crush the Oreos finely. I usually use a food processor, but a zip-top bag and rolling pin do the trick.
- Spatula: For folding whipped cream gently into the filling.
Pro tip: If you don’t have an electric mixer, a sturdy whisk and a bit of patience can get you through, though it might take longer to reach the right texture. Also, lining the pan with parchment paper helps with easy removal of the bars.
Preparation Method
- Prepare the crust: Start by crushing 16 Oreos into fine crumbs using your food processor or place them in a sealed bag and crush with a rolling pin. Combine crumbs with melted unsalted butter in a bowl and mix until the texture resembles wet sand. Press this mixture firmly and evenly into the bottom of your 8×8-inch pan to form the crust. Aim for a compact base that doesn’t fall apart. Chill the crust in the fridge while you prepare the filling. (Approx. 10 minutes)
- Make the cheesecake filling: In a medium bowl, beat the softened cream cheese with an electric mixer until smooth and creamy, about 2-3 minutes. Gradually add the sifted powdered sugar and vanilla extract, continuing to beat until fully combined and silky. The filling should be lump-free and slightly glossy.
- Whip the cream: In a separate chilled bowl, whip the heavy cream until soft peaks form. This means when you lift the whisk, the cream holds a gentle peak but isn’t stiff.
- Combine filling and whipped cream: Gently fold the whipped cream into the cream cheese mixture using a spatula. The key here is to fold carefully to keep the airiness—don’t overmix or you’ll lose that fluffy texture. A good fold is done in about 10 slow strokes, turning the bowl as you go.
- Add crushed Oreos: Roughly chop the remaining 8 Oreos into chunks and fold them into the filling mixture. This adds those classic Oreo bites scattered throughout the creamy cheesecake.
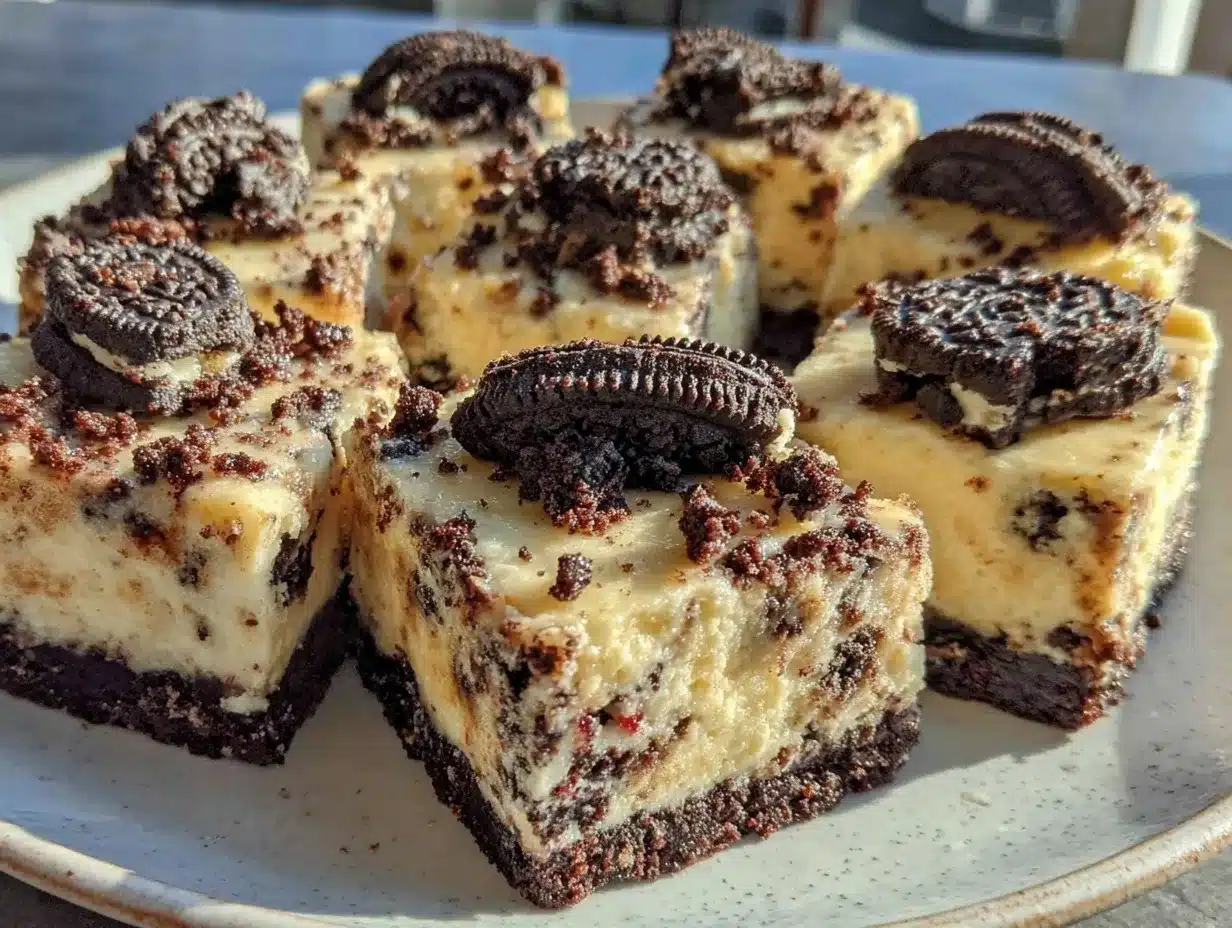
- Assemble the bars: Pour the filling over the chilled crust and spread evenly with your spatula. Sprinkle a few extra Oreo crumbs or mini chocolate chips on top for a pretty finish.
- Chill: Cover the pan tightly with plastic wrap and refrigerate for at least 4 hours, but overnight is best. This allows the filling to set properly and flavors to meld.
- Serve: Once set, lift the bars out using parchment paper overhang, cut into 12 squares with a sharp knife (warm the knife under hot water for clean cuts), and enjoy!
Note: If your filling feels too soft after chilling, an extra hour in the fridge usually helps firm it up. Remember, patience here pays off with that perfect creamy texture!
Cooking Tips & Techniques
Getting creamy no-bake Oreo cheesecake bars just right is all about technique and timing. Here are some tips I’ve picked up over the years:
- Room Temperature Cream Cheese: This is non-negotiable. Cold cream cheese lumps up, making it harder to get a smooth filling. Let it sit on the counter for about an hour or microwave in short bursts if you’re in a rush.
- Whipping the Cream: Chill your bowl and beaters beforehand to get better volume faster. Watch closely—overwhipping cream turns it grainy and buttery, which ruins the texture.
- Folding Technique: Folding keeps the mixture airy. Use a gentle under-over motion with a spatula instead of stirring vigorously.
- Crust Pressing: Pack the Oreo crust firmly but not too hard—you want it compact enough to hold but not rock-hard to bite.
- Cutting the Bars: Use a sharp knife dipped in hot water before slicing each row to avoid crumbly edges. Wipe the knife clean between cuts for neat squares.
One time, I forgot to chill the bars long enough and ended up with a gooey mess—but hey, it still tasted great with a spoon! Just don’t skip the chilling if you want those perfect bars to hold their shape.
Variations & Adaptations
This recipe is a great base for customization. Here are some ideas I’ve tried or recommend:
- Mint Oreo Cheesecake: Swap classic Oreos for mint-flavored ones to add a refreshing twist. Perfect for St. Patrick’s Day or when you crave something different.
- Peanut Butter Swirl: Gently swirl creamy peanut butter into the filling before chilling for a nutty surprise in every bite. Just warm the peanut butter slightly to make swirling easier.
- Berry Topping: Add fresh strawberries or raspberries on top before chilling for a fruity contrast that brightens the rich flavors.
- Vegan/Dairy-Free: Use dairy-free cream cheese and coconut cream. Choose vegan Oreo-style cookies (many Oreos are accidentally vegan, but check labels).
- Individual Servings: Make mini cheesecake bars or parfaits in small jars for easy portion control and cute presentation at parties.
Personally, I once made these with a swirl of salted caramel sauce drizzled on top, and it was a total hit with family. Try swapping or adding flavors that fit your mood—you really can’t go wrong!
Serving & Storage Suggestions
Serve these creamy no-bake Oreo cheesecake bars chilled straight from the fridge for the best texture. They’re perfect as a stand-alone dessert or paired with a scoop of vanilla ice cream or a drizzle of chocolate sauce for extra indulgence.
If you want a little extra flair, sprinkle some crushed Oreos or a dusting of cocoa powder on top right before serving. These bars also pair nicely with a hot cup of coffee or a cold glass of milk—classic combo, right?
For storage, keep them tightly covered in the refrigerator for up to 4 days. They actually taste better after a day or two as the flavors meld and the texture firms up. You can freeze the bars for up to 2 months—just wrap them well in plastic wrap and foil.
When reheating frozen bars, thaw overnight in the fridge and serve chilled. Avoid microwaving as it changes the texture and can make the crust soggy.
Nutritional Information & Benefits
Each creamy no-bake Oreo cheesecake bar contains approximately 280 calories, with about 18g of fat, 27g of carbohydrates, and 4g of protein. The use of Oreos and cream cheese means this is definitely a treat, but it’s made with real ingredients you can trust—no artificial fillers or preservatives.
Cream cheese provides a good dose of calcium and some protein, while the heavy cream adds richness and creaminess without added stabilizers. Using quality ingredients means you get the best flavor and texture without unnecessary additives.
If you want to lighten it up, try using reduced-fat cream cheese and substituting half the heavy cream with Greek yogurt. Just remember, that changes the texture slightly but still keeps a satisfying creaminess.
These bars are gluten-containing due to the Oreos, but you can easily make a gluten-free version using gluten-free chocolate sandwich cookies.
Conclusion
Honestly, creamy no-bake Oreo cheesecake bars have become my secret weapon when I want to impress with minimal effort. They strike just the right balance between sweet, creamy, and crunchy, and they’re so simple to throw together. I love how versatile they are—easy to adapt for different tastes and occasions.
Give yourself permission to experiment with toppings or mix-ins, and remember, no two batches have to be exactly alike. Whether you’re an Oreo fanatic or just someone who loves a good cheesecake, these bars won’t disappoint. I hope you enjoy making and sharing them as much as I do!
Don’t forget to leave a comment or share your favorite tweaks—I’d love to hear how you make these bars your own!
FAQs
Can I make these bars ahead of time?
Yes! These bars actually taste better after chilling overnight. Just keep them covered in the fridge.
Do I have to use full-fat cream cheese?
Full-fat cream cheese gives the best texture and flavor, but you can use reduced-fat if needed. Just expect a slightly less creamy result.
Can I use a different cookie for the crust?
Definitely! Chocolate sandwich cookies are best, but graham crackers or gluten-free cookies work well too.
How do I store leftover bars?
Store leftovers in an airtight container in the fridge for up to 4 days. You can also freeze them for up to 2 months.
Is it possible to make this recipe vegan?
Yes, by swapping dairy ingredients for vegan alternatives and using vegan Oreo-style cookies, you can make a delicious vegan version.
Pin This Recipe!
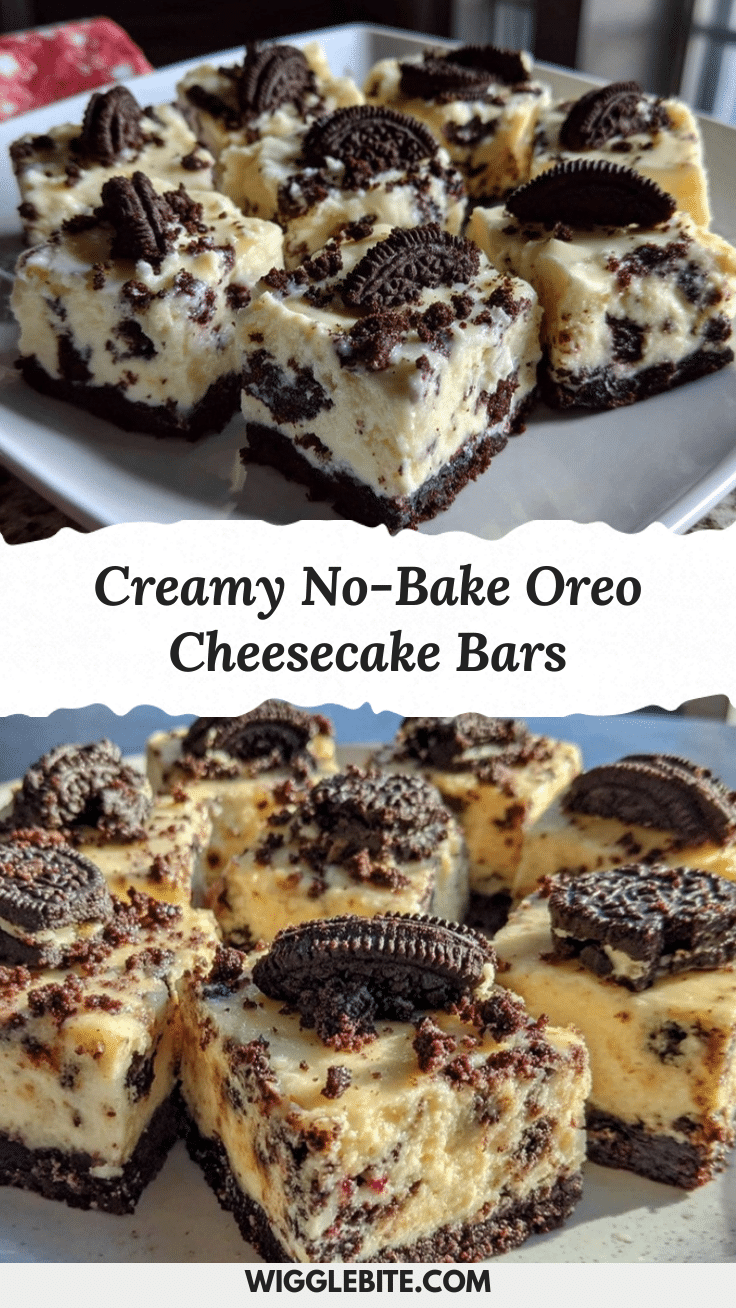
Creamy No-Bake Oreo Cheesecake Bars
A quick and easy no-bake dessert featuring a crunchy Oreo crust and a creamy cheesecake filling, perfect for busy nights or spontaneous cravings.
- Prep Time: 15 minutes
- Cook Time: 0 minutes
- Total Time: 4 hours 15 minutes
- Yield: 12 servings 1x
- Category: Dessert
- Cuisine: American
Ingredients
- 24 whole Oreos, crushed
- 6 tablespoons (85g) unsalted butter, melted
- 16 ounces (450g) cream cheese, softened to room temperature
- 1 cup (120g) powdered sugar, sifted
- 1 teaspoon vanilla extract
- 1 cup (240ml) heavy whipping cream, chilled
- Optional toppings: extra crushed Oreos or mini chocolate chips
Instructions
- Prepare the crust: Crush 16 Oreos into fine crumbs using a food processor or rolling pin. Combine crumbs with melted unsalted butter and mix until texture resembles wet sand. Press firmly and evenly into the bottom of an 8×8-inch pan. Chill in the fridge for about 10 minutes.
- Make the cheesecake filling: Beat softened cream cheese with an electric mixer until smooth and creamy, about 2-3 minutes. Gradually add sifted powdered sugar and vanilla extract, beating until fully combined and silky.
- Whip the cream: In a separate chilled bowl, whip the heavy cream until soft peaks form.
- Combine filling and whipped cream: Gently fold whipped cream into the cream cheese mixture using a spatula with about 10 slow strokes to keep it airy.
- Add crushed Oreos: Roughly chop the remaining 8 Oreos and fold them into the filling mixture.
- Assemble the bars: Pour the filling over the chilled crust and spread evenly. Sprinkle extra Oreo crumbs or mini chocolate chips on top if desired.
- Chill: Cover the pan tightly with plastic wrap and refrigerate for at least 4 hours or overnight for best results.
- Serve: Lift bars out using parchment paper overhang, cut into 12 squares with a sharp knife warmed under hot water for clean cuts, and enjoy.
Notes
Use room temperature cream cheese for smooth filling. Chill bowl and beaters before whipping cream. Fold whipped cream gently to keep airiness. Press crust firmly but not too hard. Warm knife under hot water before slicing for clean cuts. Chill bars overnight for best texture. For dairy-free or vegan versions, substitute cream cheese and heavy cream with plant-based alternatives and use vegan Oreo-style cookies.
Nutrition
- Serving Size: 1 bar (1/12th of rec
- Calories: 280
- Fat: 18
- Carbohydrates: 27
- Protein: 4
Keywords: no-bake, Oreo, cheesecake, dessert bars, easy dessert, quick dessert, creamy, Oreo crust