Introduction
Let me tell you, the first whiff of cinnamon and buttery pastry drifting from my kitchen when I bake this classic apple pie is pure magic. The apples bubble away, filling the air with the kind of sweet perfume that makes neighbors poke their heads in and kids start hovering near the oven (honestly, who can resist?). I remember the first time I made this apple pie—I was knee-high to a grasshopper, standing on a rickety stool next to my grandma, watching her fingers weave the perfect lattice crust with the kind of care that only comes from years of pie-making. When I finally tasted my own creation, I was instantly hooked. It was the kind of moment where you pause, take a deep breath, and just smile because you know you’re onto something truly special.
There’s something about homemade apple pie that just feels like a warm hug, especially when the weather turns chilly or you’re looking for a little nostalgic comfort. Years ago, I tried to recreate that golden lattice crust for a bake sale, and let’s face it, my first attempt was hilariously lopsided—but the taste? Unbeatable. Now, this pie is a staple for family gatherings, gifting, and those rainy weekends when you need a little pick-me-up. My family can’t stop sneaking slices off the cooling rack (and I can’t really blame them), and friends have been known to ask for this recipe more than once. It’s dangerously easy to fall in love with this classic apple pie recipe, and if you haven’t made one from scratch before, trust me—you’ll wish you’d discovered it years ago.
Perfect for potlucks, holiday dinners, or just brightening up your Pinterest dessert board, this classic apple pie with golden lattice crust brings joy to every bite. I tested this recipe more times than I care to admit (all in the name of research, of course), and every time, it feels like I’m sharing a little piece of my family’s kitchen with you. You’re going to want to bookmark this one—it’s the kind of pie that never goes out of style.
Why You’ll Love This Recipe
After years of pie baking, family taste tests, and a few kitchen disasters (oh, the time I forgot the sugar!), I can honestly say this classic apple pie recipe is the best homemade lattice crust guide you’ll ever need. Here’s why you’ll keep coming back for more:
- Quick & Easy: Comes together in under 2 hours—perfect for busy afternoons or when you need a last-minute crowd-pleaser.
- Simple Ingredients: No wild goose chases for specialty items. You probably have everything you need right in your pantry and fruit bowl.
- Perfect for Any Occasion: From Thanksgiving dinner to Sunday potlucks, this pie shines on any table.
- Crowd-Pleaser: Kids, adults, and picky eaters all agree—this apple pie never lasts long. It’s a fan favorite every single time.
- Unbelievably Delicious: The filling is juicy, with just the right balance of sweet and tart, while the golden lattice crust adds a beautiful crunch and buttery flavor.
What sets this apple pie apart from the rest? For starters, my grandma’s trick of tossing the apples with lemon juice and a pinch of nutmeg makes the filling extra bright and flavorful. The lattice crust isn’t just for looks—it helps the pie bake evenly, letting steam escape so your filling isn’t soupy (I learned this the hard way after a few soggy-bottom disasters!). Whether you’re blending different apple varieties or adding a hint of vanilla, these little touches make a big difference.
This recipe isn’t just good—it’s the sort of dessert that makes you close your eyes after the first bite and savor every taste. It’s comfort food at its finest: homemade, hearty, and always satisfying. Perfect for impressing your guests without breaking a sweat, or just turning a simple family meal into something special. If you’re searching for a classic apple pie recipe with the best homemade lattice crust guide, you’ve found it—and you’re going to love it.
What Ingredients You Will Need
This classic apple pie recipe uses wholesome, easy-to-find ingredients that deliver bold flavor and that dreamy, flaky texture without any fuss. Most are pantry staples, and a few can be swapped out depending on what you have.
- For the Apple Filling:
- 6-7 cups (about 900g) of apples, peeled, cored, and sliced (Granny Smith and Honeycrisp are my favorites, but use what you love)
- 2/3 cup (135g) granulated sugar
- 1/4 cup (50g) packed light brown sugar (adds depth and caramel flavor)
- 2 tbsp (16g) all-purpose flour (thickens the filling)
- 1 tsp ground cinnamon
- 1/4 tsp ground nutmeg
- 1/4 tsp salt
- 2 tbsp (30ml) lemon juice (prevents browning, adds brightness)
- 1 tsp vanilla extract (optional, but I never skip it!)
- 2 tbsp (28g) unsalted butter, diced (dotted on top for extra richness)
- For the Pie Crust:
- 2 1/2 cups (315g) all-purpose flour
- 1 tsp salt
- 1 tbsp (12g) granulated sugar
- 1 cup (226g) unsalted butter, cold and cubed (I use Kerrygold for ultra-flaky results)
- 6-8 tbsp (90-120ml) ice water (add slowly until the dough comes together)
- For the Lattice Crust Finish:
- 1 large egg, beaten (for brushing)
- 1 tbsp (15ml) milk or cream (makes the crust golden)
- 2 tbsp (24g) coarse sugar (turbinado or demerara for sparkle and crunch)
Ingredient notes: For gluten-free pie, swap all-purpose flour with a 1-to-1 gluten-free blend (Bob’s Red Mill works well). If dairy is an issue, use plant-based butter. Apples can be swapped for pears in a pinch—just reduce sugar a tad. If you’re short on cinnamon, pumpkin pie spice will do in a pinch. Each ingredient does its part, and you can mix and match as needed (just don’t skip the butter—trust me!).
Equipment Needed
You don’t need a fancy kitchen to bake this apple pie. Here’s what I always reach for:
- 9-inch (23cm) pie dish (ceramic or glass preferred for even baking)
- Large mixing bowl (for tossing apples)
- Medium bowl (for pie crust ingredients)
- Pastry blender or two forks (for cutting butter into flour—I’ve used both, but a pastry blender saves your wrists!)
- Rolling pin (wooden or silicone, whatever you’ve got)
- Sharp knife or pizza wheel (for slicing lattice strips)
- Measuring cups and spoons (precise baking makes all the difference)
- Pastry brush (for egg wash—if you don’t have one, use a clean fingertip!)
- Baking sheet (to catch any drips and keep your oven clean)
- Aluminum foil or pie shield (for protecting your crust edges if they brown too quickly)
If you don’t have a pastry blender, two forks or even your fingertips work in a pinch. For rolling pins, I’ve used wine bottles before—no shame! Clean up your tools after each use, especially the pie dish, to keep them in tip-top shape. Most of these are budget-friendly and found at any supermarket or home goods store.
Preparation Method
Ready to make your classic apple pie? Here’s my step-by-step, no-nonsense guide (with a few personal hacks sprinkled in):
- Make the Pie Crust: In a medium bowl, whisk together 2 1/2 cups (315g) flour, 1 tsp salt, and 1 tbsp (12g) sugar. Add 1 cup (226g) cold, cubed butter. Use a pastry blender, two forks, or your hands to cut the butter into pea-sized bits. The mixture should look sandy with small lumps (don’t overmix, or the crust gets tough!). Slowly drizzle in 6-8 tbsp (90-120ml) ice water, stirring just until the dough holds together. Divide in half, shape each into a disk, wrap in plastic, and chill for at least 1 hour (overnight is even better).
- Prep the Apple Filling: Peel, core, and slice your apples—should be about 6-7 cups (900g). Toss apples in a large bowl with 2/3 cup (135g) sugar, 1/4 cup (50g) brown sugar, 2 tbsp (16g) flour, 1 tsp cinnamon, 1/4 tsp nutmeg, 1/4 tsp salt, 2 tbsp (30ml) lemon juice, and 1 tsp vanilla extract if using. Mix until apples are well coated. Let them sit for 15-30 minutes—this helps the juices develop and gives the pie that juicy goodness.
- Roll Out Bottom Crust: On a lightly floured surface, roll out one dough disk into a 12-inch (30cm) circle, about 1/8-inch (3mm) thick. Gently fit into your 9-inch (23cm) pie dish, pressing into the edges. Let the excess hang over for now.
- Fill the Pie: Spoon apple mixture into the crust, mounding it slightly in the center. Dot with 2 tbsp (28g) diced butter. If apples seem very juicy, sprinkle a little extra flour over the top.
- Make the Lattice Crust: Roll out the second dough disk to the same size. Using a sharp knife or pizza wheel, cut into 1/2- to 3/4-inch (1.25-2cm) wide strips. Lay half the strips across the pie in one direction, then weave the remaining strips over and under, creating the lattice pattern. (Don’t stress if it’s not perfect—rustic is charming!) Trim the overhang, fold edges under, and crimp with your fingers or a fork.
- Egg Wash & Sugar: Beat 1 egg with 1 tbsp (15ml) milk or cream. Brush over the lattice and edges. Sprinkle 2 tbsp (24g) coarse sugar for sparkle.
- Bake: Place pie on a baking sheet and bake at 400°F (205°C) for 20 minutes. Reduce heat to 375°F (190°C), cover edges with foil if browning too fast, and bake another 35-45 minutes. The crust should be golden, and the filling bubbling. If your pie isn’t browning enough, uncover for the final 10 minutes.
- Cool: Let the pie cool for at least 2 hours before slicing. If you cut too soon, the filling will run everywhere—trust me, I’ve learned!
Pro tip: If your dough cracks, patch with extra scraps. If your apples look dry, add another spoonful of lemon juice. Baking is a bit of an art—sometimes imperfect pies taste the best!
Cooking Tips & Techniques
Even after dozens of pies, I still pick up little tricks every time. Here’s how to get the most out of this classic apple pie recipe with golden lattice crust:
- Cold Butter is Key: Keep your butter and water super cold for maximum flakiness. I even pop my flour in the freezer for 10 minutes if the kitchen’s warm.
- Mix Apple Varieties: Using a blend—Granny Smith for tartness, Honeycrisp for sweetness—makes the filling more complex. Don’t be afraid to experiment.
- Don’t Overwork the Dough: The less you fuss, the more tender your crust. If you see little streaks of butter, you’re doing it right.
- Let the Pie Rest: Cutting too soon means a runny filling. Give it time to set—it’s worth the wait!
- Lattice Troubles: If your strips break, patch them or weave shorter pieces. Rustic looks are totally in.
- Prevent Soggy Bottoms: Baking on a lower rack and using a glass pie dish helps. If you’re still getting soggy crust, try pre-baking the bottom crust for 10 minutes.
- Multitasking: While dough chills, prep your apples and set out your tools. It keeps the workflow smooth and stress-free.
My worst pie mistake? Overfilling with apples and underbaking—resulted in a mess that was still delicious but definitely not Pinterest-worthy. You live and learn, right?
Variations & Adaptations
There’s no rule that says you have to stick to the classic! Here are some tasty ways to make this apple pie your own:
- Gluten-Free: Substitute all-purpose flour with a gluten-free blend. The crust turns out tender and flaky (Bob’s Red Mill is my go-to).
- Vegan: Use plant-based butter and brush the crust with almond milk instead of egg wash. The result is just as golden and crisp.
- Seasonal Twist: Add fresh cranberries in winter or swap apples for ripe peaches in summer. Each fruit brings a new flavor profile.
- Spice It Up: Toss in a pinch of cardamom or ginger for extra warmth. If you love bold flavors, a dash of allspice works wonders.
- Nutty Crunch: Mix chopped pecans or walnuts into the filling for texture.
- Sweetener Swap: Coconut sugar or maple syrup can be used in place of regular sugar for a subtle twist.
Personally, I’ve made a caramel apple version—just drizzle homemade caramel over the filling before adding the lattice. It’s messy, but so worth it. Don’t be afraid to play around. The best pies often break the rules!
Serving & Storage Suggestions
This classic apple pie is best served slightly warm, with a scoop of vanilla ice cream or a dollop of whipped cream (seriously, it’s a game changer). I love placing it at the center of the table and letting everyone dig in—there’s something so inviting about homemade pie.
For presentation, slice neatly and serve on vintage plates for that nostalgic vibe. Pair with coffee, hot cider, or even a sharp cheddar cheese slice for contrast.
Storage is simple: Cover leftovers with foil or plastic wrap and refrigerate for up to 4 days. For longer storage, wrap tightly and freeze slices for up to 2 months. Reheat in a low oven (300°F/150°C) for 10-15 minutes, or microwave individual slices for 30 seconds (the crust stays crisper in the oven, though!).
Honestly, the flavors mellow and blend beautifully after a day. Sometimes, I think day-old pie is even better!
Nutritional Information & Benefits
Each slice of this classic apple pie (1/8 of the pie) has roughly 340 calories, 16g fat, 48g carbs, and 3g protein. It’s not exactly health food, but hey, life’s short! Apples bring fiber, vitamin C, and natural sweetness, while cinnamon is known for its antioxidant properties.
If you’re gluten-free or watching dairy, those swaps are easy. Just keep in mind this recipe contains wheat, butter, and eggs—so it’s not suitable for those with severe allergies.
I always say, homemade desserts are about joy and balance. Share a slice with friends, savor every bite, and enjoy the comfort that only a classic apple pie can bring!
Conclusion
If you’re looking for the best classic apple pie recipe with a homemade lattice crust, this is the one to try. It’s got heart, history, and a flavor that never goes out of style. Customize your apples, tweak your spices, or try new crust tricks—this pie loves a personal touch.
I love this recipe because it connects me to my family and brings smiles every single time. There’s nothing like seeing a golden pie cooling in the window and knowing you made it from scratch.
Give it a go, and let me know how yours turns out! Share your photos, swap in your favorite apples, or add your own twist. Leave a comment below—what’s your secret pie tip? Happy baking, friend!
FAQs
What are the best apples to use for classic apple pie?
Granny Smith and Honeycrisp apples are my favorites—they hold their shape and balance sweet and tart flavors. You can mix varieties for more depth!
How do I prevent a soggy bottom crust?
Bake your pie on a lower oven rack and use a glass pie dish. If you still struggle, pre-bake (blind bake) the bottom crust for 10 minutes before adding the filling.
Can I make the pie crust ahead of time?
Absolutely! Pie dough can be made up to 2 days in advance and kept chilled. You can also freeze the dough disks for up to a month—just thaw overnight in the fridge.
How do I get my lattice crust golden and shiny?
Brush the lattice with a mixture of beaten egg and milk or cream before baking. Sprinkle with coarse sugar for extra sparkle and crunch.
Can I freeze the baked apple pie?
Yes! Let the pie cool completely, wrap tightly, and freeze for up to 2 months. Reheat in a 350°F (175°C) oven until warmed through. The crust stays crisp and the filling tastes just as good.
Pin This Recipe!

Classic Apple Pie Recipe Best Homemade Lattice Crust Guide

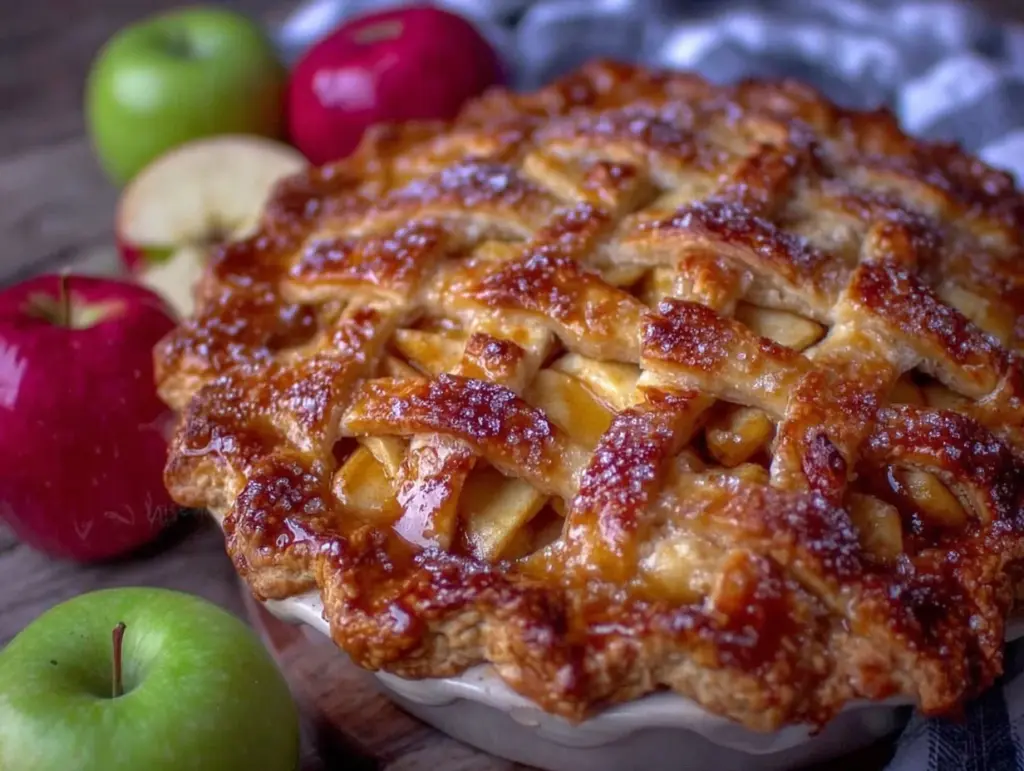
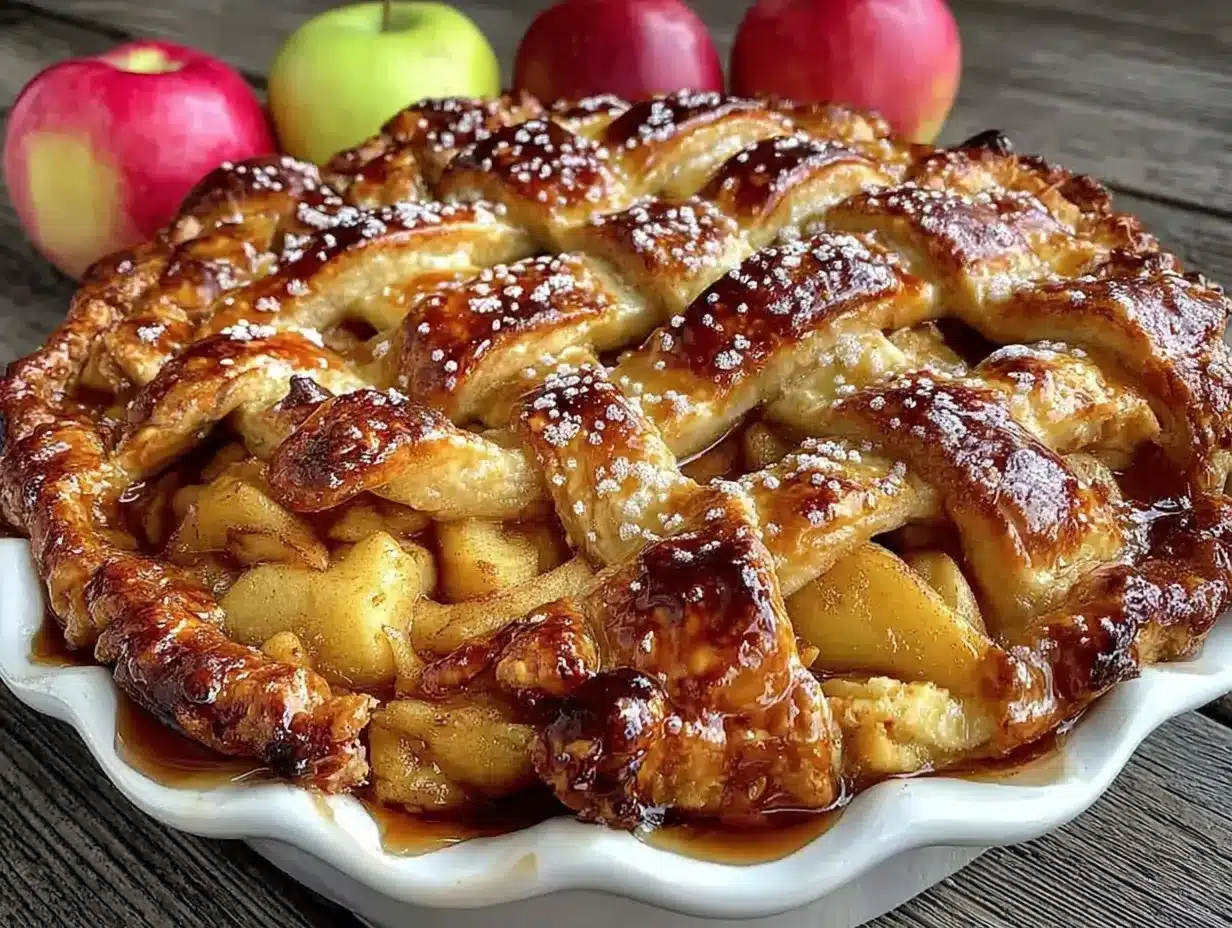
This classic apple pie features a juicy, cinnamon-spiced apple filling and a golden, buttery lattice crust. Perfect for holidays, potlucks, or cozy family gatherings, it’s a nostalgic dessert that’s always a crowd-pleaser.
- Prep Time: 30 minutes
- Cook Time: 1 hour 5 minutes
- Total Time: 1 hour 35 minutes
- Yield: 8 servings 1x
- Category: Dessert
- Cuisine: American
Ingredients
- 6–7 cups apples, peeled, cored, and sliced (Granny Smith and Honeycrisp recommended)
- 2/3 cup granulated sugar
- 1/4 cup packed light brown sugar
- 2 tbsp all-purpose flour
- 1 tsp ground cinnamon
- 1/4 tsp ground nutmeg
- 1/4 tsp salt
- 2 tbsp lemon juice
- 1 tsp vanilla extract (optional)
- 2 tbsp unsalted butter, diced
- 2 1/2 cups all-purpose flour (for crust)
- 1 tsp salt (for crust)
- 1 tbsp granulated sugar (for crust)
- 1 cup unsalted butter, cold and cubed (for crust)
- 6–8 tbsp ice water (for crust)
- 1 large egg, beaten (for brushing)
- 1 tbsp milk or cream (for brushing)
- 2 tbsp coarse sugar (turbinado or demerara)
Instructions
- In a medium bowl, whisk together 2 1/2 cups flour, 1 tsp salt, and 1 tbsp sugar. Add 1 cup cold, cubed butter and cut in using a pastry blender or forks until pea-sized bits form. Slowly add 6-8 tbsp ice water until dough holds together. Divide in half, shape into disks, wrap, and chill for at least 1 hour.
- Peel, core, and slice apples (6-7 cups). Toss in a large bowl with granulated sugar, brown sugar, flour, cinnamon, nutmeg, salt, lemon juice, and vanilla extract. Mix well and let sit for 15-30 minutes.
- On a floured surface, roll out one dough disk into a 12-inch circle, about 1/8-inch thick. Fit into a 9-inch pie dish, letting excess hang over.
- Spoon apple mixture into crust, mounding slightly. Dot with diced butter. Sprinkle extra flour if apples are very juicy.
- Roll out second dough disk to same size. Cut into 1/2- to 3/4-inch wide strips. Lay half the strips across pie, then weave remaining strips to form lattice. Trim overhang, fold edges under, and crimp.
- Beat egg with milk or cream. Brush over lattice and edges. Sprinkle coarse sugar on top.
- Place pie on baking sheet. Bake at 400°F for 20 minutes. Reduce heat to 375°F, cover edges if browning too fast, and bake another 35-45 minutes until crust is golden and filling bubbles.
- Cool pie for at least 2 hours before slicing.
Notes
For best results, use a mix of tart and sweet apples. Keep butter and water cold for a flaky crust. Let pie cool fully before slicing to prevent a runny filling. For gluten-free, substitute flour with a 1-to-1 gluten-free blend. Pie dough can be made ahead and frozen. Serve with vanilla ice cream or whipped cream for extra indulgence.
Nutrition
- Serving Size: 1 slice (1/8 of pie)
- Calories: 340
- Sugar: 26
- Sodium: 320
- Fat: 16
- Saturated Fat: 10
- Carbohydrates: 48
- Fiber: 3
- Protein: 3
Keywords: apple pie, classic apple pie, homemade pie, lattice crust, dessert, holiday pie, Thanksgiving, American pie, fruit pie, best apple pie