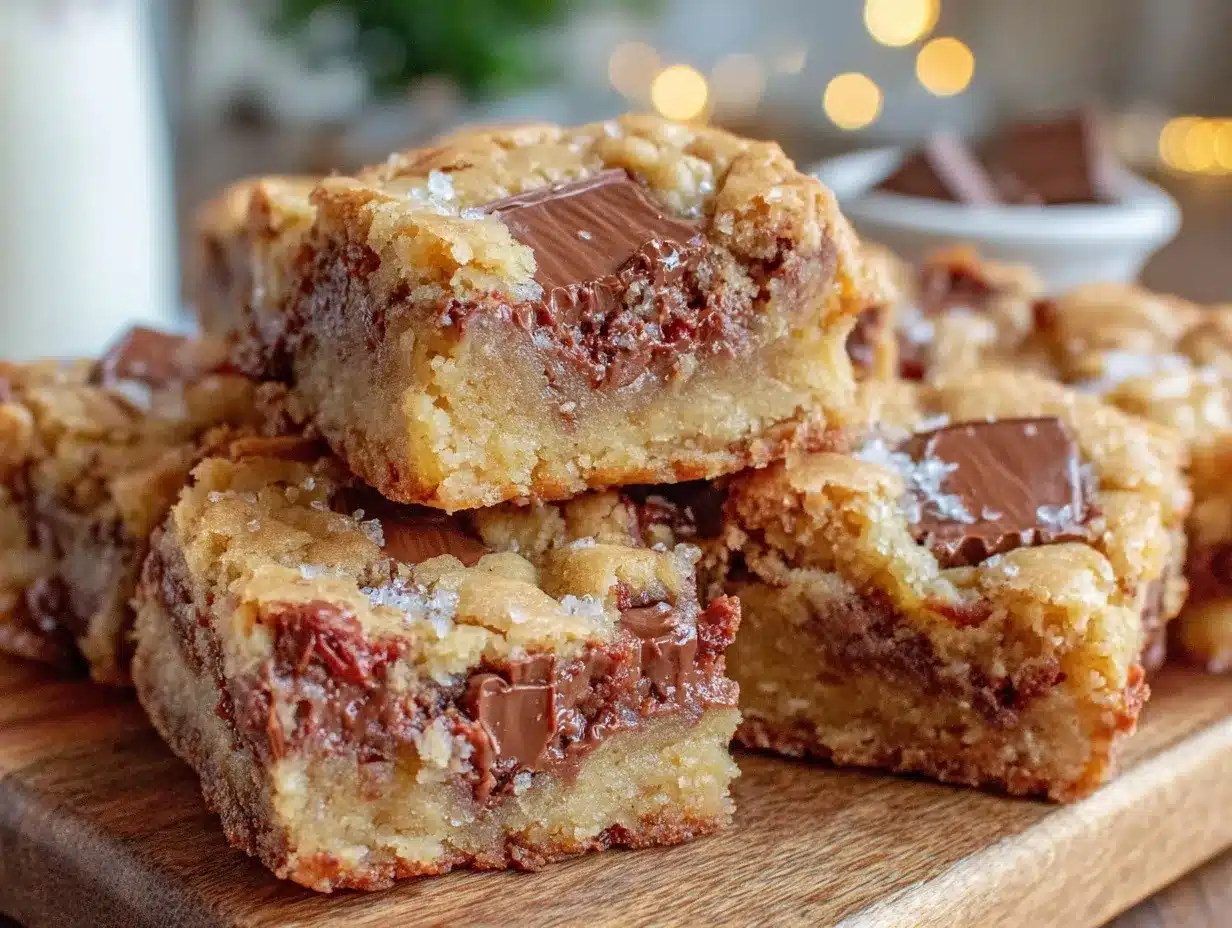
“I wasn’t expecting my Saturday afternoon baking session to turn into a full-on kitchen disaster, but there I was, covered in flour, with a broken mixing bowl and a half-finished batch of cookie dough,” I laughed to myself as I recounted that chaotic day. It all started when I aimed to make simple peanut butter cookies, but somehow ended up with a gooey, chewy mess that was honestly too delicious to waste. The secret? Accidentally tossing in extra peanut butter and forgetting to add the usual binder at first. That happy mistake led me to what I now call my Chewy Peanut Butter Cup Cookie Bars with Melty Chocolate Chunks.
You know that feeling when you bite into something warm, soft, and just perfectly chewy, and it instantly takes you back to simpler times? That’s exactly what these cookie bars do for me. I remember walking into my neighbor’s kitchen on a lazy Sunday, drawn in by the irresistible scent of peanut butter and chocolate mingling in the air. She shrugged off my questions with a smile, saying it was just a simple recipe she threw together — but honestly, it felt like a little slice of magic.
Maybe you’ve been there too, craving something sweet but not wanting to fuss over complicated recipes or fancy ingredients. I mean, who hasn’t ruined a batch of cookies once or twice? But the best part about this recipe is that it’s forgiving. It’s the kind of treat that welcomes a little improvisation, a little mess, and rewards you with gooey, melty chocolate in every bite. Honestly, I keep making these cookie bars because they’re simple, satisfying, and perfect for sharing — or hiding away for yourself!
Why You’ll Love This Recipe
After testing dozens of peanut butter cookie bar recipes, this one stands out for so many reasons. Let me share why this recipe has won over my kitchen and my friends’ taste buds alike:
- Quick & Easy: Ready in under 30 minutes, it’s perfect for those last-minute sweet cravings or when you want a homemade treat without hours of fuss.
- Simple Ingredients: No hunting for obscure items here. Basic pantry staples like peanut butter, sugar, and chocolate chips come together effortlessly.
- Perfect for Any Occasion: Whether you’re packing snacks for a picnic, bringing something to a potluck, or just craving comfort food, these bars fit the bill.
- Crowd-Pleaser: Kids and adults alike rave about the chewy texture and melty pockets of chocolate — it’s hard to stop at just one piece.
- Unbelievably Delicious: The chewy, peanut buttery base paired with melty chocolate chunks creates a flavor combo that’s downright addictive.
What sets this recipe apart is the little twist of folding in chunky peanut butter with smooth, melty chocolate pieces — not just chips but generous chunks that add texture and bursts of flavor. I also keep the sugar balanced to avoid overpowering sweetness, letting the peanut butter shine through. Honestly, after a few tries, I tweaked the baking time to get that perfect chewiness without drying out. It’s a recipe that feels both nostalgic and fresh at the same time.
So, if you’re looking for a no-fail, crowd-pleasing peanut butter treat with a fudgy twist, you’re going to want to keep reading.
What Ingredients You Will Need
This recipe uses simple, wholesome ingredients that come together to deliver bold peanut butter flavor and satisfyingly chewy texture — all without complicated steps or exotic items. Here’s what you’ll want to gather before you start:
- Peanut Butter: 1 cup creamy peanut butter (I prefer Skippy Natural for that smooth, rich flavor)
- Brown Sugar: 3/4 cup packed light brown sugar (adds moisture and depth to the chewiness)
- Granulated Sugar: 1/4 cup (helps with structure and just a touch of crunch)
- Unsalted Butter: 1/2 cup (1 stick), softened (adds richness and tenderness)
- Large Eggs: 2, room temperature (for binding and moisture)
- Vanilla Extract: 1 teaspoon (for that warm, sweet aroma)
- All-Purpose Flour: 1 1/4 cups (for structure)
- Baking Soda: 1/2 teaspoon (helps with a slight rise and texture)
- Salt: 1/4 teaspoon (balances the sweetness and enhances peanut flavor)
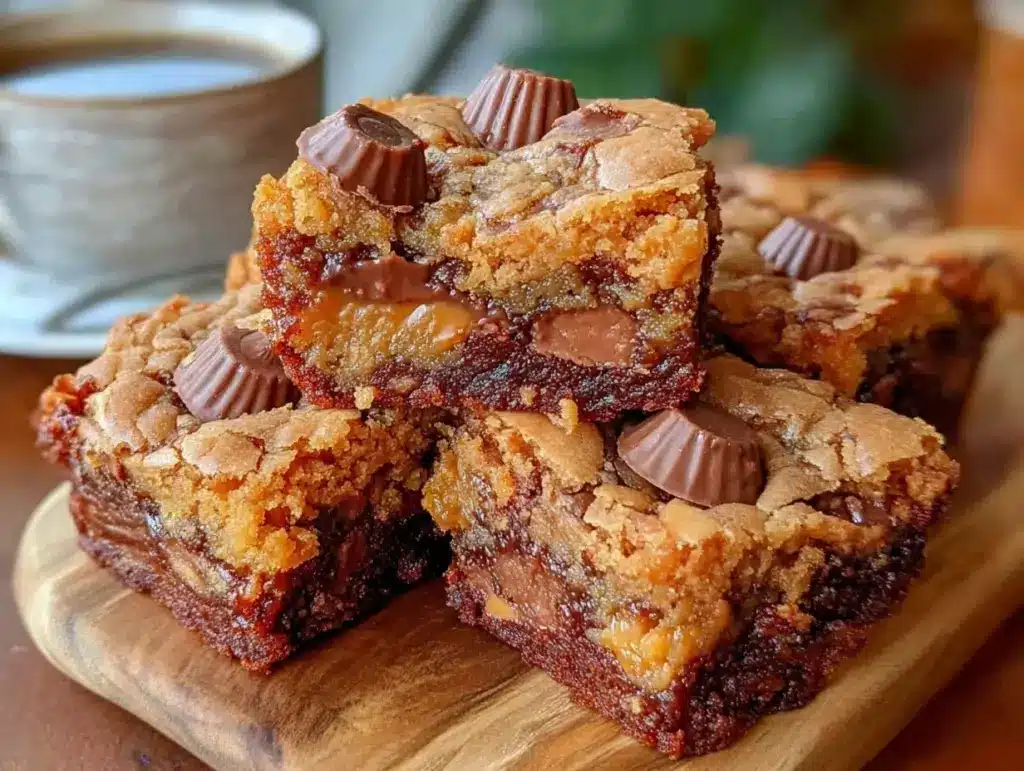
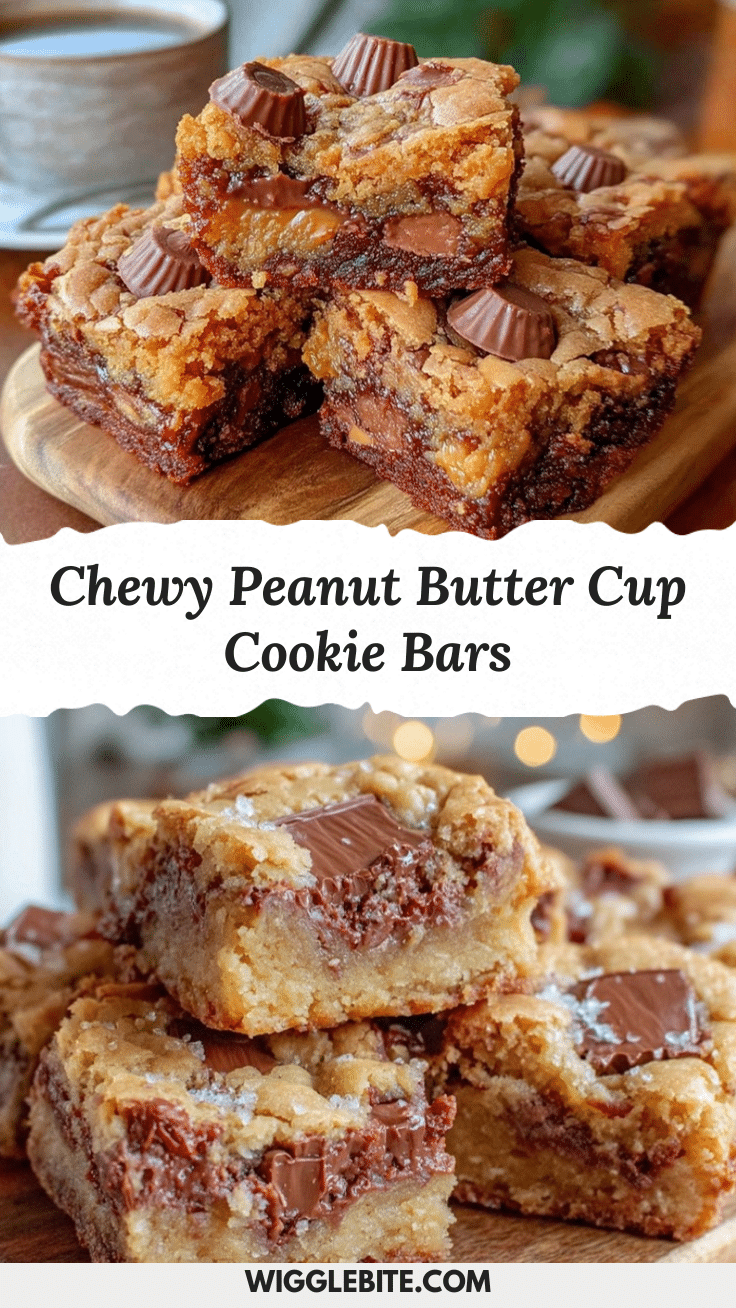
- Chocolate Chunks: 1 cup (use a mix of bittersweet and milk chocolate chunks for melty pockets; Ghirardelli works great)
Ingredient Tips: If you prefer a gluten-free version, swapping the all-purpose flour for a gluten-free blend works well — just watch the texture and add a tablespoon of almond flour for better chewiness. Also, feel free to use natural peanut butter, but it may alter the texture slightly since it’s thinner. For dairy-free adaptations, swap the butter with coconut oil and make sure your chocolate chunks are dairy-free.
Equipment Needed
Just a handful of everyday kitchen tools will get you through this recipe:
- Mixing Bowls: One medium and one large for combining wet and dry ingredients
- Electric Mixer or Stand Mixer: Helpful but not necessary; you can mix by hand with a sturdy spoon
- Rubber Spatula: For folding ingredients without overmixing
- 9×9-inch Baking Pan: I use a glass or metal pan — both work fine; just grease it well or line with parchment paper for easy removal
- Measuring Cups & Spoons: Accurate measurements help with consistency
- Oven Thermometer (optional): For checking oven temperature, which can affect baking time and texture
Personally, I find a silicone spatula invaluable for scraping every bit of dough out of the bowl. If you don’t have a stand mixer, don’t sweat it—this recipe is forgiving enough to mix by hand, though it might take a bit more elbow grease. For budget-conscious cooks, a simple wooden spoon and a glass baking pan will do just fine.
Preparation Method
- Preheat your oven to 350°F (175°C). Grease your 9×9-inch baking pan or line it with parchment paper, leaving some overhang for easy removal later. This usually takes about 10 minutes.
- In a large bowl, cream together the softened butter, peanut butter, brown sugar, and granulated sugar. Use an electric mixer on medium speed for about 2-3 minutes until the mixture is light and fluffy. The texture should be smooth with no sugar lumps visible.
- Add the eggs, one at a time, mixing well after each addition. Stir in the vanilla extract. This step usually takes 1 to 2 minutes. The batter will look thick and glossy.
- In a separate bowl, whisk together the flour, baking soda, and salt. This dry mix helps distribute the leavening evenly and prevents clumps.
- Gradually add the dry ingredients to the wet ingredients. Mix on low speed or fold gently with a spatula until just combined. Avoid overmixing to keep the bars chewy and tender.
- Fold in the chocolate chunks carefully. You want them evenly distributed but don’t break them up too much — those melty pockets are the best part!
- Transfer the dough into the prepared baking pan. Spread it evenly with a spatula, smoothing the top for an even bake. The batter will be thick and sticky.
- Bake for 20-25 minutes. Start checking at 20 minutes by inserting a toothpick into the center. It should come out with a few moist crumbs but no wet batter. The edges will be lightly golden, but the center should remain soft for that chewy texture.
- Allow the cookie bars to cool completely in the pan. This usually takes about 30 minutes at room temperature. Cooling helps the bars set and makes cutting easier.
- Lift the bars out using the parchment paper overhang. Cut into squares or rectangles with a sharp knife. Try to resist eating them warm—it’s hard, but the texture improves as they cool!
Pro tip: If you find your bars are too crumbly, try reducing the flour by a tablespoon next time or adding a splash of milk to keep the batter moist. Also, ovens vary, so keep an eye on the baking time — slightly underbaked bars yield the best chewiness.
Cooking Tips & Techniques
Getting that perfect chewy texture in peanut butter cookie bars takes a few tricks I learned the hard way. Here’s what I’ve found works best:
- Don’t overmix the dough. Once you add the flour, mix just enough to combine. Overmixing develops gluten and makes cookies tough, which nobody wants.
- Use room temperature ingredients. It helps the batter come together more smoothly and bakes evenly.
- Softened butter, not melted. Soft butter incorporates air, leading to a lighter texture, while melted butter can make the bars too dense.
- Watch your oven temperature. An oven that runs hot can dry out your bars. If you don’t have a thermometer, consider lowering baking time slightly to avoid overbaking.
- Fold in chocolate chunks gently. A gentle hand keeps the chunks intact, so you get those gooey pockets instead of chocolate spread all over.
- Cool completely before cutting. This prevents crumbly edges and helps the bars hold together better.
Once, I left the bars in the oven for 30 minutes instead of 25, and they turned into a dry, crumbly mess — lesson learned the hard way. Now, I set my timer and peek early. Also, multitasking in the kitchen? I like to prep ingredients while the oven preheats, which saves time and keeps everything moving smoothly.
Variations & Adaptations
This recipe is a versatile base for lots of fun twists. Here are a few ways to make it your own:
- Nut-Free Version: Substitute peanut butter with sunflower seed butter and use dairy-free chocolate chips for allergy-friendly bars.
- Chocolate Swirl: Swirl melted dark chocolate over the batter before baking for an extra chocolatey punch and pretty marbling effect.
- Crunch Factor: Add 1/2 cup chopped roasted peanuts or walnuts to the mix for a delightful crunch that complements the chewy base.
- Seasonal Twist: Mix in dried cranberries or chopped dried cherries during fall and winter for a fruity note that brightens the rich peanut butter flavor.
- Healthier Swap: Use coconut sugar instead of brown sugar and whole wheat flour for a more nutrient-dense bar. Expect a slightly denser texture but delicious nonetheless.
Personally, I tried adding a teaspoon of cinnamon once — it added a warm depth that surprised me in the best way. Feel free to experiment with spices or even a pinch of cayenne for a subtle heat kick!
Serving & Storage Suggestions
These chewy peanut butter cup cookie bars are best served at room temperature, where the chocolate chunks are soft but not melted all over. They also taste fantastic slightly warmed — just pop a bar in the microwave for 10 seconds to get that gooey chocolate fix.
Serve them as a sweet snack with a cold glass of milk or alongside a cup of coffee or tea for afternoon indulgence. For parties, cut into bite-sized squares and arrange on a platter for easy grab-and-go treats.
Store leftovers in an airtight container at room temperature for up to 3 days. For longer storage, keep them in the fridge for up to a week, or freeze individually wrapped bars for up to 3 months. When reheating frozen bars, let them thaw at room temperature or microwave briefly to regain that chewy softness.
Fun fact: the flavors actually deepen a bit after a day, making these bars even more irresistible. If you can resist, try prepping a batch ahead of time for the best taste experience.
Nutritional Information & Benefits
Each chewy peanut butter cup cookie bar (based on 16 servings) roughly contains:
| Calories | 210 kcal |
|---|---|
| Fat | 12g |
| Carbohydrates | 22g |
| Protein | 5g |
| Fiber | 2g |
Peanut butter is a great source of plant-based protein and healthy fats, which can help keep you fuller longer. Using brown sugar adds moisture without an overwhelming sweetness, and the dark chocolate chunks bring antioxidants to the mix. While these bars are still a treat, swapping ingredients can tailor them for gluten-free or dairy-free diets. Just a heads-up: peanuts and chocolate are common allergens, so keep that in mind when sharing.
From my perspective, these bars strike a nice balance — indulgent but not overly rich — making them a sweet spot treat alongside a balanced diet.
Conclusion
If you’re after a sweet treat that’s chewy, peanut buttery, and packed with melty chocolate chunks, this recipe is a winner. It’s easy to make, forgiving for beginners, and perfect for sharing or savoring solo. Honestly, I love how it combines simple pantry ingredients into something that feels special without the fuss.
Feel free to tweak it — add nuts, swirl chocolate, or try alternative nut butters to match your taste. I’d love to hear what variations you come up with!
Go ahead and make a batch, then pop back here to share your experience or any tips you’ve picked up. Happy baking, and may your kitchen be filled with the warm, nutty aroma of these chewy cookie bars!
Frequently Asked Questions
Can I use natural peanut butter in this recipe?
Yes, but natural peanut butter is thinner and may make the bars less chewy. You might want to reduce any added liquids or add an extra tablespoon of flour to compensate.
How do I store these cookie bars to keep them fresh?
Store them in an airtight container at room temperature for up to 3 days, in the fridge for up to a week, or freeze for longer storage. Reheat briefly for that fresh-baked feel.
Can I substitute the chocolate chunks with chips or other mix-ins?
Absolutely! Chocolate chips work fine, although chunks provide larger melty pockets. You can also add nuts, dried fruit, or even white chocolate for variety.
What if I don’t have a 9×9-inch pan?
You can use an 8×8-inch pan for thicker bars (just increase bake time slightly) or a 9×13-inch pan for thinner bars (reduce baking time).
Is this recipe gluten-free?
Not as written, but you can swap all-purpose flour for a gluten-free flour blend to make it gluten-free. Just check that your baking soda and other ingredients are gluten-free too.
Pin This Recipe!
Chewy Peanut Butter Cup Cookie Bars Easy Homemade Recipe with Melty Chocolate Chunks

These chewy peanut butter cup cookie bars feature a gooey, peanut buttery base with melty chocolate chunks, perfect for a quick and easy homemade treat.
- Prep Time: 10 minutes
- Cook Time: 20-25 minutes
- Total Time: 35-40 minutes
- Yield: 16 servings 1x
- Category: Dessert
- Cuisine: American
Ingredients
- 1 cup creamy peanut butter
- 3/4 cup packed light brown sugar
- 1/4 cup granulated sugar
- 1/2 cup (1 stick) unsalted butter, softened
- 2 large eggs, room temperature
- 1 teaspoon vanilla extract
- 1 1/4 cups all-purpose flour
- 1/2 teaspoon baking soda
- 1/4 teaspoon salt
- 1 cup chocolate chunks (mix of bittersweet and milk chocolate)
Instructions
- Preheat your oven to 350°F (175°C). Grease a 9×9-inch baking pan or line it with parchment paper, leaving some overhang for easy removal.
- In a large bowl, cream together the softened butter, peanut butter, brown sugar, and granulated sugar using an electric mixer on medium speed for 2-3 minutes until light and fluffy.
- Add the eggs one at a time, mixing well after each addition. Stir in the vanilla extract.
- In a separate bowl, whisk together the flour, baking soda, and salt.
- Gradually add the dry ingredients to the wet ingredients, mixing on low speed or folding gently with a spatula until just combined. Avoid overmixing.
- Fold in the chocolate chunks carefully to distribute evenly without breaking them up.
- Transfer the dough into the prepared baking pan and spread evenly with a spatula.
- Bake for 20-25 minutes, checking at 20 minutes with a toothpick. It should come out with a few moist crumbs but no wet batter.
- Allow the cookie bars to cool completely in the pan, about 30 minutes.
- Lift the bars out using the parchment paper overhang and cut into squares or rectangles.
Notes
Do not overmix the dough after adding flour to keep bars chewy. Use room temperature ingredients for best results. Softened butter is preferred over melted for lighter texture. Cool bars completely before cutting to prevent crumbling. Adjust baking time slightly based on oven temperature. For gluten-free, substitute flour with gluten-free blend and add almond flour for chewiness. For dairy-free, use coconut oil instead of butter and dairy-free chocolate chunks.
Nutrition
- Serving Size: 1 cookie bar (1/16th
- Calories: 210
- Fat: 12
- Carbohydrates: 22
- Fiber: 2
- Protein: 5
Keywords: peanut butter cookie bars, chewy cookie bars, peanut butter dessert, chocolate chunk cookie bars, easy homemade cookies