Let me tell you, the warm scent of buttery dough mingling with sweet, fruity jam wafting from my oven is enough to make anyone’s mouth water. The first time I baked these classic homemade thumbprint cookies with jam, I was instantly hooked. The kind of moment where you pause, take a deep breath, and just smile because you know you’re onto something truly special. Years ago, when I was knee-high to a grasshopper, my grandma used to make these little delights during the holidays. There was something about the way the jam glistened in each indentation that made them feel like tiny, edible treasures.
I stumbled upon this recipe on a rainy weekend while trying to recreate those nostalgic flavors I adored as a kid. Honestly, I wish I’d discovered how dangerously easy and satisfying these cookies are much sooner. My family couldn’t stop sneaking them off the cooling rack (and I can’t really blame them). These thumbprint cookies are perfect for potlucks, a sweet treat for your kids after school, or to brighten up your Pinterest cookie board with their charming appearance and classic taste.
After testing this recipe multiple times in the name of research, of course, it’s now a staple for family gatherings and gifting. Each bite feels like a warm hug wrapped in buttery dough and fruity goodness — trust me, you’re going to want to bookmark this one.
Why You’ll Love This Recipe
In all my years of baking, this classic homemade thumbprint cookies with jam recipe has stood out for a few key reasons. It’s tried, tested, and family-approved, making it one of those recipes you’ll come back to again and again.
- Quick & Easy: Comes together in under 30 minutes, perfect for busy weeknights or last-minute cravings.
- Simple Ingredients: No fancy grocery trips needed; you likely already have everything in your kitchen.
- Perfect for Any Occasion: Great for holiday mornings, afternoon teas, or casual get-togethers.
- Crowd-Pleaser: Always gets rave reviews from kids and adults alike — they’re just pure nostalgic comfort.
- Unbelievably Delicious: The buttery cookie base combined with the sweet-tart jam is a texture and flavor combo that feels next-level.
What really sets this recipe apart is the little technique I picked up — chilling the dough before shaping ensures the cookies keep their perfect thumbprint shape and don’t spread too thin. Plus, using a mix of your favorite jams lets you customize flavors easily. This isn’t just another jam cookie; it’s the best version you’ll find, whether you’re making them for yourself or impressing guests without any fuss.
Honestly, this recipe isn’t just good — it’s the kind that makes you close your eyes after the first bite, savoring that perfect balance of buttery dough and fruity sweetness. It’s comfort food reimagined: simple, fast, and soul-soothing.
What Ingredients You Will Need
This recipe uses simple, wholesome ingredients to deliver bold flavor and satisfying texture without the fuss. Most of these are pantry staples, so you probably have them on hand right now.
- Unsalted Butter, softened (1 cup / 225g) — adds richness and tenderness
- Granulated Sugar (2/3 cup / 135g) — for sweetness and slight crunch
- Large Egg Yolk (1), room temperature — helps bind the dough
- Pure Vanilla Extract (1 tsp) — for that classic warm aroma
- All-Purpose Flour (2 cups / 250g) — the sturdy base of the cookie
- Salt (1/4 tsp) — balances sweetness and enhances flavor
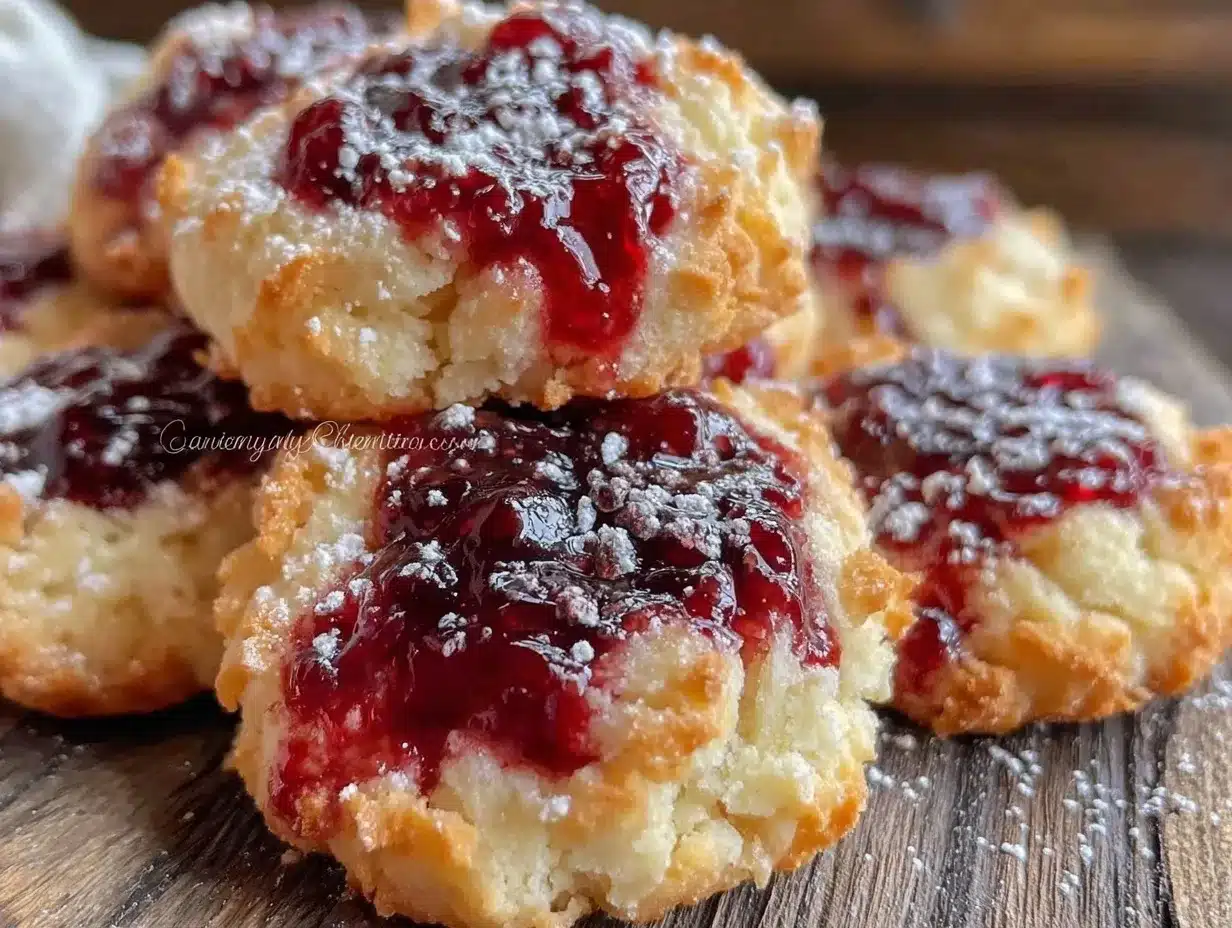
- Jam or Preserves (1/2 cup / 160g) — raspberry, strawberry, or apricot work beautifully
Ingredient Tips: I prefer using a trusted brand like Bonne Maman for jams — their texture and flavor are consistently spot on. If you’re looking for a dairy-free option, swap the butter for a plant-based margarine, and for gluten-free, try almond flour but expect a slightly different texture. In summer, swapping jam for fresh berry compote adds a fresh twist.
Equipment Needed
- Mixing bowl (medium size) — for combining ingredients
- Electric mixer or hand whisk — speeds up the creaming of butter and sugar
- Measuring cups and spoons — for precise ingredient amounts
- Baking sheet lined with parchment paper — helps cookies bake evenly and prevents sticking
- Cooling rack — for letting cookies rest and crisp up
- Small spoon or your thumb — to create the signature indentations
If you don’t have an electric mixer, no worries! A sturdy wooden spoon and some elbow grease work just fine. For budget-friendly options, silicone baking mats can replace parchment paper and are reusable. Just make sure your baking sheet is sturdy and doesn’t warp in the oven for the best results.
Preparation Method
- Cream the Butter and Sugar: In a medium bowl, beat 1 cup (225g) softened unsalted butter with 2/3 cup (135g) granulated sugar using an electric mixer on medium speed until light and fluffy — about 3 to 4 minutes. This step is key for that melt-in-your-mouth texture.
- Add Egg Yolk and Vanilla: Mix in 1 large egg yolk and 1 teaspoon pure vanilla extract until just combined. The dough will be rich and aromatic — smells like a dream at this point.
- Sift in Dry Ingredients: In a separate bowl, whisk together 2 cups (250g) all-purpose flour and 1/4 teaspoon salt. Gradually add the dry mix to the wet ingredients, stirring gently until a soft dough forms. Avoid overmixing — you want the dough tender, not tough.
- Chill the Dough: Wrap the dough in plastic wrap and refrigerate for at least 30 minutes. This step prevents spreading during baking and gives you cleaner thumbprints.
- Preheat Oven: Set your oven to 350°F (175°C) and line a baking sheet with parchment paper.
- Shape the Cookies: Scoop tablespoons of chilled dough (about 1 tbsp or 15g each), roll into balls, and place on the baking sheet about 2 inches apart. Using your thumb or the back of a small spoon, gently press an indentation into the center of each ball — be careful not to press all the way through!
- Fill with Jam: Spoon about 1/2 teaspoon of your chosen jam into each indentation. Don’t overfill; the jam will bubble and spread a little during baking.
- Bake: Bake for 12-15 minutes, or until the edges are lightly golden but the jam looks set. Keep an eye on them after 10 minutes to avoid overbaking — you want soft centers with a crisp exterior.
- Cool: Let the cookies cool on the baking sheet for 5 minutes before transferring to a wire rack to cool completely. This helps them firm up and keeps the jam glossy.
Pro tip: If you notice your dough is too sticky to handle, chill it a bit longer or dust your hands with flour. Also, using room temperature egg yolk helps the dough come together smoothly without extra mixing.
Cooking Tips & Techniques
For the best classic homemade thumbprint cookies with jam, a few tricks from my kitchen can make all the difference. First, the creaming step — beating butter and sugar until fluffy — is where the magic starts. It traps air, making cookies light and tender. Don’t rush this part!
Chilling the dough is non-negotiable. I learned this the hard way after my first batch spread into flat discs that looked nothing like the pretty thumbprints I wanted. Half an hour in the fridge chills the fat and prevents this mess.
When pressing your thumbprints, gently is the word. Press too hard, and you’ll end up with jam leakage or cookies that don’t hold their shape. A small spoon can help if your thumbs are too big or soft.
Be mindful of baking times — ovens vary, and jam can quickly bubble over or dry out. I usually start checking at 12 minutes and pull them out as soon as the edges get a hint of gold. This keeps them soft but set.
One of my favorite hacks is to use a mix of jams for variety — raspberry and apricot combos really please the eye and palate. Also, if multitasking, prepare the dough the night before; it’ll be even easier to shape the next day.
Variations & Adaptations
These classic homemade thumbprint cookies with jam are wonderfully versatile. Here are a few ways I’ve switched things up over the years:
- Nutty Delight: Mix finely chopped pecans or walnuts into the dough for a crunchy surprise.
- Chocolate Twist: Add 1/4 cup unsweetened cocoa powder to the dough and fill with chocolate hazelnut spread instead of jam.
- Gluten-Free: Swap all-purpose flour for an equal amount of gluten-free flour blend — just watch the dough’s texture and chill longer if too soft.
- Vegan Version: Use vegan butter and replace the egg yolk with 2 tablespoons of aquafaba (chickpea water), which whips up surprisingly well.
- Seasonal Jams: In summer, fresh peach or blueberry preserves add a bright, seasonal flair.
One personal favorite is adding a sprinkle of coarse sugar on top before baking for a little sparkle and crunch. It’s a simple touch that guests always notice.
Serving & Storage Suggestions
Serve these thumbprint cookies at room temperature to fully enjoy their buttery softness and jammy centers. They pair beautifully with a cup of tea, coffee, or even a glass of cold milk for the kids. For holiday gatherings, arrange them on a festive platter or stack them in a pretty tin for gifting.
Store cookies in an airtight container at room temperature for up to 4 days. If you want to keep them longer, freezing works like a charm — just freeze the baked cookies in a single layer on a tray, then transfer to a freezer bag. When ready to enjoy, thaw at room temperature and, if you like, warm gently in a low oven for a few minutes.
Reheating enhances the jam’s softness and brings back that fresh-baked aroma. Also, flavors tend to deepen after a day, so if you can wait, they actually taste better the next day.
Nutritional Information & Benefits
Each cookie contains approximately 120-140 calories depending on jam choice, with about 6g fat, 18g carbohydrates, and 1g protein. The use of unsalted butter and moderate sugar keeps it balanced—not too heavy but still indulgent.
Jam adds a touch of fruit-derived vitamins and antioxidants, especially if you pick versions with no added sugars. Using homemade or natural preserves boosts the wholesome factor even more.
This recipe is naturally gluten-free adaptable and can be adjusted for vegan diets, making it accessible for many dietary needs. Just a heads up: contains egg and dairy unless substituted.
From a wellness perspective, these cookies remind me that treats can be both nourishing and joyful when made with care and simple ingredients.
Conclusion
These classic homemade thumbprint cookies with jam are a timeless treat worth making over and over. They bring together buttery richness and fruity sweetness in a way that feels both nostalgic and fresh. I love how easy they are to customize — whether you want to add nuts, try different jams, or make them allergy-friendly.
Give this recipe a try, tweak it to your liking, and watch it become a family favorite. If you do make them, please come back and share your adaptations or stories — I’m always curious how you put your personal spin on it! Baking is better when shared, after all.
So go ahead, bake these little gems today and enjoy a warm, jam-filled hug from your oven.
FAQs About Classic Homemade Thumbprint Cookies with Jam
Can I use store-bought jam for these cookies?
Absolutely! Store-bought jams work perfectly. Just choose one with a good balance of sweetness and fruit flavor. I like using brands with natural ingredients for the best taste.
How do I prevent the cookies from spreading too much?
Chilling the dough before baking is key. Make sure your butter is softened, not melted, and avoid pressing the thumbprint too deep. Also, bake on a cool baking sheet for even results.
Can I make these cookies ahead of time?
Yes! You can prepare the dough and refrigerate it for up to 24 hours before shaping and baking. Baked cookies store well in an airtight container for several days.
What’s the best way to make a vegan version?
Swap butter with vegan margarine and replace the egg yolk with 2 tablespoons of aquafaba (the liquid from a can of chickpeas), whipped until frothy. This keeps the dough tender and easy to work with.
Can I freeze these cookies?
Definitely. Freeze baked cookies in a single layer, then transfer to a freezer bag. Thaw at room temperature before serving, or warm them slightly in the oven for a fresh-baked feel.
Pin This Recipe!
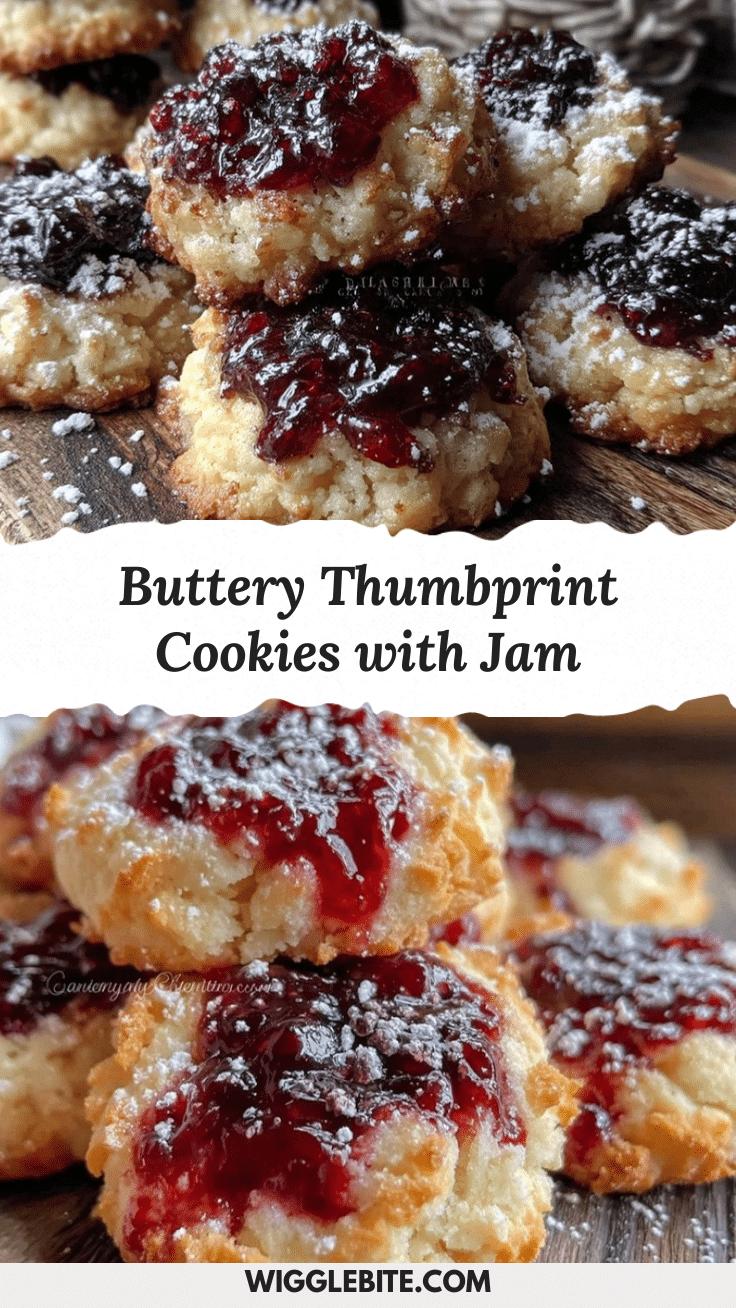
Classic Homemade Thumbprint Cookies with Jam

These classic homemade thumbprint cookies feature a buttery dough filled with sweet, fruity jam, perfect for any occasion and easy to make.
- Prep Time: 15 minutes
- Cook Time: 15 minutes
- Total Time: 30 minutes
- Yield: 24 cookies 1x
- Category: Dessert
- Cuisine: American
Ingredients
- 1 cup (225g) unsalted butter, softened
- 2/3 cup (135g) granulated sugar
- 1 large egg yolk, room temperature
- 1 teaspoon pure vanilla extract
- 2 cups (250g) all-purpose flour
- 1/4 teaspoon salt
- 1/2 cup (160g) jam or preserves (raspberry, strawberry, or apricot recommended)
Instructions
- Cream the butter and sugar: In a medium bowl, beat 1 cup softened unsalted butter with 2/3 cup granulated sugar using an electric mixer on medium speed until light and fluffy, about 3 to 4 minutes.
- Add egg yolk and vanilla: Mix in 1 large egg yolk and 1 teaspoon pure vanilla extract until just combined.
- Sift in dry ingredients: In a separate bowl, whisk together 2 cups all-purpose flour and 1/4 teaspoon salt. Gradually add the dry mix to the wet ingredients, stirring gently until a soft dough forms. Avoid overmixing.
- Chill the dough: Wrap the dough in plastic wrap and refrigerate for at least 30 minutes.
- Preheat oven to 350°F (175°C) and line a baking sheet with parchment paper.
- Shape the cookies: Scoop tablespoons of chilled dough (about 1 tbsp or 15g each), roll into balls, and place on the baking sheet about 2 inches apart. Using your thumb or the back of a small spoon, gently press an indentation into the center of each ball.
- Fill with jam: Spoon about 1/2 teaspoon of your chosen jam into each indentation.
- Bake for 12-15 minutes, or until the edges are lightly golden and the jam looks set. Check after 10 minutes to avoid overbaking.
- Cool: Let the cookies cool on the baking sheet for 5 minutes before transferring to a wire rack to cool completely.
Notes
Chilling the dough before shaping prevents spreading and keeps the thumbprint shape. Use room temperature egg yolk for smooth dough. Press thumbprints gently to avoid jam leakage. Check baking time closely to keep centers soft. Dough can be prepared a day ahead. For dairy-free, use plant-based margarine; for gluten-free, substitute with almond flour but chill longer.
Nutrition
- Serving Size: 1 cookie
- Calories: 130
- Sugar: 10
- Sodium: 70
- Fat: 6
- Saturated Fat: 4
- Carbohydrates: 18
- Fiber: 0.5
- Protein: 1
Keywords: thumbprint cookies, jam cookies, homemade cookies, easy cookies, buttery cookies, classic cookies, holiday cookies