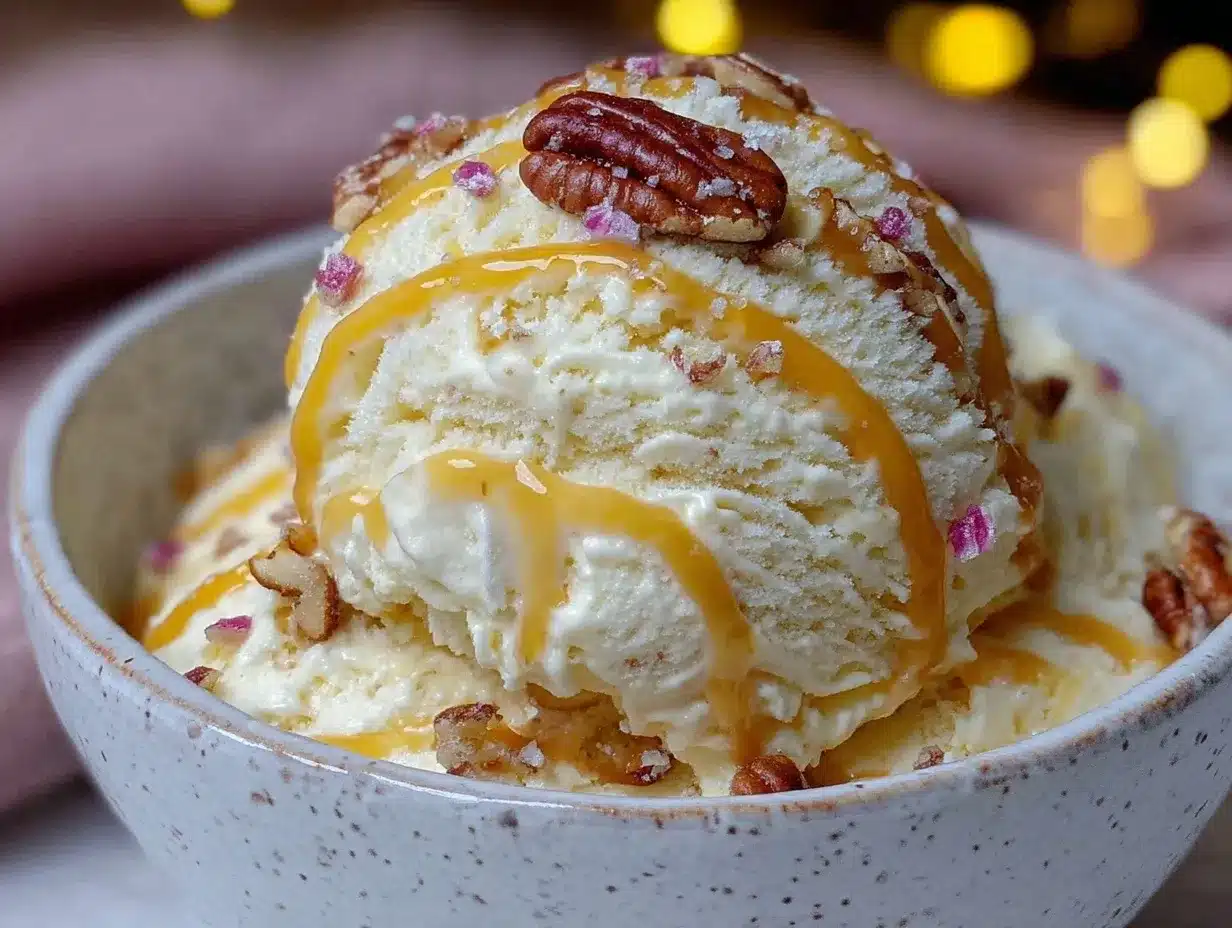
Let me tell you, the scent of rich vanilla swirling with sweet caramel wafting from my kitchen is enough to make anyone’s mouth water. The first time I churned this creamy homemade ice cream delight, I was instantly hooked. It’s that kind of moment where you pause, take a deep breath, and just smile because you know you’re onto something truly special. Years ago, when I was knee-high to a grasshopper, my grandma used to make the most heavenly vanilla ice cream, but this version—with that luscious caramel twist—feels like a nostalgic upgrade I wish I’d discovered sooner.
You know what’s honest? My family couldn’t stop sneaking spoonfuls straight from the freezer (and I can’t really blame them). Whether it’s a lazy Sunday afternoon or a spontaneous dinner party, this ice cream recipe has become a staple. It’s dangerously easy to make yet delivers pure, nostalgic comfort. Perfect for brightening up your Pinterest cookie board or as a sweet treat for your kids, this creamy homemade ice cream delight with vanilla & caramel is the kind of recipe you’re going to want to bookmark—and test multiple times, in the name of research, of course!
Why You’ll Love This Recipe
Honestly, this creamy homemade ice cream delight with vanilla & caramel has been a game-changer in my kitchen. Not only is it simple, but it’s also a crowd-pleaser—always getting rave reviews from kids and adults alike. Here’s why it stands out:
- Quick & Easy: Comes together in under an hour (plus freezing time), perfect for busy weeknights or last-minute cravings.
- Simple Ingredients: No fancy grocery trips needed; you likely already have everything in your pantry and fridge.
- Perfect for Any Occasion: Great for summer parties, cozy family nights, or even as a spontaneous dessert fix.
- Crowd-Pleaser: The silky texture and that sweet caramel ribbon always get compliments.
- Unbelievably Delicious: The balance between the creamy vanilla base and the rich caramel swirl is next-level comfort food.
This isn’t just any ice cream recipe. By gently folding in homemade caramel sauce and using real vanilla bean or pure extract, you get a flavor that’s deep and satisfying. Plus, the secret to its creamy texture lies in the careful blending of cream and milk, which keeps it smooth without being too heavy. It’s the kind of dessert that makes you close your eyes after the first scoop—pure comfort with a little twist.
What Ingredients You Will Need
This recipe uses simple, wholesome ingredients to deliver bold flavor and a satisfyingly smooth texture without fuss. Most of these are pantry and fridge staples, and substitutions are easy if needed.
- Whole Milk – 2 cups (480 ml) (for creaminess and smooth texture)
- Heavy Cream – 1 cup (240 ml) (adds richness)
- Granulated Sugar – 3/4 cup (150 g) (sweetness balance)
- Vanilla Bean – 1 pod, split and seeds scraped (or 2 tsp pure vanilla extract)
- Egg Yolks – 4 large, room temperature (for luscious custard base)
- Salt – 1/4 tsp (enhances flavor)
- Caramel Sauce – 1/2 cup (120 ml) homemade or store-bought (for that irresistible swirl)
Ingredient Notes: I recommend using a high-quality vanilla bean like Tahitian or Madagascar for the best aroma. For caramel, homemade is ideal—you can control the sweetness and texture—but a trusted brand like Ghirardelli or Trader Joe’s works great too. If you want to make this dairy-free, swap heavy cream and milk with coconut cream and almond milk, and try a vegan caramel sauce.
Equipment Needed
- Ice cream maker (a mid-range model like Cuisinart is perfect; no need to break the bank)
- Mixing bowls (glass or stainless steel work best for temperature control)
- Whisk and rubber spatula (for smooth blending and folding)
- Medium saucepan (for heating milk and cream)
- Fine mesh strainer (to ensure custard is silky smooth)
- Measuring cups and spoons (precise is key here!)
- Thermometer (optional but helpful—aim for 170°F/77°C when cooking custard)
If you don’t have an ice cream maker, don’t fret—you can still make this recipe by freezing the custard in a container and stirring every 30 minutes to prevent ice crystals. I’ve done this plenty of times when my machine was out of commission, and it still turns out great!
Preparation Method
- Warm the Milk and Cream: In a medium saucepan, combine 2 cups (480 ml) whole milk and 1 cup (240 ml) heavy cream. Add the split vanilla bean pod and seeds. Warm the mixture over medium heat until it just starts to steam and small bubbles form around the edges (about 170°F/77°C). Remove from heat and let it steep for 15 minutes to extract maximum vanilla flavor.
- Whisk the Egg Yolks and Sugar: While the milk is steeping, whisk together 4 large egg yolks and 3/4 cup (150 g) granulated sugar in a separate bowl until the mixture is pale and slightly thickened.
- Temper the Eggs: Slowly pour about 1 cup (240 ml) of the warm milk mixture into the yolks while whisking constantly. This step prevents the eggs from scrambling. Then, pour the yolk mixture back into the saucepan with the remaining milk.
- Cook the Custard: Return the saucepan to medium-low heat. Stir constantly with a wooden spoon or heatproof spatula, scraping the bottom, until the custard thickens enough to coat the back of the spoon (about 175°F/80°C). Don’t let it boil! This usually takes 5–8 minutes.
- Strain and Chill: Remove the vanilla bean pod, then strain the custard through a fine mesh sieve into a clean bowl. Stir in 1/4 tsp salt. Cover the surface with plastic wrap to avoid a skin forming and refrigerate until completely chilled (at least 4 hours or overnight). Pro tip: chilling it overnight really helps the flavors meld.
- Churn the Ice Cream: Pour the chilled custard into your ice cream maker and churn according to the manufacturer’s instructions (usually 20–30 minutes). The mixture will thicken to a soft-serve consistency.
- Swirl in the Caramel: Transfer half of the ice cream to a freezer-safe container. Drizzle half of the caramel sauce over it, then gently swirl with a knife or spatula. Repeat with the remaining ice cream and caramel. This creates those gorgeous caramel ribbons.
- Freeze Until Firm: Cover and freeze the ice cream for at least 4 hours until firm enough to scoop.
If your ice cream turns out too icy, it usually means the custard wasn’t cooked enough or chilled fully before churning. Next time, just let it rest longer in the fridge and don’t rush the cooking step.
Cooking Tips & Techniques
Here’s what I’ve learned after many batches of this creamy homemade ice cream delight:
- Don’t rush the custard: Cooking the egg yolks slowly and stirring constantly avoids scrambling and creates that silky texture.
- Chill well: Make sure your custard is fully chilled before churning. I sometimes pop it in the freezer for 20 minutes before churning to speed things up.
- Use fresh eggs: It makes a noticeable difference in flavor and richness.
- Swirl, don’t mix: When adding caramel, gently fold it in to keep those pretty ribbons instead of blending it all together.
- Maintain your ice cream maker: Clean it thoroughly after each use and keep the bowl frozen as per the instructions for best results.
- Multitask wisely: While the custard chills, you can whip up a quick caramel sauce or prep toppings—keeps the process smooth and fun.
One lesson I learned the hard way: skipping the straining step leads to a grainy texture—trust me, it’s worth the extra effort!
Variations & Adaptations
Want to put your own spin on this creamy homemade ice cream delight? Here are a few ideas I’ve tried and loved:
- Salted Caramel Twist: Add a pinch more sea salt to your caramel sauce for that perfect salty-sweet balance.
- Chocolate Swirl: Substitute caramel with a bittersweet chocolate ganache swirl for a mocha vibe.
- Dairy-Free Version: Use coconut milk and cream instead of dairy, and swap egg yolks for a cornstarch-thickened custard base. The coconut adds a lovely tropical note.
- Berry Infusion: Mix in fresh or frozen raspberries or strawberries during the last few minutes of churning for a fruity surprise.
- Spiced Vanilla: Add a cinnamon stick or a pinch of cardamom to the milk while warming for a cozy, aromatic ice cream.
One time, I tried adding a splash of bourbon to the caramel before swirling it in—dangerously good! Feel free to experiment with what you love.
Serving & Storage Suggestions
This creamy homemade ice cream delight is best served slightly softened—take it out of the freezer 5–10 minutes before scooping. Serve it in chilled bowls or waffle cones for a classic touch.
It pairs beautifully with warm desserts like apple pie or brownies, or simply topped with chopped nuts or flaky sea salt. For a grown-up treat, add a drizzle of espresso or a splash of your favorite liqueur.
Store leftovers in an airtight container in the freezer for up to 2 weeks. To avoid ice crystals, press a piece of parchment paper directly on the surface before sealing. When reheating, just let it soften at room temperature for a few minutes or microwave in short bursts (10 seconds) if you’re in a hurry.
Flavors actually deepen and mellow after a day or two in the freezer—so if you can wait, it’s worth it!
Nutritional Information & Benefits
Per serving (about 1/2 cup or 120 ml):
| Calories | 280 |
|---|---|
| Fat | 18g |
| Carbohydrates | 24g |
| Protein | 4g |
This recipe uses wholesome ingredients like real eggs and dairy, providing protein and calcium, while the caramel adds that sweet touch (but watch portions if you’re watching sugar intake). You can opt for organic milk and eggs if you prefer. For those avoiding gluten or soy, this recipe is naturally free of both.
From a wellness perspective, making your own ice cream lets you control what goes in—no weird preservatives or stabilizers. Plus, the real vanilla bean offers antioxidants and aromatic benefits that you just don’t get from artificial flavoring.
Conclusion
Honestly, this creamy homemade ice cream delight with vanilla & caramel is one of those recipes that’s worth every effort. It’s simple, satisfying, and perfect for any occasion when you want to impress without the stress. Customize it however you like—add spices, make it dairy-free, or swirl in your favorite sauce. I love it because it reminds me of cozy family moments and the joy of a homemade treat.
Give it a try, and let me know how it turns out! Share your variations, tips, or favorite pairings in the comments below. You’re going to love having this recipe in your back pocket for sweet cravings or special celebrations. Remember, great ice cream is all about patience and love—so scoop, savor, and enjoy every bite!
FAQs about Creamy Homemade Ice Cream Delight with Vanilla & Caramel
Can I make this ice cream without an ice cream maker?
Yes! Pour the custard into a freezer-safe container and stir vigorously every 30 minutes for about 3 hours to break up ice crystals. It won’t be as smooth as churned, but still delicious.
How long does homemade ice cream last in the freezer?
Stored properly in an airtight container, it’s best enjoyed within 2 weeks for optimal texture and flavor.
Can I use artificial vanilla instead of vanilla bean?
You can, but real vanilla bean or pure extract gives a richer, more complex flavor that’s worth the little extra effort.
What’s the best way to make homemade caramel sauce?
Slowly melt sugar until amber, then carefully add butter and cream while stirring constantly. Let it cool before swirling into your ice cream.
Is it possible to make this recipe vegan?
Absolutely! Use coconut milk and cream, replace eggs with a cornstarch-thickened base, and swap caramel for a vegan-friendly version made with coconut sugar and coconut cream.
Pin This Recipe!

Creamy Homemade Ice Cream Delight Recipe Easy Vanilla Caramel Treat
A rich and creamy homemade vanilla ice cream with luscious caramel swirls, perfect for any occasion and easy to make with simple ingredients.
- Prep Time: 20 minutes
- Cook Time: 15 minutes
- Total Time: 5 hours 35 minutes
- Yield: 8 servings 1x
- Category: Dessert
- Cuisine: American
Ingredients
- 2 cups (480 ml) whole milk
- 1 cup (240 ml) heavy cream
- 3/4 cup (150 g) granulated sugar
- 1 vanilla bean pod, split and seeds scraped (or 2 tsp pure vanilla extract)
- 4 large egg yolks, room temperature
- 1/4 tsp salt
- 1/2 cup (120 ml) caramel sauce, homemade or store-bought
Instructions
- In a medium saucepan, combine whole milk and heavy cream. Add the split vanilla bean pod and seeds. Warm over medium heat until steaming and small bubbles form around edges (about 170°F/77°C). Remove from heat and steep for 15 minutes.
- Whisk together egg yolks and granulated sugar in a separate bowl until pale and slightly thickened.
- Slowly pour about 1 cup (240 ml) of the warm milk mixture into the yolks while whisking constantly to temper the eggs. Pour the yolk mixture back into the saucepan with the remaining milk.
- Return saucepan to medium-low heat. Stir constantly until custard thickens enough to coat the back of a spoon (about 175°F/80°C), about 5–8 minutes. Do not boil.
- Remove vanilla bean pod and strain custard through a fine mesh sieve into a clean bowl. Stir in salt. Cover surface with plastic wrap and refrigerate until completely chilled, at least 4 hours or overnight.
- Pour chilled custard into an ice cream maker and churn according to manufacturer’s instructions (usually 20–30 minutes) until soft-serve consistency.
- Transfer half of the ice cream to a freezer-safe container. Drizzle half of the caramel sauce over it and gently swirl with a knife or spatula. Repeat with remaining ice cream and caramel.
- Cover and freeze for at least 4 hours until firm enough to scoop.
Notes
If you don’t have an ice cream maker, freeze the custard in a container and stir every 30 minutes for about 3 hours to prevent ice crystals. Use high-quality vanilla bean for best flavor. Chill custard overnight for best results. Avoid skipping the straining step to prevent grainy texture. Swirl caramel gently to keep ribbons distinct.
Nutrition
- Serving Size: 1/2 cup (120 ml)
- Calories: 280
- Fat: 18
- Carbohydrates: 24
- Protein: 4
Keywords: homemade ice cream, vanilla ice cream, caramel ice cream, easy ice cream recipe, creamy ice cream, dessert, summer treat