
Let me tell you, the scent of freshly baked bunny cookies with that delicate icing just drifting through the kitchen is enough to make anyone’s mouth water. The first time I baked these perfect bunny cookies, I was instantly hooked—the kind of moment where you pause, take a deep breath, and just smile because you know you’re onto something truly special. I stumbled upon this recipe years ago when I was knee-high to a grasshopper, baking alongside my grandma on a rainy weekend. Those crunchy edges contrasted with the soft, sweet icing gave such pure, nostalgic comfort that I wish I’d discovered it sooner.
Honestly, my family couldn’t stop sneaking them off the cooling rack (and I can’t really blame them). These bunny cookies quickly became a staple for family gatherings and gifting. You know what’s great? They’re dangerously easy to make, perfect for potlucks, or as a sweet treat for your kids. Whether you’re brightening up your Pinterest cookie board or just craving a little homemade happiness, this recipe for perfect bunny cookies with delicate icing and crunchy edges is absolutely worth bookmarking.
Why You’ll Love This Recipe
This recipe has been put to the test multiple times in the name of research, of course, and here’s why it stands out from the crowd:
- Quick & Easy: Comes together in under 30 minutes—ideal for busy weeknights or last-minute cookie cravings.
- Simple Ingredients: No fancy grocery runs needed; chances are you already have everything in your kitchen pantry.
- Perfect for Every Occasion: Whether it’s Easter brunch, a springtime potluck, or just a cozy afternoon treat, these bunny cookies fit right in.
- Crowd-Pleaser: Kids and adults alike rave about the crunchy edges paired with that smooth, delicate icing.
- Unbelievably Delicious: The balance between the buttery cookie base and the subtly sweet icing makes every bite feel like a warm hug.
What makes this recipe different? It’s not just your basic sugar cookie with icing slapped on top. The secret lies in the perfectly balanced dough that crisps just right around the edges while staying tender inside, plus an easy-to-make icing that’s light but flavorful. Plus, I love that it’s versatile enough to customize with your favorite flavors or colors. The first bite will have you closing your eyes, savoring that beautiful combo of texture and taste. It’s comfort food, reimagined for the cookie lover who wants the best of both worlds—simple, satisfying, and just a little bit special.
What Ingredients You Will Need
This recipe uses simple, wholesome ingredients to deliver bold flavor and satisfying texture without the fuss. Most are pantry staples, and substitutions are easy if needed.
- For the cookie dough:
- 2 ½ cups (315g) all-purpose flour (I recommend King Arthur for best texture)
- 1 cup (227g) unsalted butter, softened (room temperature for easier mixing)
- ¾ cup (150g) granulated sugar
- 1 large egg, room temperature
- 1 tsp vanilla extract (pure vanilla really makes a difference)
- ½ tsp baking powder
- ¼ tsp salt
- For the delicate icing:
- 1 ½ cups (180g) powdered sugar, sifted
- 2-3 tbsp milk (whole milk or dairy-free alternative like almond milk works great)
- ½ tsp vanilla extract
- Food coloring (optional, for festive bunny designs)
Ingredient tips: Use unsalted butter to control saltiness, and sift powdered sugar to keep your icing smooth. If you’re feeling adventurous, swap in almond flour for half the flour for a slight nutty twist. For a dairy-free option, coconut oil can replace butter, and coconut milk works well for the icing.
Equipment Needed
- Mixing bowls (medium and large sizes)
- Electric mixer or stand mixer (hand mixing works but takes longer)
- Baking sheet(s) lined with parchment paper or silicone baking mats
- Rolling pin (or a clean wine bottle in a pinch!)
- Bunny-shaped cookie cutters (various sizes for fun)
- Wire cooling rack
- Small bowls or piping bags for icing
If you don’t have a stand mixer, a sturdy hand mixer or even a wooden spoon and some elbow grease will do just fine. Silicone baking mats are a personal favorite—they help cookies bake evenly and cleanup is a breeze. Parchment paper is the budget-friendly alternative, just watch your baking times carefully. For icing, if you don’t have piping bags, a zip-top plastic bag with a tiny corner snipped off works wonders.
Preparation Method
- Prep your workspace: Preheat your oven to 350°F (175°C). Line baking sheets with parchment paper or silicone mats. This helps prevent sticking and encourages those perfect crunchy edges.
- Make the dough: In a large bowl, cream the softened butter and granulated sugar until light and fluffy—about 3-4 minutes with an electric mixer on medium speed. This step is key to achieving that melt-in-your-mouth texture.
- Add egg and vanilla: Beat in the egg and vanilla extract until fully combined. The dough will start to come together here.
- Combine dry ingredients: In a separate bowl, whisk the flour, baking powder, and salt together. Then gradually add this to the wet mixture, mixing on low speed or folding with a spatula until just combined. Don’t overmix — that’s the secret to tender cookies.
- Chill the dough: Wrap the dough in plastic wrap and chill in the fridge for at least 30 minutes. Chilling firms the dough, making it easier to roll out and helps prevent spreading during baking.
- Roll and cut shapes: Lightly flour your surface and roll out the dough to about ¼ inch (6mm) thickness. Use your bunny-shaped cutters to cut out cookies. Gather scraps, re-roll, and repeat.
- Bake: Place cookies about 1 inch (2.5 cm) apart on the prepared sheets. Bake for 10-12 minutes or until the edges turn golden brown but the centers are still soft. Keep an eye on them—oven temps vary!
- Cool: Let the cookies cool on the baking sheet for 5 minutes before transferring to a wire rack to cool completely. This helps them firm up without breaking.
- Prepare the icing: In a small bowl, whisk powdered sugar, milk (start with 2 tbsp), and vanilla until smooth. Adjust consistency by adding a bit more milk if needed—you want it thick enough to hold shape but still spreadable.
- Decorate: Use a small spoon, butter knife, or piping bag to apply icing to cooled cookies. Let them set for at least an hour before stacking or storing.
If your dough feels too sticky, pop it back in the fridge for 10-15 minutes. For even edges, don’t skip chilling the dough. And remember, those little golden-brown edges? That’s your signal they’re ready!
Cooking Tips & Techniques
Honestly, the trick to perfect bunny cookies with crunchy edges and delicate icing is in the details. Here are some tips I’ve learned over the years:
- Butter temperature matters: Softened, but not melting, butter creates a smooth dough that’s easy to work with and bakes up tender.
- Don’t skip chilling: Chilling the dough keeps the cookies from spreading too much and helps those edges crisp up nicely.
- Rolling thickness: Rolling your dough evenly to about ¼ inch thickness ensures even baking. Too thin, and cookies burn; too thick, and they stay doughy.
- Baking time vigilance: Ovens vary, so start checking at 9 minutes. Look for golden edges and a slightly soft center.
- Powdered sugar icing: Sift your powdered sugar to avoid lumps. Adjust milk quantity slowly to get just the right consistency for piping or spreading.
- Layering icing: For a more intricate look, let the base icing dry before adding details with colored icing.
One time, I accidentally added too much milk to the icing and ended up with a puddle rather than a coating. Lesson learned: slow and steady wins the race! Also, multitasking by chilling the dough while prepping the icing saves time. Patience is key for icing to set properly; don’t rush this step or the design will smear.
Variations & Adaptations
Want to switch things up? Here are some ways I’ve played around with this bunny cookie recipe over time:
- Flavor twists: Add a teaspoon of almond extract or lemon zest to the dough for a fresh, unexpected punch.
- Dietary swaps: Use gluten-free flour blends for a gluten-free version, or swap butter for coconut oil for a dairy-free alternative.
- Seasonal themes: Instead of bunny shapes, try flower or egg cutters for spring, or pumpkin shapes for fall. Use natural food coloring from beet juice or turmeric for a subtle tint.
- Cooking methods: If you prefer, these cookies can be baked in a convection oven; just reduce time by 1-2 minutes and watch closely.
- Personal fave: One time, I mixed in finely chopped toasted nuts into the dough for a delightful crunch that pairs well with the smooth icing.
Serving & Storage Suggestions
These perfect bunny cookies are best served at room temperature, letting their crunchy edges and delicate icing shine. They pair wonderfully with a cup of tea or a glass of cold milk—especially for the kiddos.
For storing, keep them in an airtight container at room temperature for up to 4 days. If you want to keep them longer, stash them in the freezer for up to 2 months—just thaw at room temperature before serving. Icing might soften a bit in the fridge or freezer, so let cookies rest a bit after reheating.
Reheating is simple: 10-15 seconds in the microwave or a quick warm-up in a low oven brings back that fresh-baked vibe. Over time, the flavors meld nicely, and the icing softens just enough to make every bite a gentle treat.
Nutritional Information & Benefits
Each bunny cookie (about 40g) contains approximately 150 calories, 7g fat, 20g carbohydrates, and 2g protein. While these are a sweet treat, the use of real butter and simple ingredients makes them a cleaner indulgence compared to store-bought options.
Butter provides some fat-soluble vitamins like A and E, and using real vanilla extract adds antioxidants. The recipe can be tweaked to reduce sugar or swap in whole grain flours for a slightly healthier spin.
Be mindful of common allergens like gluten, dairy, and eggs, but the recipe is flexible to accommodate various dietary needs with substitutions.
From a personal wellness perspective, treating yourself to homemade goodies like these bunny cookies feels like a well-earned reward—comfort food made thoughtfully and with love.
Conclusion
So there you have it—the perfect bunny cookies with delicate icing and crunchy edges that are as charming as they are delicious. This recipe is worth trying because it’s simple, satisfying, and adaptable to whatever you have on hand or prefer in flavor. I love these cookies because they bring back memories, brighten up any table, and honestly, make me feel just a little bit happier.
Give them a whirl, customize to your heart’s content, and please come back to share your results or your own twists. Happy baking, and remember—sometimes the best moments come with a cookie in hand and a smile on your face!
FAQs
How can I make bunny cookies without a cookie cutter?
You can freehand cut the dough into bunny shapes using a knife or trace and cut around a paper template. Alternatively, use other cookie cutters you have on hand for fun shapes.
Why do my cookies lose their shape while baking?
This usually happens if the dough is too warm or overworked. Chilling the dough before cutting and baking helps keep the shapes crisp and defined.
Can I make the icing ahead of time?
Yes! The icing can be made a day ahead. Keep it covered tightly to prevent drying out. Stir well before using.
How do I store decorated bunny cookies to keep the icing intact?
Store in a single layer in an airtight container at room temperature. Avoid stacking while icing is still wet. For longer storage, freeze completely cooled and decorated cookies.
Can I add sprinkles or decorations to the icing?
Absolutely! Add sprinkles right after icing before it sets for extra fun. You can also use edible markers or colored icing for detailed designs.
Pin This Recipe!

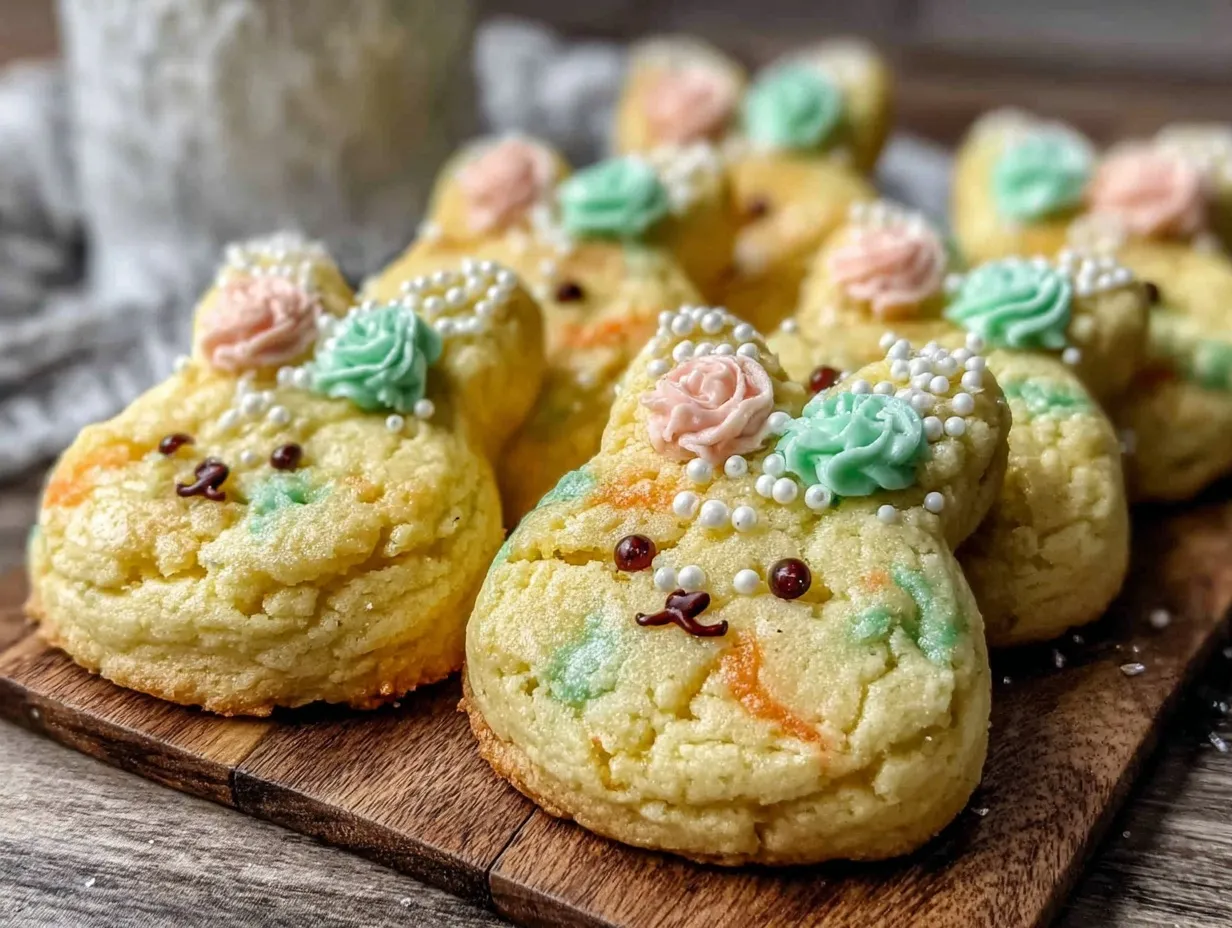
Perfect Bunny Cookies Recipe Easy Homemade Icing and Crunchy Edges

These perfect bunny cookies feature crunchy edges and delicate homemade icing, making them a nostalgic and crowd-pleasing treat that’s quick and easy to make.
- Prep Time: 15 minutes
- Cook Time: 12 minutes
- Total Time: 45 minutes
- Yield: 24 cookies 1x
- Category: Dessert
- Cuisine: American
Ingredients
- 2 ½ cups (315g) all-purpose flour
- 1 cup (227g) unsalted butter, softened
- ¾ cup (150g) granulated sugar
- 1 large egg, room temperature
- 1 tsp vanilla extract
- ½ tsp baking powder
- ¼ tsp salt
- 1 ½ cups (180g) powdered sugar, sifted
- 2–3 tbsp milk (whole milk or dairy-free alternative)
- ½ tsp vanilla extract
- Food coloring (optional)
Instructions
- Preheat oven to 350°F (175°C). Line baking sheets with parchment paper or silicone mats.
- In a large bowl, cream softened butter and granulated sugar until light and fluffy, about 3-4 minutes with an electric mixer on medium speed.
- Beat in the egg and vanilla extract until fully combined.
- In a separate bowl, whisk flour, baking powder, and salt together. Gradually add to wet mixture, mixing on low speed or folding with a spatula until just combined. Do not overmix.
- Wrap dough in plastic wrap and chill in the fridge for at least 30 minutes.
- Lightly flour surface and roll dough to about ¼ inch (6mm) thickness. Use bunny-shaped cutters to cut out cookies. Gather scraps, re-roll, and repeat.
- Place cookies about 1 inch apart on prepared sheets. Bake for 10-12 minutes or until edges are golden brown but centers are still soft.
- Let cookies cool on baking sheet for 5 minutes, then transfer to wire rack to cool completely.
- In a small bowl, whisk powdered sugar, 2 tbsp milk, and vanilla until smooth. Adjust consistency with more milk if needed.
- Decorate cooled cookies with icing using a spoon, butter knife, or piping bag. Let icing set for at least an hour before storing.
Notes
Use softened but not melting butter for best dough texture. Chill dough to prevent spreading and achieve crunchy edges. Sift powdered sugar for smooth icing. Adjust milk slowly to get the right icing consistency. Let icing set fully before stacking or storing. For dairy-free, substitute coconut oil for butter and coconut milk for milk. For gluten-free, use gluten-free flour blends.
Nutrition
- Serving Size: 1 cookie (about 40g)
- Calories: 150
- Fat: 7
- Carbohydrates: 20
- Protein: 2
Keywords: bunny cookies, sugar cookies, homemade icing, crunchy edges, easy cookies, Easter cookies, kid-friendly cookies