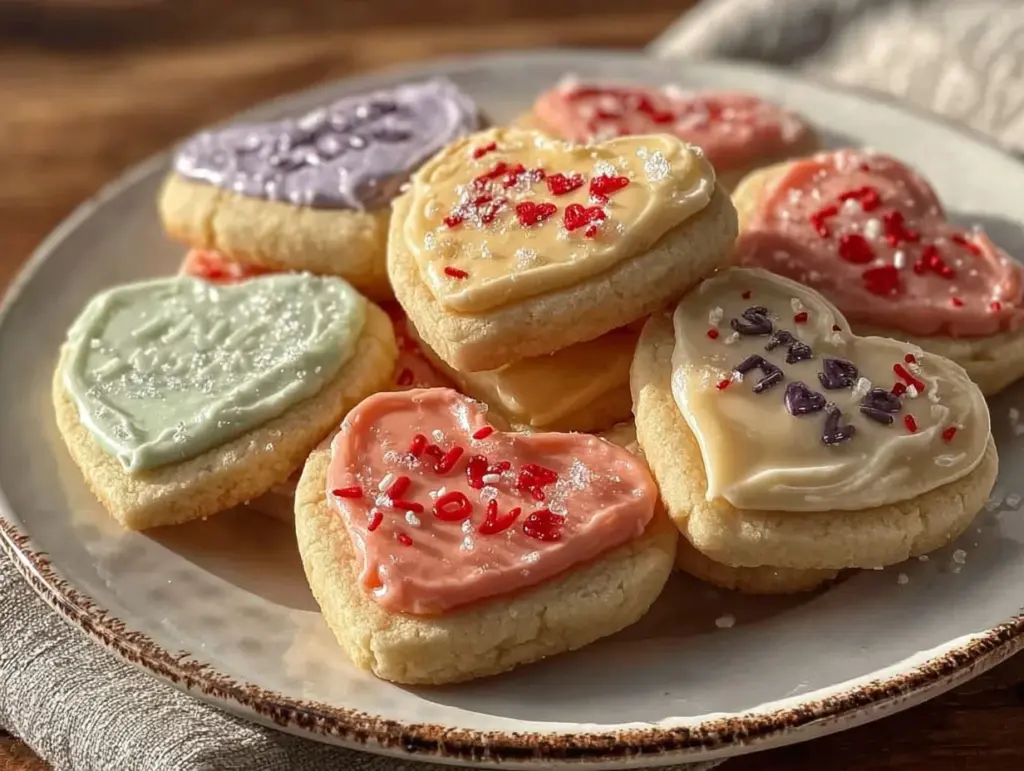
Let me tell you, the scent of buttery sugar cookies fresh out of the oven, combined with the soft pastel colors of those sweet vintage messages, is enough to make anyone’s heart skip a beat. The first time I baked these Classic Conversation Heart Cookies, I was instantly hooked—there’s just something about those tiny, sweet words like “Be Mine” and “Sweet Talk” that takes me right back to childhood. Honestly, it’s the kind of moment where you pause, take a deep breath, and just smile because you know you’re onto something truly special.
Years ago, when I was knee-high to a grasshopper, my grandma would hand me a box of conversation hearts around Valentine’s Day, and I’d spend hours reading and rereading each message. So, when I stumbled upon this cookie recipe on a rainy weekend, trying to recreate that nostalgic feel, I was over the moon. I wish I’d discovered this recipe years ago; it’s dangerously easy and delivers pure, nostalgic comfort with every bite.
My family couldn’t stop sneaking these cookies off the cooling rack (and I can’t really blame them). The sweet vintage messages, paired with the soft chew and just-right sweetness, make for a perfect treat to brighten up your Pinterest cookie board or impress at any potluck or holiday gathering. Trust me, you’re going to want to bookmark this one—it’s become a staple for family gatherings, gifting, and those moments when you need a little sweet talk.
Why You’ll Love This Recipe
After testing this recipe multiple times (in the name of research, of course), I can confidently say these Classic Conversation Heart Cookies stand out in a crowded cookie world. Here’s why:
- Quick & Easy: Comes together in under an hour—perfect for last-minute baking emergencies or fun weekend projects.
- Simple Ingredients: No fancy grocery trips needed; you likely already have everything in your pantry.
- Perfect for Valentine’s or Anytime Sweet Treats: Whether it’s a cozy dinner, a festive party, or just a mid-week pick-me-up, these cookies fit the bill.
- Crowd-Pleaser: Both kids and adults rave about that soft texture paired with playful, vintage messages.
- Unbelievably Delicious: The balance of buttery sweetness and melt-in-your-mouth softness is pure comfort food magic.
What sets this recipe apart? It’s all in the dough’s tender crumb and the way you decorate each cookie with sweet vintage messages that feel straight out of a timeless postcard. I blend just enough almond extract to make the flavor pop without overpowering, and the royal icing dries with a perfect matte finish—you know, the kind that’s pretty enough to gift but tastes like a dream. Honestly, these aren’t just cookies; they’re little edible love notes that make you close your eyes after the first bite.
What Ingredients You Will Need
This recipe uses simple, wholesome ingredients to deliver bold flavor and a satisfying, tender texture without the fuss. Most of these are pantry staples, but if you want to swap a few things, I’ve included some handy notes below.
- For the cookie dough:
- 2 ¾ cups (345g) all-purpose flour (I recommend King Arthur for consistent texture)
- 1 teaspoon baking powder
- ½ teaspoon salt
- ¾ cup (170g) unsalted butter, softened (room temperature is key for easy mixing)
- 1 ½ cups (300g) granulated sugar
- 1 large egg (room temperature helps with smooth blending)
- 2 teaspoons pure vanilla extract
- ½ teaspoon almond extract (adds a subtle, vintage twist)
- For the royal icing (for the vintage messages):
- 3 cups (360g) powdered sugar, sifted (to avoid lumps)
- 2 tablespoons meringue powder
- 5 tablespoons water (add more to thin if needed)
- Gel food coloring in pastel shades (pink, purple, green, yellow, blue)
- Edible food markers or piping bags with fine tips (for writing messages)
Substitution tips: Use almond flour for a gluten-free twist but note the texture will be more crumbly. Swap butter for dairy-free margarine or coconut oil if you need a vegan version, though the flavor will differ slightly. For the icing, if you prefer a softer look, you can use store-bought royal icing mix, but homemade is best for that authentic vintage feel.
Equipment Needed
- Mixing bowls (a large one for dough, a smaller one for icing)
- Electric mixer or stand mixer (makes creaming butter and sugar a breeze)
- Measuring cups and spoons (precision really helps here)
- Rolling pin (a silicone one works great for less sticking)
- Heart-shaped cookie cutters (I use a 2-inch size for that classic look)
- Baking sheets lined with parchment paper or silicone mats
- Cooling racks (to let cookies set without losing their crisp edges)
- Piping bags or squeeze bottles for icing (fine tips recommended for writing messages)
- Edible food markers for adding the vintage messages (optional but highly recommended)
If you don’t have a stand mixer, a sturdy hand mixer will do just fine. For rolling the dough, if you’re short on space, rolling between two sheets of parchment paper cuts down on mess and sticking. Keeping your icing consistency just right is easier if you have a small angled spatula or toothpicks for adjustments.
Preparation Method

- Prep your dry ingredients: In a medium bowl, whisk together 2 ¾ cups (345g) all-purpose flour, 1 teaspoon baking powder, and ½ teaspoon salt. Set aside. This step keeps things moving smoothly later.
- Cream the butter and sugar: In a large bowl, use an electric mixer to beat ¾ cup (170g) softened unsalted butter with 1 ½ cups (300g) granulated sugar until light and fluffy—about 3 to 5 minutes. You’ll know you’re there when the mixture looks pale and smooth.
- Add egg and extracts: Beat in 1 large room temperature egg, 2 teaspoons vanilla extract, and ½ teaspoon almond extract until combined. The almond extract really gives a subtle, vintage vibe that’s hard to beat.
- Combine wet and dry: Gradually add the flour mixture, mixing on low speed just until the dough starts coming together. Be careful not to overmix—that can make the cookies tough.
- Chill the dough: Form the dough into a disk, wrap it tightly in plastic wrap, and refrigerate for at least 1 hour (or up to 24 hours). This is a crucial step for easier rolling and better cookie shape.
- Roll and cut: Preheat your oven to 350°F (175°C). On a lightly floured surface, roll the dough out to about ¼ inch (6mm) thickness. Use your heart-shaped cookie cutter to cut out shapes, placing them on parchment-lined baking sheets about 1 inch apart.
- Bake: Bake for 8 to 10 minutes, or until the edges just begin to turn golden. Keep an eye on them; you want soft edges, not browned or crispy.
- Cool completely: Transfer cookies to wire racks and let them cool fully before decorating—this prevents the icing from melting.
- Prepare royal icing: In a clean bowl, mix 3 cups (360g) powdered sugar, 2 tablespoons meringue powder, and 5 tablespoons water. Beat until stiff peaks form, around 5 minutes. Divide and tint the icing with your pastel gel colors.
- Decorate: Spread a thin layer of colored icing on each cookie and let it dry slightly. Then, using edible food markers or fine piping tips, write sweet vintage messages like “Be Mine,” “True Love,” or “Sweet Talk.” Let dry overnight for best results.
Pro tip: If your dough feels too sticky, pop it back in the fridge for 15 minutes before rolling. Also, if the icing is too thick for writing, add water a drop at a time until it flows smoothly.
Cooking Tips & Techniques
When making Classic Conversation Heart Cookies, a few tricks can save you from frustration and guarantee success. First, chilling the dough is non-negotiable—trust me, I’ve tried skipping it, and the cookies lose their neat shape and become too soft to handle.
Also, be gentle when rolling out the dough. Rolling too thin will give you crispy, less tender cookies, while too thick means underbaked centers. Aim for that perfect quarter-inch thickness for soft, chewy results.
When decorating, patience is your best friend. Let the base icing dry for at least 30 minutes before writing messages. Rushing it can cause smudging and frustration (been there!). Use a light hand with edible markers—pressing too hard can tear the icing surface.
Multitasking tip: While the cookies bake, prep your icing colors and set up your decorating station. This way, you can decorate as soon as the cookies cool, making the process smoother and more enjoyable.
Variations & Adaptations
- Gluten-Free Version: Swap the all-purpose flour for a 1-to-1 gluten-free baking flour blend. Add an extra ¼ teaspoon xanthan gum if your blend doesn’t contain it for better texture.
- Vegan Adaptation: Replace butter with coconut oil or vegan margarine and use a flax egg (1 tablespoon ground flaxseed + 3 tablespoons water) in place of the egg. The texture shifts slightly but still delicious.
- Flavor Twists: Add a teaspoon of lemon or orange zest to the dough for a fresh citrus note. Or swap almond extract for peppermint extract for a cool winter vibe.
- Different Messages: Instead of vintage sayings, try personalized names, inside jokes, or holiday-themed words using edible food markers.
One time, I tried using natural food colorings like beet juice powder and matcha for the icing—it gave a rustic look that felt very homemade and charming. Definitely worth a try if you want a more natural vibe.
Serving & Storage Suggestions
These Classic Conversation Heart Cookies are best served at room temperature, letting that buttery softness shine through. They look fantastic arranged on a pastel platter or wrapped up in a cute box tied with ribbon—perfect for gifting or party favors.
Pair these cookies with a cup of hot tea, coffee, or even a cold glass of milk for that classic combo. They’re also a fun addition to any Valentine’s Day brunch or dessert table.
To store, keep cookies in an airtight container at room temperature for up to 5 days. If you want to save them longer, freeze them in layers separated by parchment paper for up to 3 months. When ready to enjoy, thaw at room temperature and you’ll have that fresh-baked taste all over again.
Note that the flavor and texture actually improve a little after a day or two as the icing sets fully and the cookies soften slightly. So if you can resist, these cookies get even better with time.
Nutritional Information & Benefits
Each cookie (based on a 2-inch size) contains approximately 120 calories, 5g fat, 18g carbohydrates, and 1g protein. While these are definitely a sweet treat, the recipe includes wholesome ingredients like real butter and pure vanilla, avoiding artificial fillers.
The almond extract adds a touch of nutty flavor without adding significant calories and is a nice alternative for those avoiding heavy artificial flavorings. Using powdered sugar in the royal icing means smoother texture with less graininess, making it easier to digest for some compared to granulated sugar.
For dietary considerations, this recipe can be adapted to gluten-free and vegan diets without losing much charm or taste. Just be mindful of potential allergens like nuts if using almond extract.
Conclusion
If you’re craving a sweet that’s as charming to look at as it is to eat, these Classic Conversation Heart Cookies with Sweet Vintage Messages are your new best friend. They’re fun, nostalgic, and honestly, a little addictive. You can customize the messages, colors, and flavors to suit your mood or occasion, making them perfect for everything from Valentine’s Day to everyday smiles.
I love this recipe because it brings back those warm, fuzzy feelings from my childhood while giving me a chance to get creative in the kitchen. Now it’s your turn—try it, tweak it, and share how you made it your own. Don’t forget to leave a comment below or tag me when you post your cookies. Happy baking and sweet talking!
FAQs
Can I make the dough ahead of time?
Yes! You can prepare the dough and refrigerate it for up to 24 hours before rolling and baking. It actually helps develop better flavor and easier handling.
How do I prevent the royal icing from cracking?
Make sure your cookies are completely cool before icing. Also, don’t apply icing too thickly and store cookies in an airtight container to maintain moisture balance.
What’s the best way to write the messages on the cookies?
Using edible food markers is easiest for beginners, but you can also pipe with a fine-tipped icing bag. Practice on parchment first to get comfortable.
Can I freeze the baked cookies without icing?
Absolutely. Freeze the baked, cooled cookies in airtight containers with parchment layers for up to 3 months. Decorate after thawing for the freshest look.
What if I don’t have almond extract—can I skip it?
You can omit almond extract or replace it with an equal amount of vanilla extract. The cookies will still taste great, though almond adds that subtle vintage note I love.
Pin This Recipe!
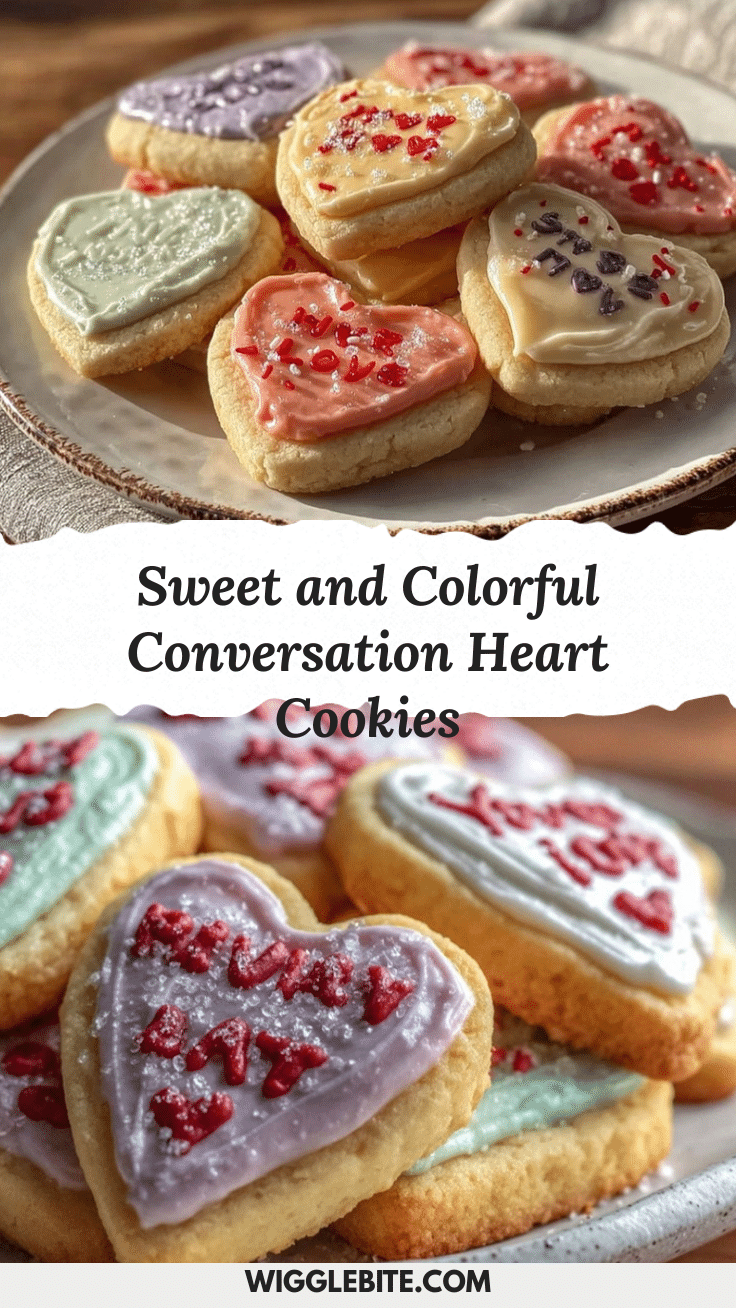
Classic Conversation Heart Cookies

These nostalgic buttery sugar cookies feature soft pastel vintage messages, perfect for Valentine’s Day or any sweet occasion. They offer a tender crumb and melt-in-your-mouth softness with customizable decorations.
- Prep Time: 15 minutes
- Cook Time: 10 minutes
- Total Time: 1 hour 25 minutes
- Yield: 24 cookies 1x
- Category: Dessert
- Cuisine: American
Ingredients
- 2 ¾ cups (345g) all-purpose flour
- 1 teaspoon baking powder
- ½ teaspoon salt
- ¾ cup (170g) unsalted butter, softened
- 1 ½ cups (300g) granulated sugar
- 1 large egg
- 2 teaspoons pure vanilla extract
- ½ teaspoon almond extract
- 3 cups (360g) powdered sugar, sifted
- 2 tablespoons meringue powder
- 5 tablespoons water
- Gel food coloring in pastel shades (pink, purple, green, yellow, blue)
- Edible food markers or piping bags with fine tips
Instructions
- In a medium bowl, whisk together flour, baking powder, and salt. Set aside.
- In a large bowl, beat softened butter and granulated sugar with an electric mixer until light and fluffy, about 3 to 5 minutes.
- Add egg, vanilla extract, and almond extract; beat until combined.
- Gradually add the flour mixture, mixing on low speed just until dough starts coming together. Avoid overmixing.
- Form dough into a disk, wrap in plastic wrap, and refrigerate for at least 1 hour or up to 24 hours.
- Preheat oven to 350°F (175°C). Roll dough on a lightly floured surface to ¼ inch thickness.
- Cut out heart shapes with cookie cutter and place on parchment-lined baking sheets about 1 inch apart.
- Bake for 8 to 10 minutes until edges just begin to turn golden. Avoid browning or crisping edges.
- Cool cookies completely on wire racks before decorating.
- For royal icing, mix powdered sugar, meringue powder, and water until stiff peaks form, about 5 minutes.
- Divide and tint icing with pastel gel colors.
- Spread a thin layer of colored icing on each cookie and let dry slightly.
- Write vintage messages using edible food markers or fine piping tips.
- Let decorated cookies dry overnight for best results.
Notes
Chill dough for at least 1 hour to ensure easier rolling and better cookie shape. Roll dough to ¼ inch thickness for soft, chewy cookies. Let icing dry before writing messages to avoid smudging. Store cookies in airtight container at room temperature up to 5 days or freeze up to 3 months. Dough can be refrigerated up to 24 hours before baking.
Nutrition
- Serving Size: 1 cookie (2-inch siz
- Calories: 120
- Fat: 5
- Carbohydrates: 18
- Protein: 1
Keywords: conversation heart cookies, sugar cookies, vintage cookies, Valentine’s Day cookies, royal icing, edible messages, nostalgic treats