Imagine walking into your kitchen on a chilly Saturday morning, and the scent of cocoa and vanilla hits you like a wave of pure happiness. The velvety aroma of red velvet brownies mingled with rich, creamy cheesecake feels downright magical. The first time I made these Red Velvet Cheesecake Brownies with a white chocolate swirl, I thought—wow, this is the kind of moment where you pause, take a deep breath, and just smile because you know you’re onto something truly special.
I still remember that rainy weekend years ago when I wanted to bake something that combined my love for red velvet cake and cheesecake. My grandma always said, “If you’re going to bake, make it worth every bite.” Honestly, these brownies are dangerously easy and deliver pure, nostalgic comfort. The red velvet layer is soft and fudgy; the cheesecake is silky and tangy; and that swirl of melted white chocolate glistens like frosting on a birthday card.
Let’s face it—my family couldn’t stop sneaking pieces off the cooling rack. Even my dad, who claims he’s not a “sweets person,” ended up with red velvet crumbs on his shirt (I’m still laughing about that). These brownies have become a staple for family gatherings, birthday parties, and Pinterest-worthy dessert boards. If you’re searching for a sweet treat to brighten up your dessert table, trust me, this is the recipe you’ll want to bookmark. I tested it over a dozen times, in the name of research, of course, just to make sure it’s as foolproof and decadent as possible. Each batch feels like a warm hug—and you’ll see why.
Why You’ll Love This Recipe
- Quick & Easy: These Red Velvet Cheesecake Brownies come together in under an hour—including prep and bake time. Perfect for busy weeknights, spontaneous dessert cravings, or when you need something gorgeous for a party.
- Simple Ingredients: No fancy shopping lists required. You probably already have everything you need in your pantry and fridge.
- Perfect for Any Occasion: Whether it’s a cozy brunch, holiday gathering, potluck, or just a Wednesday night, these brownies fit right in. I’ve even packed them as gifts because they travel so well.
- Crowd-Pleaser: Kids love the pretty red color and sweet flavor; adults rave about the creamy cheesecake layer and white chocolate swirl. I’ve never had leftovers (and I’m not complaining!).
- Unbelievably Delicious: The fudgy red velvet base, creamy cheesecake center, and swirled white chocolate create a texture and flavor combo that’s next-level comfort food.
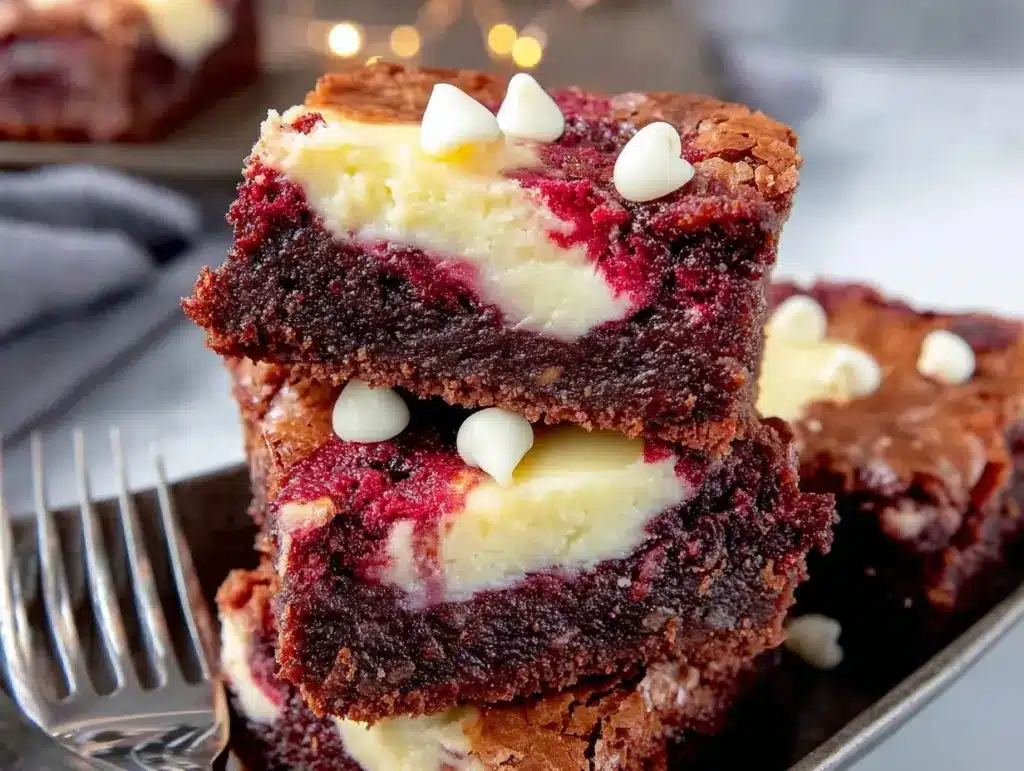
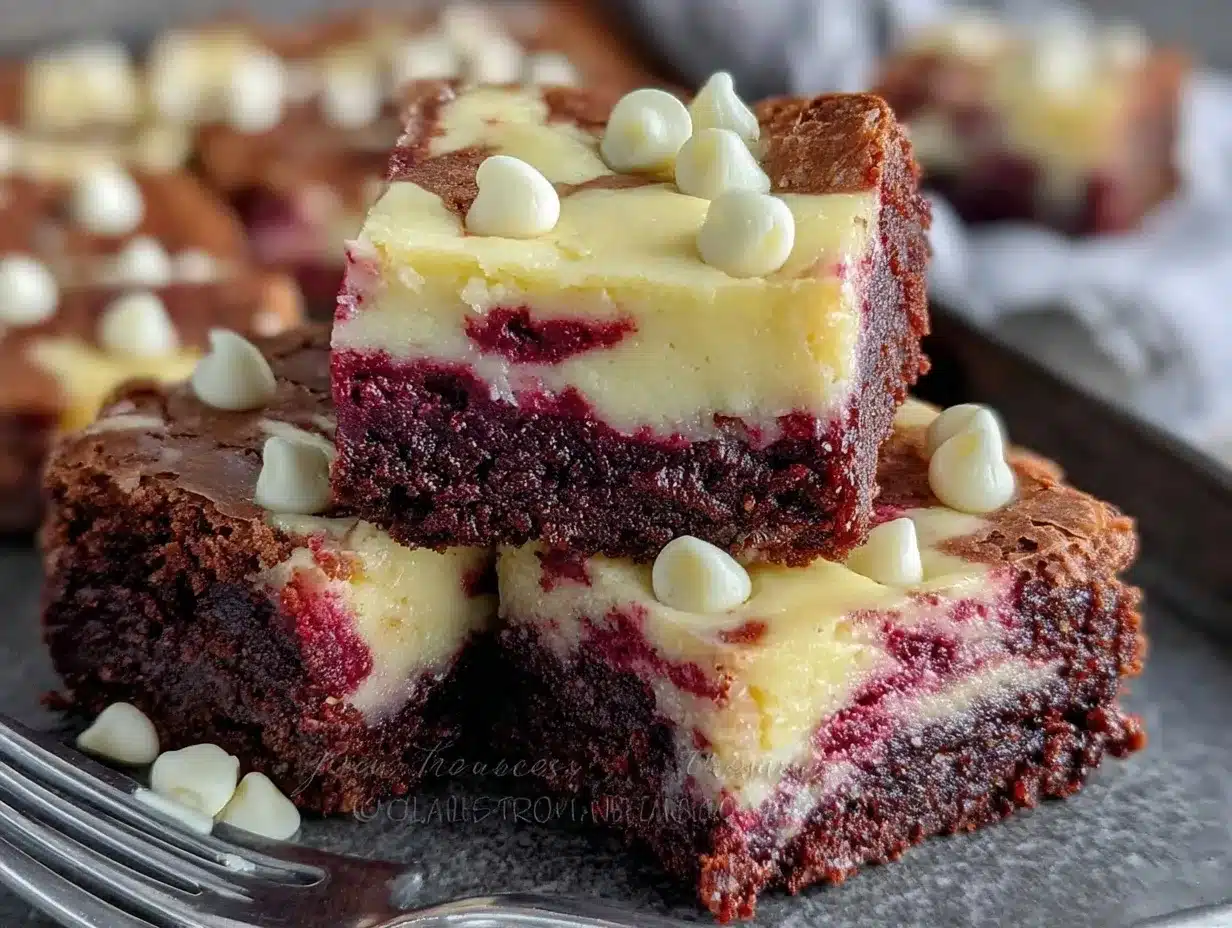
What sets this Red Velvet Cheesecake Brownies recipe apart is the swirl of real white chocolate—it’s not just for looks! I blend the cream cheese until ultra-smooth and add a touch of sour cream for tang. The red velvet layer is rich with cocoa, perfectly moist, and not overly sweet. The contrast of flavors and colors makes every bite a mini celebration.
If you’re like me, you want recipes that work every time. I’ve tested this one over and over, jotting notes about timing, texture, and color. Each batch comes out with just the right amount of swirl, and honestly, it’s the kind of dessert that makes you close your eyes after the first bite. It’s comforting, impressive, and so much easier than you’d think. Whether you’re baking for friends, family, or just yourself (no judgment!), this recipe is going to become a staple in your kitchen.
What Ingredients You Will Need
This recipe uses simple, wholesome ingredients to deliver bold flavor and a satisfying, creamy texture—without any fuss. Most items are pantry staples, and there’s plenty of room for easy swaps if you need them.
- For the Red Velvet Brownie Layer:
- All-purpose flour (120g / 1 cup) – sifted for best texture
- Cocoa powder (unsweetened, 20g / 1/4 cup) – Dutch-process gives deeper flavor
- Granulated sugar (200g / 1 cup) – I sometimes use organic cane sugar for extra crunch
- Unsalted butter (115g / 1/2 cup) – melted and slightly cooled (adds richness)
- Large eggs (2) – room temperature for easier blending
- Red food coloring (liquid or gel, about 1 tablespoon or as needed) – gel gives more vibrant color
- Vanilla extract (1 teaspoon) – pure vanilla for best aroma
- Salt (1/4 teaspoon) – balances the sweetness
- White vinegar (1 teaspoon) – adds that classic red velvet tang
- For the Cheesecake Layer:
- Cream cheese (225g / 8 ounces) – full fat, softened (I like Philadelphia for the creamiest texture)
- Sour cream (60g / 1/4 cup) – optional, for extra tang and smoothness
- Granulated sugar (50g / 1/4 cup) – balances the tang of cream cheese
- Large egg (1) – room temperature
- Vanilla extract (1/2 teaspoon)
- For the White Chocolate Swirl:
- White chocolate chips (85g / 1/2 cup) – or chopped white chocolate bar
- Heavy cream (2 tablespoons) – makes the swirl extra glossy and smooth
If you’re gluten-free, swap the flour for almond flour (same amount by weight). For dairy-free, use vegan cream cheese and coconut yogurt in place of sour cream; Earth Balance is a good butter alternative. For the food coloring, I sometimes use beet juice for a natural red hue—works great if you’re avoiding artificial dyes. The white chocolate swirl is optional, but I wouldn’t skip it; it’s the “wow” factor.
Seasonal swaps are easy—try adding fresh raspberries to the cheesecake layer in summer, or sprinkle crushed peppermint on top for winter holidays. Ingredient brands matter, too! I trust Ghirardelli white chocolate and King Arthur flour. The cream cheese layer is super forgiving, so don’t stress if it’s a little softer or firmer—just spread it gently.
Equipment Needed
- 8×8-inch (20x20cm) square baking pan – lined with parchment for easy removal
- Mixing bowls (at least 2 medium-sized) – glass or stainless steel work best
- Whisk and spatula – a rubber spatula helps with swirling and scraping batter
- Electric mixer or hand mixer – for a smooth cheesecake layer (you can do it by hand, but it takes longer)
- Microwave-safe bowl – for melting white chocolate
- Measuring cups and spoons – accuracy makes a big difference here
- Toothpick or butter knife – for swirling the cheesecake and white chocolate together
If you don’t have a square pan, a round cake pan works—just adjust bake time and cut in wedges. I’ve tried glass and metal pans; metal gives crisper edges. For the mixer, I used a hand whisk once (my electric died mid-bake), and the brownies still came out creamy—just a little arm workout. Parchment paper is a lifesaver for cleanup; I reuse mine for cookies when I’m feeling frugal. If you’re on a tight budget, dollar store pans and utensils work fine—just double-check for warping.
Preparation Method
- Prep the Pan: Line your 8×8-inch (20x20cm) pan with parchment paper, leaving a little overhang for easy lifting. Preheat your oven to 350°F (175°C). Grease lightly if you’re worried about sticking.
- Make the Red Velvet Brownie Batter:
- In a medium bowl, whisk together flour (120g), cocoa powder (20g), and salt (1/4 tsp). Set aside.
- In a separate bowl, combine melted butter (115g), sugar (200g), eggs (2, room temp), vanilla (1 tsp), red food coloring (1 tbsp), and vinegar (1 tsp). Whisk until smooth and glossy.
- Gradually add the dry mix to the wet mix, stirring until just combined. The batter should be thick and vibrant red. Don’t overmix, or your brownies might get tough.
- Spread the Brownie Layer: Pour about 2/3 of the red velvet batter into the prepared pan. Use a spatula to spread evenly. Reserve the remaining 1/3 for swirling later.
- Prepare the Cheesecake Layer:
- In a clean bowl, beat softened cream cheese (225g), sour cream (60g), sugar (50g), egg (1), and vanilla (1/2 tsp) until smooth and creamy—about 2-3 minutes with a mixer.
- Scrape down the sides a few times to avoid lumps. The mixture should be glossy and pourable.
- Layer the Cheesecake: Pour the cheesecake mixture gently over the red velvet base. Use a spatula to smooth it into the corners.
- Add the Remaining Brownie Batter: Dollop the reserved red velvet batter in spoonfuls over the cheesecake layer. Don’t worry about being neat.
- Make the White Chocolate Swirl:
- In a microwave-safe bowl, melt white chocolate chips (85g) with heavy cream (2 tbsp) in 20-second bursts, stirring after each round until smooth.
- Drizzle the melted white chocolate over the top in thin lines or squiggles.
- Swirl It All Together: Use a toothpick or butter knife to gently swirl the brownie, cheesecake, and white chocolate layers together. Aim for pretty marbling but don’t over-mix—it’s okay if some areas have more swirl than others.
- Bake: Place the pan in the center of your oven and bake for 35-40 minutes. The edges should look set, and the center slightly wobbly. If you insert a toothpick, it should come out with a few moist crumbs (not wet batter).
- Cool and Slice: Let the brownies cool completely in the pan—at least 1 hour, or chill for 30 minutes in the fridge for cleaner cuts. Use the parchment overhang to lift out and slice into squares.
Note: If the top looks too jiggly after 40 minutes, cover with foil and bake an extra 5 minutes. If your swirl sinks, it’s fine—the flavor’s still amazing! For extra clean edges, wipe your knife between cuts. The colors look even brighter once they’re fully cool.
Honestly, I’ve messed up the swirl plenty of times—just keep going. Imperfection means it’s homemade! And if your cheesecake layer cracks a little, it’ll still taste dreamy.
Cooking Tips & Techniques
Here are some tried-and-true tips I’ve learned after many batches of Red Velvet Cheesecake Brownies:
- Room Temperature Ingredients: Use room temp eggs and cream cheese for a smoother, lump-free cheesecake layer. Cold ingredients can cause streaks and uneven baking.
- Don’t Overmix: Once you combine the dry and wet ingredients for the brownie base, stop mixing as soon as you don’t see flour streaks. Overmixing makes brownies dense and tough.
- Perfect Swirl: Use a toothpick or butter knife—gently swirl, but don’t overdo it. If you swirl too much, the layers blend together and you lose those beautiful marbled streaks.
- Bake Time Matters: It’s easy to underbake or overbake. Check at 35 minutes—edges should be firm, center just set. Ovens vary, so trust your eyes more than the timer.
- White Chocolate: If your white chocolate seizes when melting, add a splash more cream and stir until smooth. I’ve had this happen when I was in a rush; patience helps.
- Clean Cuts: Chill brownies before slicing for sharp, Instagram-worthy squares. Use a hot knife for best results (just run under hot water and wipe dry).
I’ll admit—I’ve forgotten the parchment once, and prying brownies out of a pan isn’t fun. Always line your pan! If you’re multitasking, set a timer for each step so you don’t lose track. These brownies are forgiving, but a little attention to detail goes a long way. And hey, if your swirl isn’t perfect, that just proves it’s homemade.
Variations & Adaptations
Want to make these Red Velvet Cheesecake Brownies your own? Here are some favorite ways to switch things up:
- Gluten-Free: Substitute the all-purpose flour with almond flour or a gluten-free blend (like Bob’s Red Mill 1-to-1). The brownies stay fudgy and flavorful.
- Low-Sugar: Use a sugar alternative such as Swerve or coconut sugar for a lighter treat. I’ve tried half granulated, half coconut sugar with good results.
- Dairy-Free: Swap regular cream cheese and sour cream for vegan versions, and use coconut milk instead of heavy cream in the swirl. Earth Balance works for butter.
- Seasonal Flavors: Add fresh raspberries or blueberries to the cheesecake layer in summer, or sprinkle crushed peppermint on top for a wintery twist.
- Nutty Crunch: Mix in chopped pecans or walnuts to the brownie batter for texture. My brother loves it this way—it’s a bit like a brownie meets red velvet cake.
- Extra Chocolate: Stir in dark chocolate chips to the red velvet batter for a richer flavor. Sometimes I sprinkle mini chips on top for a double-chocolate effect.
My personal favorite is the raspberry version—the tangy fruit with the creamy cheesecake and fudgy brownie is just epic. And yes, you can bake this in muffin tins for individual brownie bites (reduce bake time to 20-22 minutes). If you need nut-free, just skip any add-ins and double-check your chocolate is allergen-friendly. There’s a variation here for everyone!
Serving & Storage Suggestions
These Red Velvet Cheesecake Brownies are best served slightly chilled or at room temperature. I love stacking them on a pretty platter, then dusting with powdered sugar for a Pinterest-worthy finish. If you want to get fancy, drizzle a little extra melted white chocolate on top just before serving.
Pair with coffee, milk, or even a glass of bubbly for celebrations. For parties, cut the brownies into small squares or triangles—makes them easy to grab and super cute on dessert trays. They also look gorgeous in cupcake liners for gifting (trust me, friends will swoon).
To store, keep brownies in an airtight container in the fridge for up to 5 days. The flavors actually meld and deepen overnight, so they’re even better the next day. Freeze individual squares by wrapping tightly in plastic, then foil—thaw in the fridge for an hour before eating. Reheat gently in the microwave for 10 seconds if you prefer them warm (don’t overdo it, or the cheesecake gets rubbery).
Honestly, they rarely last long enough to worry about storage!
Nutritional Information & Benefits
Each serving (1 square, about 1/12 of the pan) is estimated to contain:
- Calories: ~260
- Fat: 14g
- Carbohydrates: 30g
- Protein: 4g
The cream cheese adds calcium and protein, while cocoa provides antioxidants. If you use almond flour, you get a dose of healthy fats and vitamin E. There’s no artificial preservatives or weird additives—just real, wholesome ingredients. The dessert is naturally nut-free unless you add nuts, and can be made gluten-free or dairy-free as needed. Watch out for allergens in the chocolate and cream cheese if you’re sensitive. For me, these brownies offer a sweet treat without going overboard, and I love that you can tweak them to fit your wellness goals.
Conclusion
If you’re searching for a dessert that’s both show-stopping and dangerously easy, these Red Velvet Cheesecake Brownies with white chocolate swirl are it. The combination of fudgy brownie, creamy cheesecake, and glossy white chocolate is pure comfort—every bite feels special.
Don’t be afraid to customize: swap flavors, change up the swirl, or add seasonal fruits. That’s half the fun, and honestly, no two batches ever turn out exactly the same (which I love). My family asks for these at every holiday and get-together, and I never get tired of watching friends’ faces light up when they taste them.
Give them a try and let me know what you think in the comments below. Did you add a personal twist? Share your photos! I always look forward to hearing your stories. Here’s to more sweet moments and delicious experiments—happy baking!
Frequently Asked Questions
Can I make these brownies ahead of time?
Absolutely! They taste even better the next day after chilling in the fridge. Just store in an airtight container.
Can I use natural food coloring instead of red gel?
Yes. Beet juice or natural red powder works, but the color may be softer. The flavor stays delicious.
What’s the best way to get clean slices?
Chill the brownies after baking, then use a sharp knife wiped clean between cuts. A hot knife works wonders!
Can I freeze these brownies?
Yes, wrap individual squares tightly in plastic and foil. Thaw in the fridge before serving for best texture.
Is it okay to skip the white chocolate swirl?
Totally! The brownies will still be creamy and rich, but the swirl adds a pretty finish and extra sweetness.
Pin This Recipe!
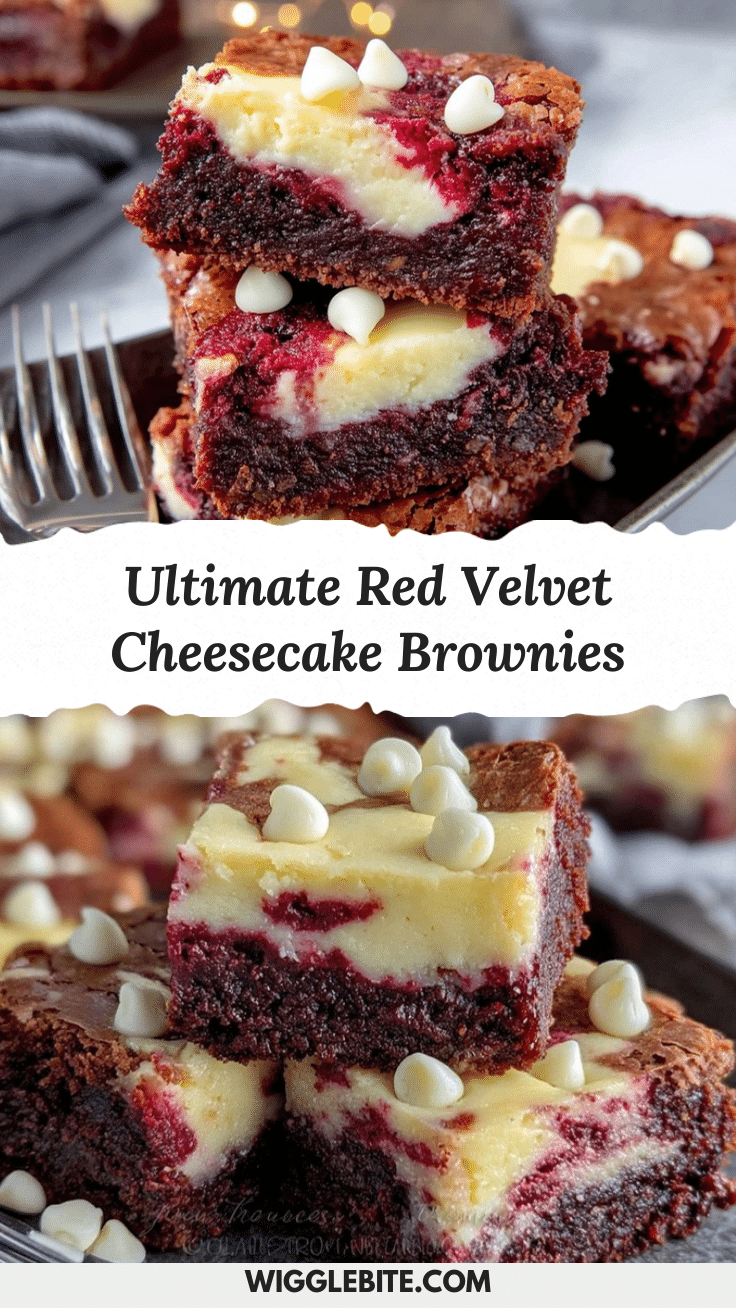
Red Velvet Cheesecake Brownies with White Chocolate Swirl
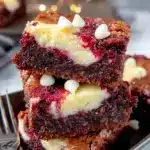
These Red Velvet Cheesecake Brownies feature a fudgy red velvet base, creamy cheesecake layer, and a glossy white chocolate swirl. Easy to make and perfect for any occasion, they deliver nostalgic comfort and impressive flavor.
- Prep Time: 15 minutes
- Cook Time: 35-40 minutes
- Total Time: 55 minutes
- Yield: 12 squares 1x
- Category: Dessert
- Cuisine: American
Ingredients
- 1 cup all-purpose flour, sifted
- 1/4 cup unsweetened cocoa powder (Dutch-process preferred)
- 1 cup granulated sugar
- 1/2 cup unsalted butter, melted and slightly cooled
- 2 large eggs, room temperature
- 1 tablespoon red food coloring (liquid or gel)
- 1 teaspoon vanilla extract
- 1/4 teaspoon salt
- 1 teaspoon white vinegar
- 8 ounces cream cheese, softened (full fat)
- 1/4 cup sour cream (optional, for tang)
- 1/4 cup granulated sugar
- 1 large egg, room temperature
- 1/2 teaspoon vanilla extract
- 1/2 cup white chocolate chips or chopped white chocolate bar
- 2 tablespoons heavy cream
Instructions
- Line an 8×8-inch baking pan with parchment paper, leaving an overhang for easy lifting. Preheat oven to 350°F (175°C). Lightly grease if desired.
- In a medium bowl, whisk together flour, cocoa powder, and salt. Set aside.
- In another bowl, combine melted butter, sugar, eggs, vanilla, red food coloring, and vinegar. Whisk until smooth and glossy.
- Gradually add dry ingredients to wet ingredients, stirring until just combined. Do not overmix.
- Pour about 2/3 of the red velvet batter into the prepared pan and spread evenly. Reserve remaining 1/3 for swirling.
- In a clean bowl, beat cream cheese, sour cream, sugar, egg, and vanilla until smooth and creamy (2-3 minutes with mixer). Scrape down sides as needed.
- Pour cheesecake mixture gently over the red velvet base and smooth with a spatula.
- Dollop reserved red velvet batter in spoonfuls over the cheesecake layer.
- In a microwave-safe bowl, melt white chocolate chips with heavy cream in 20-second bursts, stirring after each until smooth.
- Drizzle melted white chocolate over the top in thin lines or squiggles.
- Use a toothpick or butter knife to gently swirl brownie, cheesecake, and white chocolate layers together for a marbled effect.
- Bake in the center of the oven for 35-40 minutes, until edges are set and center is slightly wobbly. Toothpick should come out with moist crumbs.
- Cool completely in the pan (at least 1 hour, or chill for 30 minutes in fridge for cleaner cuts). Use parchment to lift out and slice into squares.
Notes
Use room temperature eggs and cream cheese for a smoother cheesecake layer. Don’t overmix the brownie batter to keep it fudgy. Swirl gently for a marbled look. Chill brownies before slicing for clean edges. For gluten-free, substitute almond flour; for dairy-free, use vegan cream cheese and coconut yogurt. The white chocolate swirl is optional but adds a pretty finish.
Nutrition
- Serving Size: 1 square (1/12 of pa
- Calories: 260
- Sugar: 22
- Sodium: 160
- Fat: 14
- Saturated Fat: 8
- Carbohydrates: 30
- Fiber: 1
- Protein: 4
Keywords: red velvet brownies, cheesecake brownies, white chocolate swirl, easy dessert, holiday baking, party treats, comfort food, fudgy brownies