Introduction
Picture this: the satisfying sound of chocolate snapping under your fingers, followed by the irresistible crunch of crispy rice mixed with velvety melted chocolate as it melts in your mouth. There’s something magical about biting into a homemade crunch bar that’s just the right balance of sweet and crispy. The first time I made these bars, I remember thinking, “Why on earth haven’t I done this sooner?” It was the kind of moment where you pause, take a deep breath, and smile because you know you’ve stumbled upon a keeper.
When I was little, my mom used to sneak a crunch bar into my lunchbox every Friday, a treat I always looked forward to. Years later, I found myself craving that same nostalgic joy but with a homemade twist. After testing batch after batch (in the name of research, of course), I finally landed on a recipe that brings all the nostalgia of store-bought crunch bars but with fresher, richer flavors. My kids couldn’t stop eating them, and honestly, neither could I! They’ve since become a staple for movie nights, holiday gifting, and, let’s be real, sneaky midnight snacks.
If you’ve ever wanted to recreate that classic crunchy chocolate goodness right in your kitchen, you’re in luck. These perfect homemade crunch bars are dangerously easy to make, require minimal ingredients, and are guaranteed to impress everyone who tries them. Trust me—once you make them, you’ll never go back to the store-bought version again.
Why You’ll Love This Recipe
- Quick & Easy: These crunch bars come together in under 20 minutes, so you can whip them up whenever a sweet craving strikes.
- Minimal Ingredients: All you need are 3 simple ingredients that you probably already have in your pantry!
- Perfect for Any Occasion: Whether you’re hosting a party, looking for a fun treat for the kids, or need a last-minute dessert, these bars are always a hit.
- Crowd-Pleaser: Everyone loves a good crunch—these bars always get rave reviews, and they’re great for sharing.
- Customizable: You can easily adapt the recipe to suit your preferences, whether you want to add a nutty twist, use dark chocolate, or make them dairy-free.
- Healthier Homemade Version: Skip the preservatives and unnecessary additives found in store-bought bars—you control the ingredients here.
What sets this recipe apart is how simple yet satisfying it is. The balance of creamy chocolate and crispy rice is pure perfection, offering an indulgent treat that doesn’t feel overly heavy. Plus, you’ll love how versatile these bars are. Whether you’re crafting them for a fancy dessert table or just need a quick snack, they’ll always hit the mark. Trust me, this recipe is one you’ll want to bookmark for all your sweet cravings!
Ingredients You Will Need
This recipe uses simple, wholesome ingredients to deliver bold flavor and satisfying texture without the fuss.
- Milk or Dark Chocolate Chips: You can use your favorite brand. I love using semi-sweet for the perfect balance of richness and sweetness.
- Coconut Oil: Just a spoonful helps the chocolate melt smoothly and gives the bars a nice sheen.
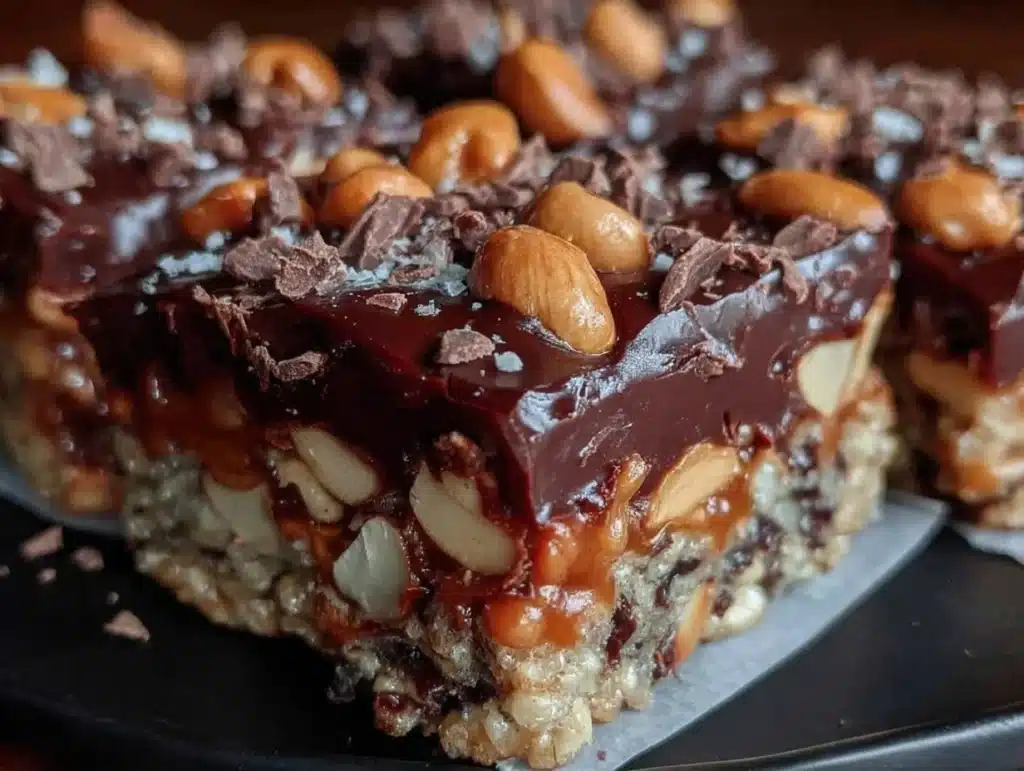
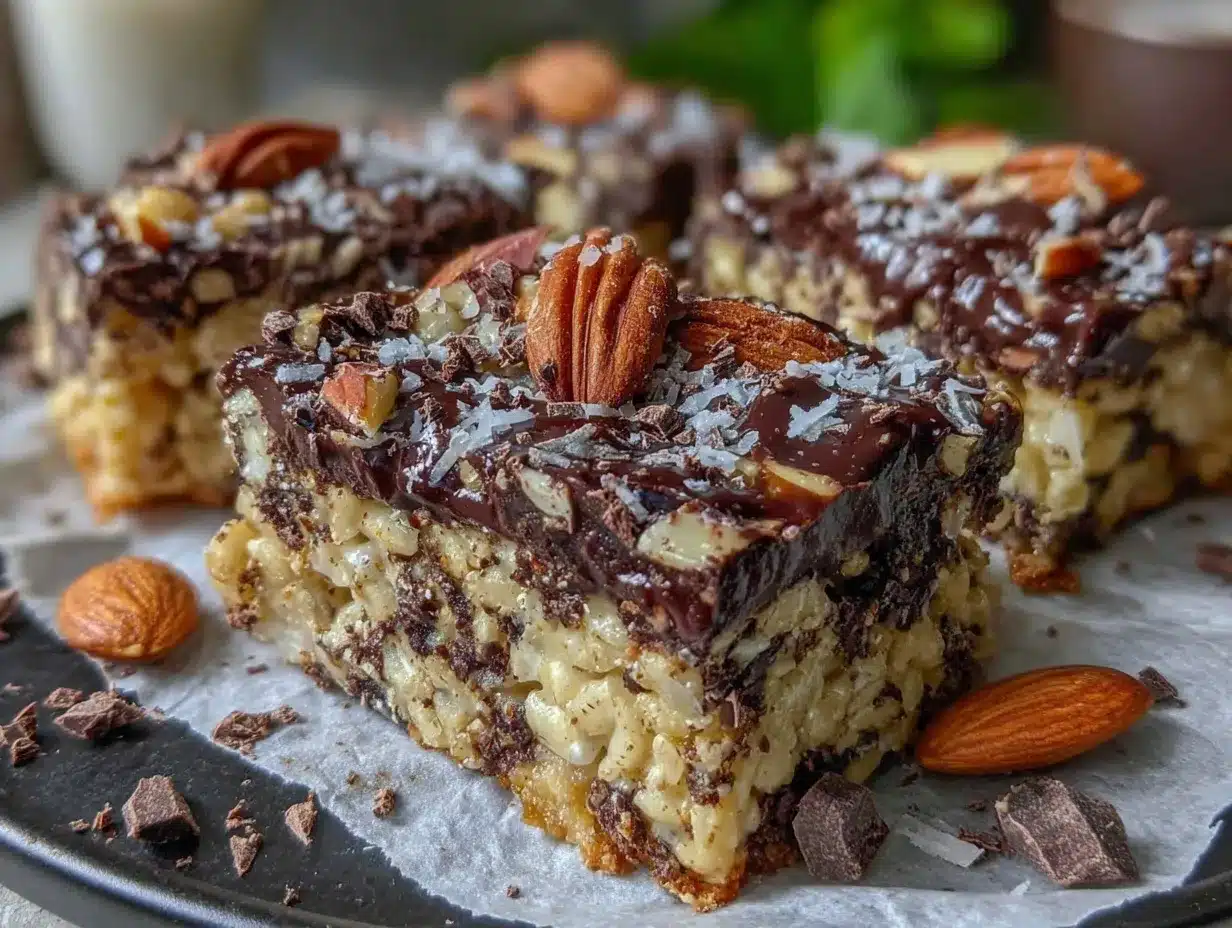
- Crispy Rice Cereal: The star of the show! Look for plain puffed rice cereal for that signature crunch. (You can even use a gluten-free version.)
Optional add-ins:
- Coarse Sea Salt: Sprinkle it on top for a gourmet touch.
- Chopped Nuts: Almonds, peanuts, or pecans add a delightful texture and flavor.
- Mini Marshmallows: For a fun twist, toss in a handful of marshmallows to create a gooey layer.
Feel free to swap milk chocolate for dark chocolate if you prefer a richer flavor or use dairy-free chocolate chips to make these bars vegan-friendly. You can also experiment with adding dried fruits like cranberries or raisins for a chewy contrast to the crunch.
Equipment Needed
- Mixing Bowls: You’ll need one large bowl for mixing the ingredients.
- Microwave-Safe Bowl: Perfect for melting the chocolate and coconut oil.
- Silicone Spatula: Helps with stirring and spreading the chocolate mixture evenly.
- Baking Dish: An 8×8-inch or similar-sized dish works best for this recipe.
- Parchment Paper: Makes removing the bars from the pan a breeze.
If you don’t have a microwave, you can use a double boiler to melt the chocolate and coconut oil. And if you don’t have parchment paper, greasing the pan lightly with oil or butter works in a pinch.
Preparation Method
- Line your baking dish with parchment paper, leaving some overhang on the sides for easy removal later. Set it aside.
- In a microwave-safe bowl, combine 2 cups (12 oz or 340 grams) of chocolate chips and 1 tablespoon (15 ml) of coconut oil. Microwave in 20-second intervals, stirring after each, until the chocolate is completely melted and smooth. This should take roughly 1-2 minutes.
- Once the chocolate is fully melted, add 2 cups (50 grams) of crispy rice cereal to the bowl. Gently fold the cereal into the chocolate using a silicone spatula until every piece is well-coated.
- Pour the chocolate-coated cereal mixture into the prepared baking dish. Use the spatula to spread it out evenly, pressing it down gently to ensure there are no air pockets.
- If you’re adding toppings like sea salt, nuts, or marshmallows, sprinkle them over the top now and press them lightly into the mixture.
- Place the baking dish in the refrigerator and allow the bars to chill for at least 2 hours or until they’re firm and set.
- Once the bars have hardened, lift them out of the pan using the parchment paper overhang. Use a sharp knife to cut them into squares or rectangles—whatever size you prefer.
And that’s it! You’ve got yourself a batch of perfect homemade crunch bars that are ready to be enjoyed.
Cooking Tips & Techniques
- Choose Quality Chocolate: The better the chocolate, the better your crunch bars will taste. I love using semi-sweet chocolate for its balanced flavor, but if you prefer dark chocolate, go for it!
- Don’t Overheat the Chocolate: When melting chocolate in the microwave, stick to short intervals and stir frequently. Overheating can cause the chocolate to seize, making it grainy.
- Use Fresh Cereal: Stale cereal won’t give you the same satisfying crunch, so check the expiration date before using.
- Evenly Spread the Mixture: Press the mixture down firmly into the pan to ensure the bars hold their shape and don’t crumble when cut.
- Customize to Your Taste: Don’t hesitate to get creative with your add-ins—nuts, dried fruits, or even colorful sprinkles for a festive touch.
Variations & Adaptations
One of my favorite things about this recipe is how versatile it is. Here are some fun ways to switch it up:
- Gluten-Free Version: Use gluten-free crispy rice cereal and dairy-free chocolate chips to make these bars safe for gluten-sensitive eaters.
- Seasonal Twist: Add crushed peppermint candies during the holidays for a festive flavor. Or try dried strawberries for a summery vibe.
- Nutty Delight: Stir in crushed peanuts, almonds, or pecans for an extra crunch and a nutty flavor.
- Spicy Kick: Add a pinch of cayenne or chili powder to the melted chocolate for a spicy-sweet treat that’s totally unique.
One time, I added a layer of peanut butter between the cereal and chocolate, and let me tell you—it was absolutely incredible! Feel free to experiment and make this recipe your own.
Serving & Storage Suggestions
These homemade crunch bars are best served cold or at room temperature. Cut them into bite-sized squares or larger bars for an easy-to-grab treat. They’re perfect for dessert platters, lunchbox snacks, or even paired with a cup of coffee or hot cocoa for a cozy afternoon pick-me-up.
To store, keep the bars in an airtight container in the refrigerator for up to 2 weeks. If you’re planning to save them for longer, they can be stored in the freezer for up to 3 months—just make sure they’re wrapped tightly to avoid freezer burn. When you’re ready to enjoy them, let them thaw at room temperature for about 15 minutes before digging in.
Pro tip: The flavors actually deepen after a day or two in the fridge, making them even more irresistible!
Nutritional Information & Benefits
Here’s a rough breakdown of the nutritional values for one serving of these crunch bars:
- Calories: 150
- Fat: 8g
- Carbohydrates: 18g
- Protein: 2g
With just a handful of ingredients, these bars are a simple treat that lets you control the quality of what you’re eating. Dark chocolate is packed with antioxidants and can even boost your mood, while crispy rice cereal provides that light, airy crunch without being overly heavy. If you opt for add-ins like nuts, you’re also getting a dose of heart-healthy fats.
Keep in mind that these are a sweet treat, so enjoy them in moderation. If you’re watching your sugar intake, you can use sugar-free chocolate chips.
Conclusion
These perfect homemade crunch bars are a must-try for anyone who loves the combination of creamy chocolate and crispy texture. Whether you’re recreating a childhood favorite or trying something new, this recipe is sure to become one of your go-to treats. It’s quick, easy, and endlessly customizable to suit your taste.
For me, these bars are more than just a snack—they’re a little slice of nostalgia wrapped in a homemade hug. I hope you enjoy making them as much as I loved creating this recipe. If you give it a try, let me know how it turns out in the comments below. What fun variations did you come up with? Share your ideas—I’d love to hear them!
Bookmark this recipe, pin it to your favorite dessert board, or share it with friends and family. Trust me, this one’s a keeper. Happy crunching!
FAQs
Can I use white chocolate instead of milk or dark chocolate?
Absolutely! White chocolate works perfectly for a sweeter twist on these crunch bars.
Can I make these crunch bars vegan?
Yes! Just use dairy-free chocolate chips and ensure your crispy rice cereal is vegan-friendly.
How do I prevent the chocolate from being too thick?
Adding a small amount of coconut oil helps smooth out the melted chocolate, making it easier to mix and spread.
Can I double this recipe?
Of course! Just use a larger pan and double all the ingredients. It’s great if you’re making these for a party or event.
What if I don’t have parchment paper?
No problem! You can lightly grease the pan with butter or coconut oil instead, but parchment paper will make it much easier to remove the bars once they’re set.
Pin This Recipe!
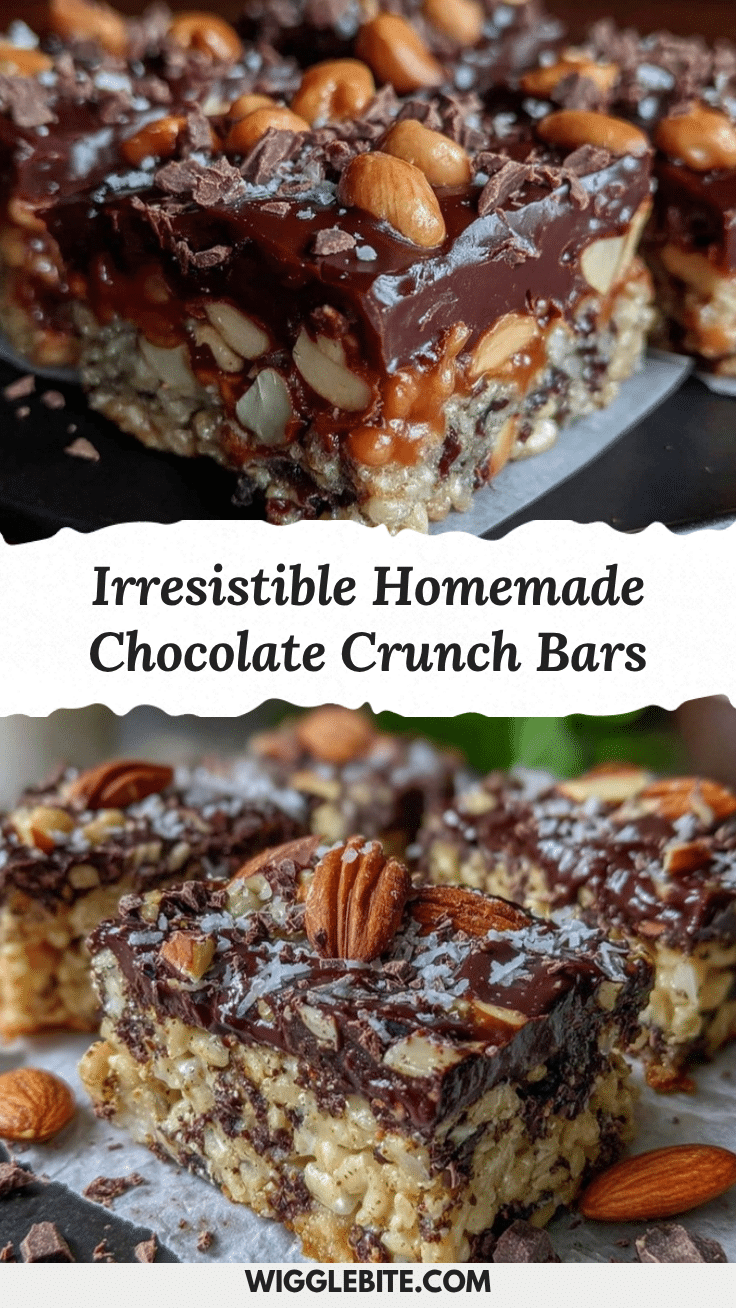
Perfect Homemade Crunch Bars Recipe You Need to Try Today

These perfect homemade crunch bars are quick, easy, and endlessly customizable. They bring all the nostalgia of store-bought crunch bars but with fresher, richer flavors.
- Prep Time: 5 minutes
- Cook Time: 15 minutes
- Total Time: 2 hours 20 minutes
- Yield: 16 servings 1x
- Category: Dessert
- Cuisine: American
Ingredients
- 2 cups (12 oz or 340 grams) milk or dark chocolate chips
- 1 tablespoon (15 ml) coconut oil
- 2 cups (50 grams) crispy rice cereal
- Optional: coarse sea salt, chopped nuts (almonds, peanuts, or pecans), mini marshmallows
Instructions
- Line your baking dish with parchment paper, leaving some overhang on the sides for easy removal later. Set it aside.
- In a microwave-safe bowl, combine 2 cups (12 oz or 340 grams) of chocolate chips and 1 tablespoon (15 ml) of coconut oil. Microwave in 20-second intervals, stirring after each, until the chocolate is completely melted and smooth. This should take roughly 1-2 minutes.
- Once the chocolate is fully melted, add 2 cups (50 grams) of crispy rice cereal to the bowl. Gently fold the cereal into the chocolate using a silicone spatula until every piece is well-coated.
- Pour the chocolate-coated cereal mixture into the prepared baking dish. Use the spatula to spread it out evenly, pressing it down gently to ensure there are no air pockets.
- If you’re adding toppings like sea salt, nuts, or marshmallows, sprinkle them over the top now and press them lightly into the mixture.
- Place the baking dish in the refrigerator and allow the bars to chill for at least 2 hours or until they’re firm and set.
- Once the bars have hardened, lift them out of the pan using the parchment paper overhang. Use a sharp knife to cut them into squares or rectangles—whatever size you prefer.
Notes
[‘Choose quality chocolate for better flavor.’, ‘Don’t overheat the chocolate to avoid graininess.’, ‘Use fresh cereal for the best crunch.’, ‘Press the mixture down firmly to ensure the bars hold their shape.’, ‘Feel free to customize with add-ins like nuts, dried fruits, or sprinkles.’]
Nutrition
- Serving Size: 1 bar
- Calories: 150
- Fat: 8
- Carbohydrates: 18
- Protein: 2
Keywords: Crunch Bars, Chocolate Dessert, Easy Recipe, Homemade Snack, Crispy Rice, Quick Dessert