
Introduction
Imagine pulling a warm, golden pie from the oven, its buttery crust perfectly flaky and the rich scent of caramelized honey filling your kitchen. That’s the magic of this Perfect Salted Honey Pie. The very first time I made this pie, I knew I had stumbled upon something truly special. It was a chilly autumn afternoon, and I wanted something that tasted like a hug in dessert form. As the pie baked, the aroma was so irresistible that my family couldn’t wait to dig in—it was love at first bite!
There’s something about the combination of sweet honey and a touch of sea salt that creates a flavor that’s both comforting and sophisticated. It’s the kind of dessert that makes you close your eyes and savor every single bite. Honestly, this pie feels like a celebration of simple ingredients coming together in the most harmonious way. Whether you’re hosting a dinner party, need a standout dessert for the holidays, or simply want to brighten up your weekend, this Salted Honey Pie delivers every time.
After testing this recipe multiple times (purely in the name of research, of course), I can confidently say this has become a staple in our home. It’s dangerously easy to make, looks stunning when served, and always gets rave reviews. Trust me, you’ll want to bookmark this one—it’s the kind of dessert that feels like a warm hug.
Why You’ll Love This Recipe
- Simple to Make: Don’t let its elegance fool you—this pie comes together in no time with just a handful of ingredients.
- Unique Flavor: The combination of honey and salt creates a perfectly balanced sweet-and-savory flavor that’s unforgettable.
- Perfect for Any Occasion: Whether it’s a holiday table centerpiece or a casual family dessert, this pie shines every time.
- Crowd-Pleaser: Kids and adults alike love the rich, creamy filling paired with that golden, flaky crust.
- Show-Stopping Presentation: The glossy finish of the honey filling makes it look like you spent hours in the kitchen—no one needs to know how easy it was!
Unlike traditional pies, this Salted Honey Pie stands out because of its rich, custard-like filling infused with the natural sweetness of honey. The pinch of sea salt adds a gourmet touch and makes the flavors pop. It’s a dessert that leaves a lasting impression and keeps everyone coming back for seconds.
What makes this recipe even more special is how versatile it is. You can easily adapt it to suit your taste by experimenting with different types of honey or even adding a dash of citrus zest for a refreshing twist. Trust me, once you’ve tasted this pie, it’ll become your go-to dessert for any occasion—cozy dinners, holiday feasts, or even just a random Tuesday night pick-me-up.
What Ingredients You Will Need
This Perfect Salted Honey Pie recipe is all about celebrating simple, wholesome ingredients. You probably have most of these in your pantry already, and if not, they’re easy to find at your local store.
- For the crust:
- 1 ¼ cups (155g) all-purpose flour
- ½ cup (115g) unsalted butter, cold and cubed
- 2-3 tablespoons ice water
- 1 tablespoon granulated sugar
- ¼ teaspoon salt
- For the filling:
- ½ cup (120ml) honey (I recommend using a high-quality raw honey for the best flavor)
- ½ cup (120ml) heavy cream
- ¼ cup (55g) unsalted butter, melted
- 3 large eggs
- 1 ½ tablespoons (15g) cornstarch
- 1 teaspoon vanilla extract
- ¼ teaspoon fine sea salt
- For garnish:
- Flaky sea salt (for that final touch)
- Fresh whipped cream (optional, but so good!)
If you don’t have heavy cream handy, you can swap it for half-and-half or even coconut cream for a dairy-free option. Feeling adventurous? Try experimenting with different types of honey, like wildflower or orange blossom, to change the flavor profile subtly.
Equipment Needed
- 9-inch pie pan: A standard pie dish works perfectly, but a tart pan can be used for a more elegant presentation.
- Rolling pin: Essential for rolling out that buttery, flaky crust.
- Mixing bowls: You’ll need a couple of different sizes for the crust and filling.
- Whisk: A good whisk helps ensure your filling is silky smooth.
- Pastry cutter: If you don’t have one, use two butter knives or even your fingers to cut the butter into the flour for the crust.
- Aluminum foil or pie crust shield: To protect the edges of your crust from over-browning.
Pro tip: Keep your rolling pin and pie pan in the fridge for about 15 minutes before rolling out your crust. Cold tools help prevent the butter in the dough from melting too quickly, which is key to achieving that perfect flakiness!
Preparation Method
- Make the crust: In a mixing bowl, combine the flour, sugar, and salt. Add the cold butter cubes and use a pastry cutter (or two knives) to cut the butter into the flour until the mixture resembles coarse crumbs. Gradually add the ice water, one tablespoon at a time, until the dough comes together. Wrap it in plastic wrap and chill for at least 30 minutes.
- Preheat the oven: Set your oven to 375°F (190°C). Lightly grease your pie pan.
- Roll out the dough: On a floured surface, roll out the chilled dough into a circle about 12 inches in diameter. Carefully transfer it to your pie pan, trimming any excess dough and crimping the edges. Chill the crust while preparing the filling.
- Prepare the filling: In a mixing bowl, whisk together honey, melted butter, heavy cream, eggs, cornstarch, vanilla, and sea salt. The mixture should be smooth and well-combined.
- Assemble the pie: Pour the filling into the chilled crust. Place the pie in the oven and bake for 40-45 minutes, or until the filling is set but still slightly wobbly in the center.
- Cool and garnish: Remove the pie from the oven and allow it to cool completely at room temperature. Sprinkle flaky sea salt on top and add a dollop of whipped cream before serving, if desired.
Tip: If the crust edges are browning too quickly, cover them with aluminum foil or use a pie crust shield for even baking.
Cooking Tips & Techniques
- Use high-quality honey: The honey is the star of the show, so choosing a rich, flavorful variety will make all the difference.
- Keep everything cold: From the butter to the water to the rolling pin—cold ingredients ensure that your crust stays flaky and doesn’t become tough.
- Don’t overmix: When making the crust, mix just until the dough comes together. Overworking it can lead to a dense, chewy texture.
- Watch the bake time: Keep an eye on the pie as it bakes—overbaking can result in a dry filling. It’s ready when the center has a slight wobble.
- Chill before serving: Let the pie cool completely before slicing. This allows the filling to set properly and ensures clean slices.
Personal tip: I once rushed this recipe and didn’t chill the dough long enough. The crust ended up shrinking in the pan—don’t skip the chilling step!
Variations & Adaptations
- Dairy-Free Option: Swap out the heavy cream for coconut cream and use plant-based butter to make this pie dairy-free.
- Gluten-Free Crust: Substitute almond flour or gluten-free all-purpose flour for the crust. Adjust the water quantity as needed.
- Citrus Twist: Add a teaspoon of orange or lemon zest to the filling for a bright, tangy flavor.
- Seasonal Spins: In the fall, you could add a pinch of cinnamon or nutmeg to the filling for a warm, spicy twist.
- Chocolate Topping: Drizzle melted dark chocolate over the cooled pie for an extra layer of indulgence.
My favorite variation is the citrus twist—it adds a refreshing zing and pairs beautifully with the sweetness of the honey.
Serving & Storage Suggestions
This Salted Honey Pie is best served at room temperature or slightly chilled. Slice into wedges and serve alone or with a dollop of freshly whipped cream. If you’re feeling fancy, garnish with a sprinkle of edible flowers for a stunning presentation.
Pair this pie with a hot cup of tea or coffee, or even a chilled glass of white wine for a more sophisticated pairing at dinner parties.
To store leftovers, cover the pie tightly with plastic wrap and refrigerate for up to 4 days. For longer storage, wrap individual slices in plastic wrap, place them in a freezer-safe container, and freeze for up to 3 months. When ready to eat, thaw in the refrigerator overnight and serve chilled or at room temperature.
Pro tip: The flavors deepen and meld beautifully after a day in the fridge, so don’t hesitate to make this pie ahead of time for your next gathering!
Nutritional Information & Benefits
This pie is a treat, but it still has a few redeeming qualities! Honey is a natural sweetener that’s rich in antioxidants and has anti-inflammatory properties. Plus, the eggs and cream provide a good source of protein and healthy fats.
Estimated nutritional values (per serving):
- Calories: 320
- Fat: 15g
- Carbohydrates: 40g
- Protein: 4g
Note: This recipe contains eggs, dairy, and gluten. If you have dietary restrictions, refer to the variations section for substitutions to suit your needs.
Conclusion
This Perfect Salted Honey Pie is more than just a dessert—it’s a little slice of joy that brings people together. Its simple ingredients and rich, complex flavors make it a recipe worth adding to your collection. Whether you’re a seasoned baker or a beginner, this pie is achievable for anyone.
What I love most about this recipe is how versatile it is. You can make it your own with a few simple tweaks, but it’s just as delightful in its original form. It’s been a hit at every gathering, and I can’t wait to hear what you think of it.
Give this recipe a try, share your variations, and let me know how it turned out for you in the comments below. And trust me, once you’ve made this pie, you’ll find yourself craving it time and time again. Happy baking!
FAQs
Can I use store-bought pie crust?
Absolutely! While homemade crust adds a special touch, a high-quality store-bought crust works perfectly if you’re short on time.
What type of honey is best for this recipe?
I recommend using a flavorful honey like wildflower, clover, or orange blossom. Avoid overly processed honey for the best taste.
How do I know when the pie is done baking?
The filling should be set but still have a slight jiggle in the center. It will firm up as it cools.
Can I make this pie ahead of time?
Yes! In fact, this pie tastes even better after it’s had time to rest in the fridge overnight. Just make sure to cover it tightly.
Can I freeze the pie?
Yes, you can freeze the pie for up to 3 months. Wrap it tightly in plastic wrap and store it in a freezer-safe container. Thaw in the fridge before serving.
Pin This Recipe!

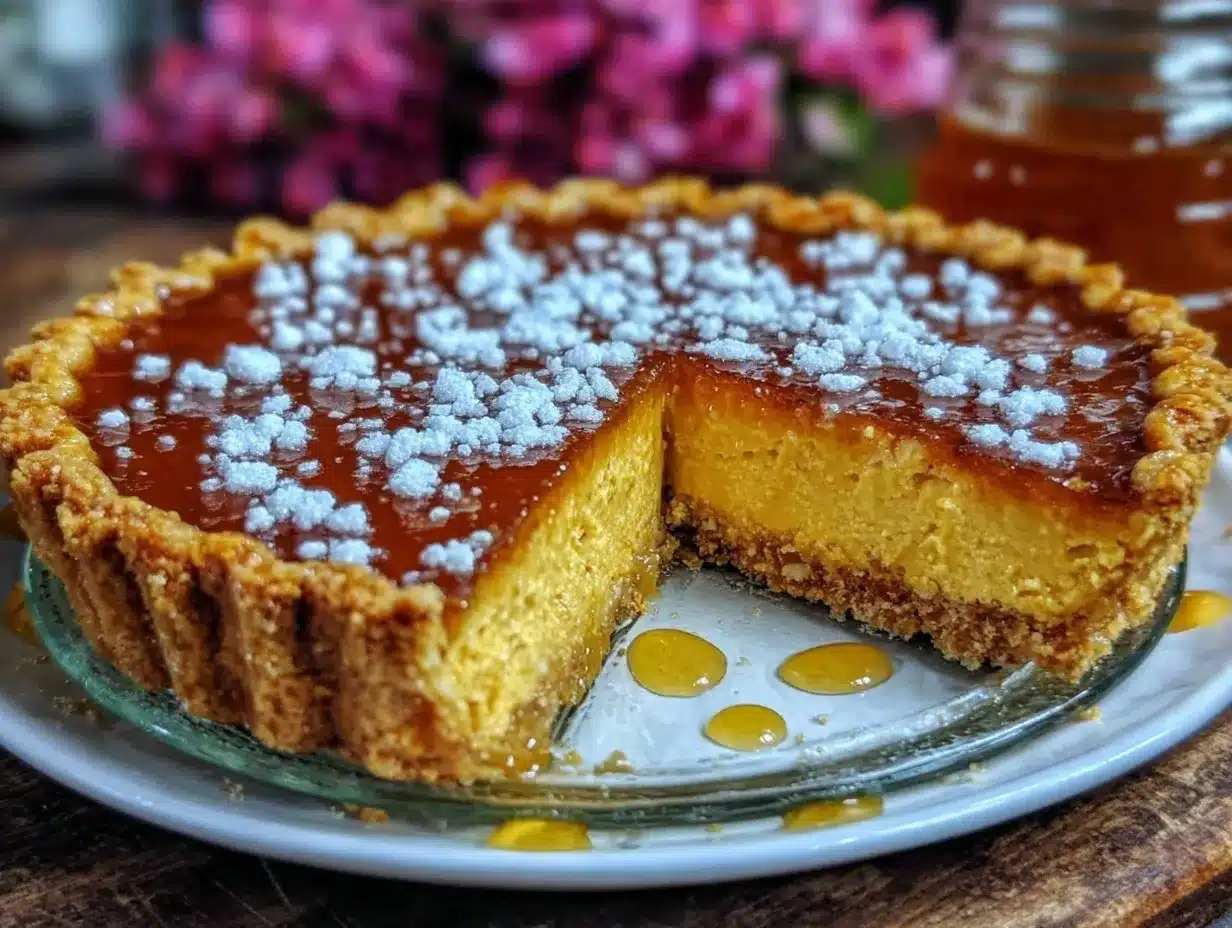
Perfect Salted Honey Pie

A rich, custard-like pie infused with the natural sweetness of honey and a touch of sea salt, perfect for any occasion.
- Prep Time: 30 minutes
- Cook Time: 45 minutes
- Total Time: 1 hour 15 minutes
- Yield: 8 servings 1x
- Category: Dessert
- Cuisine: American
Ingredients
- 1 ¼ cups (155g) all-purpose flour
- ½ cup (115g) unsalted butter, cold and cubed
- 2–3 tablespoons ice water
- 1 tablespoon granulated sugar
- ¼ teaspoon salt
- ½ cup (120ml) honey
- ½ cup (120ml) heavy cream
- ¼ cup (55g) unsalted butter, melted
- 3 large eggs
- 1 ½ tablespoons (15g) cornstarch
- 1 teaspoon vanilla extract
- ¼ teaspoon fine sea salt
- Flaky sea salt (for garnish)
- Fresh whipped cream (optional)
Instructions
- In a mixing bowl, combine the flour, sugar, and salt. Add the cold butter cubes and use a pastry cutter (or two knives) to cut the butter into the flour until the mixture resembles coarse crumbs. Gradually add the ice water, one tablespoon at a time, until the dough comes together. Wrap it in plastic wrap and chill for at least 30 minutes.
- Preheat the oven to 375°F (190°C). Lightly grease your pie pan.
- On a floured surface, roll out the chilled dough into a circle about 12 inches in diameter. Carefully transfer it to your pie pan, trimming any excess dough and crimping the edges. Chill the crust while preparing the filling.
- In a mixing bowl, whisk together honey, melted butter, heavy cream, eggs, cornstarch, vanilla, and sea salt until smooth and well-combined.
- Pour the filling into the chilled crust. Place the pie in the oven and bake for 40-45 minutes, or until the filling is set but still slightly wobbly in the center.
- Remove the pie from the oven and allow it to cool completely at room temperature. Sprinkle flaky sea salt on top and add a dollop of whipped cream before serving, if desired.
Notes
[‘Use high-quality honey for the best flavor.’, ‘Keep all ingredients and tools cold to ensure a flaky crust.’, ‘Do not overmix the crust dough to avoid a dense texture.’, ‘Let the pie cool completely before slicing to allow the filling to set properly.’, ‘The pie tastes even better after resting in the fridge overnight.’]
Nutrition
- Serving Size: 1 slice
- Calories: 320
- Fat: 15
- Carbohydrates: 40
- Protein: 4
Keywords: Salted Honey Pie, Honey Dessert, Easy Pie Recipe, Custard Pie, Holiday Dessert